IdeationFor this project the goal was to remotely operate a box fan, because who really wants to deal with dials or get off the couch when they're too warm? Using this setup, the button can be in any place in any room (provided there is a power source and an internet connection, more on that later) and control the fan wherever it happens to be.
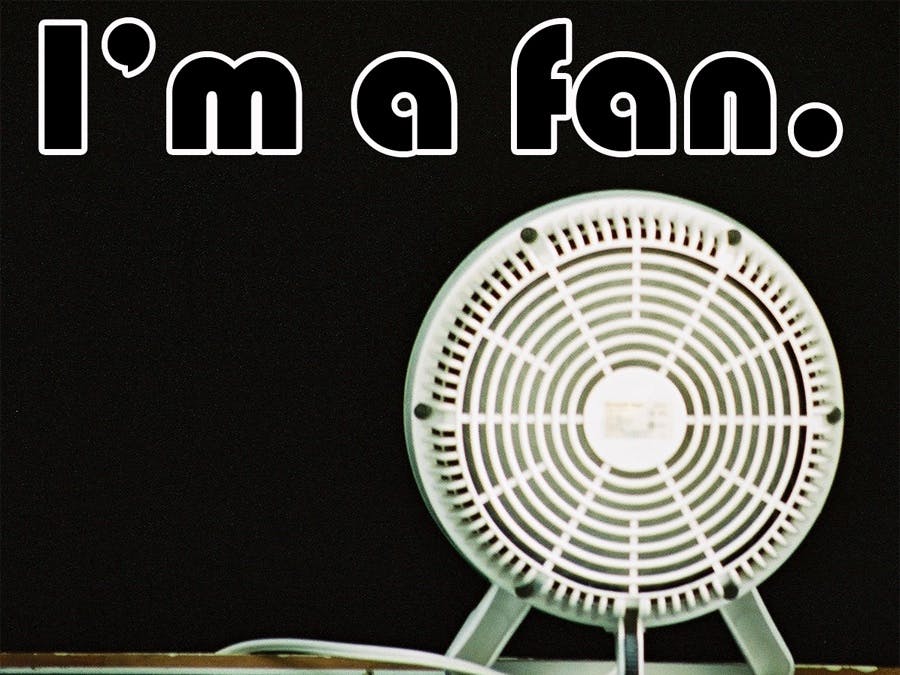
The first photon, wired to a button that sends the "publish" command.
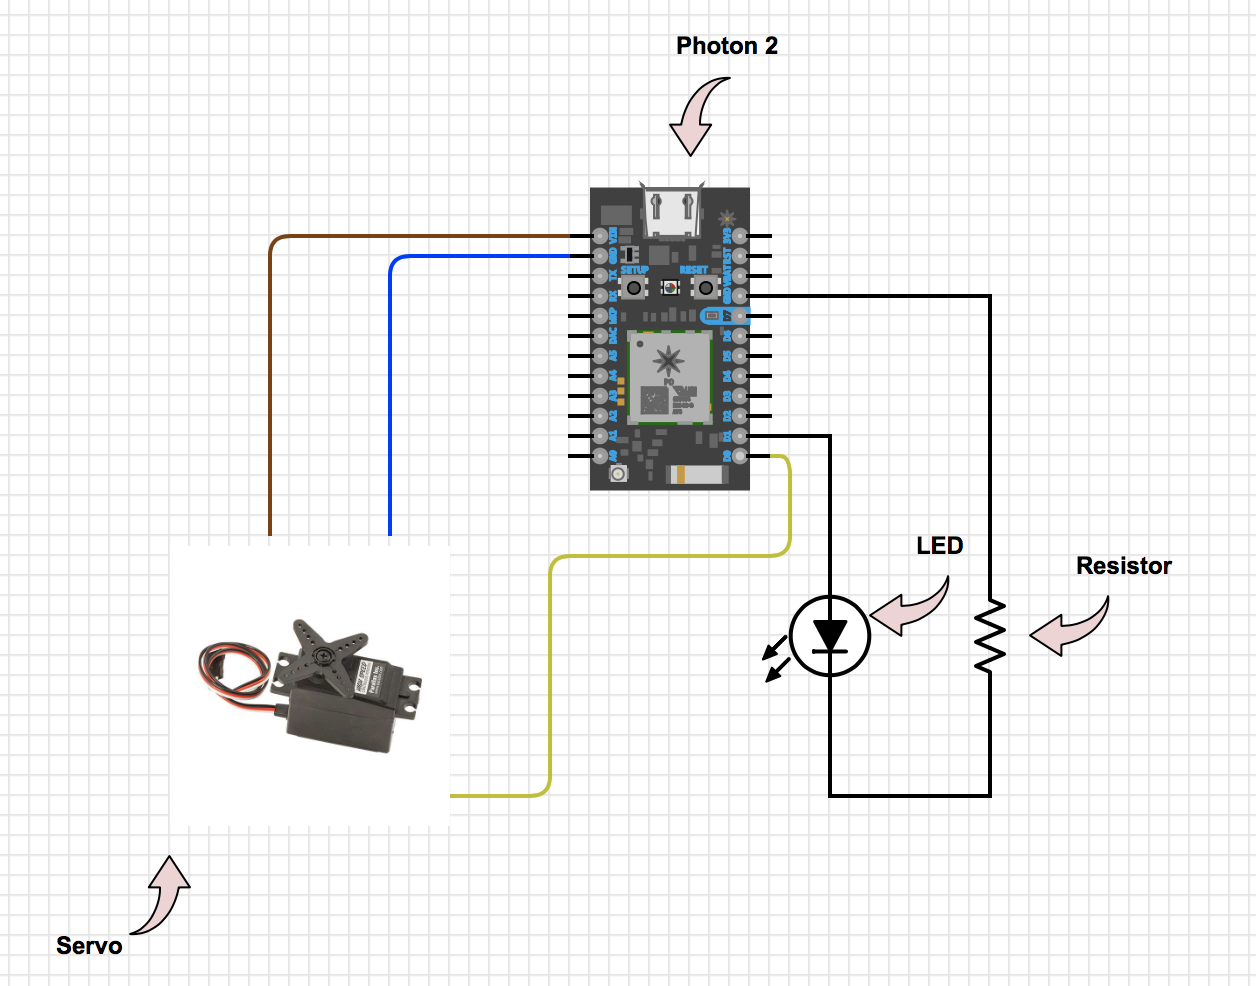
A servo screwed to the dial and fixed in place turns the fan dial to the lowest setting (because anything else blows the fan over). When the button is pushed on photon one, a signal is sent via Particle.publish. When the signal is received via Particle.subscribe by photon two, the servo turns to "off" if it was "on," and to "on" if it was "off." This "decision" is set up by an "if" statement based on the current location of the servo. The board LED and a standard stand-alone LED from the maker kit were also put on the board to act as indicators.
The fan with the receiving (subscribing) photon and it's LED (currently off), hooked up to the servo.
The servo was attached to the dial by screwing a set of blades (that came in the servo kit) to the dial itself. Small servos don't have a huge amount of torque, so we opted to use the largest set of blades to maximize the torque (remember: torque=(force)x(distance), so a greater distance means more torque on the dial!). The servo itself had to be stopped from moving the body of the motor around the dial. The body was fixed in place with a high-quality custom mount, made of only the finest cardboard and scotch tape. Once held in place, the servo did an excellent job of turning the dial. If you replicate this project, the angle of rotation set in the "myservo.write( )" command will have to be calibrated to your specific fan.
Close-up of the servo where the blade is screwed to the dial. You can also see the very sophisticated mounting system.
Using IFTTT and Google Drive, we were able to monitor when the fan received a signal. This can help track when over the course of some period of time the fan gets the most usage. It can also help troubleshoot if you pressed the button and nothing happened on the fan end. If IFTTT shows a signal was sent, you know the problem was on the fan end. Otherwise, you know it was on the button end.
One of the IFTTT applets updating the Google Spreadsheet. The other responds to event contents of "off" and puts a 0 in the column as opposed to a 10.
This is what the graph looks like in Google Sheets. The high points indicate when the fan is on, and the low indicates when it is off. The document itself can be viewed here. The date and time also come in with the data although they are not shown on the graph. It becomes too cluttered with the extra information, but it is easy enough to see looking at the data, and really is sufficient for this purpose.
Graph of "on" time vs "off" time. Data is sent to the Google Sheet on regular intervals to indicate the state of the fan by IFTTT triggers.
This project involved a lot of trial and error setting up the particle publish-subscribe communication. Initially, it was set so that the button in one position sent a message of "off" and in the other it sent the message "on," but it was quickly realized that this resulted in the fan turning itself on and then promptly back off, which was not useful. The subscribe command was modified so that it only listened for an input of "off." When that message is received, the device goes through the "if" statement described earlier and sets the servo to the position opposite where it was before the signal was sent.
Initial testing of the circuits and publish command was done with LEDs while connected to a laptop to make sure things were working as expected. As soon as the photons were connected to the fan setup however, things started to go haywire. After a lot of circuit analysis and setting up another IFTTT function with Google Sheets to monitor the publishing of the signal to the subscribing photon, it became clear that the issue was not the circuits or code, but the power source. To outfit this as a long term home improvement project, it would be worth investing in some high quality AC-DC power conversion. The USB wall adapters I was using from my phone chargers just didn't cut it for this project. This is why in the project video you will see that both photons are connected to the laptop. Alternatively (and perhaps better), you could use a "sleep" mode set up with a battery as opposed to connecting the photons directly to the wall via an adapter. In the battery scenario it would also be recommended that the LEDs not stay on while the fan is running to conserve power.
The diagnostic IFTTT output in Google Drive. The peaks indicate when a signal was sent to the subscribing photon.


_3u05Tpwasz.png?auto=compress%2Cformat&w=40&h=40&fit=fillmax&bg=fff&dpr=2)
Comments