

Hardware components | ||||||
 |
| × | 1 | |||
 |
| × | 1 | |||
| × | 1 | ||||
Software apps and online services | ||||||
 |
| |||||
 |
| |||||
Philips Hue is a fabulous lighting system. It is a hub based system that discovers when new bulbs are added, allowing you to grow the collection of smart bulbs in your home organically. Hue also has apps available on some mobile platforms that make customizing and controlling your lights an easy and visual task. These are all fine and dandy, as long as you have a mobile device with you at all times. Hardware switches are available to circumvent that need, but they have limited functionality and in all honesty, they aren’t all that flashy or futuristic looking. I thought a better experience would be to create a touchscreen panel application that you could embed into a wall to control your lights. In this article, I will show you how to program for the Hue and deploy a simple touch screen application to Windows IoT Core that you will use to control your Philips Hue lights.
Materials Needed
- A Phillips Hue System (including hub and at least one light)
- Raspberry Pi 2 running Windows IoT Core
- A Touchscreen for the Raspberry Pi 2 (for more information on my setup, visit this blog post)
Getting Started Programming with the Philips Hue System
In order to begin programming with Philips Hue, you will need to discover the IP address of your hub. To discover this, you need to access the following URL using a computer on your home network. This URL will return a JSON message back indicating the unique id of your hub, as well its internal IP address on your network. (Note: if you plan on selling this application or making it available to the general public you will need to implement auto-discovery as outlined here).
The next thing you will need to do is to create an authorized application user account for your Windows IoT Core application to use. To do this, the first thing you need to do is to physically press the link button on your Philips Hue hub. Then on your computer, using the IP address of the hub, navigate to:
http://<YOUR_HUB_IP_ADDRESS>/debug/clip.htmlThis will bring up a debug web page of sorts. In this page, simply POST to the /api URL with a message similar to the following:
{"devicetype":"Win_IOT_App#raspberrypi Carey"}Now you’ve created an authorized application user on your bridge that we will use in our Windows IoT Core application. Let’s use this debug page to see a listing of lights connected to our system. Change the URL field to:
/api/<YOUR_APPLICATION_ID>Then click the GET button. You should see a result with a slew of information (Copy and Paste this information to a document for reference):
Creating a Simple UI
This example won’t be a fully polished application suitable for mounting in your wall. The intention is to show you a couple of examples of how to interact with your lights through a Universal application, from there you can create a UI that you love. You’ve already seen how we can get a listing of our lights, we can use that information to interact with specific lights. In my case, I will be using the light with the index of 1, that we’ve named “Hallway room 1”.
Create a new Blank Universal application. Upon project creation, use NuGet to pull in the ColorPicker control for our application.
Next we will add a helpful NuGet package implemented to interact with the Hue lighting system. Use NuGet to pull in the Q42.HueApi package.
Open Package.appxmanifest and ensure the capabilities for Internet(client) and Private Networks (Client & Server) are checked.
Open MainPage.xaml, and add a namespace reference to use the ColorPicker control, by adding the following attribute to the Page element:
xmlns:color="using:ColorPicker"Finally, add the following XAML code to the Grid element on the page:
<StackPanel Orientation="Vertical" Margin="10,20,10,20">
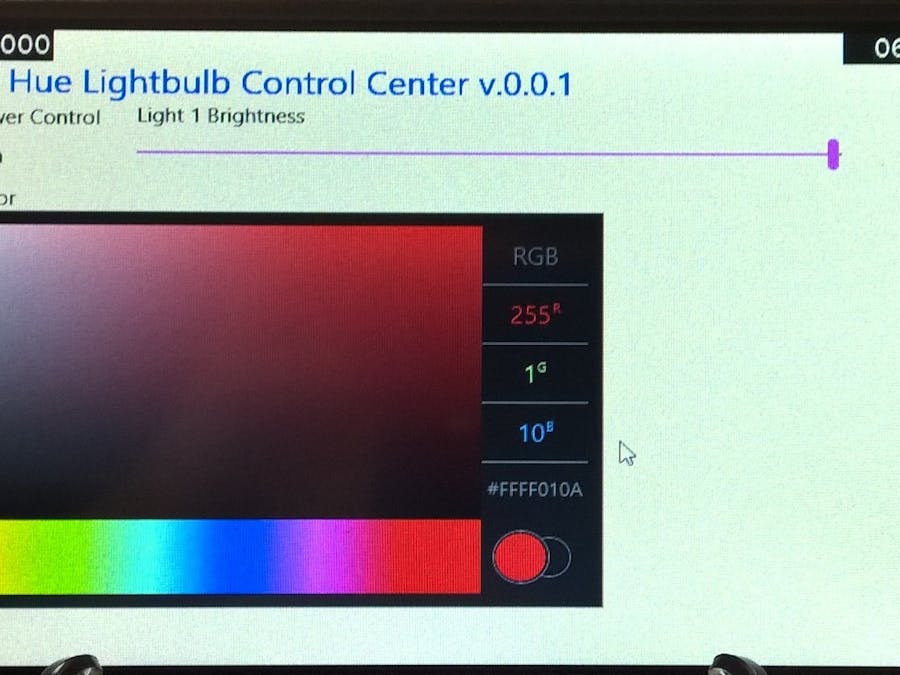
<TextBlock FontSize="25" Foreground="Blue">Philips Hue Lightbulb Control Center v.0.0.1</TextBlock>
<StackPanel Orientation="Horizontal">
<ToggleSwitch x:Name="toggle_Power" Toggled="Toggle_Power_Toggled" >Light 1 Power Control</ToggleSwitch>
<StackPanel Orientation="Vertical" Margin="15,0,0,0">
<TextBlock>Light 1 Brightness</TextBlock>
<Slider x:Name="slider_Brightness" Minimum="0" Maximum="255" Width="500" HorizontalAlignment="Left" ValueChanged="Slider_Brightness_ValueChanged" />
</StackPanel>
</StackPanel>
<TextBlock>Light 1 Color</TextBlock>
<color:ColorPicker x:Name="color_Picker" Width="500" Height="300" HorizontalAlignment="Left" BorderBrush="Black" SelectedColorChanged="Color_Picker_SelectedColorChanged"></color:ColorPicker>
</StackPanel>Now it is time to implement the UI, in MainWindow.xaml.cs copy and paste the following code listing (documented inline):
using Q42.HueApi;
using Q42.HueApi.Interfaces;
using System;
using System.Collections.Generic;
using System.Linq;
using Windows.UI;
using Windows.UI.Xaml;
using Windows.UI.Xaml.Controls;
using Windows.UI.Xaml.Controls.Primitives;
using Windows.UI.Xaml.Media;

namespace HelloPhilipsHue
{
    /// <summary>
    /// An empty page that can be used on its own or navigated to within a Frame.
    /// </summary>
    public sealed partial class MainPage : Page
    {
        private const string BRIDGE_IP = "192.168.1.225";
        private const string APP_ID = "1d0de40d14861c71a21c0c923d8a9e3";

        //command keys for queue
        private const string ON_OFF = "ON_OFF";
        private const string BRIGHTNESS = "BRIGHTNESS";
        private const string COLOR = "COLOR";

        private Dictionary<string, LightCommand> _commandQueue;
        DispatcherTimer _timer; //timer for queue

        ILocalHueClient _client;
        Light _light;
        List<string> _lightList;
        bool _isInitialized;


        public MainPage()
        {
            this.InitializeComponent();

            InitializeHue(); //fire and forget, don't wait on this call

            //initialize command queue
            _commandQueue = new Dictionary<string, LightCommand>();

            //intilialize command queue timer (avoid sending too many commands per second)
            _timer = new DispatcherTimer();
            _timer.Interval = TimeSpan.FromSeconds(0.5);
            _timer.Tick += Timer_Tick;
        }

        public async void InitializeHue()
        {
            _isInitialized = false;
            //initialize client with bridge IP and app GUID
            _client = new LocalHueClient(BRIDGE_IP);
            _client.Initialize(APP_ID);

            //only working with light #1 in this demo
            _light = await _client.GetLightAsync("1");
            _lightList = new List<string>() { "1" };

            //initialize UI
            this.toggle_Power.IsOn = _light.State.On;
            string hexColor = _light.State.ToHex();
            byte brightness = _light.State.Brightness;
            this.slider_Brightness.Value = brightness;

            var rgb = HexToRGB(hexColor);
            this.color_Picker.SelectedColor = new SolidColorBrush(Color.FromArgb(brightness, rgb[0], rgb[1], rgb[2]));

            _isInitialized = true;
            _timer.Start();
        }

        private void Color_Picker_SelectedColorChanged(object sender, EventArgs e)
        {
            if (_isInitialized && this.toggle_Power.IsOn)
            {
                //Queue color change command
                LightCommand cmd = new LightCommand();
                var color = this.color_Picker.SelectedColor.Color;
                cmd.SetColor(color.R, color.G, color.B);
                cmd.Brightness = color.A;
                QueueCommand(COLOR, cmd);
            }

        }

        private void Toggle_Power_Toggled(object sender, RoutedEventArgs e)
        {
            if (_isInitialized)
            {
                //queue power command
                LightCommand cmd = new LightCommand();
                cmd.On = this.toggle_Power.IsOn;
                QueueCommand(ON_OFF, cmd);
            }

        }

        private void Slider_Brightness_ValueChanged(object sender, RangeBaseValueChangedEventArgs e)
        {
            if (_isInitialized && toggle_Power.IsOn)
            {
                //queue brightness command
                LightCommand cmd = new LightCommand();
                cmd.Brightness = (byte)slider_Brightness.Value;
                QueueCommand(BRIGHTNESS, cmd);
            }

        }


        private void Timer_Tick(object sender, object e)
        {
            //stop timer
            _timer.Stop();

            //execute queue commands
            if (_commandQueue.Count > 0)
            {
                foreach (var cmd in _commandQueue)
                {
                    //fire and forget
                    _client.SendCommandAsync(cmd.Value, _lightList);
                }
            }

            //clear queue
            _commandQueue.Clear();

            //start timer back up again
            _timer.Start();
        }

        //helper method to queue light commands for execution
        private void QueueCommand(string commandType, LightCommand cmd)
        {
            if (_commandQueue.ContainsKey(commandType))
            {
                //replace with most recent
                _commandQueue[commandType] = cmd;
            }
            else
            {
                _commandQueue.Add(commandType, cmd);
            }

        }

        //helper method to convert hex to RGB
        private byte[] HexToRGB(string hex)
        {
            byte[] retvalue = new byte[3];
            if (hex.Contains('#'))
            {
                hex = hex.Remove(0, 1);
            }

            retvalue[0] = Convert.ToByte(hex.Substring(0, 2),16);
            retvalue[1] = Convert.ToByte(hex.Substring(2, 2),16);
            retvalue[2] = Convert.ToByte(hex.Substring(4, 2),16);

            return retvalue;

        }


    }
}
Be sure to replace the BRIDGE_IP and APP_ID constants near the top of the file with the IP address of your bridge, as well as the application id GUID. Optionally you may also replace the light index that you will be manipulating, this code is located in the InitializeHue method (replace “1” with your desired light).
The Philips Hue bridge seems to have a limitation on how many commands can be sent in quick succession. This is why the code has a queue to help reduce the number of calls. For instance, as you drag the color selection, it will fire the color change event for every color that you drag over, causing a communication exception with the bridge. The queue and timer alleviate this exception from happening.
Now you can run your application and control your Philips Hue Lighting System.
Tags:
IoTLightsPhilips HueRaspberry PiRaspberry Pi 2TouchscreenWindows IoT Core


Comments