

Hardware components | ||||||
| × | 1 | ||||
| × | 1 | ||||
 |
| × | 1 | |||
Software apps and online services | ||||||
| ||||||
| ||||||
 |
| |||||
Over the past couple months, I've been growing increasingly excited about the potential for the Helium Network. If you're unfamiliar, Helium is a mesh of decentralized LoRa nodes used for low-power, low-data consumption IoT devices, such as those used in Smart City monitoring, manufacturing, and asset tracking. What differentiates Helium from other LoRa networks is that regular people are incentivized to expand & verify coverage by deploying their own physical hotspots. In exchange for this upfront expense, hotspot owners mine a steady stream of "Helium Tokens" through a blockchain-based proof of coverage algorithm. I'd encourage you to check out the developer docs for a more robust explanation.
While I am currently awaiting the arrival of my own hotspot, Helium was generous enough to send me one of their Developer Kits to tinker with. The kit contains an Arduino Uno-esque Lorawan development board and a sensor shield (I was expecting the X-NUCLEO-IKS01A3 environmental/motion shield from their docs, but I ended up with X-NUCLEO-GNSS1A1 GPS shield, which is fine by me). While Helium's quickstart guide takes you step-by-step through setting up the board and pinging the console, tutorials about transmitting actual sensor data over the "new" Helium network (since the legacy Atom module) seem to be in short supply. So this project is less of a groundbreaking new idea and more of an extension of the quickstart guide, in the hopes that you can save yourself an hour or two of frustration with your own developer kit setup.
In this sense, I'll start where the Helium Quickstart Guide leaves off. This assumes that you already have a Helium console account and are in a place with decent enough coverage to send regular pings to the network. For reference, I am in Pittsburgh, where coverage is fine, but I was pleasantly surprised to find that I am connecting to a hotspot nearly 5 miles away, across a river. However, even if you are in a semi-urban area with few hotspots, I would expect that coverage will rapidly expand in the coming months.
1. Hardware Setup
In this case, the hardware setup is extremely straightforward. Just mount the shield on the development board, attach the LoRa antenna & GPS receiver, and you're ready to go.
2. Helium Console
Assuming you have properly set up your device in the Helium Console, you're already well on your way. First, in the Helium Console, go to "Labels" and click "Add Label". At this time, the only thing you need to do is provide a Label Name. Click "Create Label".
Next, go into the "Integrations" tab and choose the "myDevices Cayenne" Prebuilt Integration type. Name your Integration and apply the label you just made.
Side note: I'd encourage you to check out the other integration types; creating an "HTTP" integration with a RequestBin endpoint, as described in the docs, is also very straightforward, but Cayenne is probably the fastest way to visualize your data in a meaningful way.
The last thing you need to do is apply the label to the device. Select your device in the "Devices" tab and add your label under "Attached Labels". The labels tab is Helium's clever way to connect devices to associated integrations and functions. Now, any data packet that you send through that device is routed right to Cayenne (they take care of the HTTP for you).
3. Cayenne myDevices
Next, create an account on cayenne.mydevices.com and create an app. Click "Add new..." > "Device/Widget", and after selecting Lora > Helium, search for the STM32 B-L072Z-LRWAN1. Paste the DevEUI (from the Helium Console) into the required field. Change the name if you want to, then click "Add Device".
At this point, the payloads that are sent to the Helium network will be routed to your myDevices dashboard and interpreted automatically based on their sensor type. Lastly, we just have to update the code on the development board.
4. Arduino IDE
Unfortunately, Helium expects the packet of sensor data to be formatted in a specific JSON format. You could formulate this packet from scratch, or if you aren't super comfortable with C++ (or want to save some work), you could import the Cayenne Low-Power Payload (LPP) library. CayenneLPP takes some common sensor formats (temperature, pressure, humidity, GPS, etc.) and generates the packet in a way that is automatically interpreted by myDevices. In other words, insteadof this:
{
int32_t lat = latitude * 10000;
int32_t lon = longitude * 10000;
int32_t alt = meters * 100;
buffer[cursor++] = channel;
buffer[cursor++] = LPP_GPS;
buffer[cursor++] = lat >> 16;
buffer[cursor++] = lat >> 8;
buffer[cursor++] = lat;
buffer[cursor++] = lon >> 16;
buffer[cursor++] = lon >> 8;
buffer[cursor++] = lon;
buffer[cursor++] = alt >> 16;
buffer[cursor++] = alt >> 8;
buffer[cursor++] = alt;
return cursor;
}
you can just write this:
uint8_t addGPS(uint8_t channel, float latitude, float longitude, float meters);The channel input field allows you to submit data from multiple sensors within the same payload, which will be very useful if you are using, say, the X-NUCLEO-IKS01A3 shield. The GPS is based on the TeseoLIV3F library, which will also have to be imported. Sometimes it takes a few seconds to get a GPS fix (after gps->init();), so I wait to get a fix before preparing the payload. Don't forget to change the DevEUI, AppEUI, and AppKey fields to match what you have in the Helium Console, as you did during the quickstart. Upload the code, and you should see something like this in the serial monitor:
Depending on the strength of your connection, it may take a while before the GPS packets (11 bytes apiece) to start showing up in your console. The uplink responses look like blue circles in the data log:
Scroll down, and the Event Log will have some helpful feedback, such as the signal to noise ratio (mine is extremely weak!) and the name of the hotspot you're connecting to.
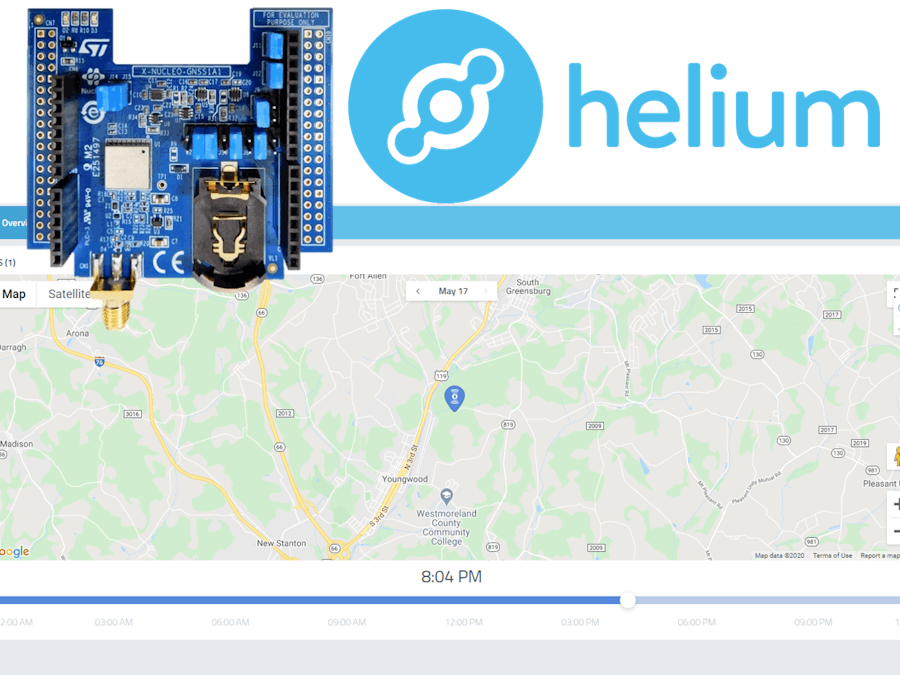
Finally, head back to your myDevices dashboard and your coordinate data is presented in a Google Maps-like interface!
For the complete code, check out this Github repo. Hope this saves you a few headaches on your way to creating your own Helium-based asset trackers!


Comments