


_1loTBwDAAZ.jpg?auto=compress%2Cformat&w=900&h=675&fit=min)
Hardware components | ||||||
 |
| × | 1 | |||
| × | 1 | ||||
 |
| × | 1 | |||
 |
| × | 1 | |||
| × | 3 | ||||
| × | 3 | ||||
| × | 3 | ||||
 |
| × | 3 | |||
Hey World!
I always wanted an On Air sign, so I decided to make my own with changing colors, and connected to the internet to let people around me and the world that I am filming, stuck and debugging, on a food break, or done filming.
I painted the sign using conductive paint and I used a Raspberry Pi Zero W and connected it to Bare Conductive’s PiCap to read which parts of the paint I touched. I connected three GPIOs to three relays to be able to switch the RBG LEDs off/on. I powered the Pi and the relays with a 5V battery pack and powered the lights with a 12V battery pack.
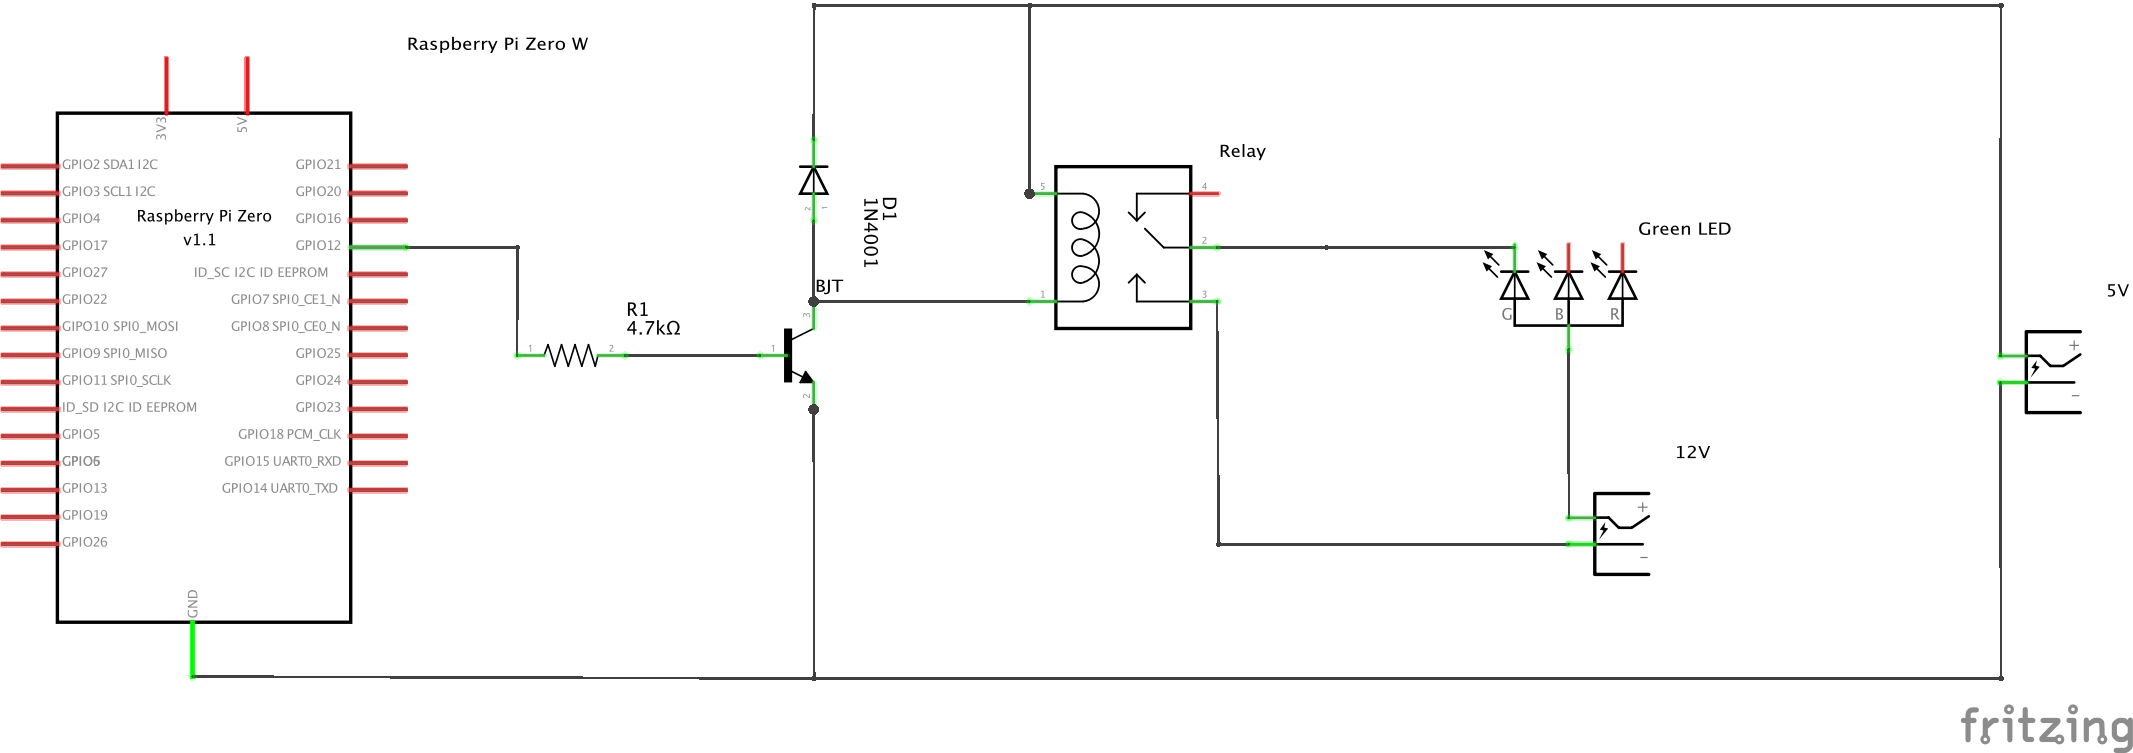
LEDs + RelaysTo be able to control the RGB LEDs, I used a relay to be able to switch each color off and on. Raspberry Pi's GPIOs do not provide enough current to switch the relays or power the LEDs so I built a driver circuit.
The schematic shows how the lights are connected to the relay and to the pi. The Raspberry Pi turns the transistor on, which triggers the relay and the light connected to the relay.
Relay = to be able to switch the LEDs On/Off.
Diode = to provide the path of the current when the coil is switched off. And keep other components from frying.
Transistor = The relay needs a large current to switch, so we use a transistor to amplify the current from the Pi to the relay.
Resistor = To regulate the current from the GPIO to the transistor and have the right current go through the relay.
Check out the schematics to see how it all works!
Raspberry PiThe Raspberry Pi, should have internet connection to Tweet and will run the script that controls the Pi Cap. No further set ups needed.
TwitterTo tweet my status, I used Raspberry Pi's tutorial on how to get started with Twitter's API. https://www.raspberrypi.org/learning/getting-started-with-the-twitter-api/
Pi CapTo get my Pi Cap set up with my Raspberry Pi Zero, I followed Bare Conductive's tutorial: https://www.bareconductive.com/make/setting-up-pi-cap-raspberry-pi-zero/


Comments