Optional: Use to observe light on and light off value through 'analogvalue' variable.
Story
Particle Mesh Project - Mesh Basics
My first mesh project!
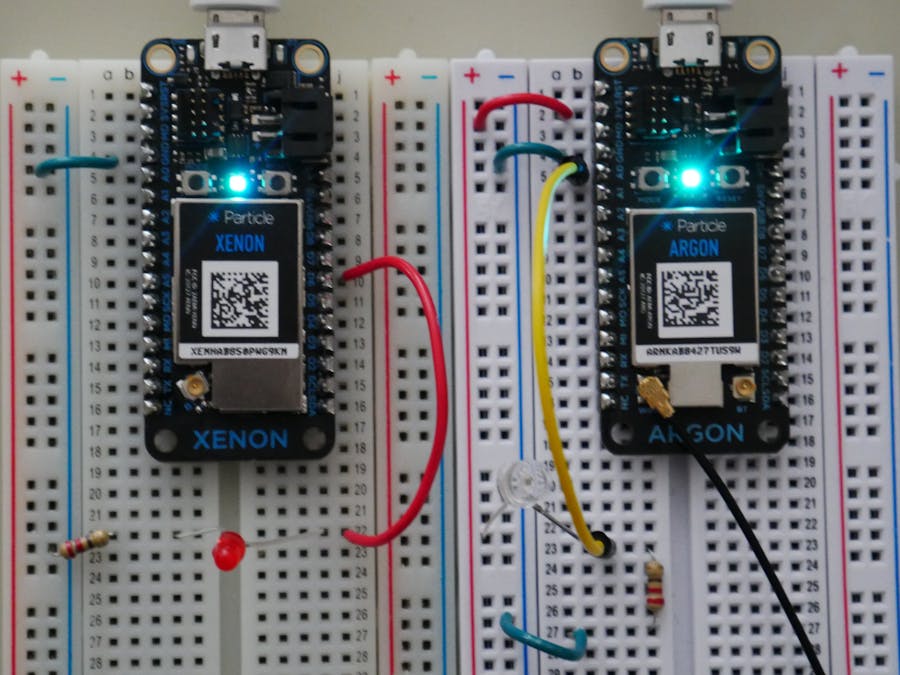
This project detects light through a photodiode. If the light is on, it sends a message through the mesh network (NOT through the cloud) and tells the other device to turn on the LED thus indicating a light has been turned on. It also sends a message when the light is off. Though the devices are next to each other, you can put them in separate rooms to detect when a light has been turned on!
This highlights the difference between the Particle.publish( ) and Mesh.publish( ) and thus the potential advantages of Mesh! In practice, sending messages through the mesh network saves on data rates or WiFi bandwidth because it is sent via bluetooth node to node avoiding round trip travel to and from the cloud!
(P.S. my background is hardware and telecom; still ramping up on software! If you think of great ways to add to this or make simpler code I'm all for it!)
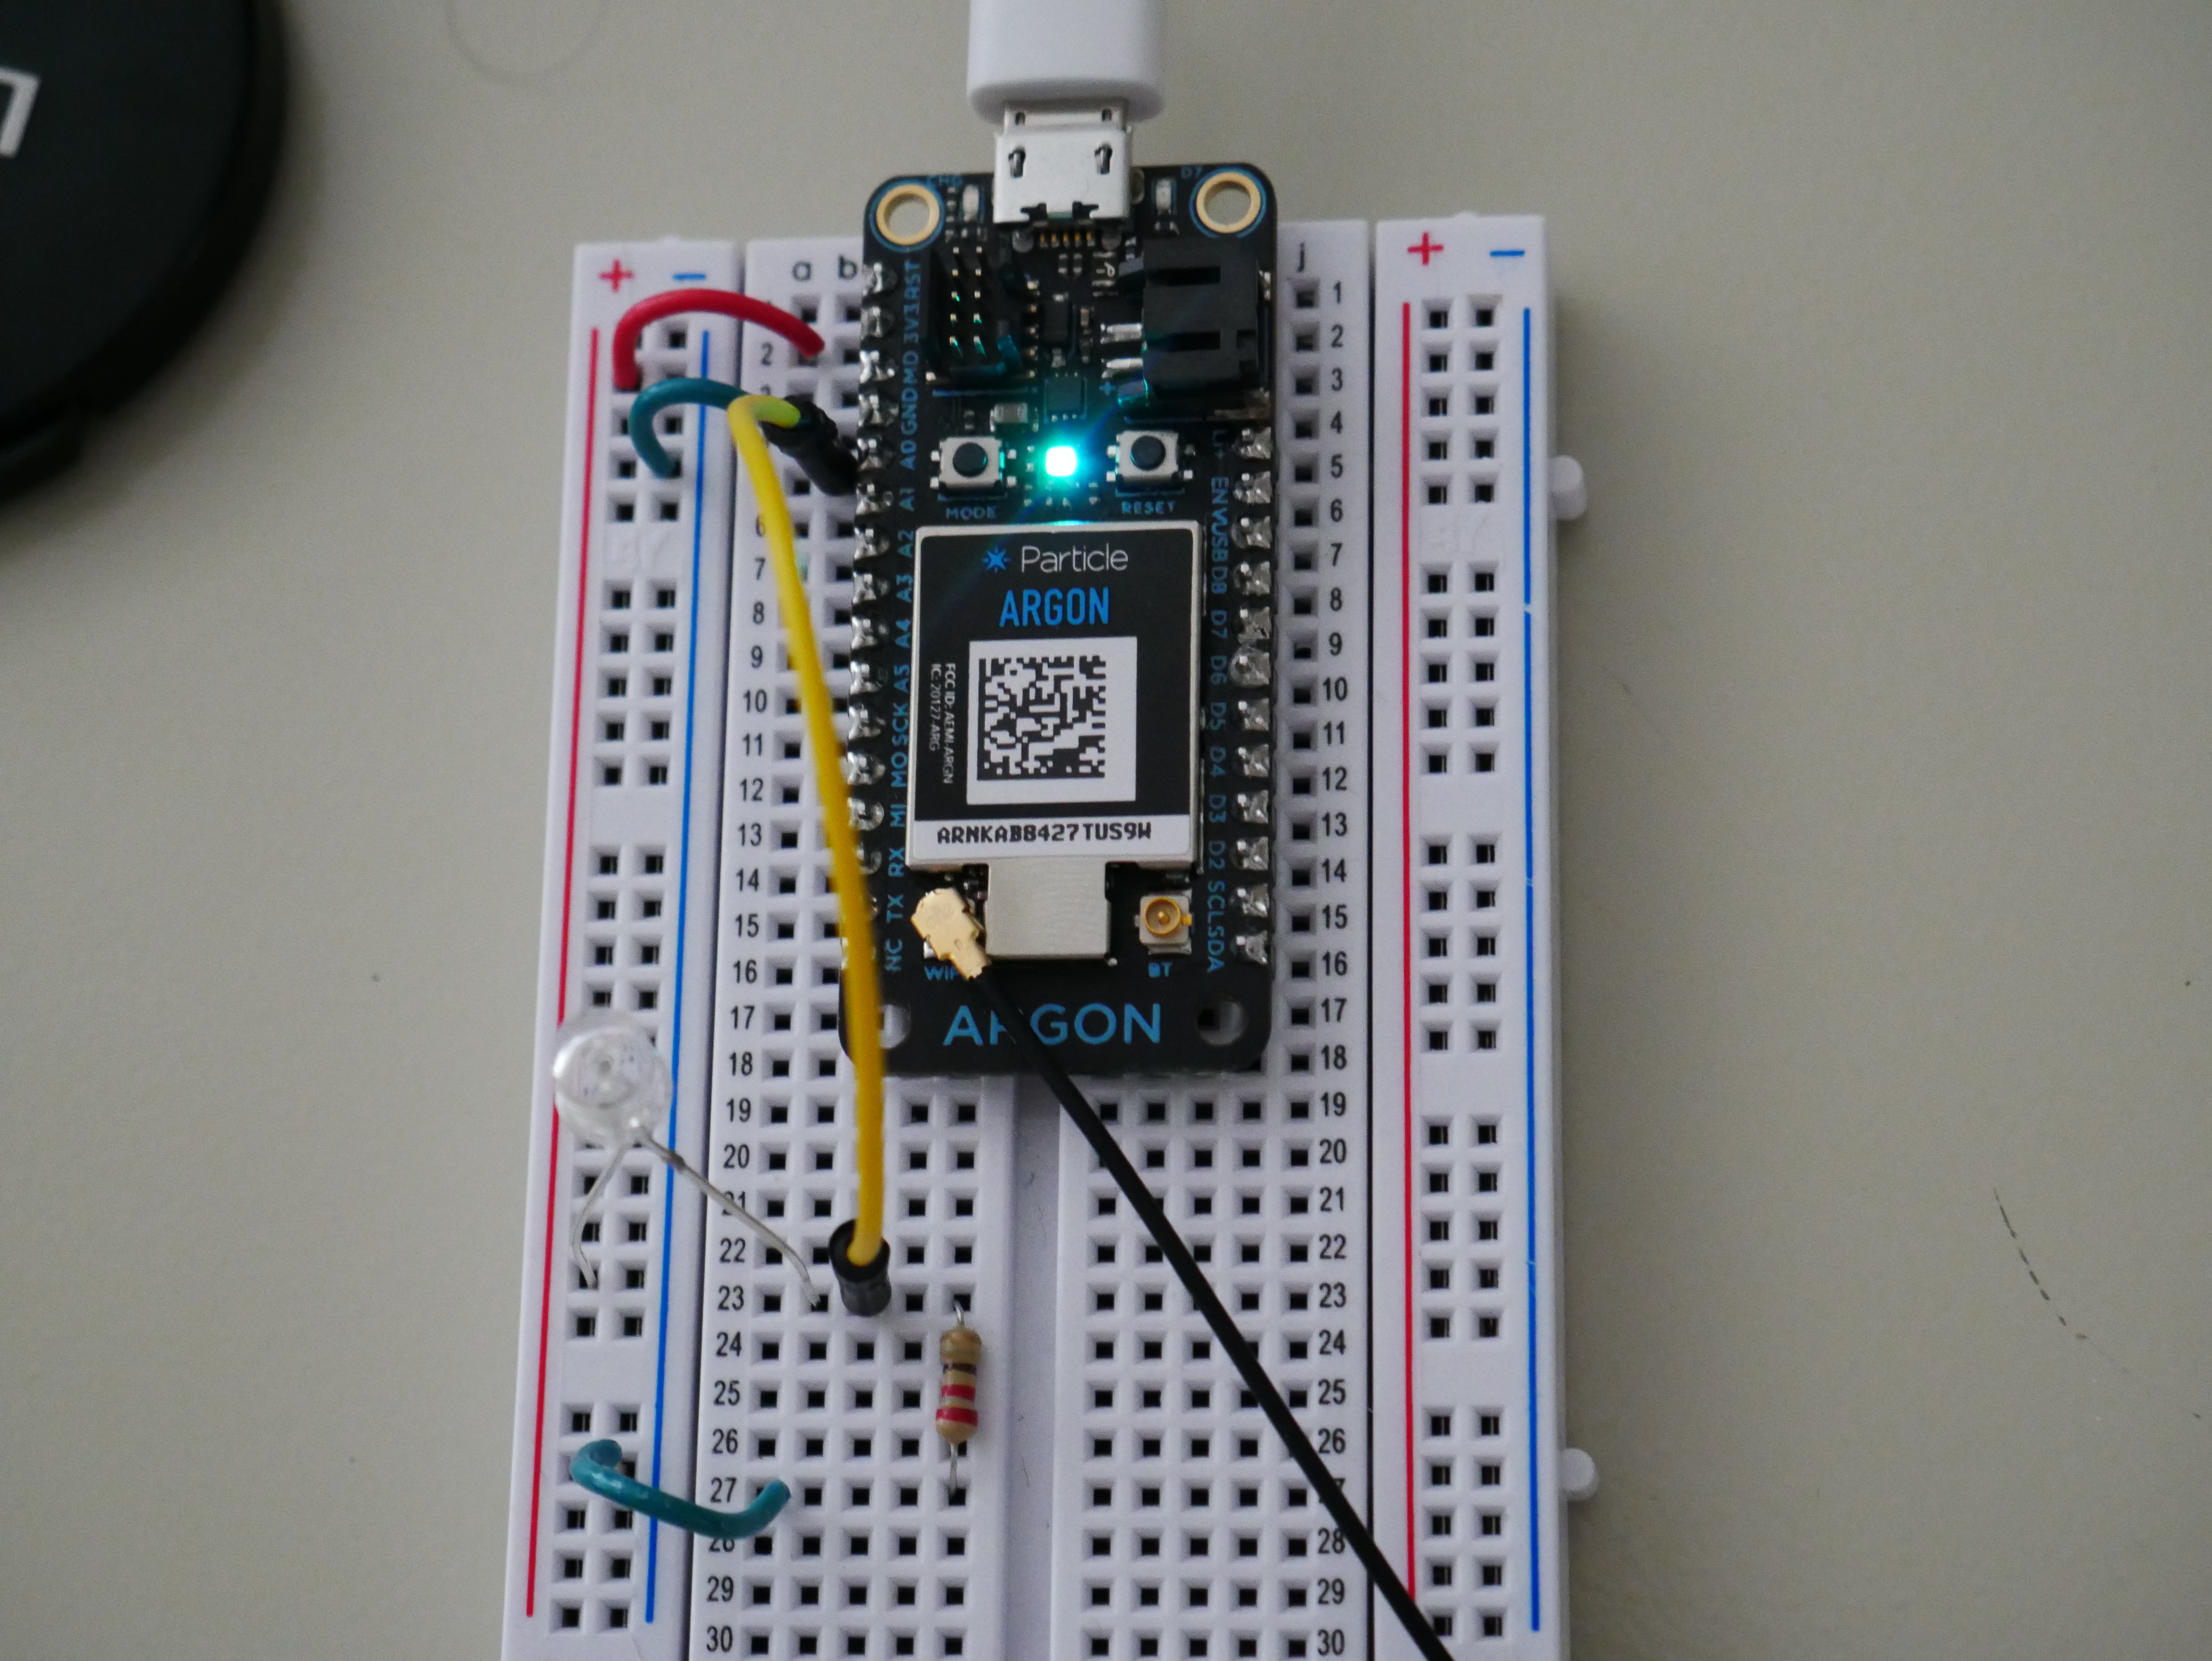
The photodiode will be in series with a 220 Ohm resistor. Unlike an LED, the shorter leg of the photo diode should be put on the 3.3V. Between the photodiode and the 220 Ohm resistor is where you will measure the value. Use a wire to connect this point to 'A0'.
LED Notifier Circuit
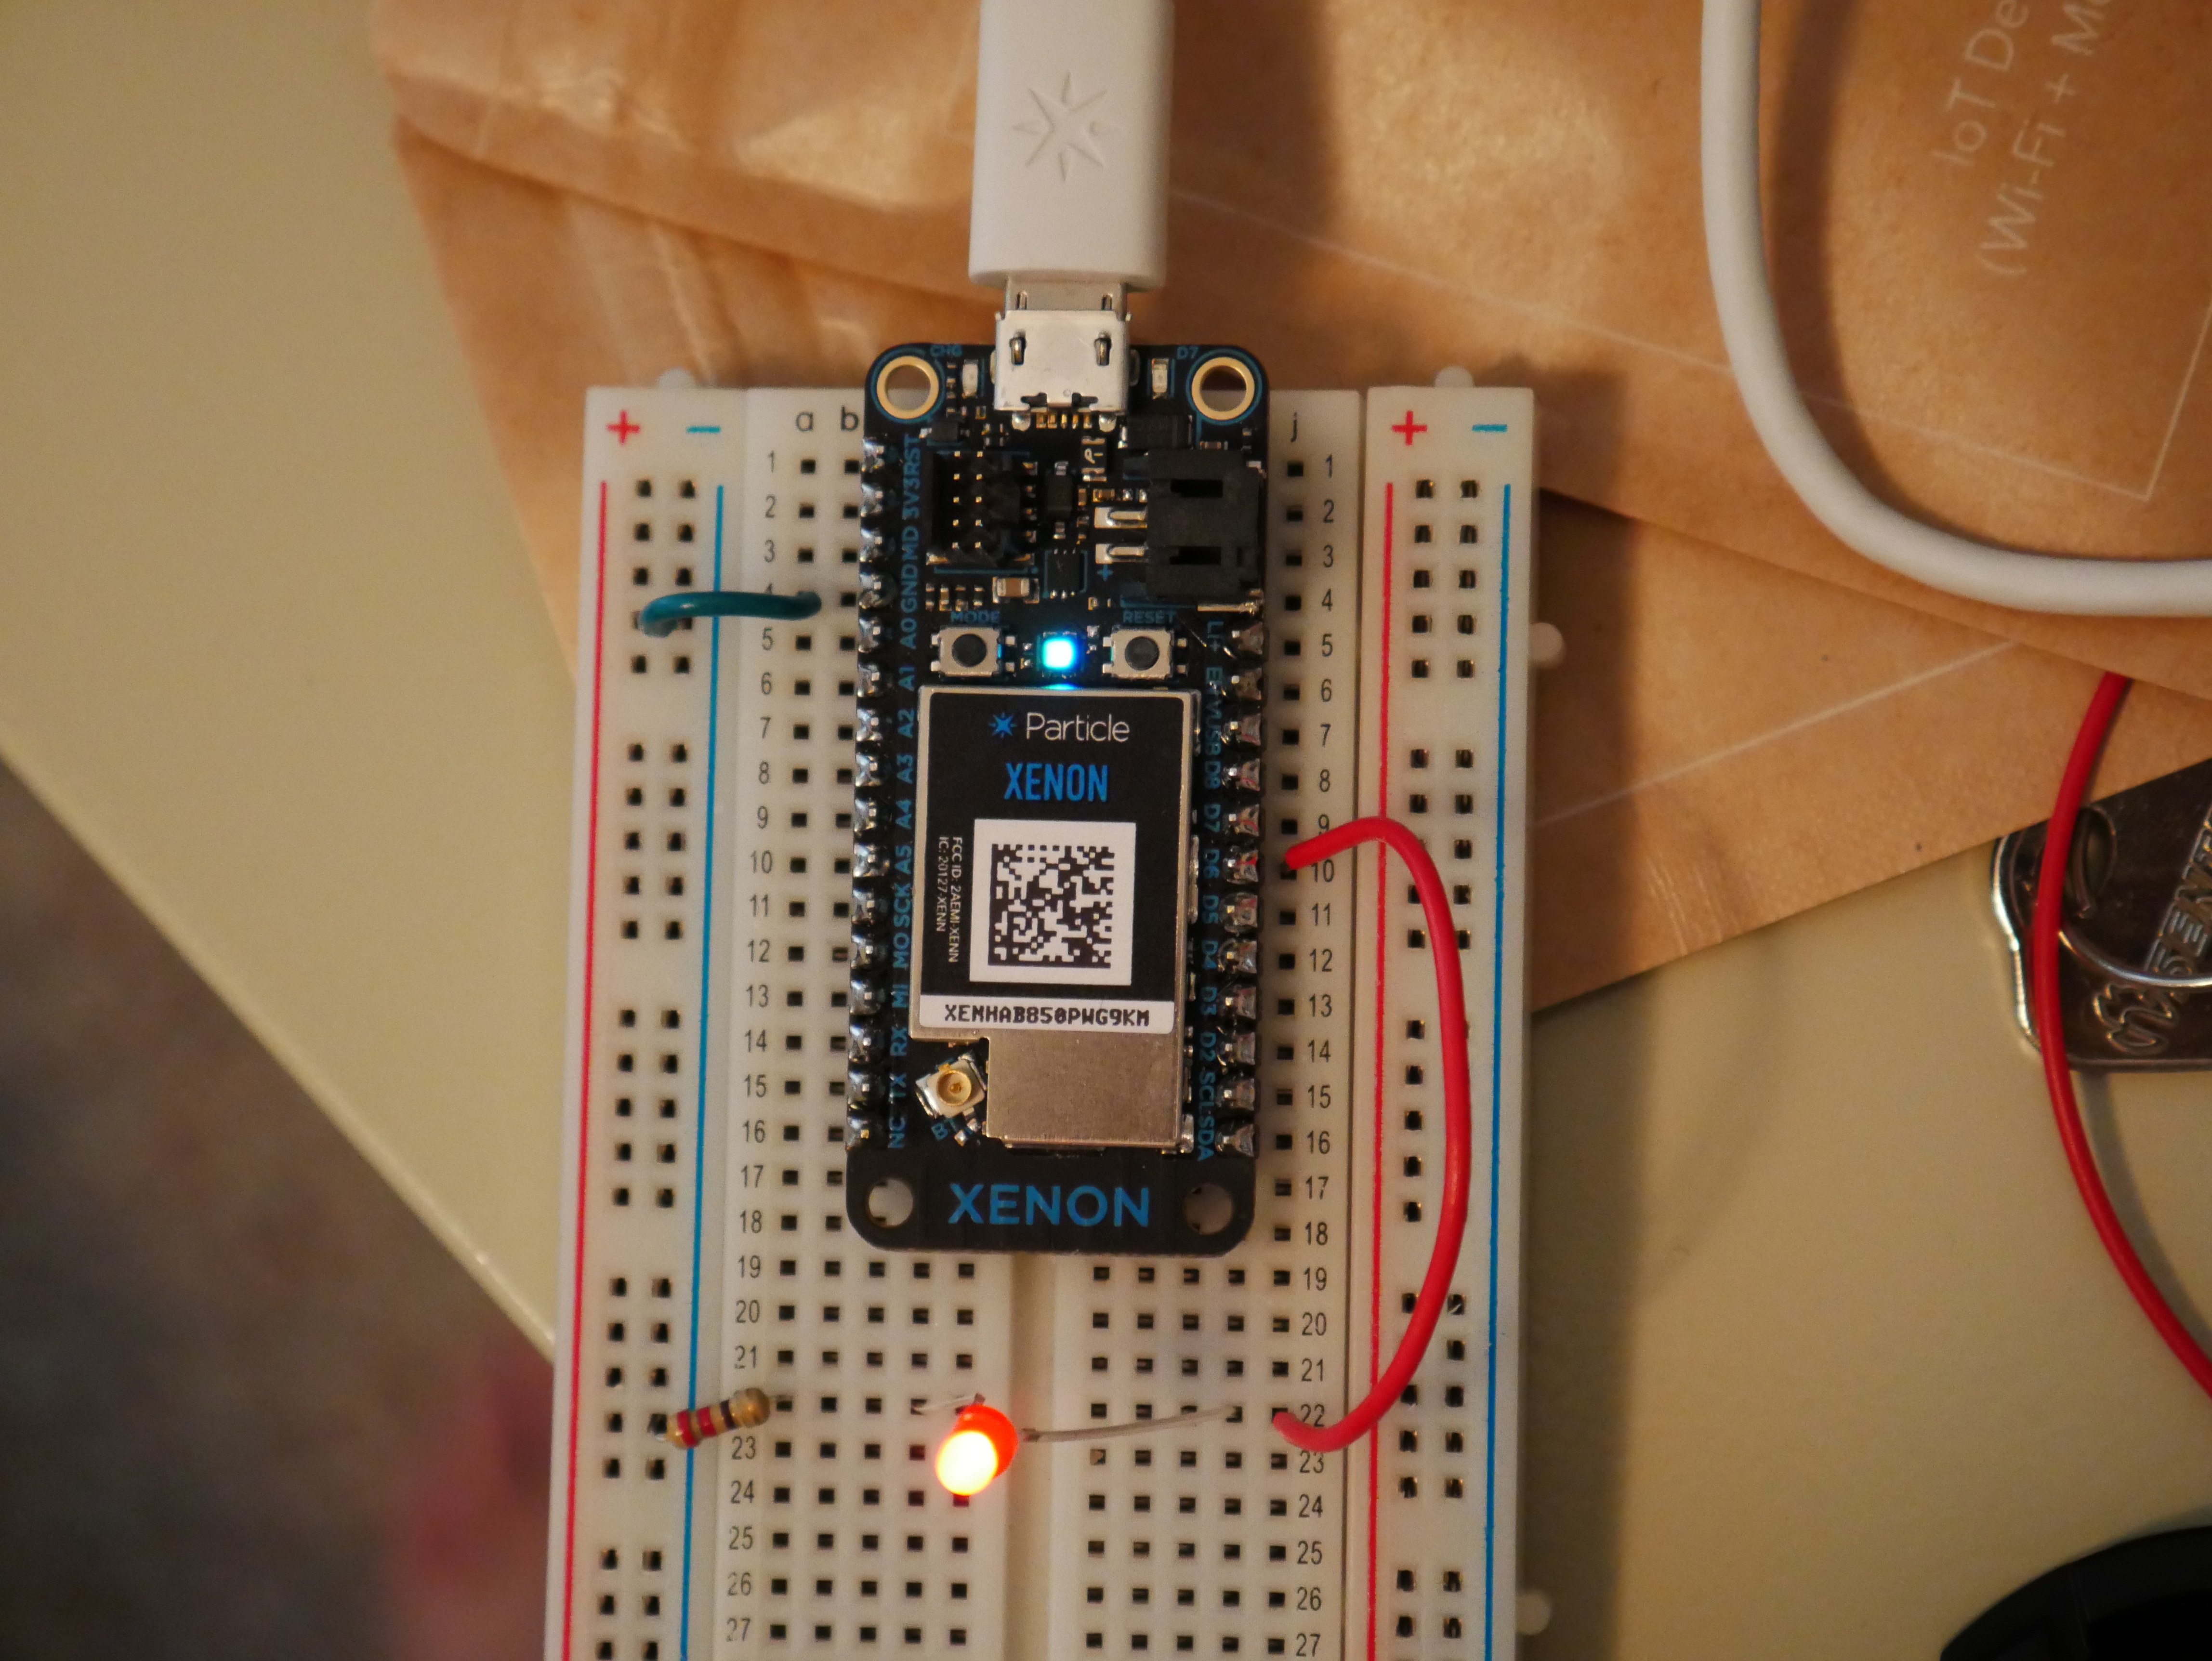
From D6 to Ground, put an LED and 220 Ohm resistor in series. This LED will turn on when the photodiode circuit detects light.
Photodiode Detection code (gateway or node device)
C/C++
IMPORTANT: For me, when my light was on the average value was ~150, and it was ~20 when the light was off. In the setup() there is a commented variable that you can use in the Particle Console to determine the value of your light when on and off. Alternatively, you can try different threshold values through trial and error.
Flash this code to the device that has the photodiode circuit. When the photodiode detects light, it will publish a message through the mesh network. The other device's code will turn on D6 and thus the LED that you will have wired up. If you do not have an LED, you could modify the code to turn on D7 (the on board LED).
Comments are mainly for newer users. If you've used non-mesh devices before, you can probably figure this
intphotosensor=A0;// This is where your photoresistor or phototransistor is plugged in. The other side goes to the "power" pin (below).//Analog pins A0-A5 are inputs, so there is no need to explicitly declare this pin as an input in our setup() loopintanalogvalue;// Here we are declaring the integer variable analogvalue, which we will use later to store the value of the photoresistor or phototransistor.voidsetup(){// This is here to allow for debugging using the USB serial portSerial.begin(9600);//The comment below can be used to create a variable. You can view the value of this variable in the particle console to determine what value is appropriate for the if else statement in the loop.//Particle.variable("analogvalue", &analogvalue, INT);}voidloop(){// check to see what the value of the photoresistor or phototransistor is and store it in the int variable analogvalue/*Use the Particle Console to see what the average analogvalue is when your light source is on and off. For me, when the light is on the average analogvalue is ~150, and when off analogvalue is ~20 thus making 100 a good threshold choice*/analogvalue=analogRead(photosensor);if(analogvalue>100){Mesh.publish("light on","main office");//If our analogvalue is >100, this means the light is on, and we are going to publish our "light on" message}elseif(analogvalue<=100){Mesh.publish("light off","main office");//If our analogvalue is <=100, this means the light is off, and we are going to publish our "light off" message}// This prints the value to the USB debugging serial port (for optional debugging purposes)Serial.printlnf("%d",analogvalue);// This delay is just to prevent overflowing the serial buffer, plus we really don't need to read the sensor more than// 10 times per second (100 millisecond delay)delay(100);}
LED Notifier (gateway or node device)
C/C++
This code handles the updates from the photodiode code through the mesh network. If the light is detected as on in the photodiode circuit, this code turns on the LED in the other circuit. The LED will be turned off if the photodiode detects no light.
intled=D6;voidsetup(){// This is here to allow for debugging using the USB serial portSerial.begin(9600);//Declare D6 pin as outputpinMode(led,OUTPUT);//Subscribe to any "light on" message published in our mesh network and name our handlerMesh.subscribe("light on",LightOnHandler);//Subscribe to any "light off" message published in our mesh network and name our handlerMesh.subscribe("light off",LightOffHandler);}//Once subscribed to a published message, our handler takes the actions necessary when the message is published on the mesh networkvoidLightOnHandler(constchar*event,constchar*data){//If light detected on the argon, turn on LED on the XenondigitalWrite(led,HIGH);}//Once subscribed to a published message, our handler takes the actions necessary when the message is published on the mesh networkvoidLightOffHandler(constchar*event,constchar*data){//If no light detected on the argon, turn off LED on the XenondigitalWrite(led,LOW);}


_zhWsCcSEcl.jpg?auto=compress%2Cformat&w=48&h=48&fit=fill&bg=ffffff)


Comments