

Hardware components | ||||||
_ztBMuBhMHo.jpg?auto=compress%2Cformat&w=48&h=48&fit=fill&bg=ffffff) |
| × | 1 | |||
 |
| × | 1 | |||
 |
| × | 3 | |||
| × | 1 | ||||
| × | 1 | ||||
 |
| × | 1 | |||
 |
| × | 1 | |||
 |
| × | 1 | |||
 |
| × | 1 | |||
Software apps and online services | ||||||
 |
| |||||
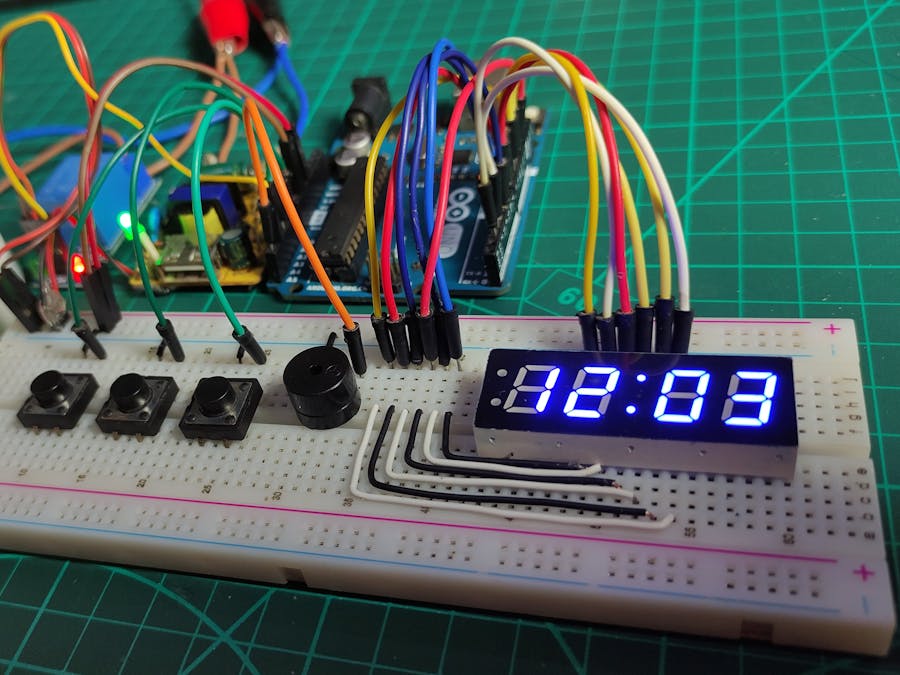
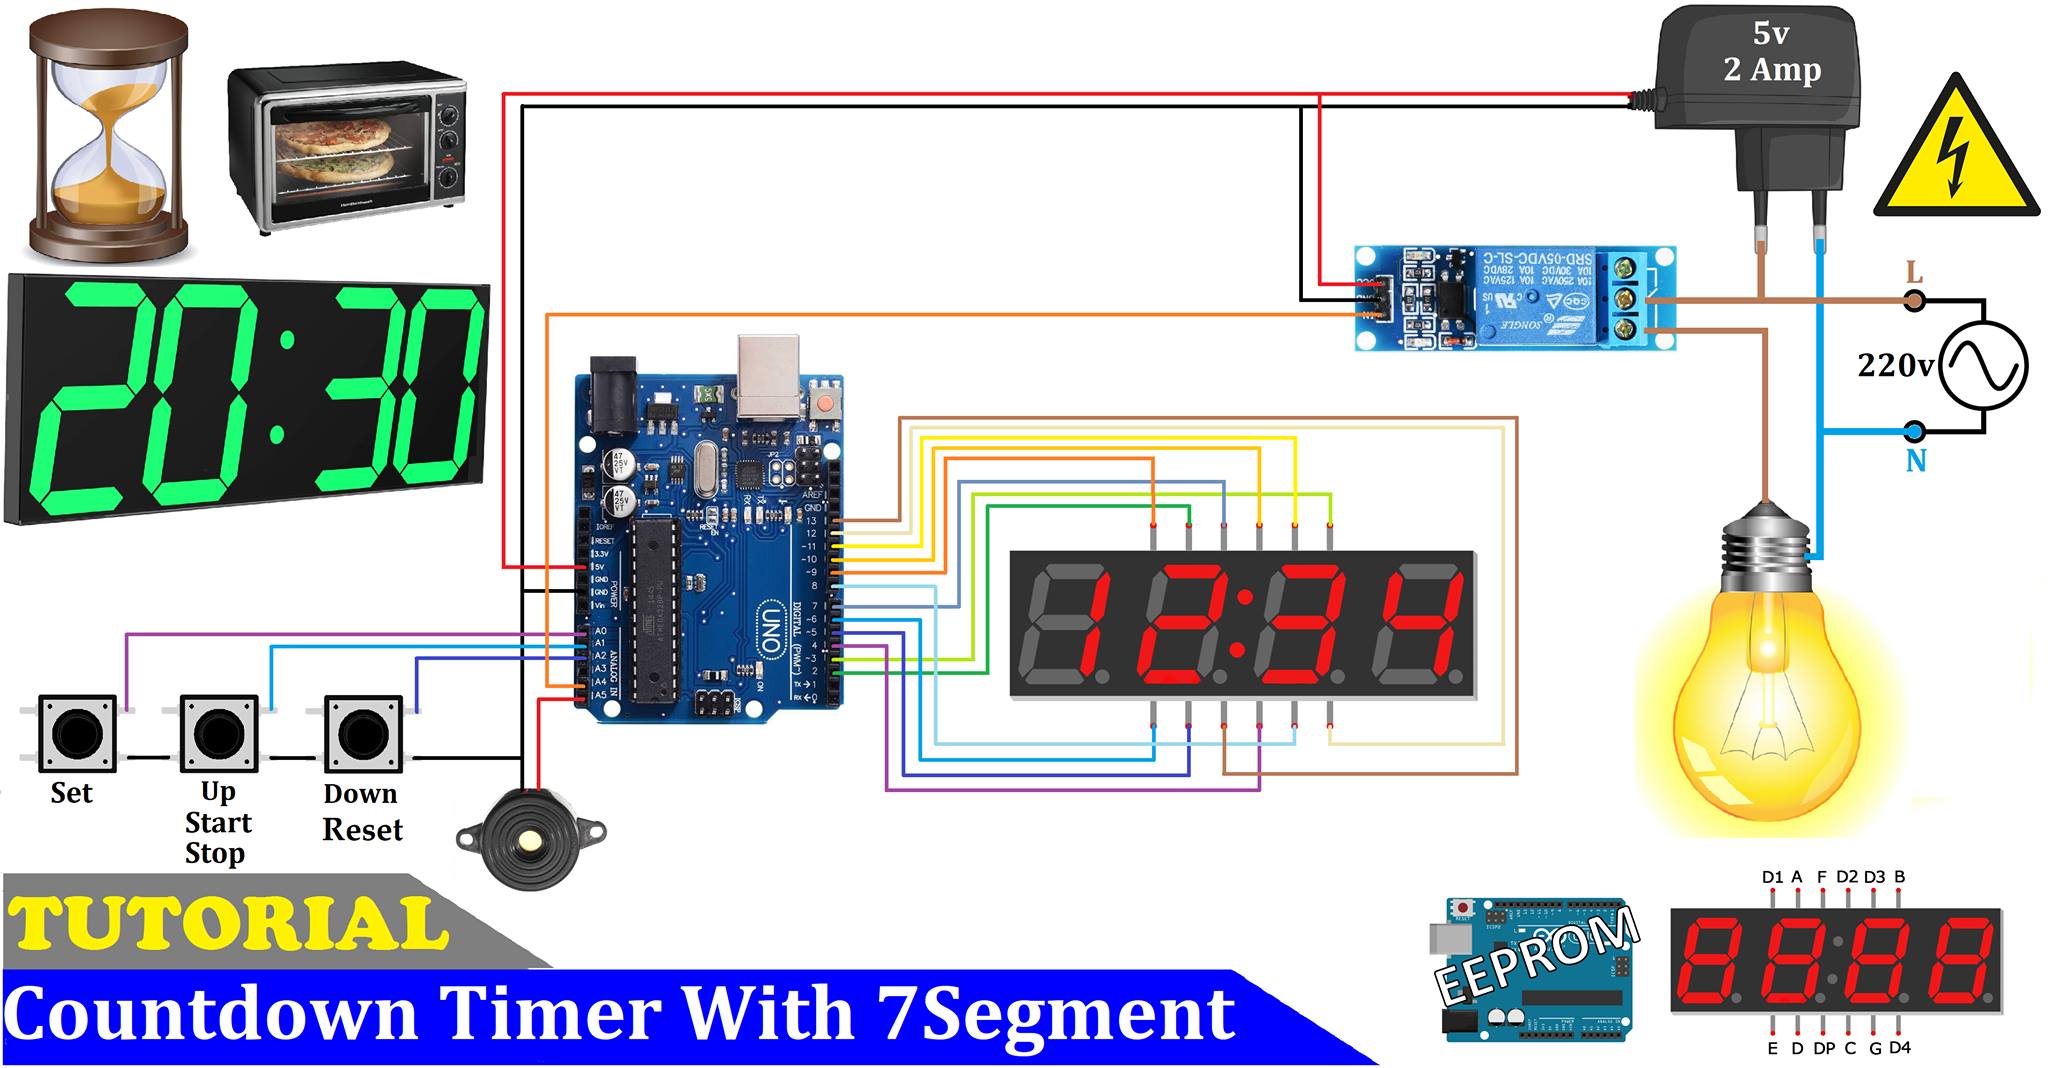
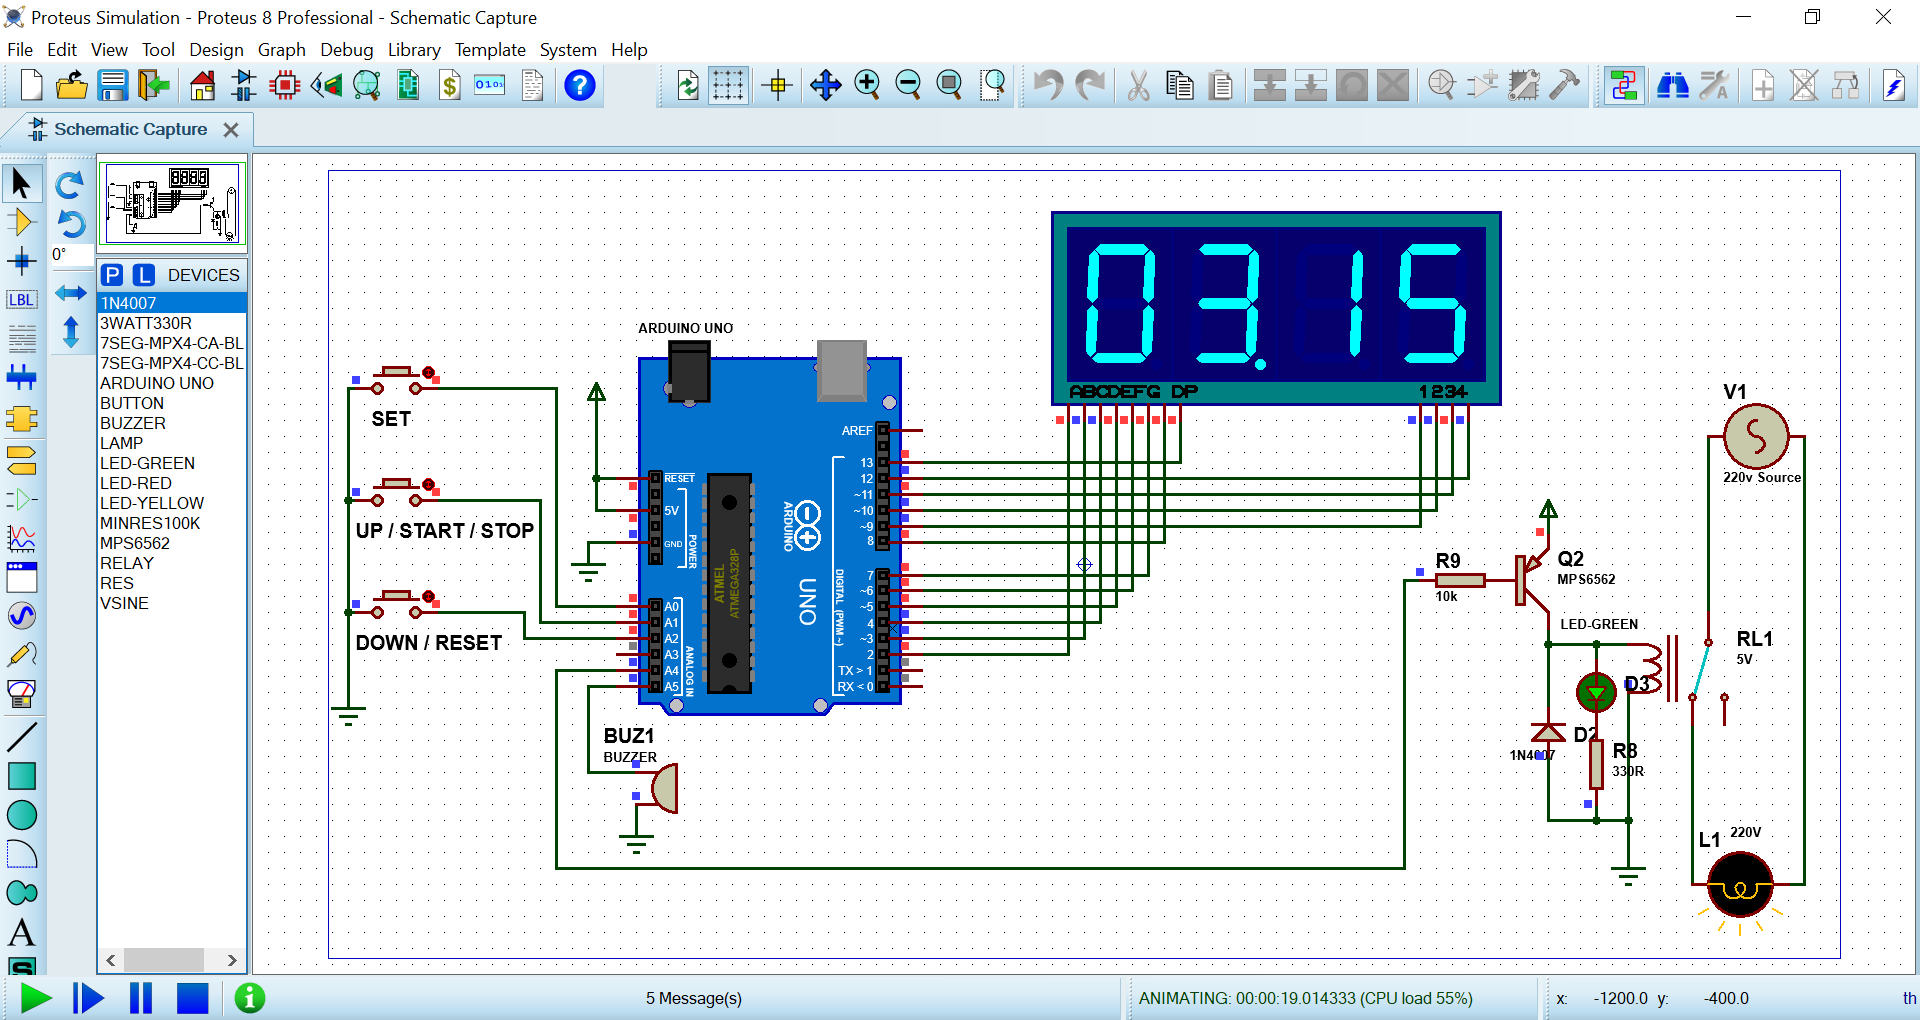
How To Make Arduino Adjustable Countdown Timer with 7Segment Display | without RTC Countdown Timer
Components
Components Details () {
Solderless Breadboard,
Arduino Uno,
4 Digit Multiplexing 7Segment Display,
Push Button x 3,
Buzzer,
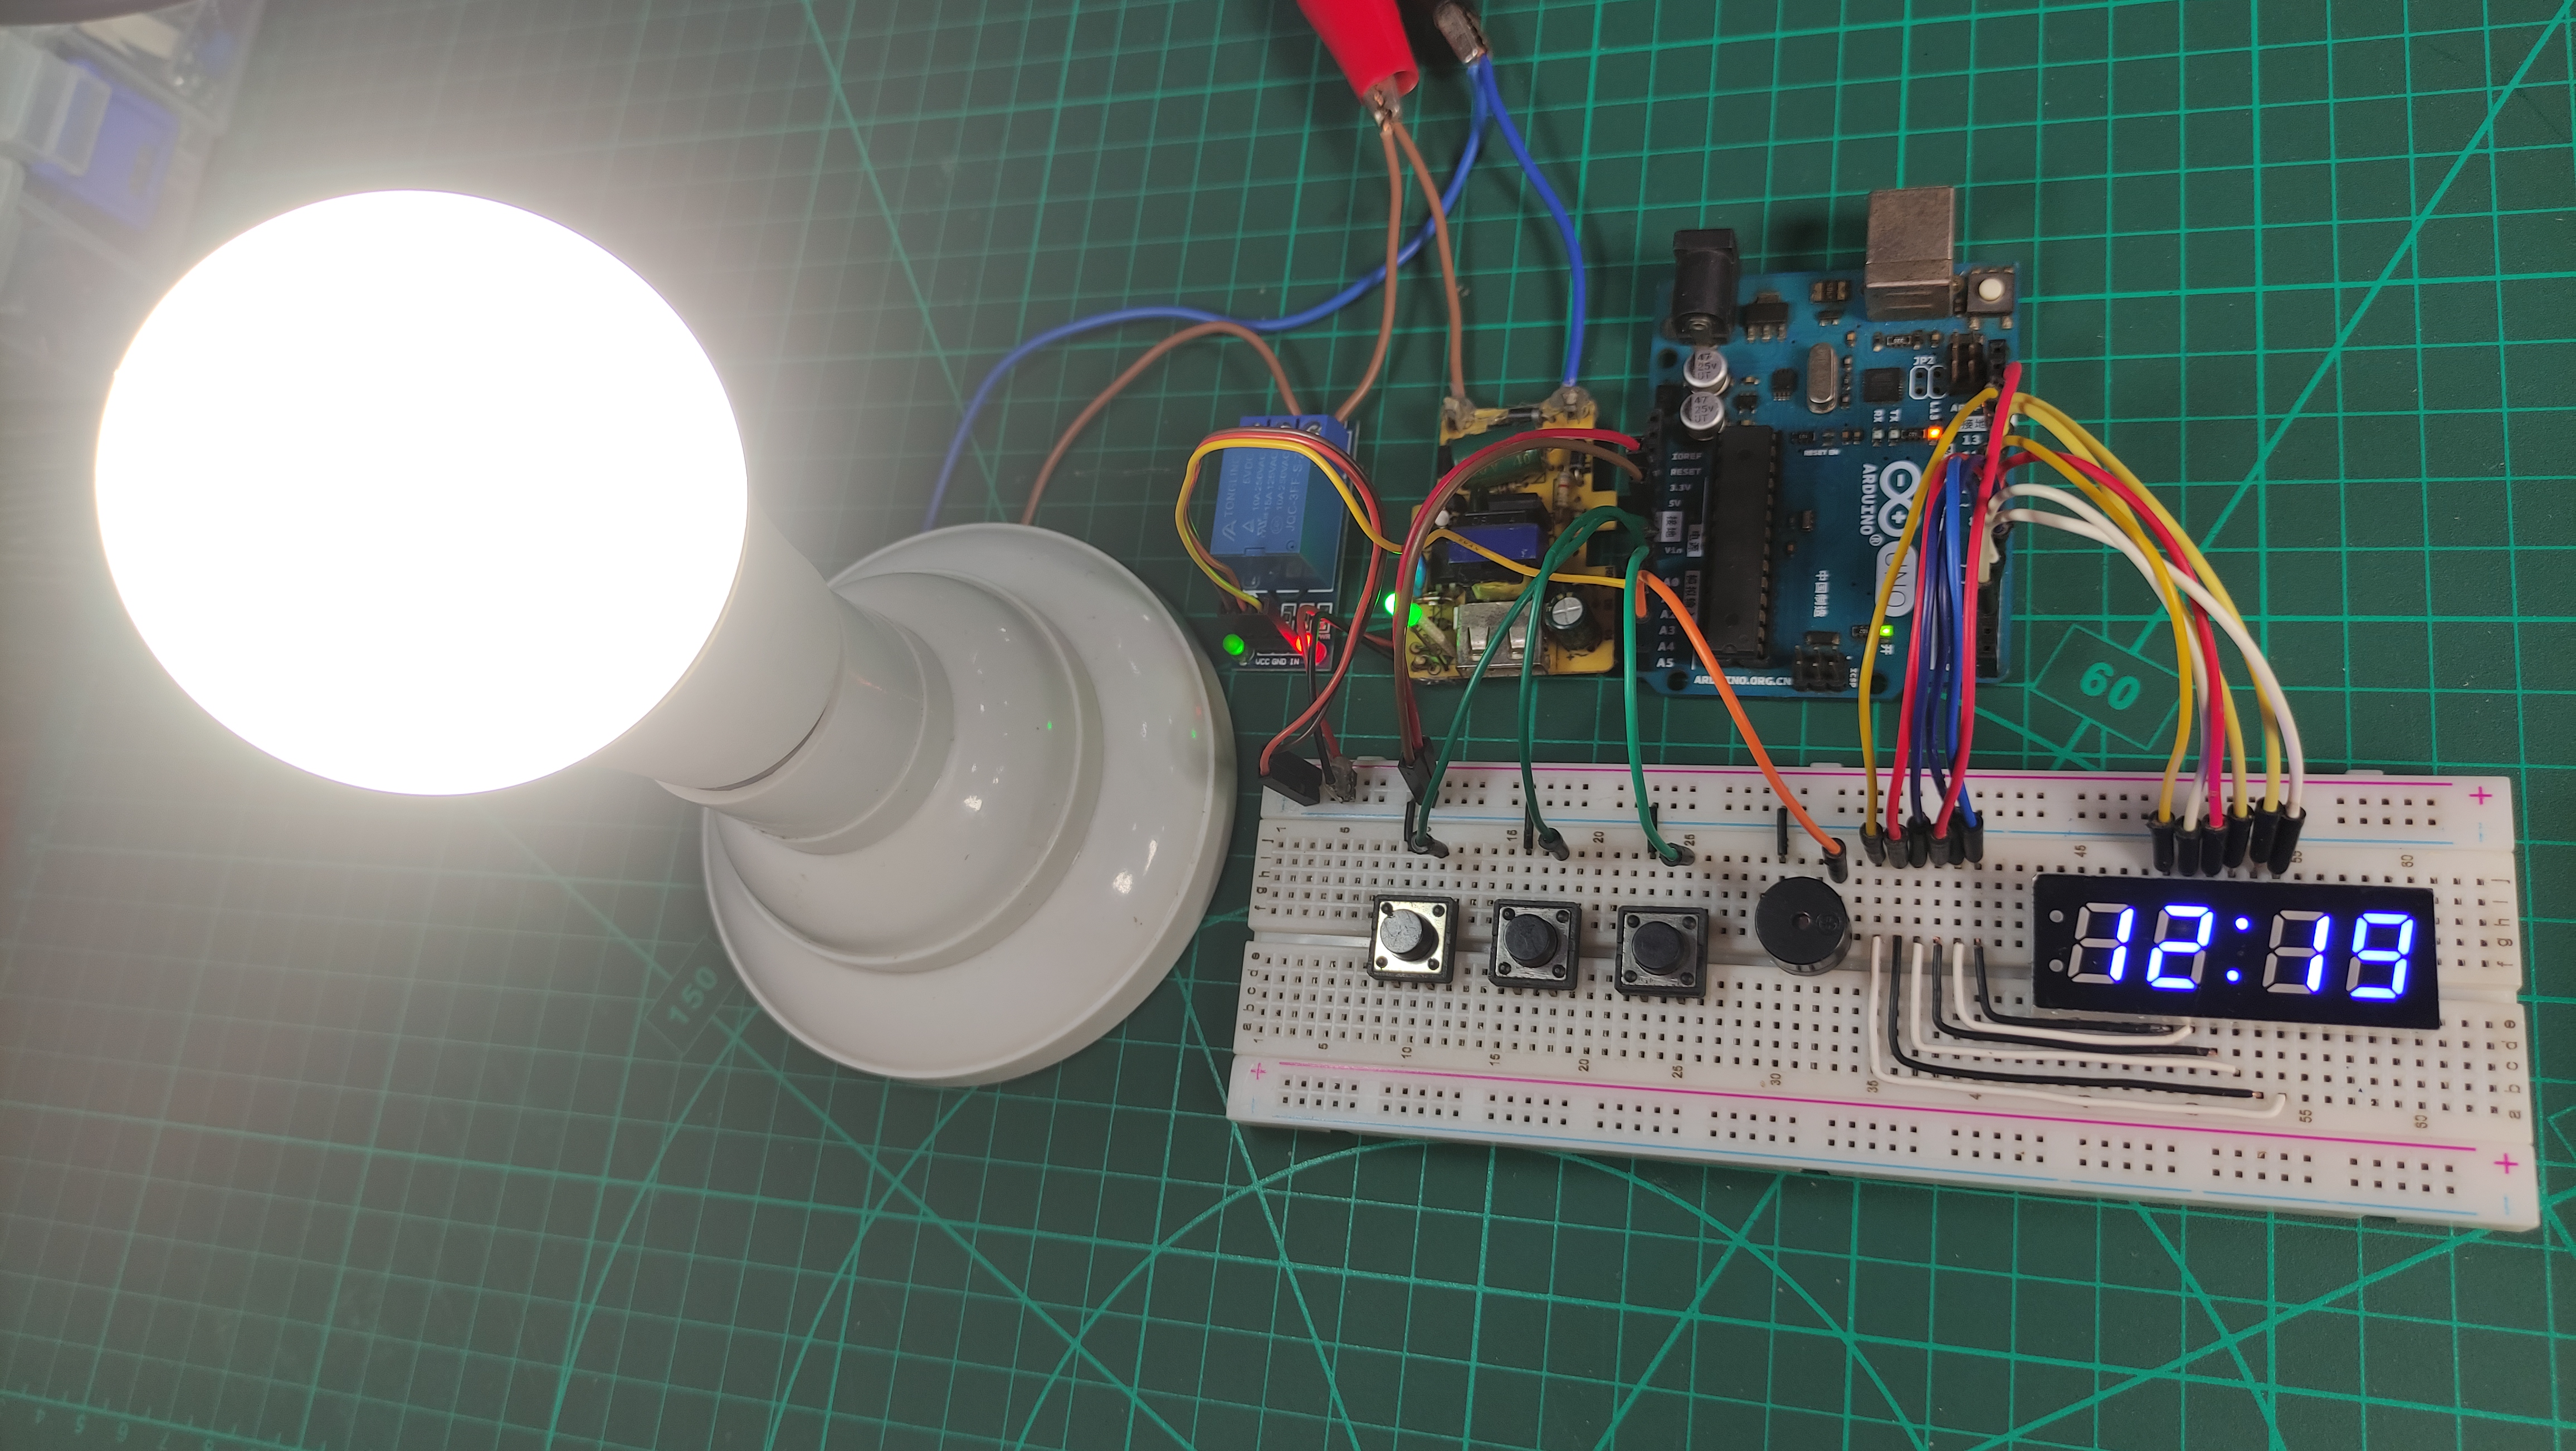
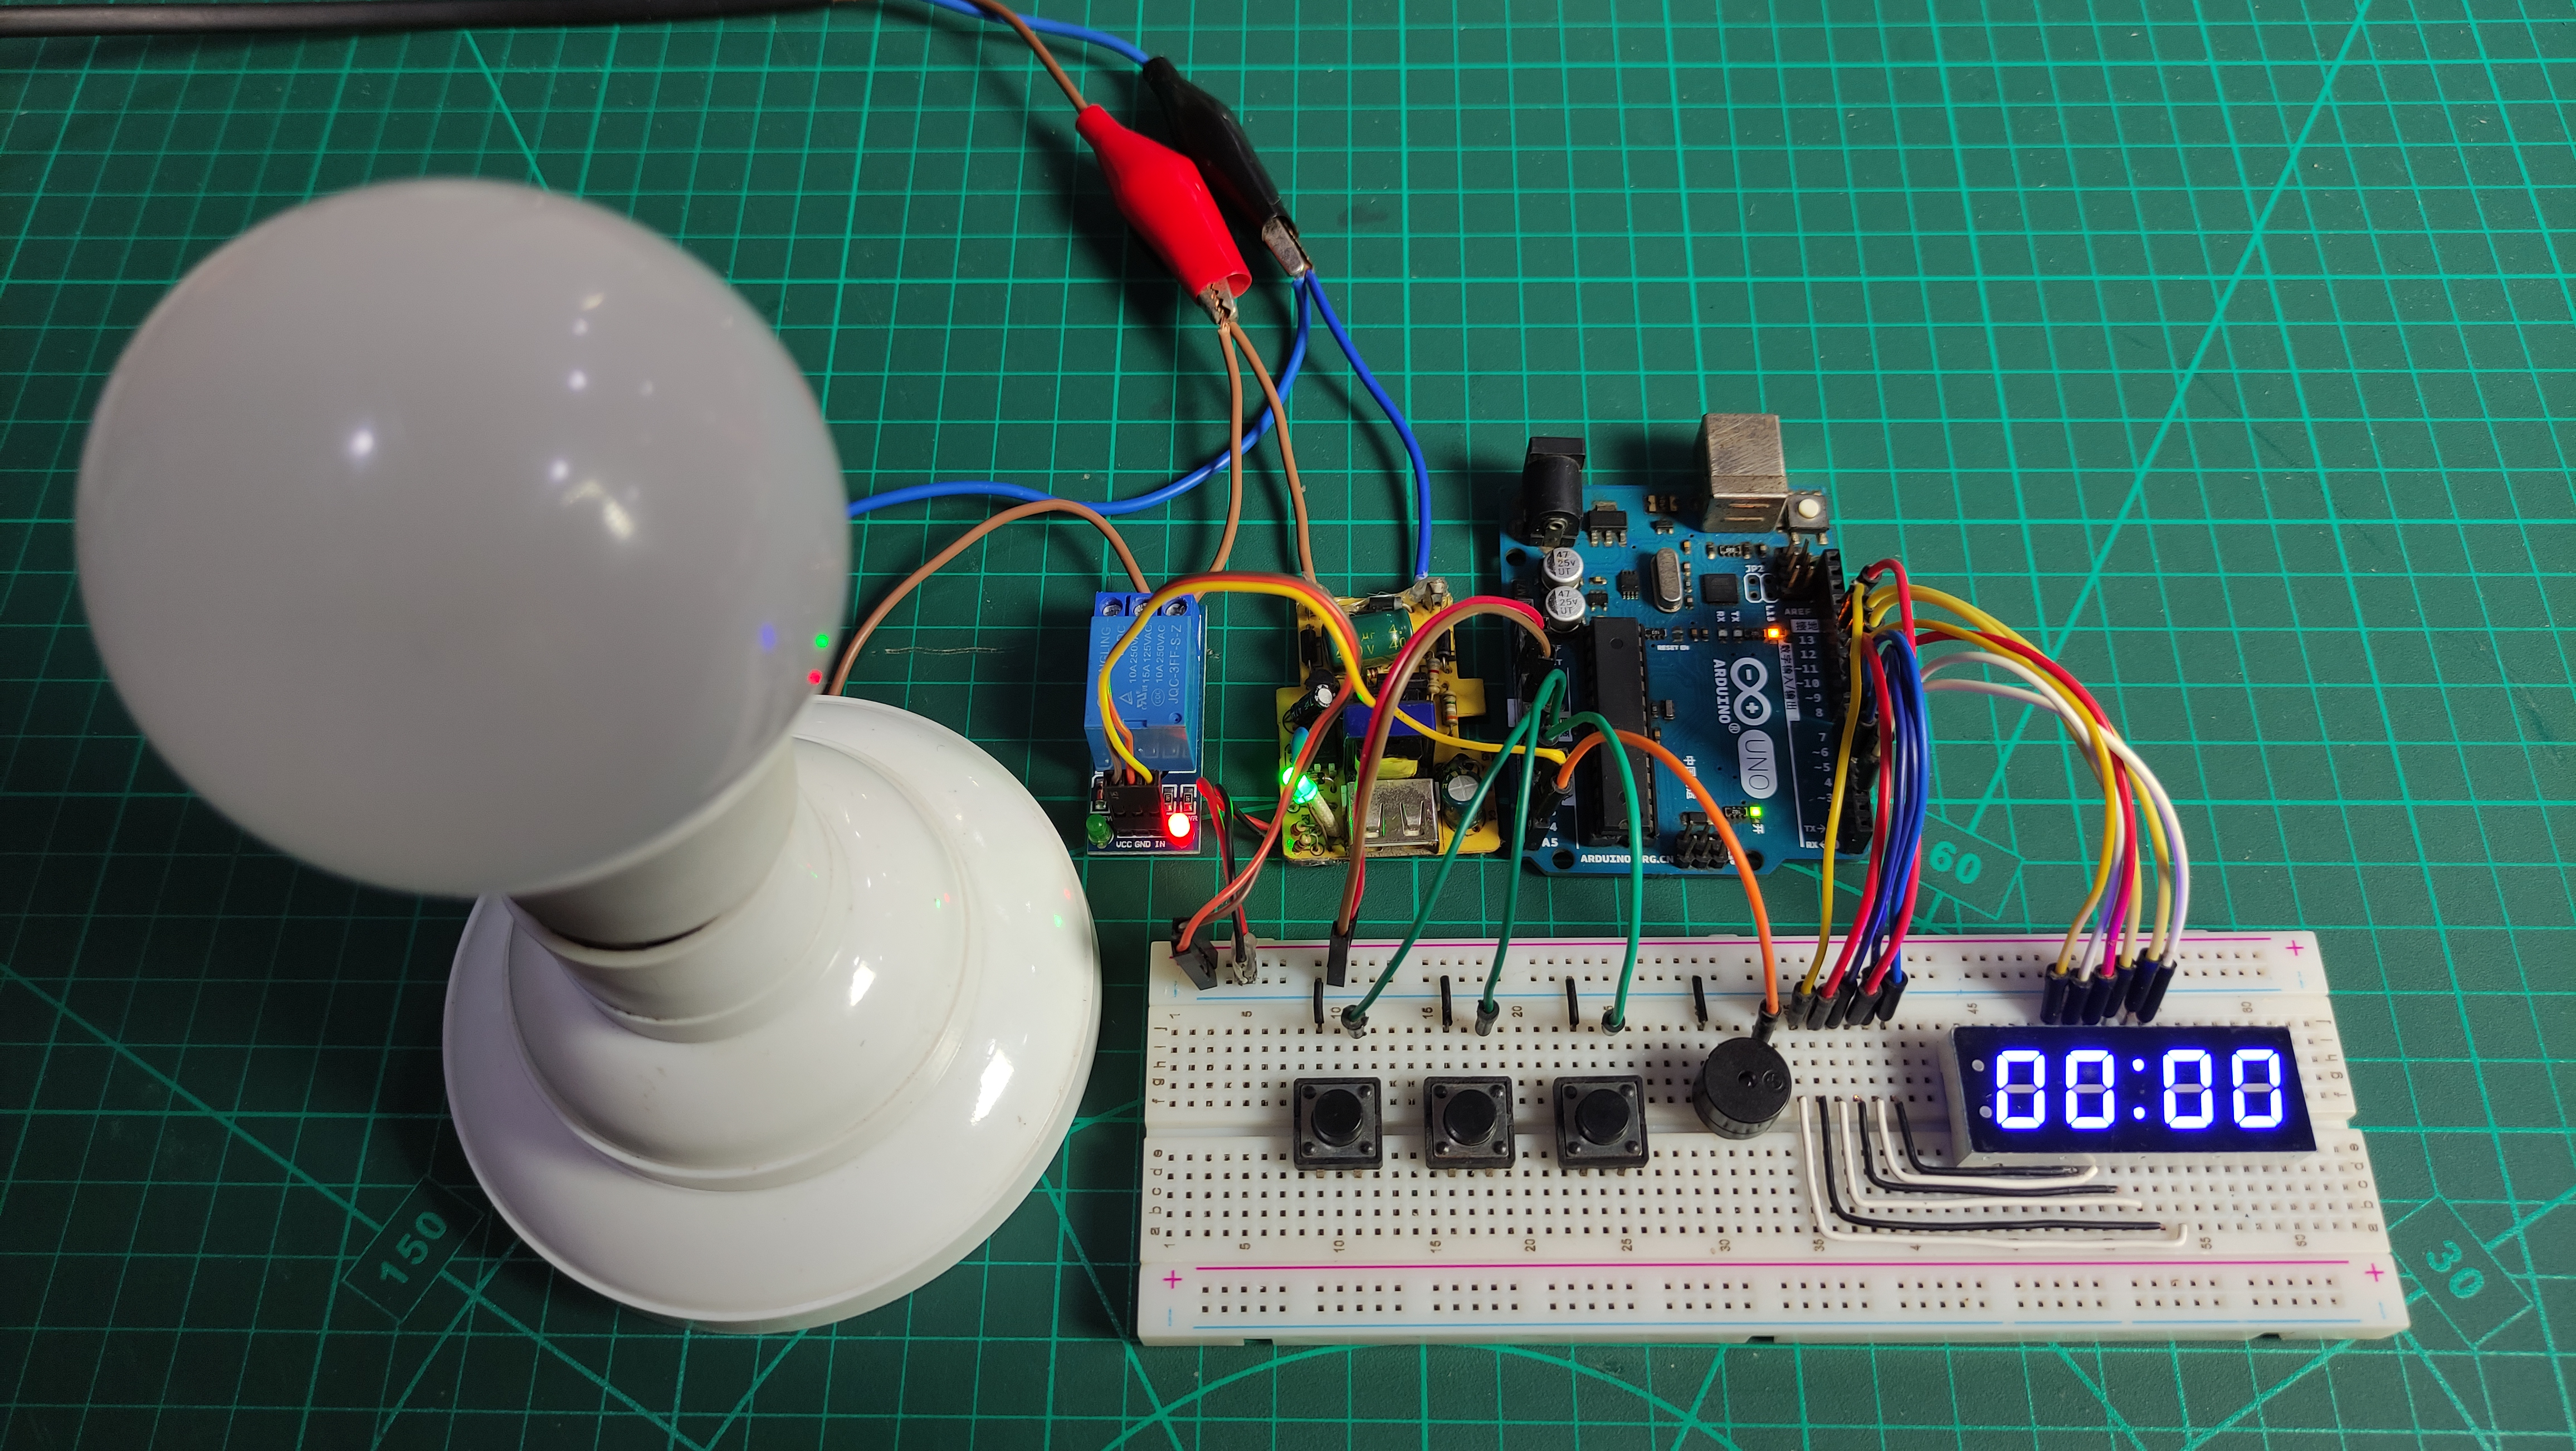
1-Channel 5v Relay Module,
Male to Male Jumper Wires,
Male to Female jumper Wires,
Bulb Holder,
220v LED Bulb,
5v 2Amp Power Adapter
}
Solderless Breadboard,
Arduino Uno,
4 Digit Multiplexing 7Segment Display,
Push Button x 3,
Buzzer,
1-Channel 5v Relay Module,
Male to Male Jumper Wires,
Male to Female jumper Wires,
Bulb Holder,
220v LED Bulb,
5v 2Amp Power Adapter
}


_3u05Tpwasz.png?auto=compress%2Cformat&w=40&h=40&fit=fillmax&bg=fff&dpr=2)
Comments