

Hardware components | ||||||
| × | 1 | ||||
Software apps and online services | ||||||
 |
| |||||
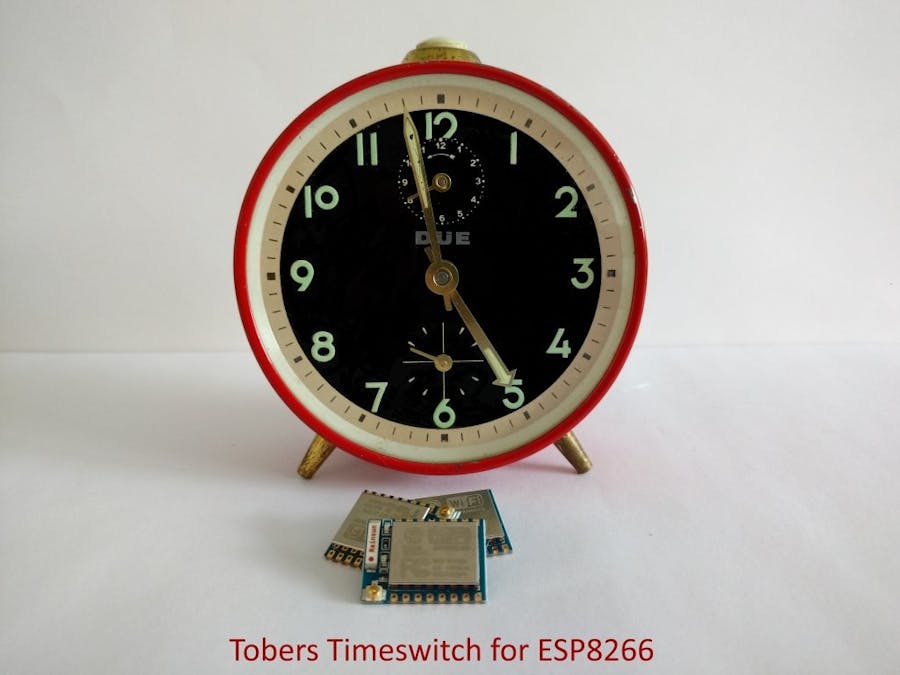
Tobers Timeswitch is a versatile and multifunctional timeswitch software for ESP8266 devices, based on the great timeswitches on fipsok.de.
Besides the "classic" timeswitch functions widely configurable for every single day, it offers a lot of different sunrise/sunset and twilight modes. A countdown timer is also available. Using the inbuilt Master/Client function you can control multiple devices "by one click". This can be very helpful if you have a lot of devices running that shall all use the same scheme of switching times. Tobers Timeswitch is easily and extensively configurable via a comfortable web interface.
InspirationI've always been a "christmas lights enthusiast". Over the years the amount of illumination gadgets became larger and larger - and so did the number of analogue timeswitches. Of course, they work fine, but it's nearly impossible to synchronize them properly. Nowadays there is a huge number of smart devices and smart plugs available - but most of them suffer from - in my opinion - some disadvantages. They either use a proprietary software, you need special apps to control them, or - what is really annoying - they "call home" to a server somewhere in the world. You probably don't need (and I don't want) all these "features".
Realizing a former project I came across the fabolous site fipsok.de, that tought me quite a lot about programming in general and ESPs in special. In my opinion this (german language) site made by Jens Fleischer is one of the most valuable resources in the web concerning ESPs & Co. On this site you can also find some really nice timeswitches. Their functions are the nucleus around which I built my own version of a timeswitch.
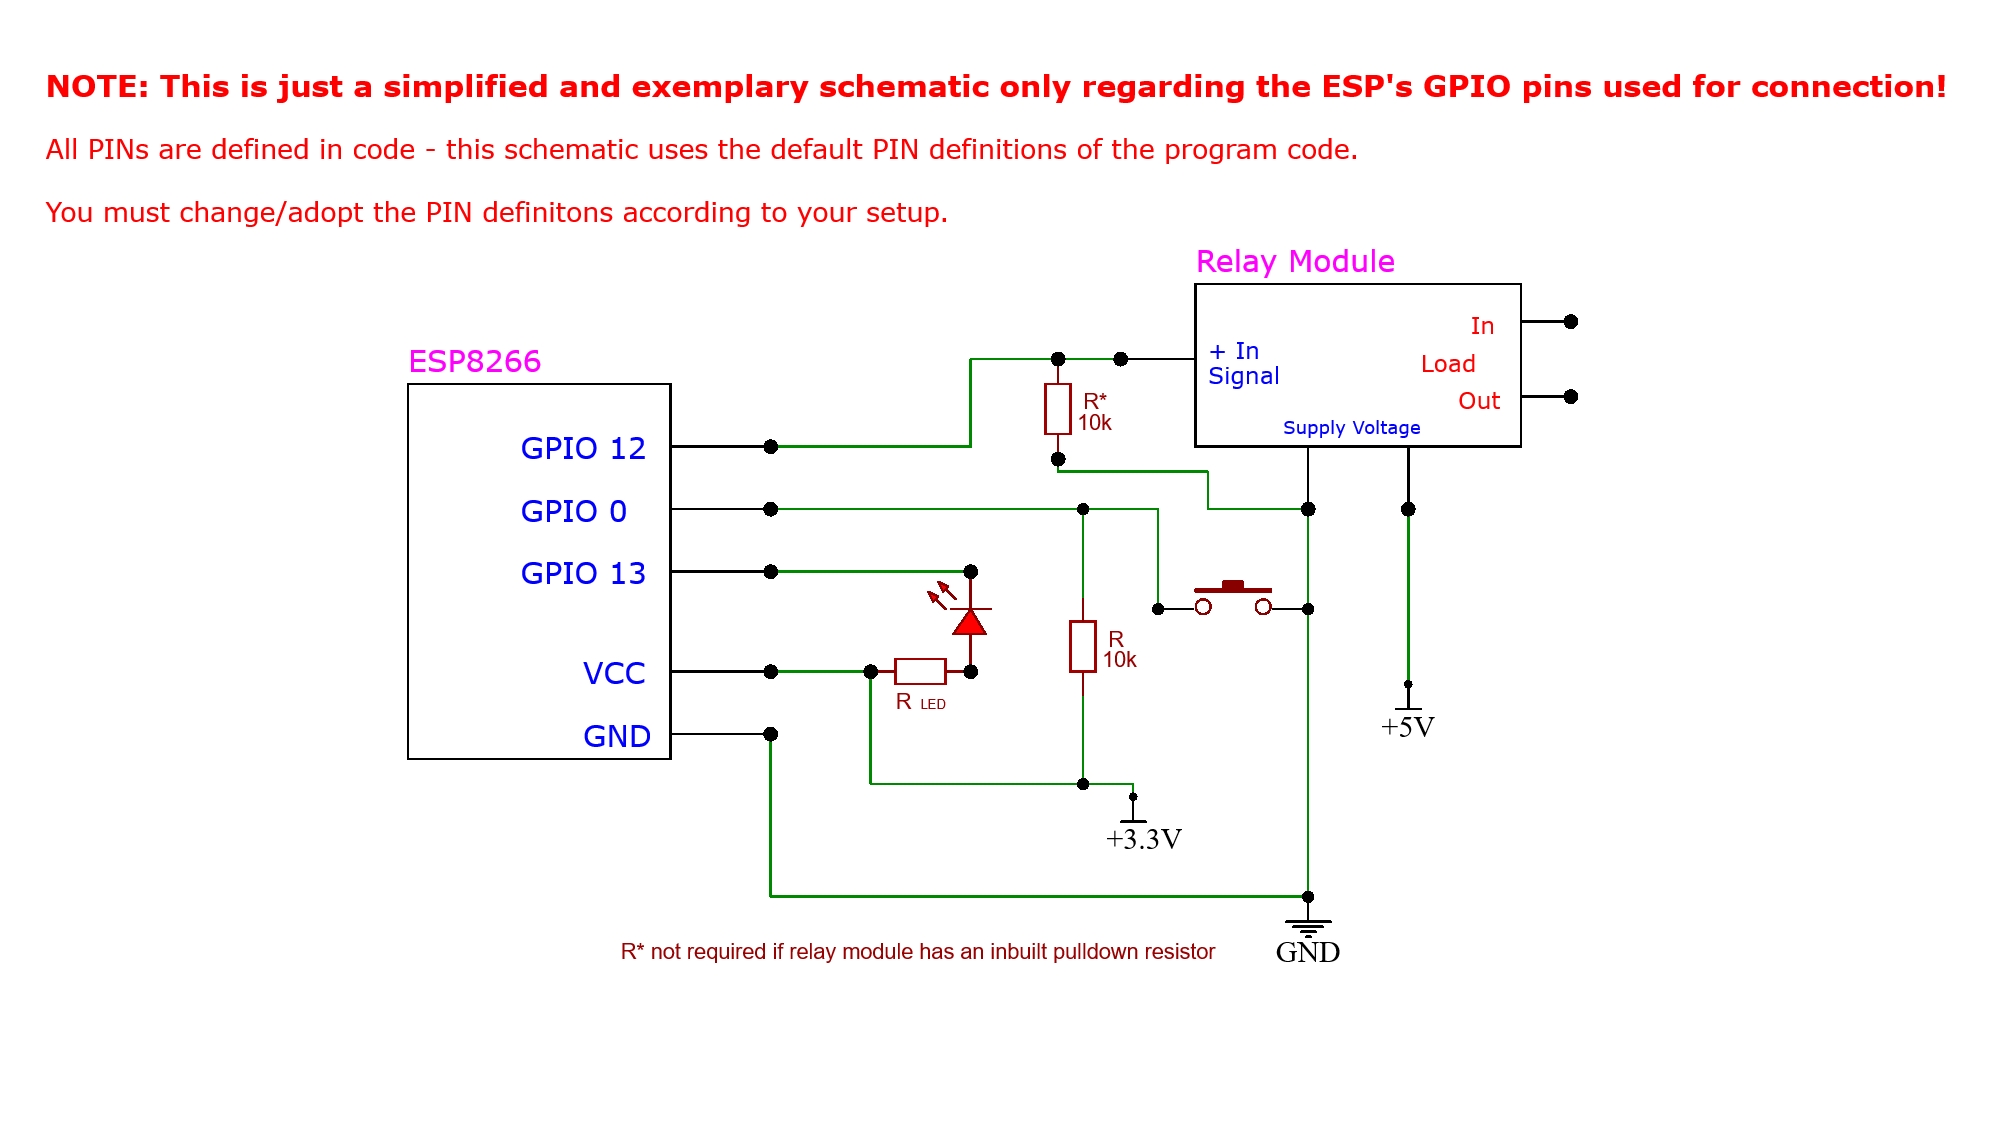
Parts requiredESP8266 (and optional: relay module, switch button, led, resistors)
or
ESP8266 / ESP8285 based device with at least 1 MB flash memory.
I run this software on several "Sonoff Basic" and "Sonoff S20" devices.
Please read the notes at the end of this article why I can't give any tips how to flash smart devices.
Arduino IDE - compiled with ARDUINO V 1.8.13 on Win 10
- installed boards: Arduino Core for ESP8266 (compiled with V 2.7.4)
- installed libraries: WifiManager_for_Multidisplay, my own fork of WiFiManager by tzapu
- installed tools: ESP8266 Little FS Data Upload
- Ensure you have installed the required boards and libraries.
- Visit my Github repository and download from the releases site the Zip-File timeswitch_.x_EN for English language ortimeswitch_.x_DE for German language. The Zip file contains the Arduino ino file with the code and all other reqired files.
- Unzip the file into your Arduino Sketch Directory.
- Open the timeswitch_.x_EN.ino respectively timeswitch_.x_DE.ino file.
... choose the proper board in Arduino - you must also set in Settings "Flash Size" the size of FS to at least 192k
Then you have to do some settings in the code. All custom variables are placed in the //// USER SETTINGS //// section at the beginning of the code.
- optional: #define DEBUG for debugging messages via serial monitor (57600)
- set the PIN definitions and 'active states' according to your setup/device
All other settings are made later on during first setup or can be set via web interface.
Now you can start compiling and uploading the code to your ESP. Having finished these steps don't forget to upload the files in folder "data" using ESP8266 Little FS Data Upload.
On first start up...The first time your device starts up it doesn't connect to your WiFi - no surprise because we didn't define any WiFi credentials in the code. Instead of that the device starts an Access Point ("Tobers_Timeswitch" or "Tobers_Zeitschaltuhr"). Connect to that AP and enter your WiFi credentials in the config portal. After successful connection to your WiFi the ESP writes the WiFi credentials persistently into its flash memory.
I highly recommend using a static IP - the address should be persistent in your network (required for Master/Client mode) and - in general - it's easier to find your device if you don't have to investigate before which IP address the router has assigned to it. (Of course the static IP must be chosen according to the settings of your router!)
[Note: It's possible to skip the config portal via "Exit". In this case the config portal is closed and the ESP works as AP only. But this operation mode without internet conncetion and time server call doesn't make any sense.]
-
User GuideCalling the IP address of your device with the browser, you will be asked to enter credentials. Enter as user "time" and as password "switch". You'll reach the site "index.html" - the main site of the timeswitch with all the classic timeswitch functions:
- set switching times and active days
-> settings take effect after clicking button "Save Times" - enable/disable single times by clicking on ON/OFF
-> settings take effect immediately - activate/deactivate all switching times by clicking button "deactivate/activate auto"
-> settings take effect immediately - switch on/off manually
-> settings take effect immediately
Please note that only with a click on "Save Times" all settings are saved to a file on flash memory and can be restored after a restart of the device.
-
Advanced Functions (advanced.html):
- assign twilight or sunrise/sunset times to certain switching times
- choose between sunrise/sunset or twilight as reference for switching times (twilight type can be changed via config site)
Having assigned the twilight mode to a certain switching time, this time is coloured brown and below a sun symbol on the main timeswitch site - meaning this time can't be changed manually as long as you undo the assignment of the twilight mode.
- enable/disable countdown timer
(while countdown timer is active all switching times are deactivated)
-
Configuration (config.html):
- set name of timeswitch
- set number of switching times
- set NTP server
- set interval for NTP server call
- enable/disable authentication for html sites and set credentials
- set longitude/latitude of your location and configure twilight type
(for information about the different types of twilight I recommend taking a look at https://www.timeanddate.com/sun/ ) - restart device
- erase WiFi credentials
- access to Master Function controlling multiple timeswitches
- access to Over the Air Update (OTA) via web interface
- access to file administration
- acces to Log-Site logging latest ten NTP-Server-Calls
Client Administration (master-client-admin.html):
- add or delete IP addresses of clients
- NOTE: IP address of master device must also be added
- list of clients is sent to all clients
-> master functions can also be called on client devices - set number of switching times for master and all client devices
-
Cockpit (master-cockpit.html):
- overview of all clients to check connection and state
- switch on/off certain devices
- activate/deactivate all switching times of certain devices
- visit certain devices by clicking the IP address
-
Master Main Switch (master-main-switch.html):
- configuration of switching times for all devices
-
Master Advanced Functions (master-advanced.html)
- advanced settings for all devices
Please note that setting the switching times via master device also sets the number of switching times according to the master switch!
Though I implemented a check in javascript, it's recommended to verify if the clients have properly taken the settings.
-
Hardware FunctionsSwitch Button: Short Press -> switch relay on/off manually
Long Press -> restart device (hold pressed until status led lights up)
Status LED: Lights up on start up and goes off when network connection AND time server call have been made successfully.
-
Over the Air Update (OTA)It is possible to update the software via web interface.
If you have an ESP with only 1 MB flash memory, the OTA cannot be done directly. The reason is the size of the program - together with the data on the LittleFS filesystem there is not enough space left for an OTA. You must take an intermediate step and flash the minimal_ota, which is delivered with the program. This sketch is much smaller and does nothing but making a network connection and enabling an update. So please take these steps:
1. Open the file "minmal_ota.ino" in Arduino IDE.
2. Make sure you have chosen the proper board settings and made the Pin definitions according to your timeswitch sketch setup.
3. Compile minmal_ota via "Sketch > Export compile Binary".
4. Upload the resulting.bin file via web interface -> ota.html (Note: This minimal sketch can do nothing but connecting to Wifi with the known credentials and enabling OTA of the updated "timeswitch.bin").
5. Once the device has restarted and connected to Wifi (status led off), just refresh ota.html and start the update with the new "timeswitch.bin" file.
Always double-check before any OTA if you have selected the proper settings in board manager! Uploading an incorrect file can brick the device - in that case you can only unbrick it by re-uploading the program via serial interface.
----------------
Important Notes ⚠️This code has been made for ESP8266. There is a large number of smart devices availabe basing on this chip - some of them are easily flashable with a custom firmware. Many tips and tutorials can be found in the web explainig how this flashing process can be made. I don't give any advise concerning this because it can be (potentially) very dangerous: Most of these devices are working with mains voltage - so modifying these devices can become a life threatening thing, if you don't have the expertise for electrical works!
As clearly stated in the license the code is published "without any warranty; without even the implied warranty of merchantability or fitness for a particular purpose."
-
General information about smart devices, smart plugs etc.
A lot of smart devices are used for switching loads on and off. It is very important (!) to keep within the specifications of the device and not to exceed the maximum load declared on the devices. Of course, this should be self-evident and a matter of common sense - or as we say: "Hausverstand". Having read through a lot of forums and hearing complaints about melt-down or burnt-off devices people have used to switch large boilers etc, I feel myself forced to give this hint. I myself wouldn't even think about reaching the maximum load - high loads should always be switched by contactors (German: "Schützschalter ").
Loads including a "Switching Power Supply" (most of the modern devices and gadgets have inbuilt SWPs) can also cause problems, because - in the moment of switching on - many SWPs draw very high inrush currents, exceeding the maxium rated load of the device by multiple times. Of course, only for a short time of some ms, but the resulting arc between the switching contacts of the relay can weld them together and destroy your switching device. This can be prevented by using contactors or inrush current limiters.
Many people are not aware that even a couple of simlutaniously switched on "retrofit LED bulbs" can cause this damage though the rated current of these lamps is very low. But each of these has a small built-in SWP and, in total, this can be too much load for the relay contacts. You can often read complaints like "My smart device has been damaged after some weeks and can't be switched off any more" - but mostly this isn't a failure of the smart device but of the wrong or not properly calculated load attached to it.
----------------
CreditsThis project wouldn't have been possible without the work of many others:
- Special thanks to Jens Fleischer - the timeswitches presented on his site are the nucleus around which I built my own version of a timeswitch. His fantastic website www.fipsok.de is one of the best places in the web to find inspiration and help concerning ESP8266 and ESP32 projects. Furthermore, the projects on his site enabled me to learn a lot about Javascript functions, which are an essential part of this project.
- HTML background pattern graphic by Henry Daubrez, taken from http://thepatternlibrary.com/
- Thanks to the many, many other programmers and enthusiasts in the web whose work and helpfulness enabled me to realize such a project.
I classified this project as "intermediate" because it requires some basic knowledge.
Nevertheless I added a lot of comments and links to the code, so I think it should be possible to figure out how the program works. Please take this effort before posting supposed malfunctions.
If you find bugs or face serious problems that can't be solved by doing a fair web search, please post them here in the comments section and not via PM.


Comments