

Hardware components | ||||||
 |
| × | 1 | |||
| × | 1 | ||||
| × | 1 | ||||
| × | 1 | ||||
 |
| × | 1 | |||
| × | 3 | ||||
 |
| × | 1 | |||
 |
| × | 3 | |||
| × | 1 | ||||
| × | 1 | ||||
Inspired by the Pomodoro Tomato on instructables.com, I decided to make a variant of the classic study timer using visual cues instead of a buzzer. I didn't just want it to be informative, however -- I also wanted it to give the user something stimulating to look at during break time. And so the idea for the prism pomodoro was born.
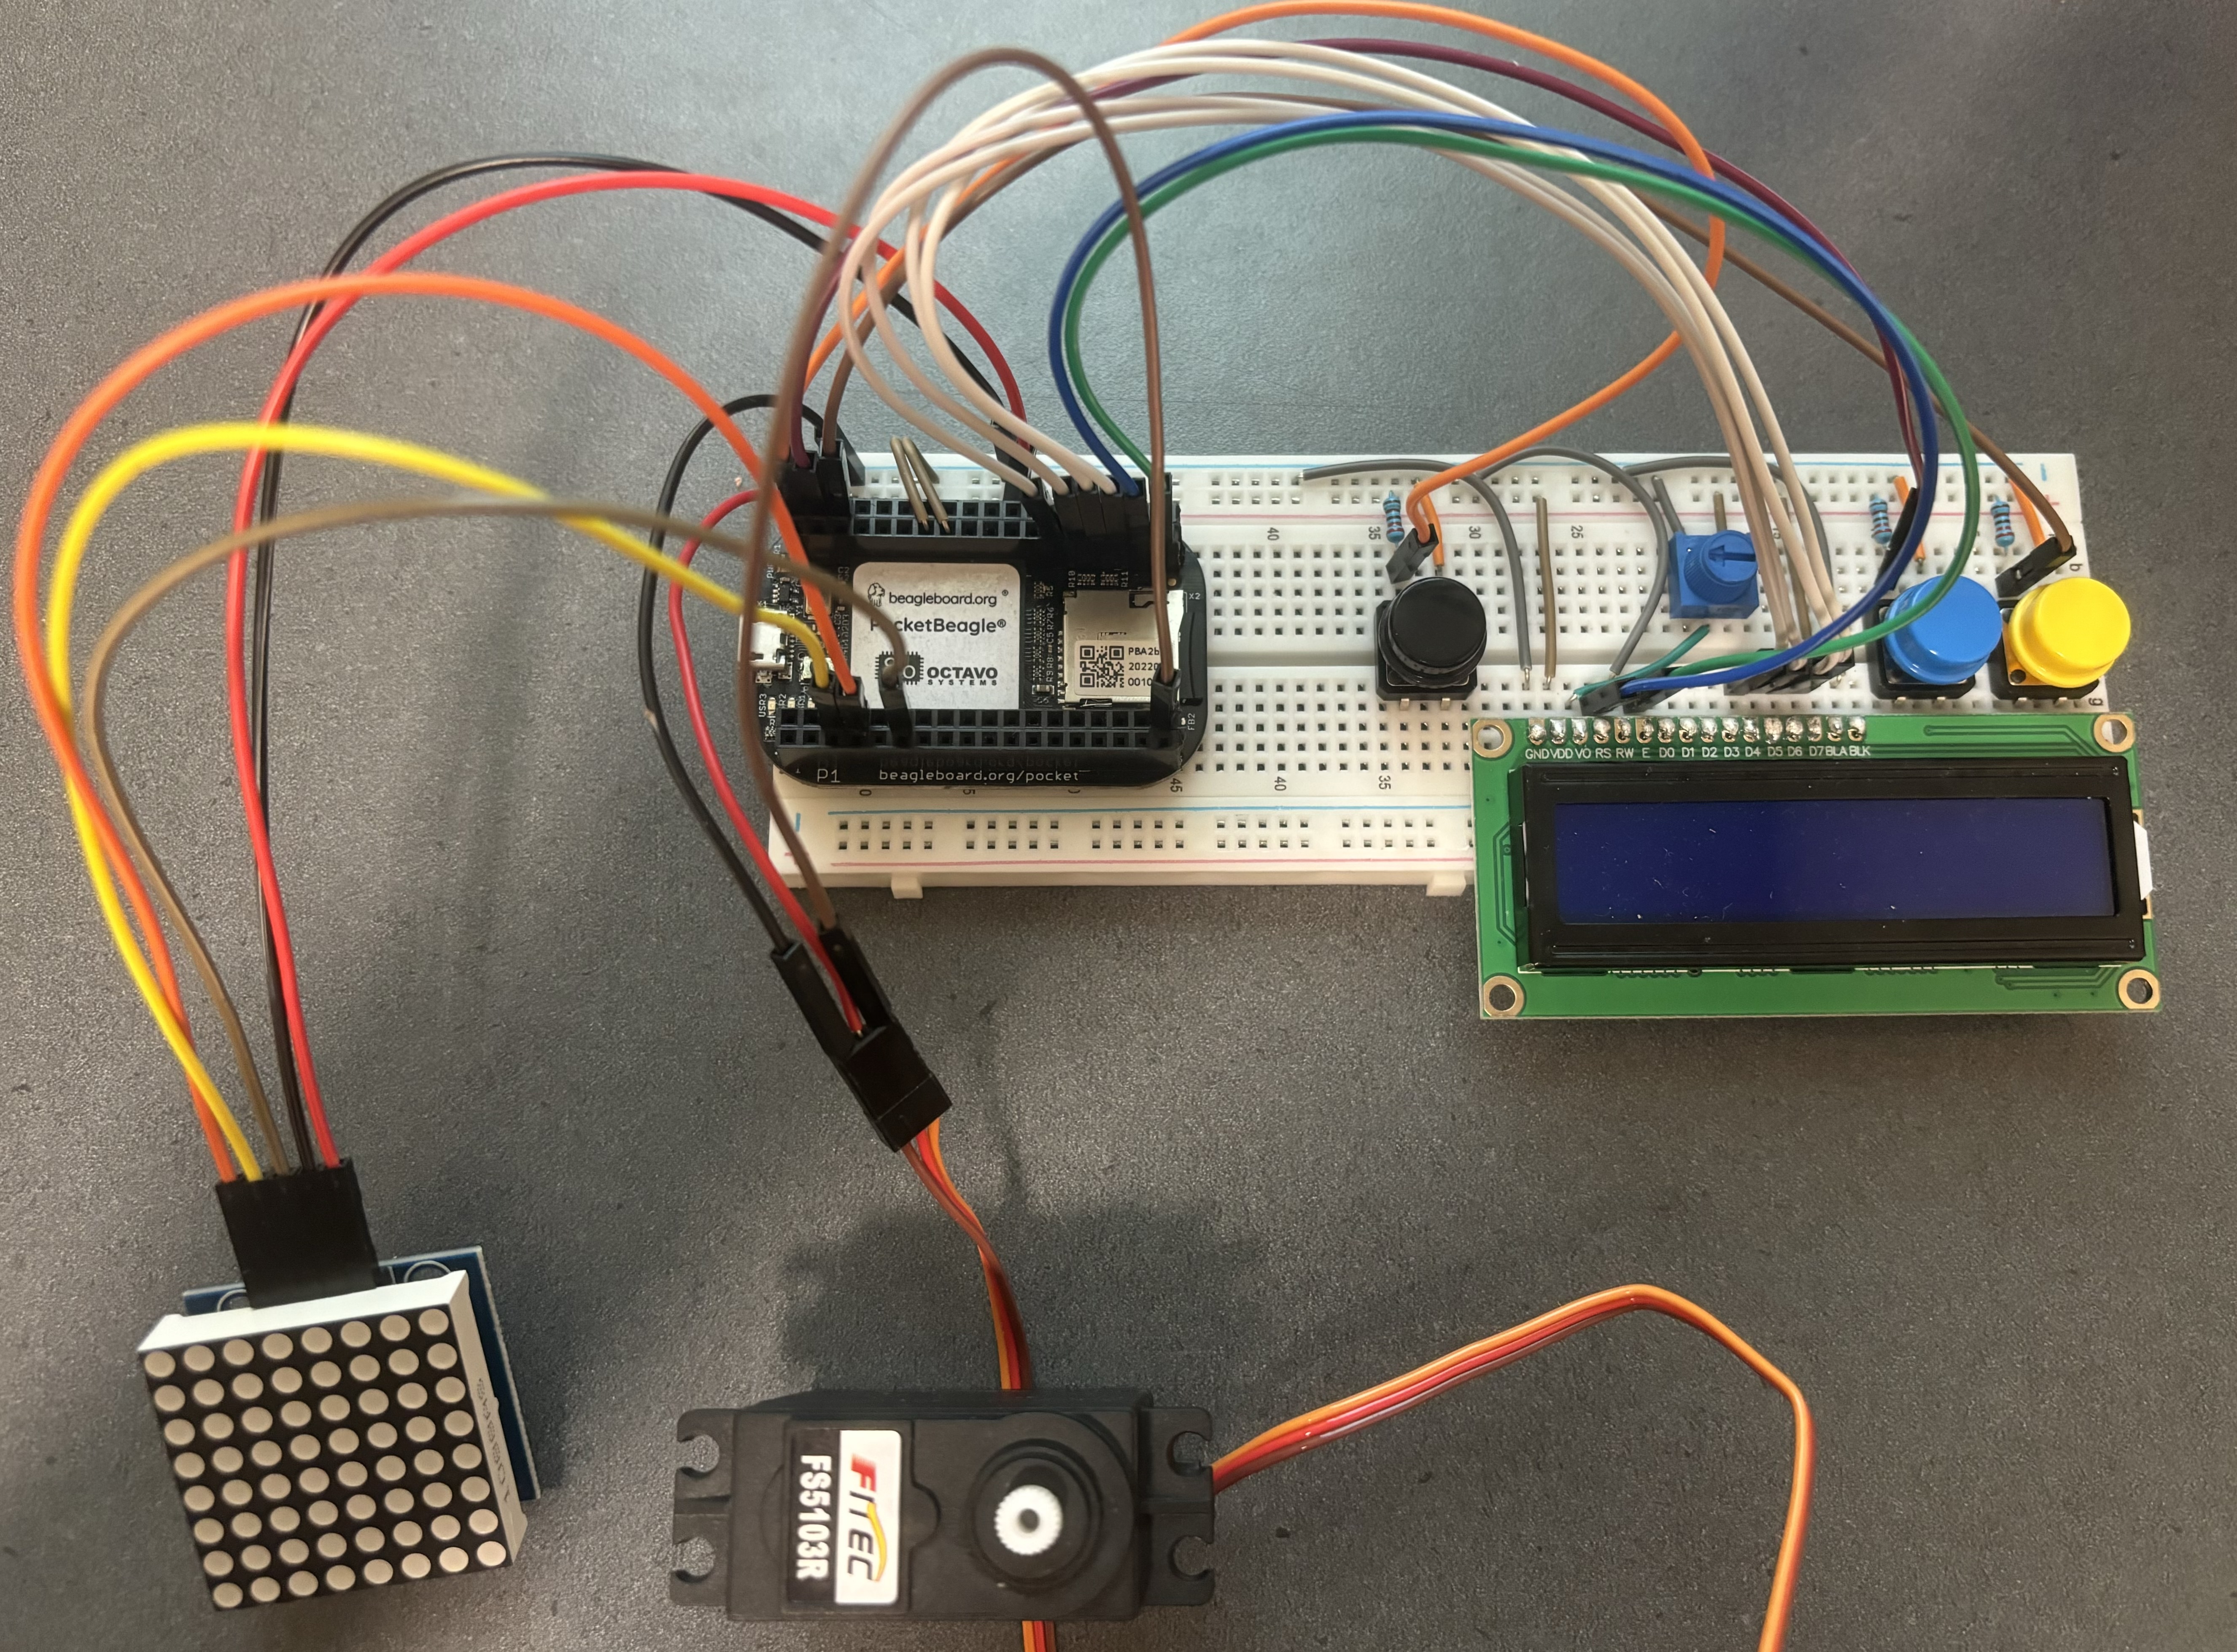
Hardware OverviewThis project runs off the PocketBeagle and has 4 types of hardware components:
- 8x8 LED matrix
- 16x2 LCD screen
- Continuous rotation Servo
- Buttons (3)
First, I placed the 3 buttons and LCD screen on the breadboard. I wired each of the buttons with a 2.2k pull-up resistor to the + power rail.
Then, I connected the +5V and GND pins of the PocketBeagle to the + and - power rails and began wiring the LCD as follows:
- GND to ground (negative power rail)
- VDD to +5V (positive power rail)
- V0 to the middle pin of a potentiometer (other pins of potentiometer to + and - rails)
- BLA to + power rail
- BLK to - power rail
Next, I added jumper cables to connect the LCD and buttons to the PocketBeagle:
- LCD D4 to P2_25
- LCD D5 to P2_27
- LCD D6 to P2_29
- LCD D7 to P2_31
- LCD RS to P2_33
- LCD E to P2_35
- Black button to P2_2
- Blue button to P2_4
- Yellow button to P2_6
I added the Servo with these connections:
- VCC to + power rail
- GND to - power rail
- Control to PocketBeagle P1_36
And the LED matrix with these connections:
- VCC to + power rail
- GND to - power rail
- DIN to PocketBeagle P1_12
- CS to PocketBeagle P1_6
- CLK to PocketBeagle P1_08
Using superglue, I attached a CD to a Servo attachment.
Then I glued prism to the opposite side of the CD from the Servo attachment.
Final ProductThe device will prompt the user by displaying "set study time" on the LCD screen. The user may increase the time by 5 minutes using the yellow button, decrease it by 5 minutes using the blue button, and confirm the choice of time using the black button. If an invalid time is chosen (0 or negative), "INVALID TIME" will display and the user will use the blue and yellow buttons to choose a valid time. Once a valid study time is chosen, it will be confirmed on the LCD screen. Then, the user will be prompted to set the break time, using the same controls as for study time -- except this time, the blue and yellow buttons decrease/increase the time by only 1 minute.
Once the break time is confirmed using the black button, the timer launches into study mode for the chosen study time. When break time comes around, the LED matrix will pulse and the Servo will spin the CD and prism. These are two options for visual cues for the timer.
The device will continue cycling through study and break mode until turned off.


_3u05Tpwasz.png?auto=compress%2Cformat&w=40&h=40&fit=fillmax&bg=fff&dpr=2)
Comments