

Hardware components | ||||||
| × | 1 | ||||
| × | 1 | ||||
| × | 1 | ||||
 |
| × | 2 | |||
Introduction
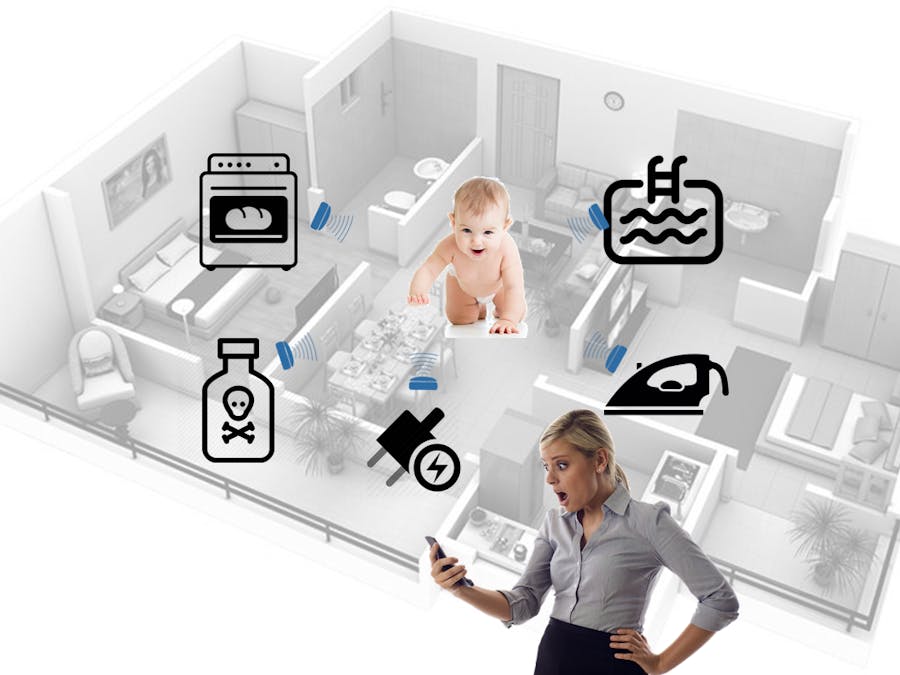
One of the main tasks and concerns of new parents is that they always should keep away their kids from hazards in the house. They have to follow their infant or toddler in all rooms and on each of his/her steps worrying about dangerous tools and places like hot oven, iron, medicines, pool and etc. It is impossible to do this tedious job all the time, especially for twins and sometime exhausted parents may stop for a moment to rest or grab something to eat hoping nothing bad would happen for their kid(s). But official reports witness that they are wrong and many children hospitalization are due to a very short moment of neglect.
In this system we are trying to track our kids based on RFID tags and if he/she approaches to a hazardous device, our system plays a distracter track (e.g. an amusing video or parents' voice on TV or nearest device) in order to discourage him/her from approaching the danger. Meanwhile the system set an alarm on the parent's cell phone via wireless network. Wireless tags can be attached easily to any device or door entries makes our design very flexible, useful and easy to install.
Top-Level Design
The tracker system comprised of two parts:
1- A proximity sensor device which is installed on the hazardous locations in the house and senses the kid approaching,
2- A central systems which gathers all signals from reader devices, plays distracter sound track and dials parents’ cell phones in order to inform them about the danger.
Hardware Design
In order to construct a hardware basis for our project, first we chose the appropriate hardware components including microcontrollers, communication, sensory and actuator parts.
1- Proximity System on Hazardous Appliance
For the proximity sensor, we chose RFID tags and reader devices. RFID tags are lightweight, cheap and off-the-shelf devices which could be easily attached to the kids’ clothing without any disturbance for them. Tags also can be attached to the pets’ wearing to help the owners to protect them as well. Moreover, as RFID readers can identify the tags separately, it is possible for the reader to distinguish between kids and pets and therefore initiate different reactions towards kids and pets proximity.
There are many RFID readers available on the market with different operating distance. We chose RDM-6300 RFID reader (Figure-2). This is an easy-to-use and inexpensive module which is appropriate for our proof-of-concept prototype.
RDM63000 utilizes UART interface for data transmission. Once a tag enters in its communication range, it starts reading data from the tag including its ID. We decide to connect the RDM module to the MPU (Arduino Mega32). To prevent interference, we use pin D2 on Arduino for Rx and use software-controller UART capability on Arduino which enables us to define UART operation on arbitrary pins(Figure-3).
RDM63000 utilizes UART interface for data transmission. Once a tag enters in its communication range, it starts reading data from the tag including its ID. We decide to connect the RDM module to the MPU (Arduino Mega32). To prevent interference, we use pin D2 on Arduino for Rx and use software-controller UART capability on Arduino which enables us to define UART operation on arbitrary pins(Figure-3).
Linkit Smart 7866 Duo, itself provides us with Wi-Fi connectivity. Therefore we are done with the system on the hazardous device. Now we can move to the next part: the “The central System: signal aggregator and alarm service”.
2- The central system
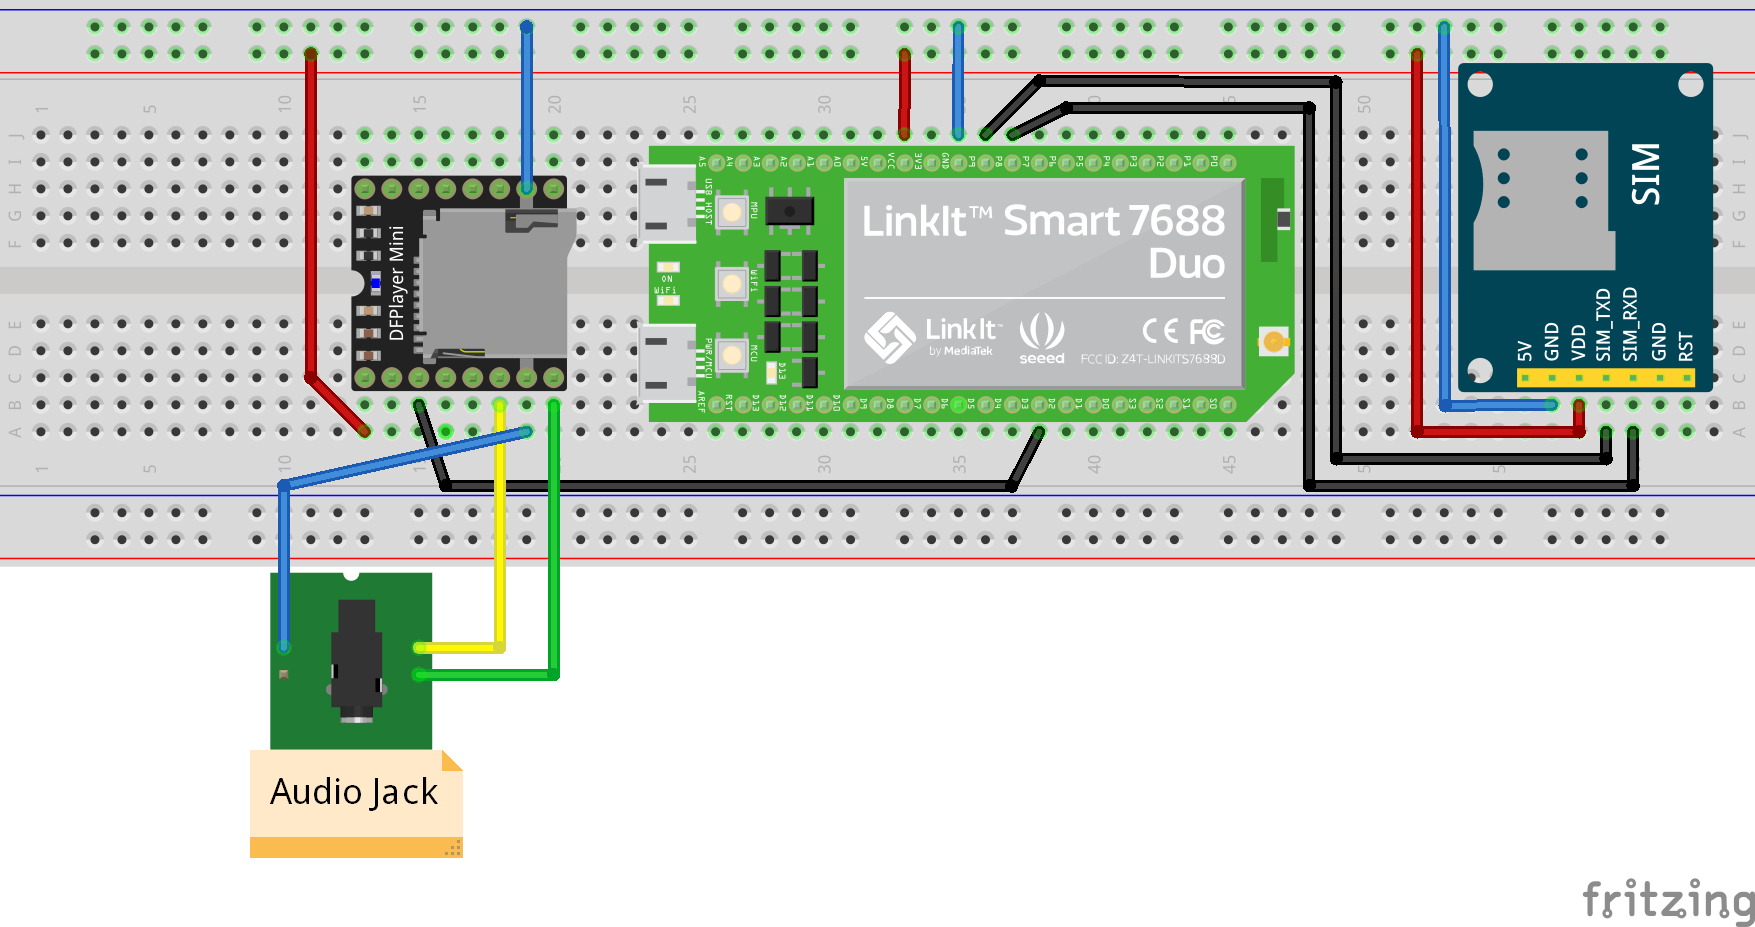
For the alarm service which its duty is to play an entertaining song for the kid in order to distract her from the danger, we pick an mp3 player module: DFPlayer Mini(Figure-4). DFPlayer Mini is a tiny audio player device which accepts a SD memory card and plays audio files stored in it. It can be controlled via external buttons as well as serial communication.
For calling parent via cell phone, we selected SIM-800L GSM Modem (Figure-5). SIM-800 accepts a SIM card and can connect to the GSM network, send text messages, make a call and connect to the Internet.
The circuit for the central system is depicted in Figure-6. DFPlayer is connected to a pair of software-controlled UART pins on Arduino part and GSM modem is connected to the MCU 7688. Once the MCU receive a signal from proximity devices around the house via the Wi-Fi network, it initiates a call using GSM modem and sends a signal to the Arduino using UART in between. Arduino then plays the entertaining song using MP3 module.
Software Design
The proximity system needs two pieces of software:
1- Arduino program: which reads RFID reader. It uses RDM6300 library which contains required codes for reading RDM6300 RFID reader. It sends the results to the MCU. You can download RDM6300 library from here.
#include <SoftwareSerial.h>
#include "RDM6300.h"
SoftwareSerial RFID(2, 3); // RX and TX
int Led=13;
uint8_t Payload[6]; // used for read comparisons
RDM6300 RDM6300(Payload);
void setup()
{
 pinMode(Led, OUTPUT);
 RFID.begin(9600);    // start serial to RFID reader
 Serial.begin(9600);  // start serial to PC
 Serial1.begin(57600); // Start serial to 7688
}
void loop()
{
 while (RFID.available() > 0)
 {
   digitalWrite(Led, HIGH);
   uint8_t c = RFID.read();
   //Serial.print(c,HEX);
   if (RDM6300.decode(c)) {
     Serial1.write("Baby is in danger!\r\n");
     for (int i=0; i < 5; i++){
       Serial.print(Payload[i], HEX);
       Serial.print(" ");
     }
     Serial.println();
   }
 }
 Serial1.write("Baby is safe.\r\n");
 digitalWrite(Led, LOW);
 delay(100);
}
2- MCU python program: It waits until receiving “Baby is in danger!” message from MPU. Then it constructs a python socket to the central system and sends that message to it.
import socket
import serial
import time
s = None
def setup():
   # open serial COM port to /dev/ttyS0, which maps to UART0(D0/D1)
   # the baudrate is set to 57600 and should be the same as the one
   # specified in the Arduino sketch uploaded to ATMega32U4.
   ToMCU = serial.Serial("/dev/ttyS0", 9600)
def loop():
	line = ser.readline()
	clientsocket = socket.socket(socket.AF_INET, socket.SOCK_STREAM)
	clientsocket.connect(('TheCentralSystem', 8089))
	clientsocket.send(line)
if __name__ == '__main__':
   setup()
   while True:
       loop()
The central system also needs two pieces of code:
1- MCU python program: it listens on a socket until receives the message. Then it dials parents’ phone number and sends a signal to the MPU (Arduino).
import serial
import time
import socket
s = None
serversocket = socket.socket(socket.AF_INET, socket.SOCK_STREAM)
def setup():
   # open serial COM port to /dev/ttyS0, which maps to UART0(D0/D1)
   # the baudrate is set to 57600 and should be the same as the one
   # specified in the Arduino sketch uploaded to ATMega32U4.
   global s
#    serversocket = socket.socket(socket.AF_INET, socket.SOCK_STREAM)
   serversocket.bind(('localhost', 8089))
   serversocket.listen(5) # become a server socket, maximum 5 connections
   ToMPU = serial.Serial("/dev/ttyS0", 9600)
   ToGSM = serial.Serial("/dev/ttyS2", 9600)
def loop():
   connection, address = serversocket.accept()
   buf = connection.recv(64)
   if len(buf) > 0:
       print buf
	if buf == "Baby is in danger!":
			ToMPU.write("1") # signal the MCU (mega32U4) to initiate the mp3 palyer
			ToGSM.write("ATD123456789\r\n") # make a call to the number '123456789'
			# You can send Text Message by the following lines od code:
			# ToGSM.write("AT+CMGF=1\r\n")
			#sleep(1);  // Delay of 1000 milli seconds or 1 second
			#ToGSM.write("AT+CMGS=\"+91xxxxxxxxxx\"\r\n"); // Replace x with mobile number
			#sleep(1);
			#ToGSM.write("I am SMS from GSM Module\r\n");// The SMS text you want to send
			#sleep(1);
			#ToGSM.write((char)26);// ASCII code of CTRL+Z
			#sleep(1);
	elif buf == "Baby is safe.":
			ToMPU.write("0") # signal the MCU (mega32U4) to initiate the mp3 palyer
       #break
	# send "1" to the Arduino sketch on ATMega32U4.
   # the sketch will turn on the LED attached to D13 on the board
   #s.write("1")
   #time.sleep(1)
   # send "0" to the sketch to turn off the LED
   #s.write("0")
   #time.sleep(1)
if __name__ == '__main__':
   setup()
   while True:
       loop()
2- Arduino program: it waits on serial port to receive a signal from the MCU. Then it plays the mp3 file. You can find DFPlayer library here.
  //#include <Esplora.h>
#include "SoftwareSerial.h"
#include "DFRobotDFPlayerMini.h"
SoftwareSerial mySoftwareSerial(2, 3); // RX, TX
DFRobotDFPlayerMini myDFPlayer;
void setup() {
                    pinMode(13, OUTPUT); // Pin 13 connected to an LED. We use it to indicate error on the MP3 Player
                    Serial1.begin(9600); // Serial to Connect to the MPU
                    Serial.begin(115200); // Serial Connected to the PC
                    mySoftwareSerial.begin(9600); // Software serial (on pins 2 and 3) to connect to the DFPlayer (Mp3 Player)
                    digitalWrite(13, 0);
                    delay(1000);
                    digitalWrite(13, 1);
                    if (myDFPlayer.available()) {
                     printDetail(myDFPlayer.readType(), myDFPlayer.read()); //Print the detail message from DFPlayer to handle different errors and states.
                    }
                    if (!myDFPlayer.begin(mySoftwareSerial))
                       {
                       while(true){ // infinite fast blinking indicates MP3 player failure
                       delay(200);
                       digitalWrite(13, 0);
                       delay(200);
                       digitalWrite(13, 1);
                         }
                       }
                       else
                       {
                       delay(1000); // 3 times blikning with 2-second interval indicates that MP3 player is operating well.
                       digitalWrite(13, 0);
                       delay(1000);
                       digitalWrite(13, 1);
                       delay(1000);
                       digitalWrite(13, 0);
                       delay(1000);
                       digitalWrite(13, 1);
                       delay(1000);
                       digitalWrite(13, 0);
                       myDFPlayer.volume(10);  //Set volume value. From 0 to 30
                       //myDFPlayer.play(1);  //Play the first mp3
                       }
}
void loop() {
   //            myDFPlayer.volume(10);  //Set volume value. From 0 to 30
   //              myDFPlayer.play(1);  //Play the first mp3
 int c = Serial1.read();      // read from MT7688
             if (c != -1) {
                   switch(c) {
                         case '0':                // Stop Mp3 player when receiving "0"
                         myDFPlayer.pause();
                         break;
                         case '1':                //  Start Mp3 player when receiving "1"
                         myDFPlayer.play(1);  //Play the first mp3
                         break;
                   }
        }
}
void printDetail(uint8_t type, int value){
 switch (type) {
   case TimeOut:
     Serial.println(F("Time Out!"));
     break;
   case WrongStack:
     Serial.println(F("Stack Wrong!"));
     break;
   case DFPlayerCardInserted:
     Serial.println(F("Card Inserted!"));
     break;
   case DFPlayerCardRemoved:
     Serial.println(F("Card Removed!"));
     break;
   case DFPlayerCardOnline:
     Serial.println(F("Card Online!"));
     break;
   case DFPlayerPlayFinished:
     Serial.print(F("Number:"));
     Serial.print(value);
     Serial.println(F(" Play Finished!"));
     break;
   case DFPlayerError:
     Serial.print(F("DFPlayerError:"));
     switch (value) {
       case Busy:
         Serial.println(F("Card not found"));
         break;
       case Sleeping:
         Serial.println(F("Sleeping"));
         break;
       case SerialWrongStack:
         Serial.println(F("Get Wrong Stack"));
         break;
       case CheckSumNotMatch:
         Serial.println(F("Check Sum Not Match"));
         break;
       case FileIndexOut:
         Serial.println(F("File Index Out of Bound"));
         break;
       case FileMismatch:
         Serial.println(F("Cannot Find File"));
         break;
       case Advertise:
         Serial.println(F("In Advertise"));
         break;
       default:
         break;
     }
     break;
   default:
     break;
 }
}
Photos
Internet and Cloud Integration
System can connect to the parents cell phone via WiFi and Evothings Studio instead of GSM call. This makes the tracking service faster, reliable and more integrated with the rest of a smart house cloud environment. This is an on-progress part of this project.
Future Works
This is a proof-of-concept project. The following improvements can make it a complete solution for modern smart houses:
1- System can distinguish between baby and pets.
2- System can determine the danger location. ( Oven, Pool, ....)

Comments