

Hardware components | ||||||
| × | 1 | ||||
 |
| × | 1 | |||
| × | 1 | ||||
| × | 1 | ||||
 |
| × | 1 | |||
 |
| × | 1 | |||
| × | 1 | ||||
 |
| × | 1 | |||
Software apps and online services | ||||||
 |
| |||||
Hand tools and fabrication machines | ||||||
| ||||||
 |
| |||||
| ||||||
| ||||||
| ||||||
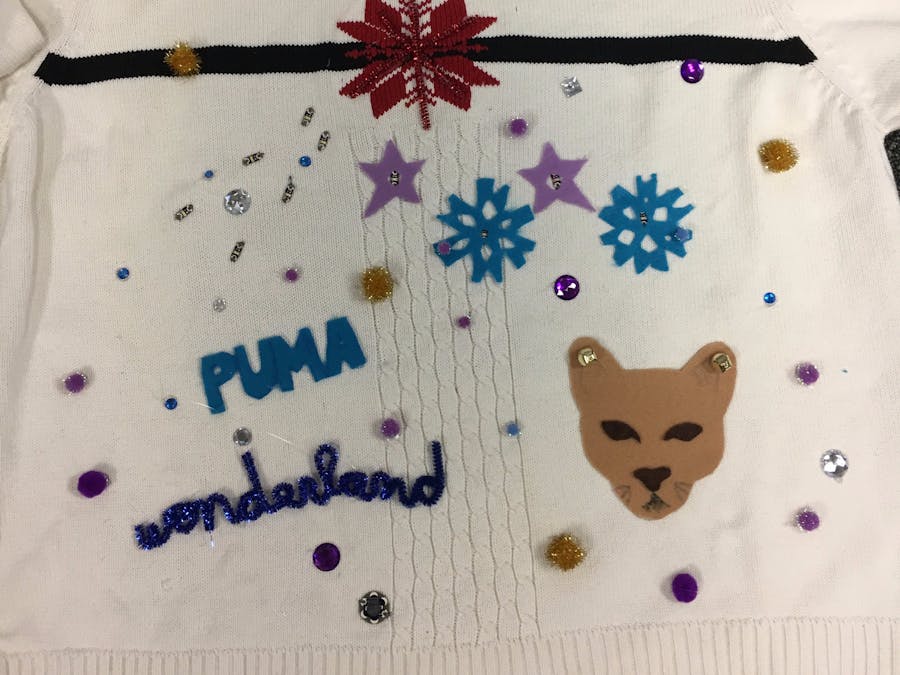
I am a computer science teacher at a middle school. A few years ago, our STEM camp director introduced me to the e-textiles concept and we bought a set of LilyPad Arduinos to use with our STEM camp classes. The use of these in an Ugly Christmas Sweater seemed so obvious to me! I hacked a Christmas shirt in 2014 and this is now my third year making an interactive sweater. It dazzles you with a light show and plays music with the push of a button, while surrounded with pompoms and gems. It plays the song "Winter Wonderland" with a shooting star animation playing when the song is not.
VideoSee the sweater in action here: https://youtu.be/VCL4oKWR0ok
I love the LilyPad Arduino SimpleSnap. I can sew snaps into the sweater and reuse the same controller every year. The controller has a built-in LiPo battery and makes bright lights and music that's sufficiently loud. You can remove the controller to charge it. I don't recommend washing your sweater - most of the parts are technically washable, but all the bling would definitely not survive the trip. The thread I use is grippy but tears if you tug too hard.
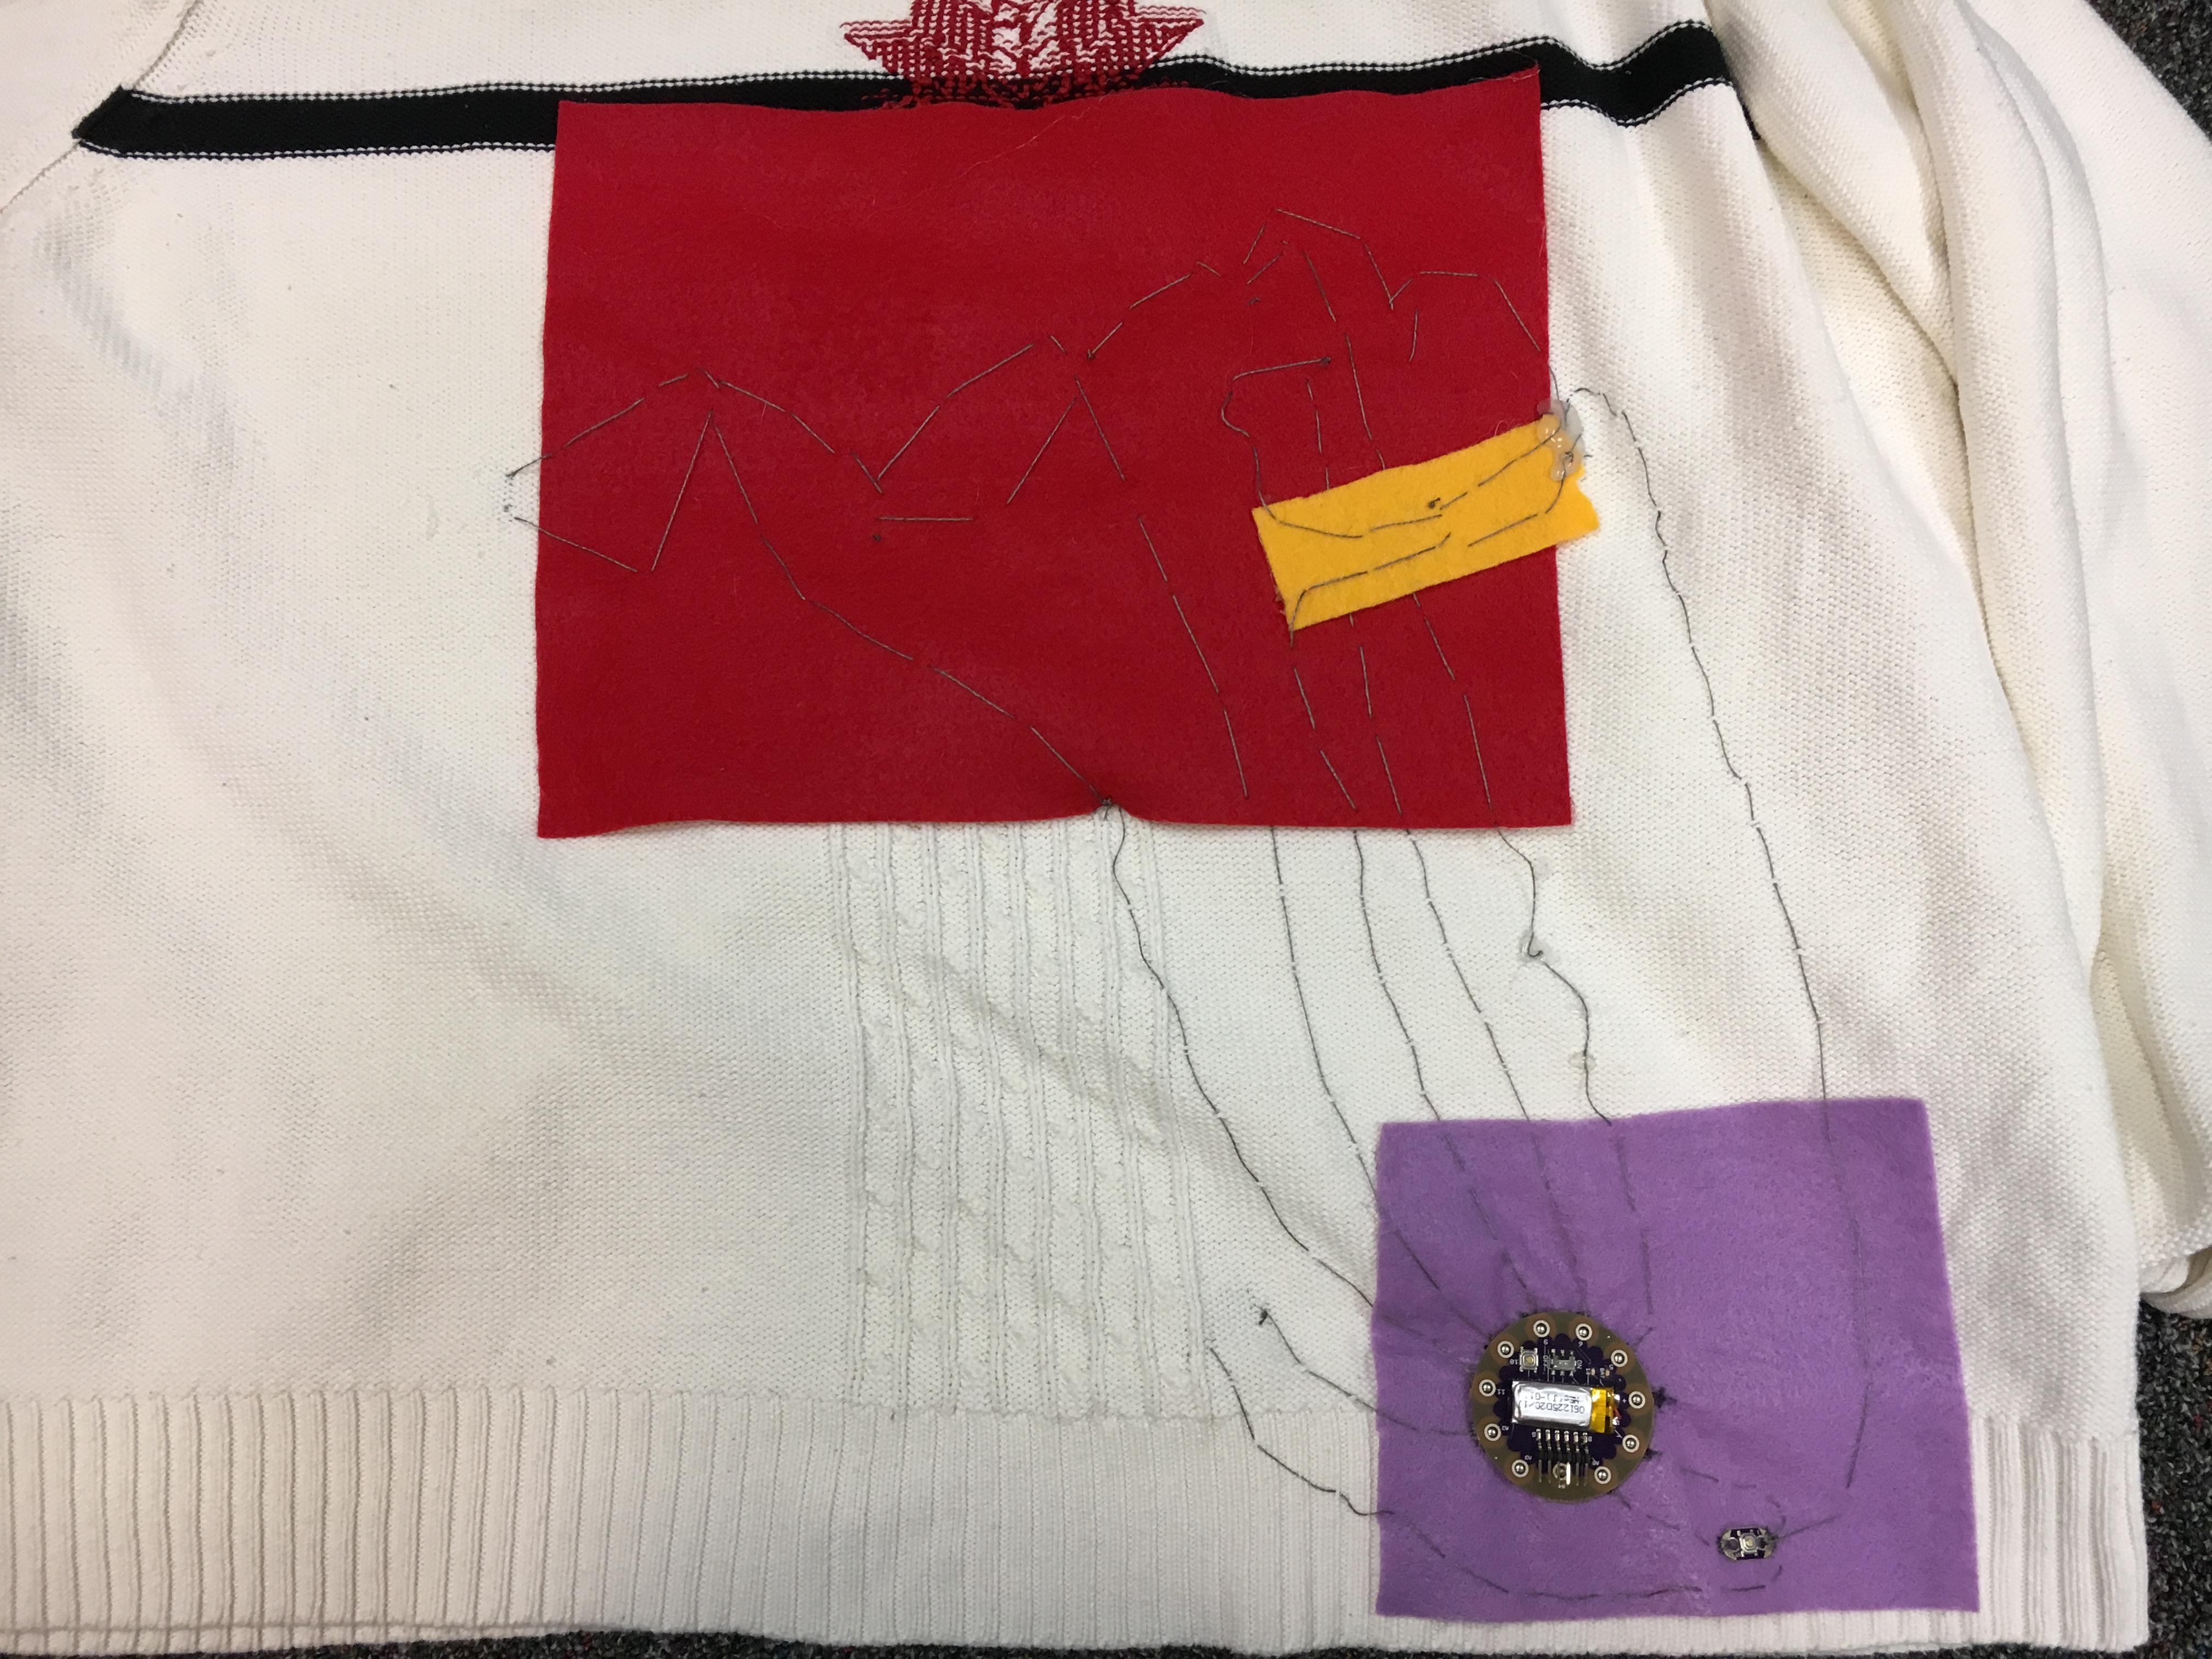
How to do it:I use just a little hot glue to attach a piece of felt to the inside of the sweater, near the hem. This piece should be big enough to hold the LilyPad Arduino SimpleSnap and also the pushbutton. You just reach under the hem to turn the sweater on or activate the music.
I glued a second, larger felt panel to the inside of the sweater. It's easier for me to sew onto the felt than it is to stitch all the way up the inside of the sweater. The felt also provides a way for you to make bridges if you have to cross any threads.
I used a marker to dot where the snaps are on the controller. Only sew on the snaps when you're ready to connect that snap to the rest of the sweater circuit.
I curled the ends of a 10 kOhm resistor and sewed one end to the snap for the + pin. The other end was sewed to A5. I put a small piece of felt on top of the resistor to shield all of this from the rest of the circuit, and hot-glued it down.
I added the pushbutton, connecting one end to A5 and the other end to GND (-). There are now three snaps sewn on.
The next snap is the one connected to pin 5. I sewed on the snap and then stitched up to the + side of the two LED's closest to my "shooting star".
I sewed the snap to pin 6 and stitched up to the next two white LED's. I had to cross the thread that connected pin 5 to two LED's, so I guided the thread underneath the felt panel.
Pin 9 was stitched to the last two white LED's that make up the shooting star. I added this yellow piece of felt as a bridge, since I had to cross the pin 6 and pin 5 paths here.
Next pin 10 was sewn to two colorful LED's.
Pin 11 was sewn to the last two colorful LED's.
I used A2 to sew to the + end of the LilyPad buzzer. The buzzer works just fine on this pin.
Now for the really tricky part which is the ground wire. All of the - sides of the LED's, and the - side of the buzzer, need to be connected to the - pin on the LilyPad Arduino SimpleSnap. Finding a way to route this ground wire was tricky and I made use of felt and hot glue to make bridges. I used some hot glue to keep + wires and the GND wire from touching in spots.
The sweater looked like this on the other side when all of these steps were done.
Next I added a bunch of bling to the front with hot glue. Pompoms, jingle bells, fake gems, pipe cleaners, and felt scraps all made an appearance here. Since our school mascot is the Puma, I used a Puma Wonderland theme. That way everyone will know this is homemade and definitely not store-bought!
Sweater Wiring using Conductive Thread
I sewed Pin 5 to two LED's closest to the center snowflake. Pin 6 goes to the next two white LED's. Pin 9 goes to the last two white LED's. Pin 10 is sewn to two of the colorful LED's and pin 11 goes to the last two colorful LED's. The + side of the buzzer goes to A2.
The ground thread was complicated to sew, as I had to connect the - side of ALL LED's, the - side of the button, and the - pin on the buzzer together on the same thread. I made a couple of felt bridges so the GND thread didn't cross the other conductive threads. Hot Glue helps keep threads in place so they don't touch.

_3u05Tpwasz.png?auto=compress%2Cformat&w=40&h=40&fit=fillmax&bg=fff&dpr=2)


Comments