This guide details the journey of building a DIY Retro Digital Camera using the affordable ESP32-CAM module, inspired by the nostalgic, lo-fi aesthetic of the original Game Boy Camera.
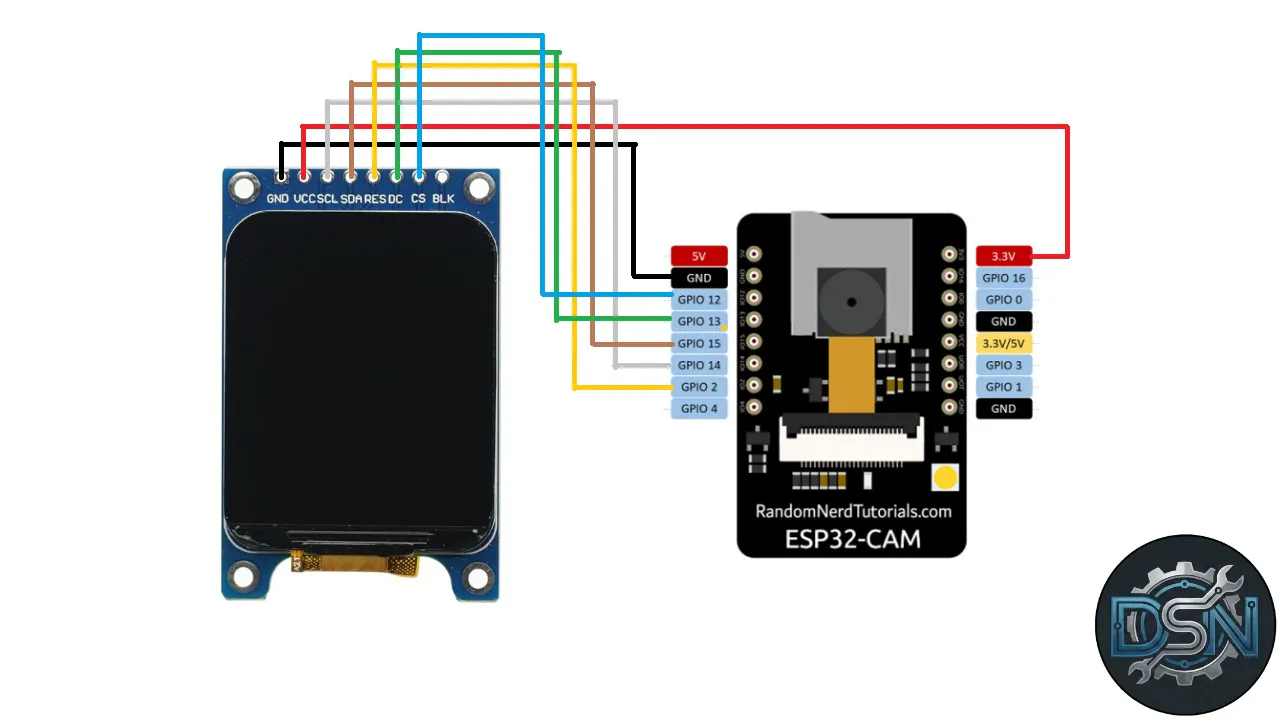
The Story: From Failure to Monochrome SuccessThe project initially aimed for a high-end portable camera using colorful TFT displays. However, the AI-Thinker ESP32-CAM has limited usable GPIO pins, leading to constant crashes when trying to run a screen, SD card, and shutter button simultaneously over SPI.
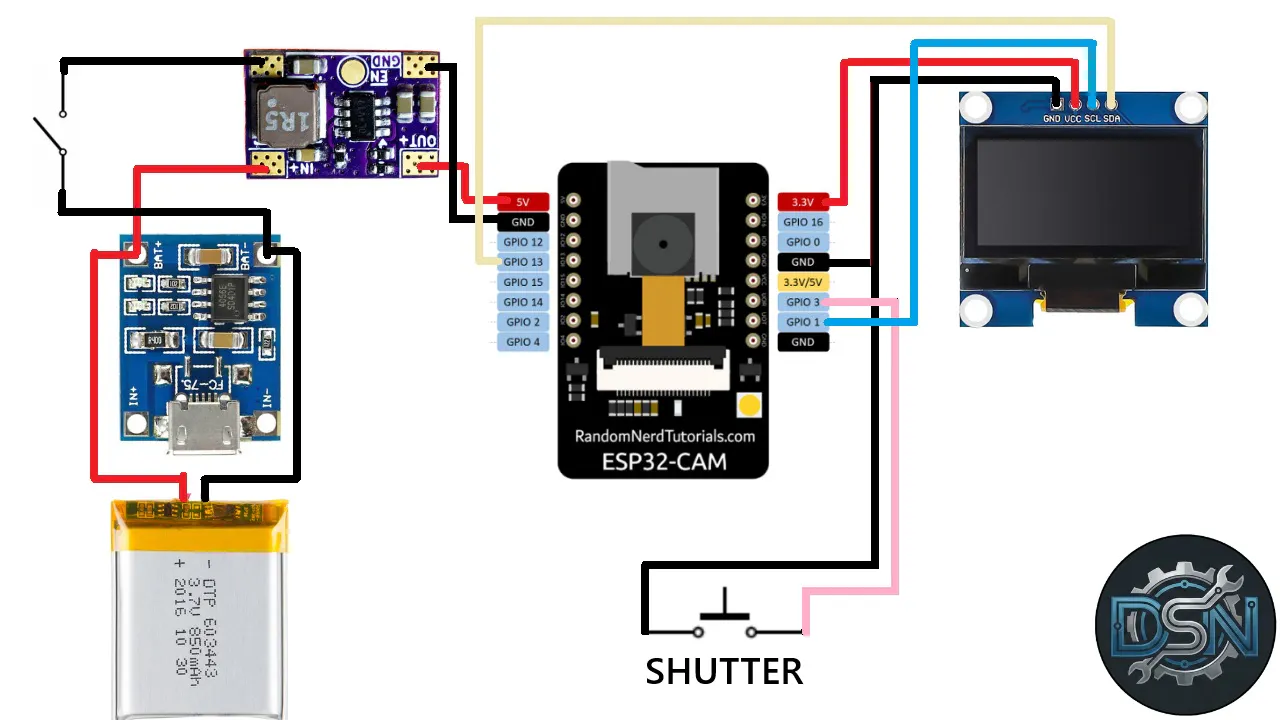
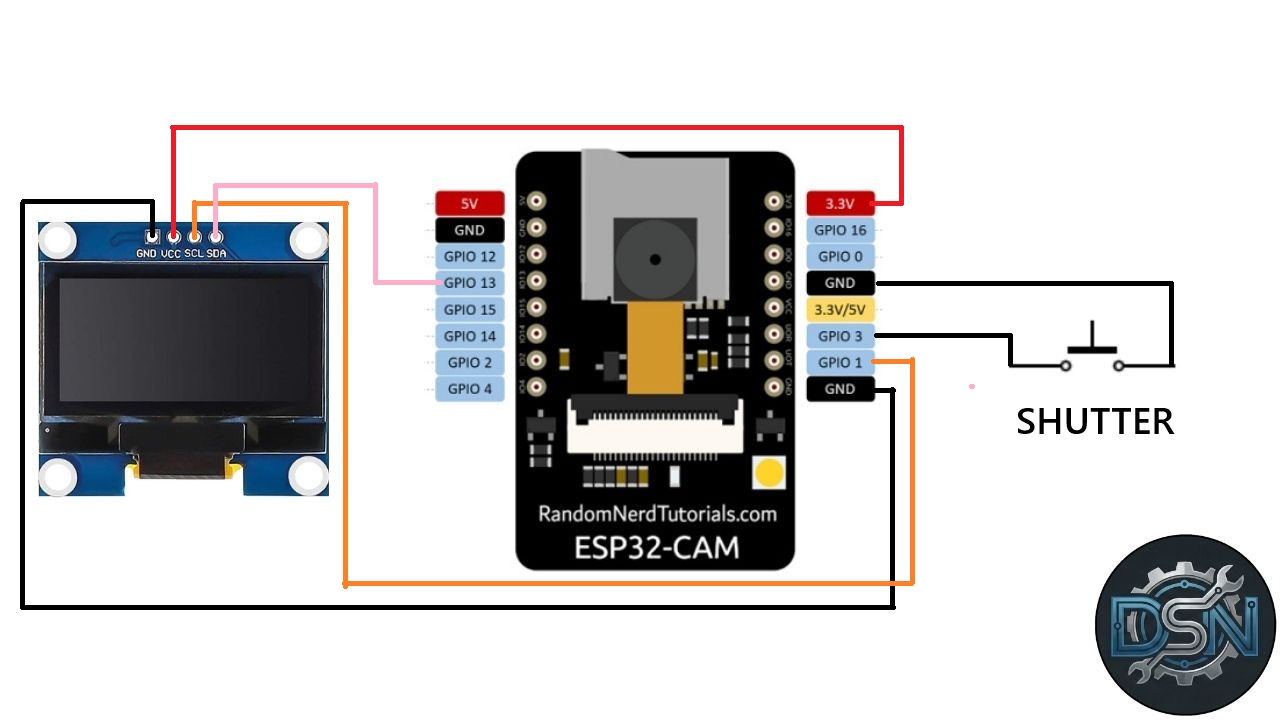
Just before abandoning the build, the solution appeared: switching to a monochrome OLED screen. By utilizing I2C communication, the build only requires two wires for the display, leaving enough pins free for the SD card to function correctly. The result is a charming, grayscale "Game Boy" style camera that captures high-resolution photos to an SD card for under $20.
Project ComponentsCore Electronics- ESP32-CAM (AI-Thinker)
- 0.96" SSD1306 OLED Display (I2C Version)
- 1.69" ST7789 TFT Display
- MicroSD Card (Must be formatted to FAT32)
- Tactile Pushbutton (Shutter)
Portable Assembly- 3D Printed Case (Designed in Fusion 360)
- TP4056 Charging Board & LiPo Battery
- Voltage Booster (Must be set to 5V)
- On-Off Sliding Switch
- TactileButton
Guideline: Build Steps1. Prepare the Firmware- Install Tools: Set up the Arduino IDE with the ESP32 board manager and select AI Thinker ESP32-CAM.
https://randomnerdtutorials.com/installing-the-esp32-board-in-arduino-ide-windows-instructions/
- Libraries: Install
Adafruit GFX, Adafruit SSD1306, tft_eSPI and JPEGDecoder.
https://github.com/adafruit/Adafruit-GFX-Library
https://github.com/adafruit/Adafruit_SSD1306
https://github.com/Bodmer/TFT_eSPI
https://github.com/Bodmer/JPEGDecoder
- Code Customization: In the "DIY Camera" script, you can toggle the internal flash ON or OFF for better lighting.
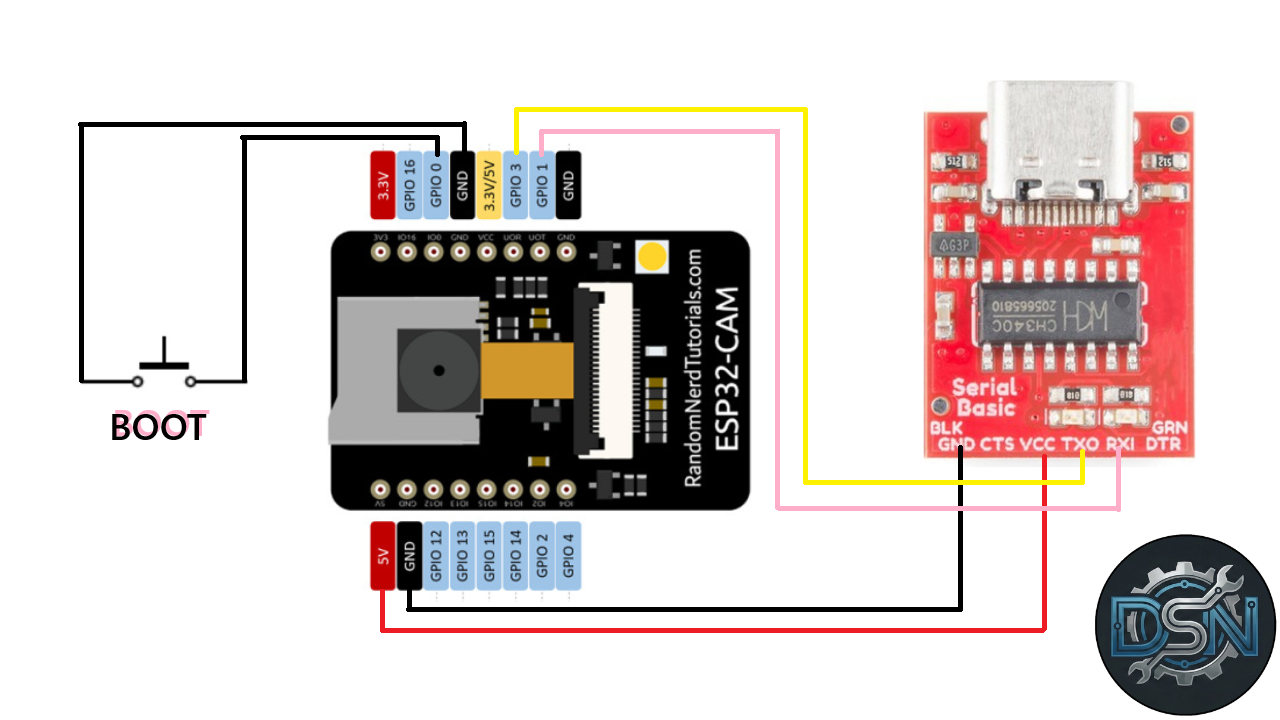
2. Uploading the CodeThe ESP32-CAM requires a specific boot sequence for uploading:
- Connect a UART module (CH340) to the board.
- Short circuit IO0 to Ground and press Reset to enter boot mode.
- Click Upload in the Arduino IDE.
3. Assembly and Operation- Wiring: Follow the I2C wiring for the OLED (Pins 14 and 15) to avoid interfering with the SD card.
- Photo Capture: Once powered, the OLED shows a grayscale live preview and a persistent photo counter.
- Saving: When the shutter is pressed, the image is processed, the flash fires, and the photo is saved with a unique filename stored in EEPROM (so the counter persists after rebooting).
3D Model : https://cults3d.com/en/3d-model/gadget/diy-esp32-cam-camera-project


_3u05Tpwasz.png?auto=compress%2Cformat&w=40&h=40&fit=fillmax&bg=fff&dpr=2)
Comments