

Hardware components | ||||||
 |
| × | 1 | |||
 |
| × | 1 | |||
 |
| × | 1 | |||
 |
| × | 1 | |||
| × | 1 | ||||
 |
| × | 1 | |||
 |
| × | 1 | |||
Software apps and online services | ||||||
 |
| |||||
This project's main objective is to Turn ON/OFF the AC when the temperature inside the room reaches a certain limit. I decided to make this system because at night, we sleep keeping the AC On and later after sometime we turn it Off. But then as soon as the temperature rises and we feel hot, we turn On the AC back again (which disturbs our sleep). So in order to counter this, we can use this system. Example, when the temperature inside the room is around 16 degrees the syystem turns off the AC and when the temprature rises above 24 degrees it turns the AC back ON without our involvement and without causing any inconvenience to us. (In this project instead of an actual AC, I replaced it with a LED Light.)
2. WORKING OF THE SYSTEM2.1 BOLT Wi-Fi MODULE
The Bolt Wi-Fi Module helps us to interact with the Bolt Cloud, also it can receive data from the various sensors and send the corresponding response for the received data. We can connect to the Bolt Cloud using the Device ID and the API key of the Bolt Module. You can connect the Bolt Device to the Cloud using the instructions given at https://cloud.boltiot.com/.
2.2 LM35 SENSOR
This LM35 Sensor is a temperature sensor which senses the temperature around the sensor, collects the information and sends it to the Cloud.
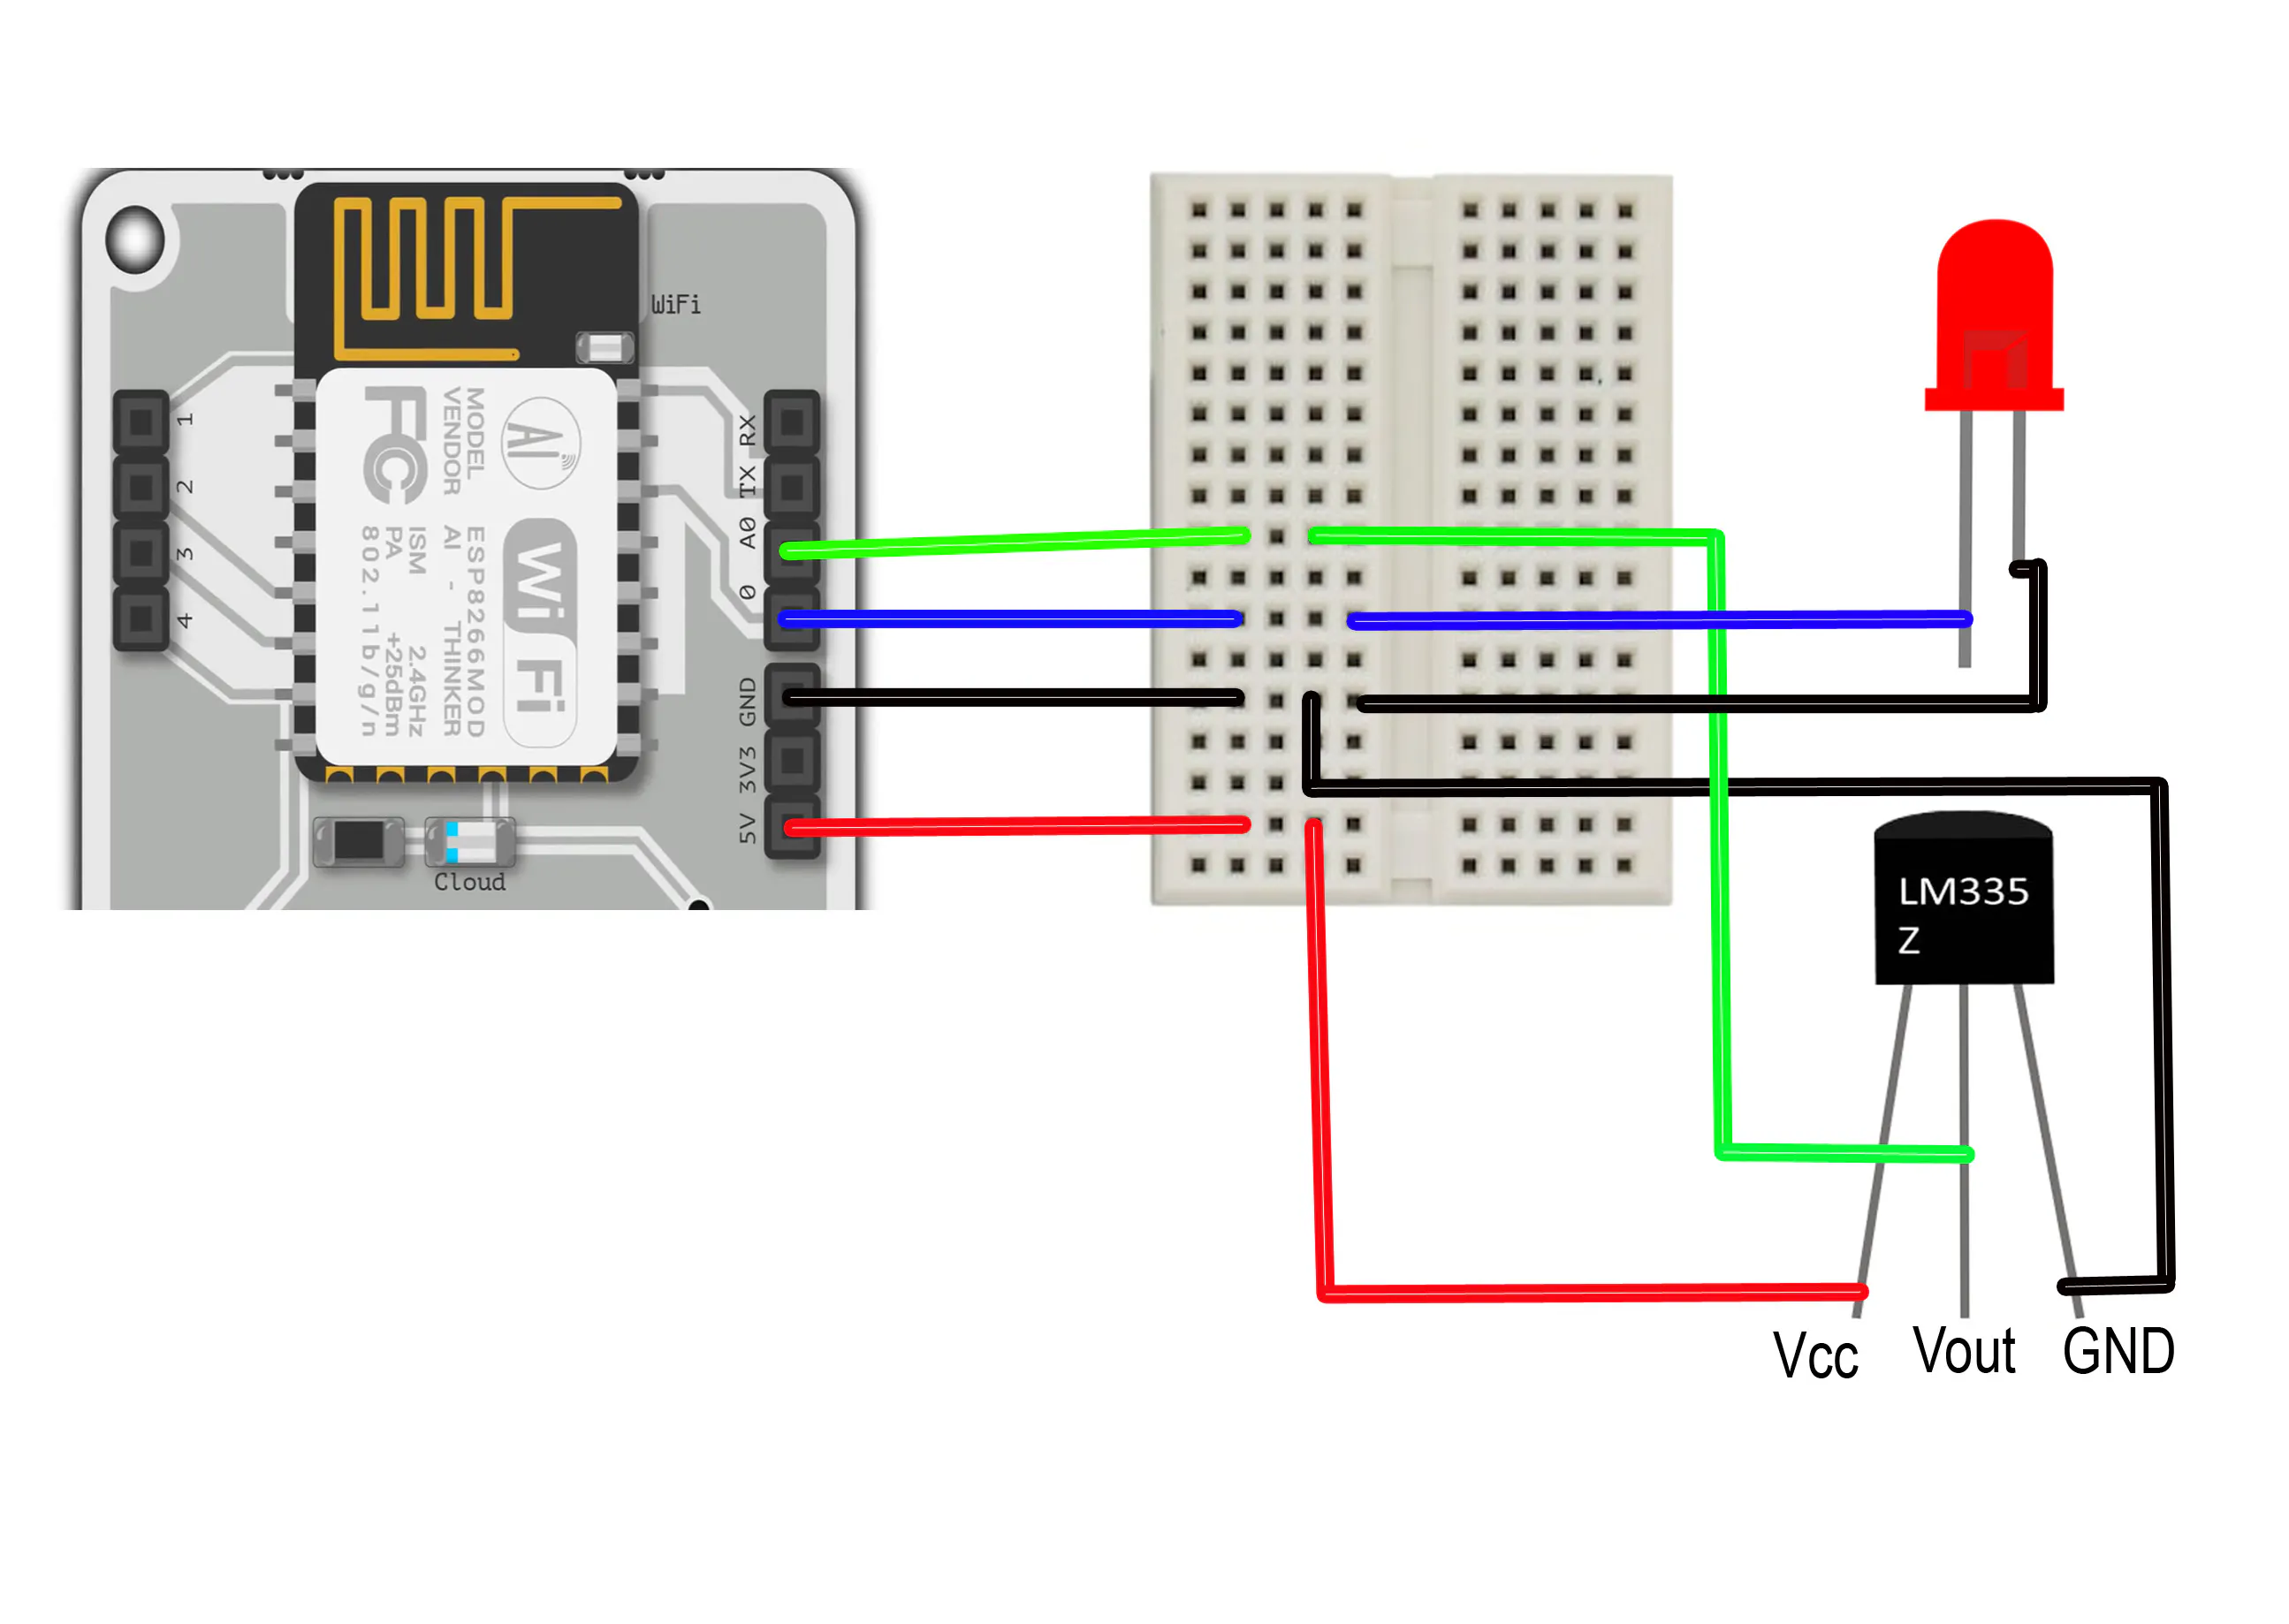
2.3 CIRCUIT CONNECTIONS
a) Connect the bolt module with the breadboard using Male-to-Male jumper wires.
b) Using the jumper wires connect the LM35 Sensor with the bread board and also the LED light.
c) With the help of the USB Cable supply power to the bolt module.
2.4 CONFIGURATION
Python has been used as a programming langauge. We need to configure the details of the device so that we can implement our python code with the bolt cloud.
API_KEY = "XXXX"        //Bolt Cloud API Key
DEVICE_ID = "BOLTXXXX"    //Device ID of the Bolt Module
2.5 PYTHON CODE
2.6 EXPLANATION OF CODE
- We import all the libraries we need for the program to run successfull.
- Then, for the code to interact with the bolt wifi module, we use API KEY and Device ID.
- In the WHILE LOOP, we recieve the sensor value from the sensor and store it (and also print it in the terminal).
- Then we use TRY AND EXCEPTION method to check whether our code is working or not, if an exception arises it shows Error.
- Now in TRY BLOCK, we convert the sensor value into temperature value so that it will be easy for us to understand and print it.
- Later using IF BLOCK, we check whether the outside temperature stays between the boundaries(limits) which we have set in the beginning, according to our convenience. If the temperature is out of bounds, then the program sends a request to the bolt wifi module to ON/OFF the switch of the AC (in our case it is the LED Light).
- And finally,we set time sleep for 300 secs, which means it checks the outside temperature for every 5 minutes and changes the temperature accordingly or keeps it as it is.
NOTE: We can run this code normally from any IDE, but it would be best if we CONFIGURE BOLT PRODUCT with this code which makes it more easy for it to interact and perform this automation process.
2.7 TURNING THE LED ON/OFF (AC)
First set the temperature limits (max_temp, min_temp) accordingly in which the should AC operate. When the temperature in the room exceeds the max_temp, then the cloud sends a response(i.e the temperature has exceeded the limit) to the Bolt module to turn on the AC(in our case the LED light) and similarly, when the the temperature is less than the min_temp then AC gets turned off. And if you want, you even set a timer for the sensor to check the tempeature ever now and then. Here I set it as 5 minutes(300 seconds), so for every 5 minutes it senses the temperature in the room and takes an action accordingly.
3. Setting up the product on Bolt CloudYou can go to https://cloud.boltiot.com/ and follow the steps given to link your product to the Bolt Cloud.
Once your device is online and your product is linked to the cloud, you are ready to test your system.


Comments