

Hardware components | ||||||
_ztBMuBhMHo.jpg?auto=compress%2Cformat&w=48&h=48&fit=fill&bg=ffffff) |
| × | 1 | |||
 |
| × | 1 | |||
 |
| × | 1 | |||
 |
| × | 1 | |||
Software apps and online services | ||||||
| ||||||
 |
| |||||
What if you don't have a Pi or beagle borne board and you still want to setup a server that can be used for Home automation projects, then this is the project for you.
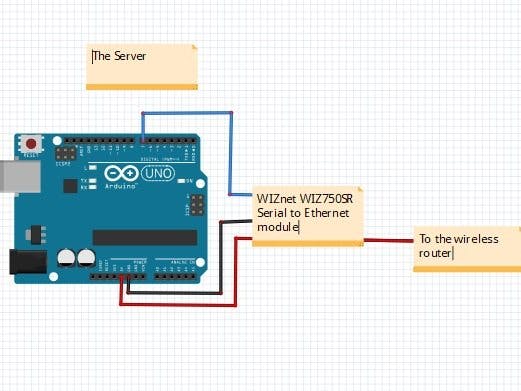
In this project, we will be setting up an arduino server that is powered by the WIZ750SR serial to Ethernet module. Then we will be sending the data commands which are received from arduino(serially) to the node mcu powered home automation device via internet. We will be using a Tenda router for this project, but feel free to use any router you like.
So lets start! First of all this is the list of all the components required :
1. Components Required- Arduino Uno
- WIZ750SR serial to Ethernet module
- NodeMCU
- Tenda Router for connection setup
- Breadboard
- Jumper wires
- Cables to power the Arduino and NodeMCU.
The images of these components are shown below:
So we can now move on to setup our WIZ750SR module.
2. Configuration of ModuleNow, We need WIZ S2E configuration tool in our laptop or pc to setup our module. Here is the download link for the same:
https://github.com/Wiznet/WIZnet-S2E-Tool-GUI
This is the git link. You can also download the software from WIZnet's official website. Once you have downloaded and installed it, open the tool and set it up following the image below:
We can get our IP by simply going to our command prompt window and typing "ipconfig".
This completes the setup of our module, and hence our server. Now it will be ready for transmission once we have run our code into the arduino.
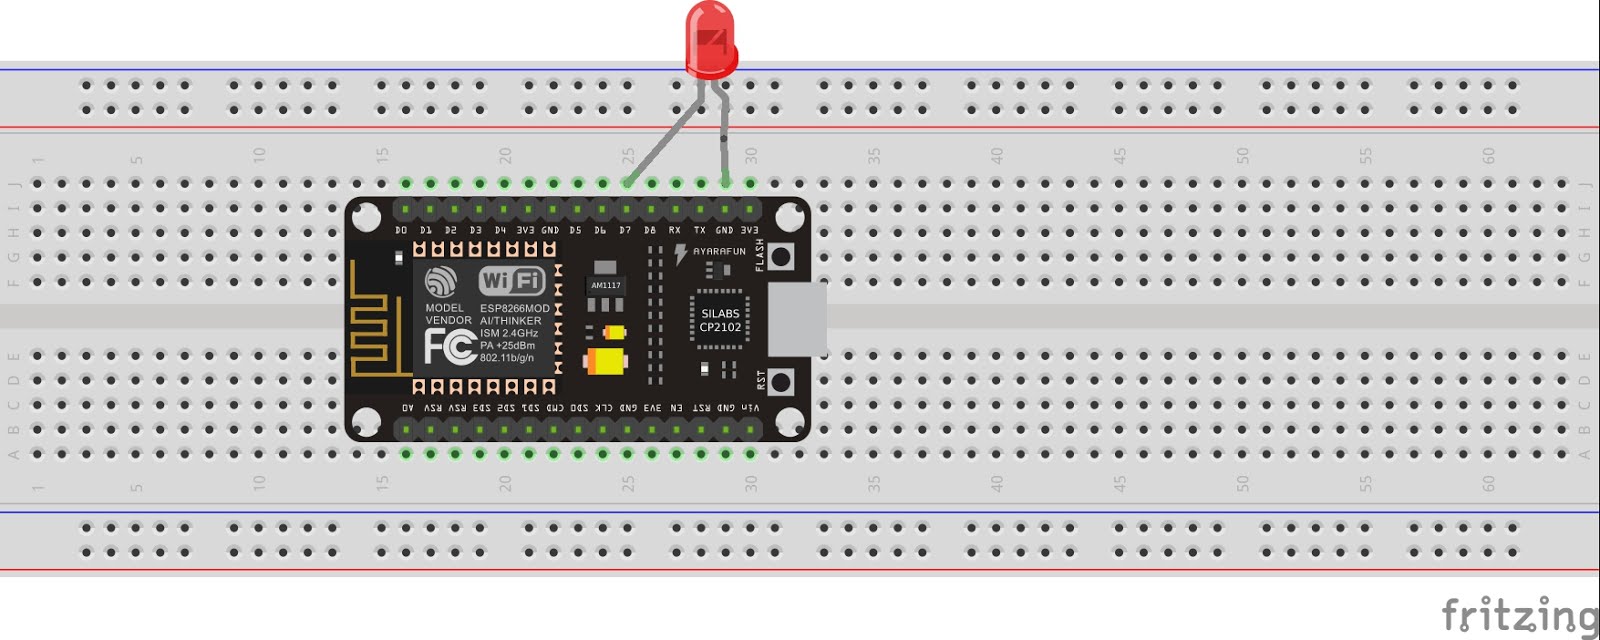
Now, lets configure our receiving end, i.e. the node MCU.
3. Node MCU ConfigurationFor configuring this, there is a really easy way available to us now. That is using the arduino IDE. Download the additional esp8266 package using the additional package download in arduino ide.
Now, its easy to code for both arduino and node MCU. The codes are attached below. Now we will see how our System will work using a block diagram shown below.
We have used this tenda router as an access point for this project as mentioned above.
So, now you can build your own Ethernet powered Arduino Server for home automation. The code I have given is for simple LED control using this method.
You can utilize this for home automation by using relays with the node mcu. The schematic of the following is shown below,
So, the project is over here, feel free to comment or message me privately if you have any doubt with the project, Thank You!


Comments