Hardware components | ||||||
 |
| × | 1 | |||
| × | 1 | ||||
| × | 1 | ||||
| × | 1 | ||||
Software apps and online services | ||||||
 |
| |||||
This is Step 2 in a 3 part series on Getting Started with WinIoT and the GrovePi+. See the other parts here.
In this second step, we will walk through all the steps to get your first GrovePi Internet of Things device running on the GrovePi and the Raspberry Pi.
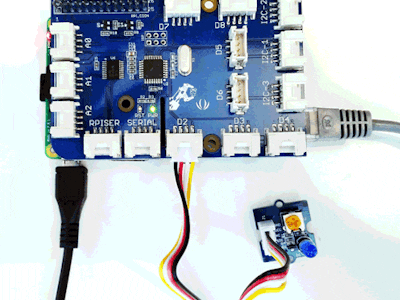
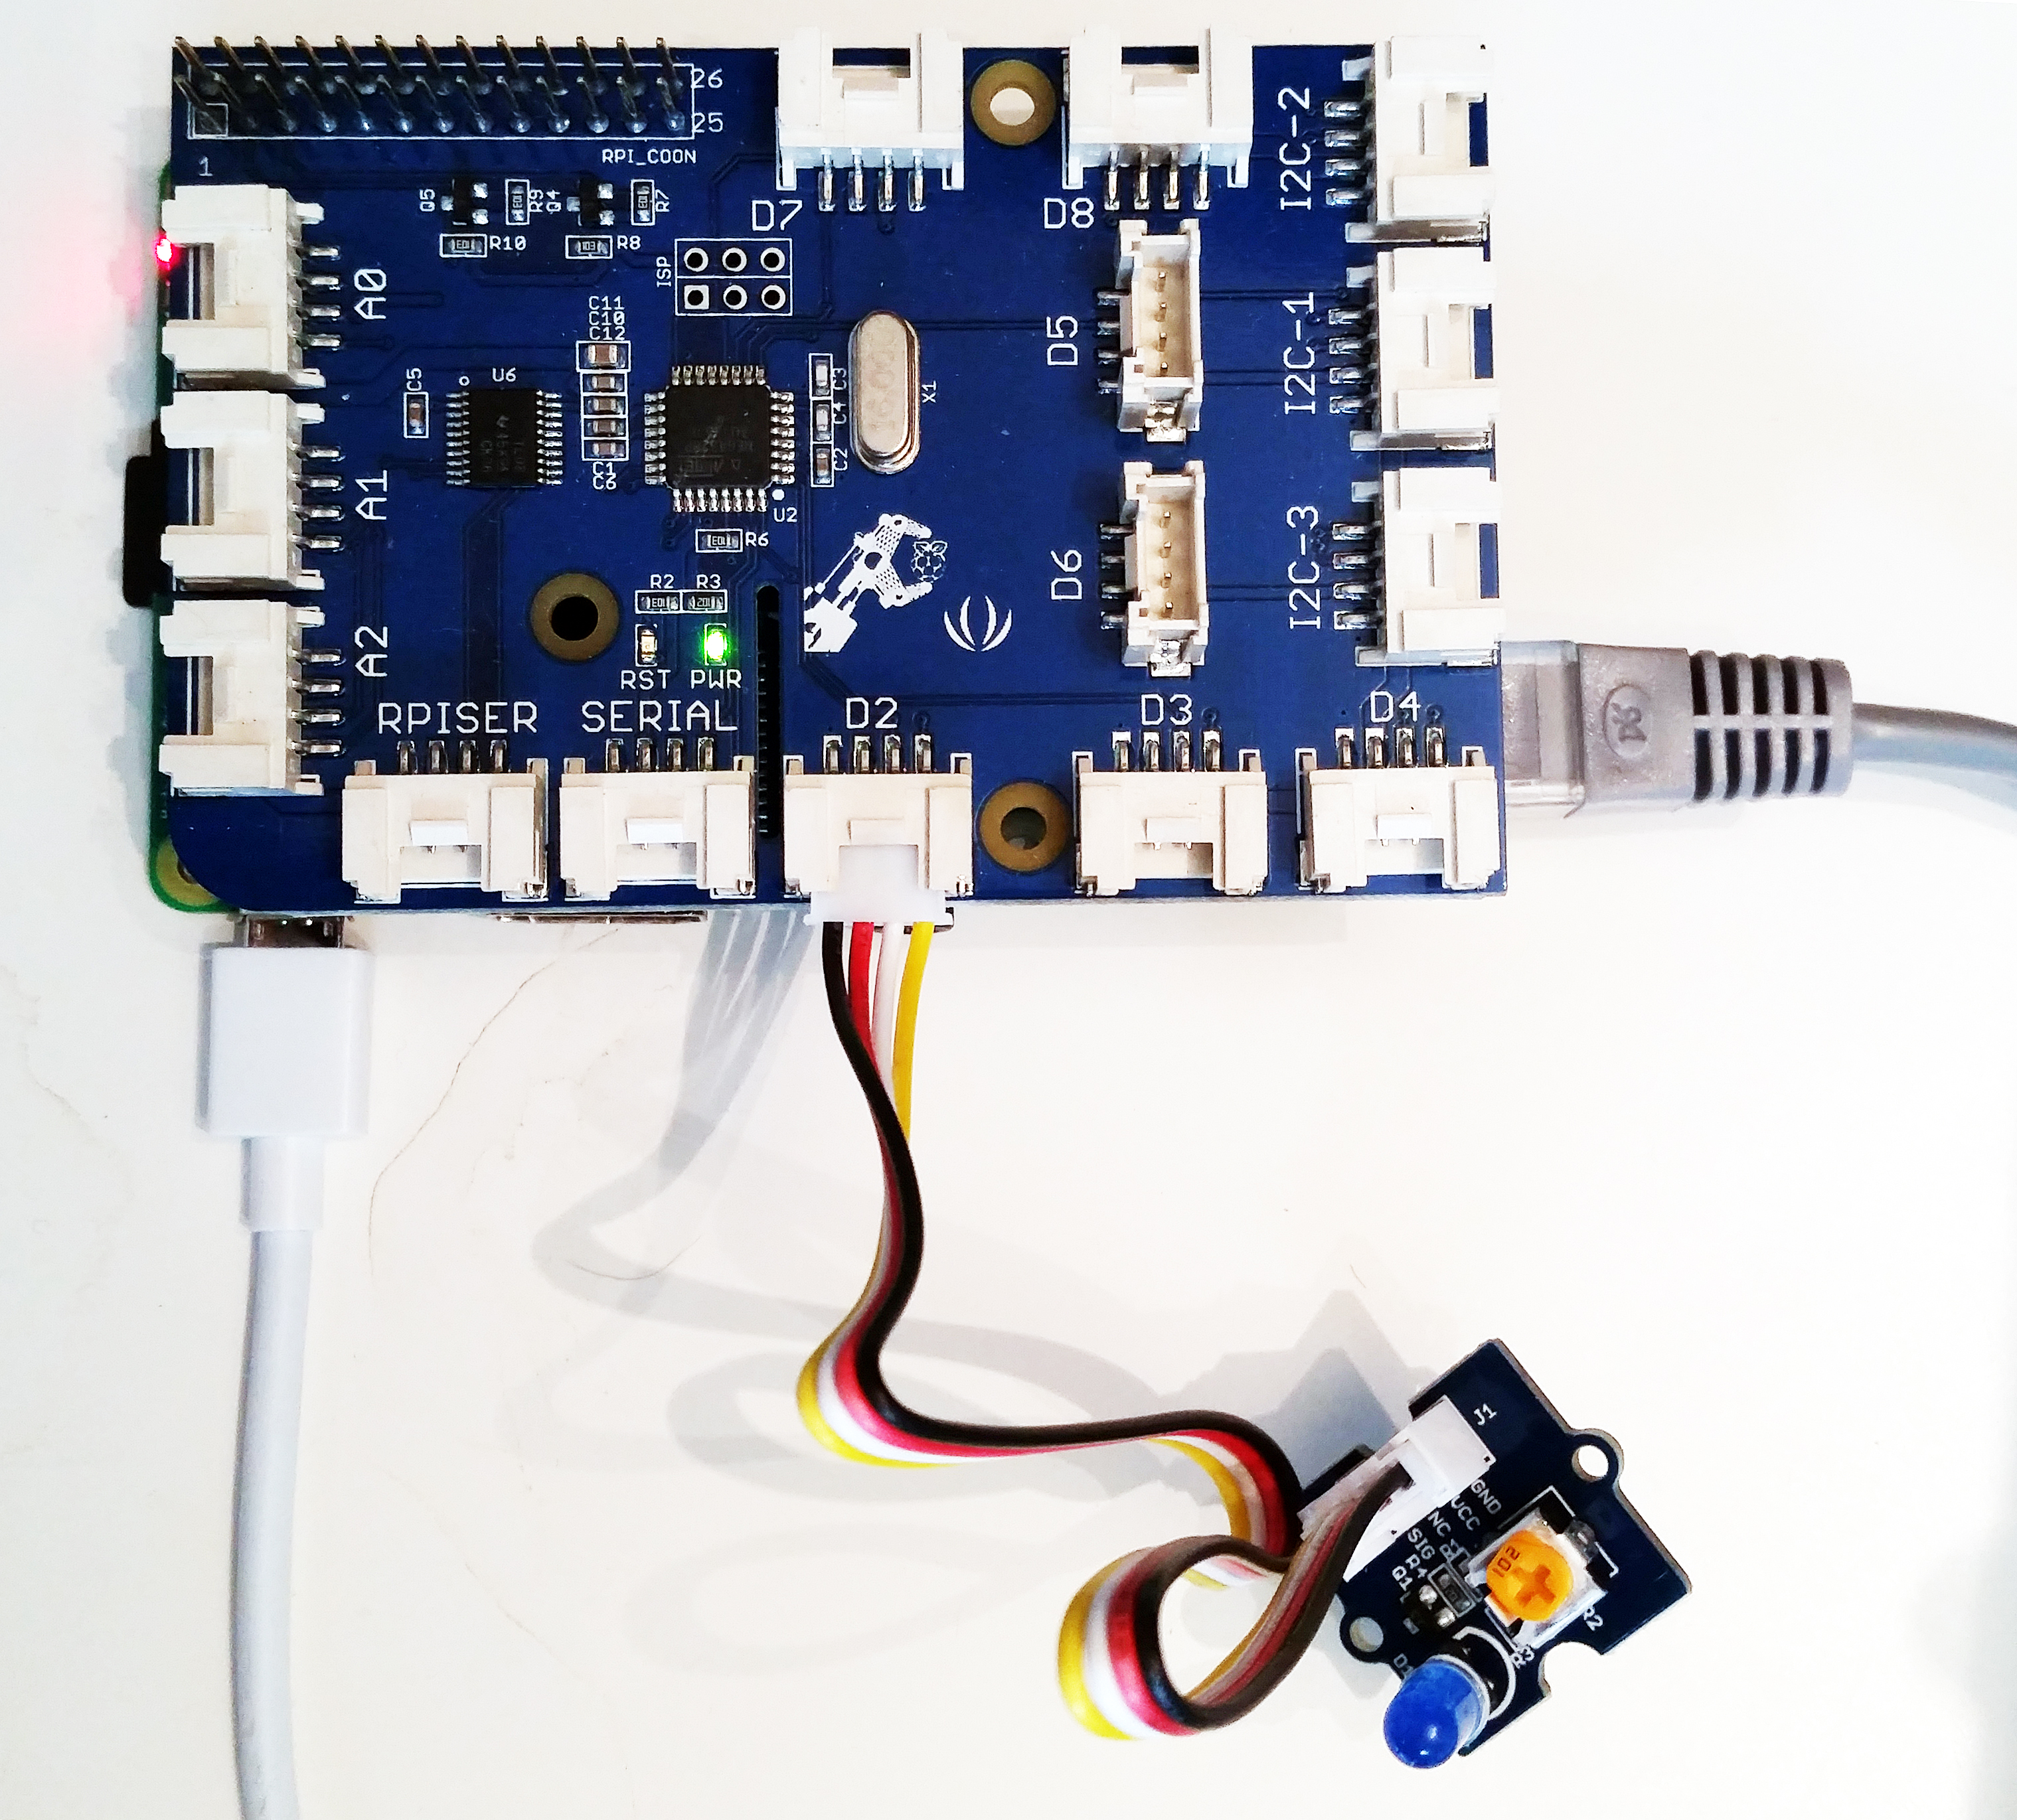
1). Setup the HardwareAttach the GrovePi to the Raspberry Pi.
2). Connect the LEDIn this example, we will blink a Grove LED on Port D2. Connect the LED to Port D2.
3). Download the Example CodeYou can download the example code in two ways:
- Download the latest zip file of all GrovePi example code here.
- If you’re using Github, you can download the Git here: https://github.com/DexterInd/GrovePi.git
You can view all the example code for C# and the GrovePi here on Github. The folders “Driver” and “GrovePi” contain the driver code for the GrovePi. The folder “Samples” contain the various GrovePi C# Samples that demonstrate the various sensors with the GrovePi.
4). Connect to Your Raspberry Pi and GrovePiOpen the WinIoT Core Dashboard and find your device.
Open the solution HelloWorldBlinky.sln This file should be under GrovePi/Software/CSharp/Samples/HelloWorldBlinky
The first time you open the GrovePi solution, you will be prompted to install Windows 10 SDK. You will need to close Visual Studio.
Run the installation. This can take up to 30 minutes.
Open the solution HelloWorldBlinky.sln This file should be under GrovePi/Software/CSharp/Samples/HelloWorldBlinky
Again. You only need to install this SDK once!
8). Add a Reference to the GrovePi LibrariesTo install GrovePi for Windows IoT, run the Package Manager Console. Open it in Visual Studio by going to “Tools” –> “NuGet Package Manager” –> “Package Manager Console”
In the command line, type “Install-Package GrovePi”.
Right-click on the HelloWorldBlinky project in the Solution Explorer and click Select Set as Startup Project.
Next, right-click on the Properties tab under HelloWorldBlinky and select Open.
Select the Debug tab. Select Remote Machine in the Target device field.
In the Remote Machine field, click the “Find…” button.
Select your Raspberry Pi. Remember in the previous step we renamed our Raspberry Pi to “GrovePi”. In the picture below you can see it has a local address of 192.168.3.102. Click “Select”
Press Ctrl + S (this file will not be saved automatically, you must save it manually).
Finally, Press F5 to launch the debugger (it will take a minute or two to deploy your app onto the Raspberry Pi).
Voila! You should have a blinking LED on the GrovePi!


Comments