


Hardware components | ||||||
 |
| × | 2 | |||
 |
| × | 2 | |||
| × | 2 | ||||
 |
| × | 2 | |||
Software apps and online services | ||||||
| ||||||
Hand tools and fabrication machines | ||||||
 |
| |||||
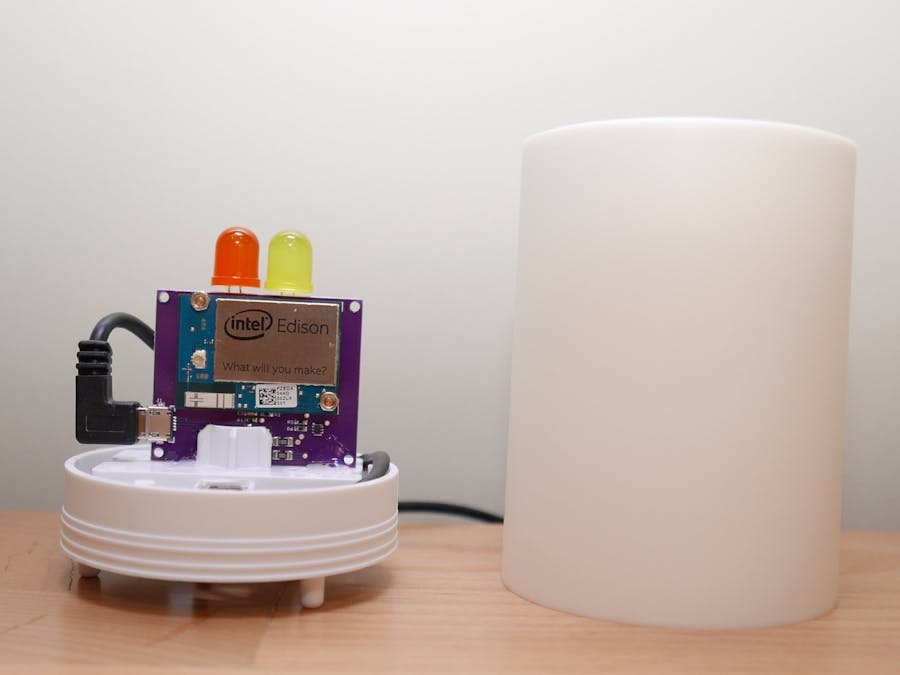
Building custom devices quickly and easily around a System-on-Module (SoM) is at the core of the design philosophy for Android Things. The Edison Candle is one of the simplest custom devices you can build, driving a couple of LEDs in a soothing flicker pattern using Pulse Width Modulation (PWM).
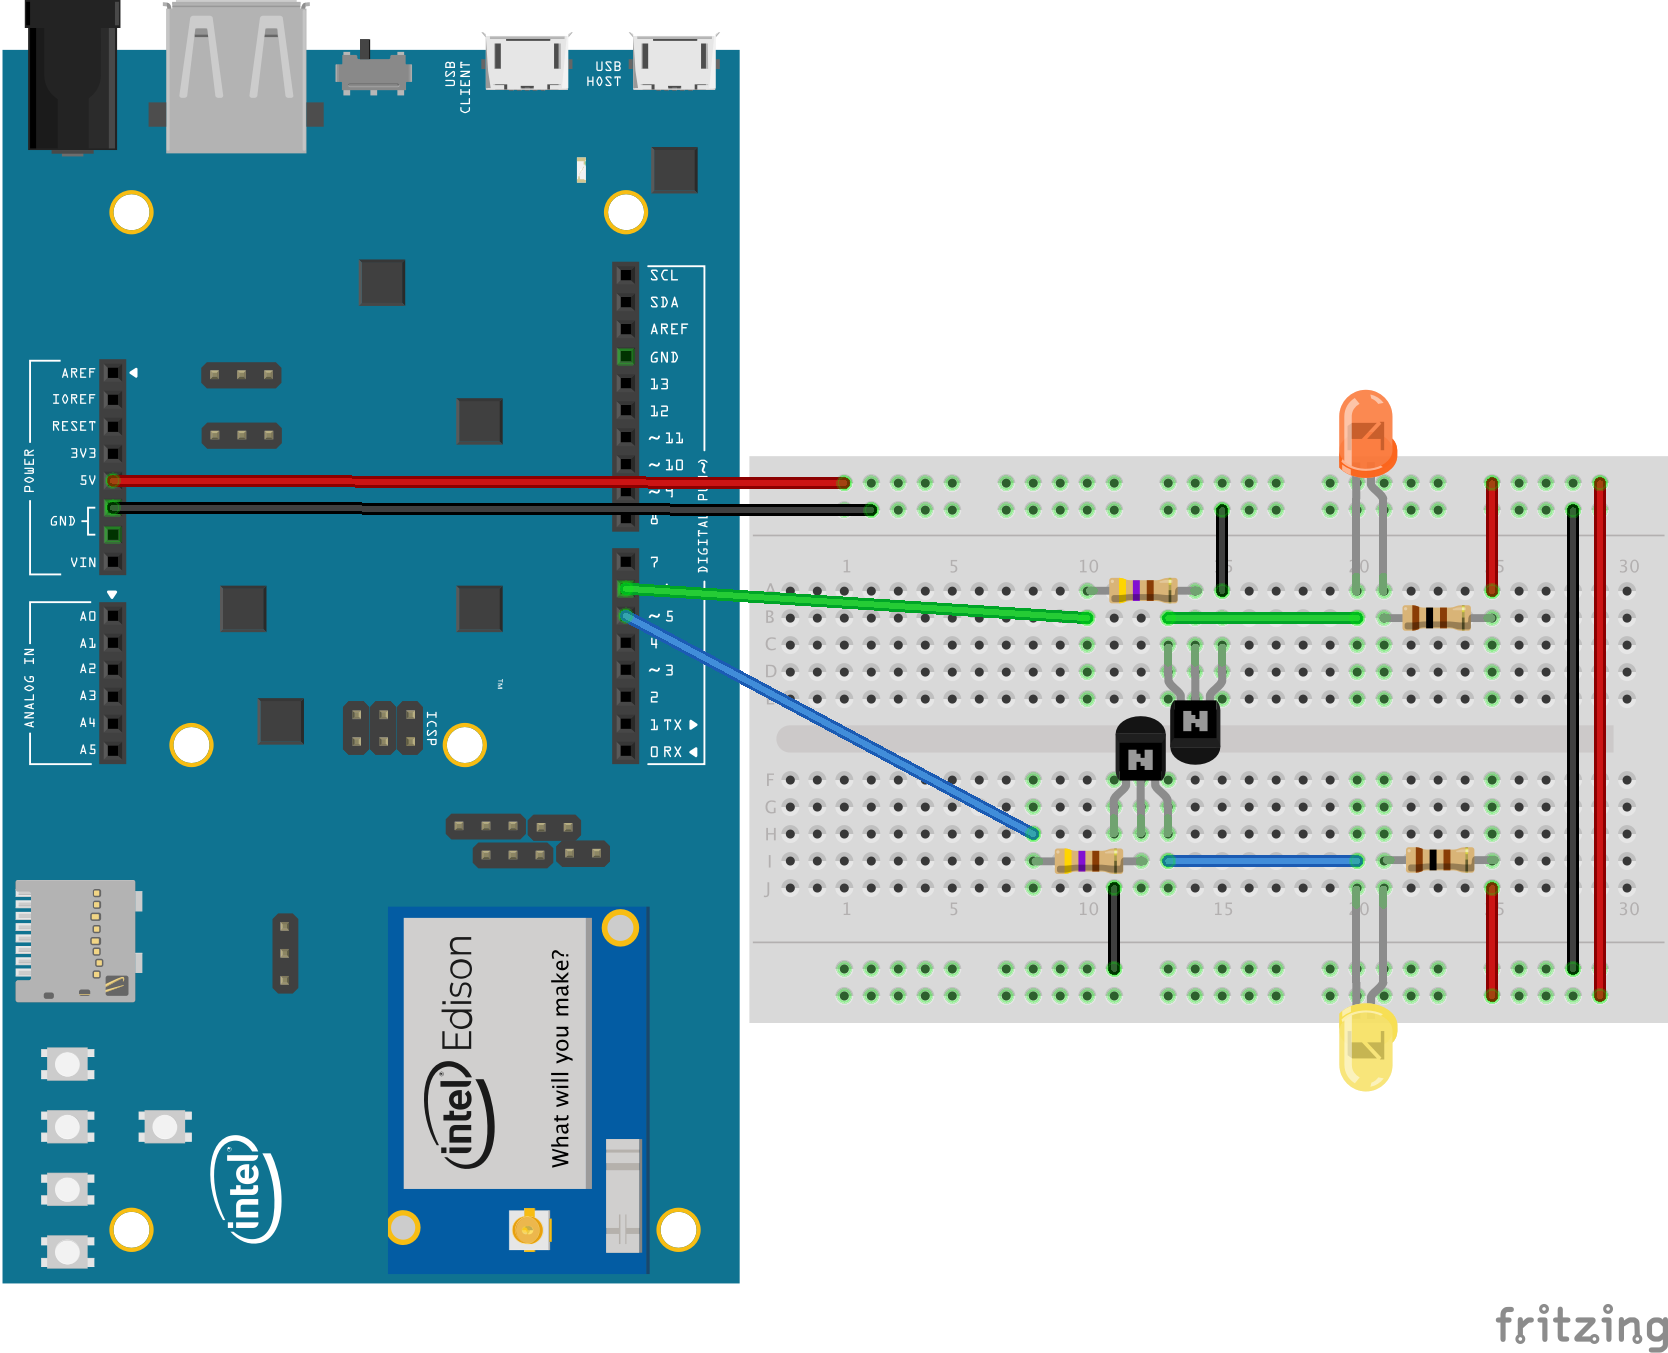
Assembling the PrototypeBefore spending the time and effort to design a custom printed circuit board (PCB), we want to verify that the concept will actually work by assembling a prototype on top of a developer kit. This allows us to connect the hardware we need quickly so we can validating software/firmware.
You can hand assemble a prototype version with your own developer kit according to the attached Fritzing schematic.
Application CodeEach LED is connected to a PWM-capable I/O pin on the compute module. We can use this PWM to vary the brightness of the LED and animate the change of that value over time.
private Pwm mYellowLed, mOrangeLed;

@Override
protected void onCreate(Bundle savedInstanceState) {
   super.onCreate(savedInstanceState);
   try {
       mYellowLed = openLed(YELLOW_PWM);
       mOrangeLed = openLed(ORANGE_PWM);
   } catch (IOException e) {
       Log.w(TAG, "Unable to open LED connections", e);
   }
}

/**
 * Open a new LED connection to the provided port name
 * @throws IOException
 */
private Pwm openLed(String name) throws IOException {
   PeripheralManagerService service = new PeripheralManagerService();
   Pwm led = service.openPwm(name);
   led.setPwmFrequencyHz(60.0f);
   led.setPwmDutyCycle(BRIGHTNESS_START);
   led.setEnabled(true);
   return led;
}
Android Things has a robust animation framework, which is useful in applying changes to a user interface…even if that interface is not a graphical display!
private ObjectAnimator mYellowFlame, mOrangeFlame;

@Override
protected void onCreate(Bundle savedInstanceState) {
   super.onCreate(savedInstanceState);
   ...
   // Create an run the flicker animations
   mYellowFlame = animateFlicker(mYellowLed, 0);
   mOrangeFlame = animateFlicker(mOrangeLed, DELAY);
   mYellowFlame.start();
   mOrangeFlame.start();
}

/**
 * Create an infinite animation to modify the LED brightness.
 */
private ObjectAnimator animateFlicker(Pwm led, long delay) {
   ObjectAnimator animator = ObjectAnimator
         .ofFloat(led, new BrightnessProperty(), START, END)
         .setDuration(DURATION_MS + delay);
   // "Bounce" at each end to create a flicker effect
   animator.setInterpolator(new BounceInterpolator());

   // Cycle through the animation forever
   animator.setRepeatMode(ValueAnimator.REVERSE);
   animator.setRepeatCount(ValueAnimator.INFINITE);
   return animator;
}
You can view the full example code on GitHub.
Moving to ProductionOnce the concept is sufficiently proven, we need to design a more robust carrier PCB for the module that better fits our application needs. In this case, all the hardware present on the dev kit isn't necessary to keep. We just need a proper power supply for the compute module and some driver circuitry for the LEDs.
We can also compact everything down to a PCB that isn't much larger than the compute module itself. All of the small or high-pitch components are assembled by the fabricator of the PCB to ensure quality and consistency.
Final assembly of the board involves choosing the color of LEDs you want and attaching the compute module. If you re-use the same module form the prototype, then the application code is already loaded and ready to go. Otherwise, the design is equipped with a Micro-USB connector to allow downloading of code even after final assembly.
You can purchase the boards and access the full hardware design files on CircuitHub.


Comments