I searched the net how to build a USB to MIDI adapter using an Arduino, but unfortunately I only found solutions that were not that great (poor MIDI software or hardware implementations). So I decided to build my own and put the result here on hackster.io.
I used an Arduino Leonardo with a breadboard to build the first prototype. Once everything was working, I built a soldered version using an Arduino Micro instead. Both are based on the ATmega32u4, which has native USB allowing it to present itself as a USB MIDI interface to the PC you connect it to.
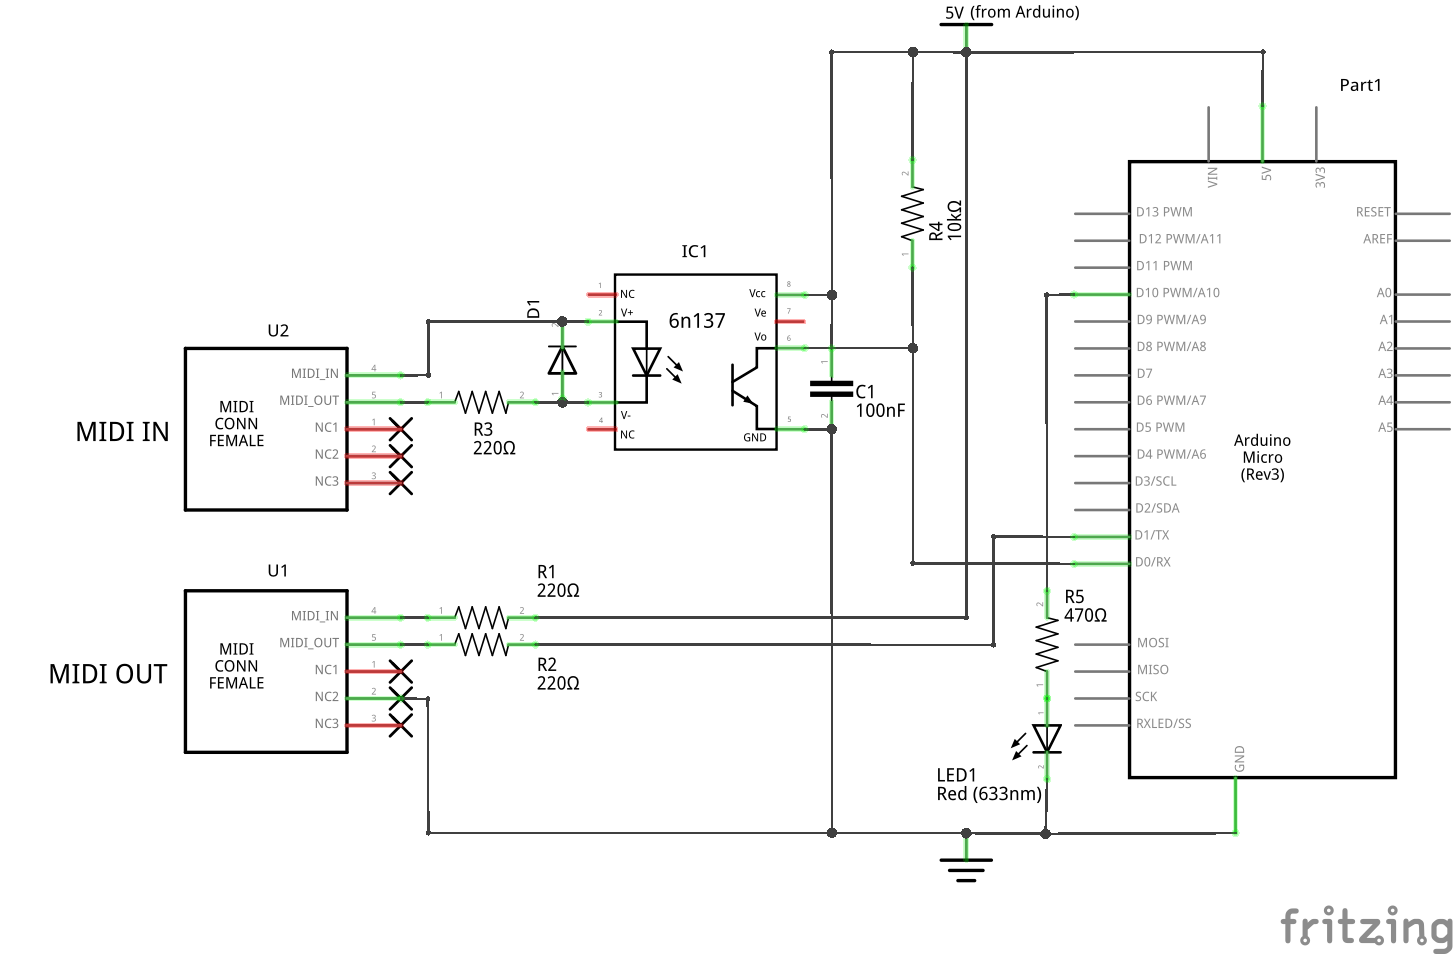
MIDI uses an opto-coupler and some resistors to create a fully isolated current loop. The circuit is pretty standard, I used a 6n137 as it's fast and widely available. As indicated by the circuit diagram, only the MIDI OUT connector has pin 2 connected to the ground, this is standard for MIDI.
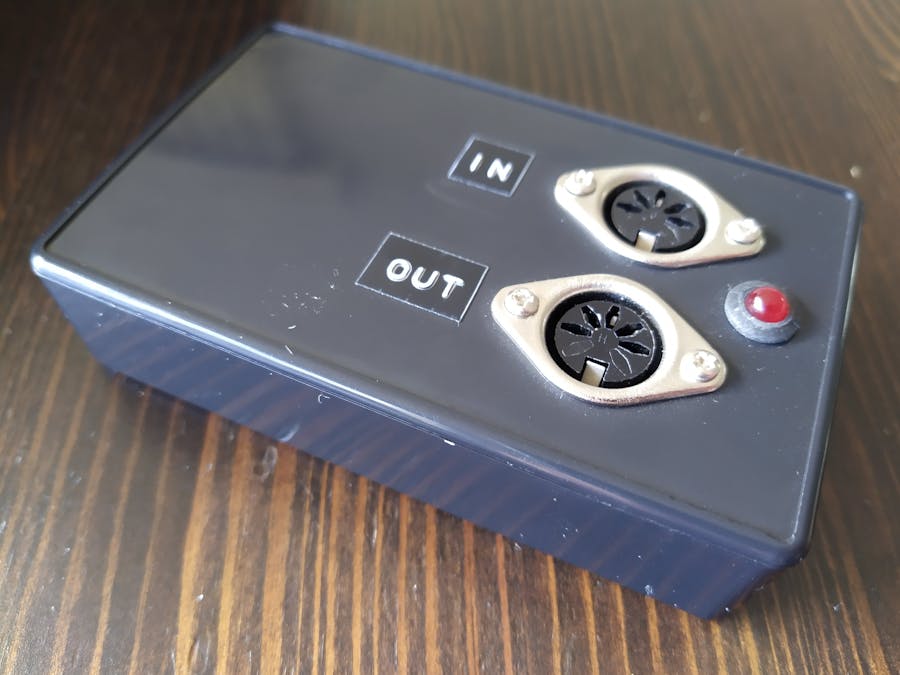
Some photos of the end result:
On the software side I decided to use the excellent Control Surface library. Unlike some other libraries or manually coded implementations, Control Surface handles all the different aspects of the somewhat complex MIDI protocol correctly.
Control Surface also lets you add all kinds of extras. You could for example add some potentiometers, pedals or buttons connected to the analog / digital inputs to add extra MIDI controls. Just take a look on the Control Surface website for more information, it's really easy to do!
You can also register callbacks so you can process the data before passing from MIDI to USB or the other direction. In my case I used this to fix the broken MIDI implementation of my Roland D50 synthesizer. The D50 sends an "all notes off" command each time the last key is depressed. Modern implementations, such as most of the VST instruments I use, interpret this as an immediate hard cut-off of all running note sustains. By filtering the "all notes off", the D50 becomes useful again as a master keyboard.
I included both the basic USB to MIDI interface source code and a version with "all notes off" filtering.
You can also use other libraries or write your own MIDI implementation of course, the hardware should work with any MIDI library with USB MIDI and Serial MIDI support.
Troubleshooting tip: if you can't seem the get this interface to talk with external MIDI devices, then perhaps you swapped pins 4 and 5. The connector pin-out diagrams can be confusing sometimes as they do not always indicate clearly which side of the connector you're viewing.
I hope the schematics and source code are useful to anyone out here. Please give me a thumbs-up if you like this project and feel free to leave a comment below if you have any questions.


_3u05Tpwasz.png?auto=compress%2Cformat&w=40&h=40&fit=fillmax&bg=fff&dpr=2)
Comments