


What I did
The Problem - Recent bad weather coupled with new developments around us has seen an influx of mice into our house. While the cats quickly catch any that make it into the house proper, they can't catch the ones living in the roof space. The mice seem to love burrowing under the insulation bats and the scratching noises above your bed can keep you awake at night. A couple of mousetraps in the roof cavity helped improve the problem, but getting up in the roof and crawling from end to end twice a day to check the traps is hot, dusty, dangerous and time consuming.
The solution - No, it wasn't throw a cat in the roof, it was connect the mousetraps to an etherten so it would tell me whenever I had caught something, removing the unnecessary trips into the roof. It now sends me an email 4 times a day telling me whether any traps have gone off, and if so which ones. Now I know when I have to go into the roof, and which traps need checking.
The electronics side was pretty easy. Total parts list was 1 X Freetronics etherten, 1 X Freetronics protosheild short, 3 X mousetraps, 3 X 10k resistors, 1 X short screw terminal block, 3 micro switches saved from an old microwave and about 50 metres of cheap speaker cable.
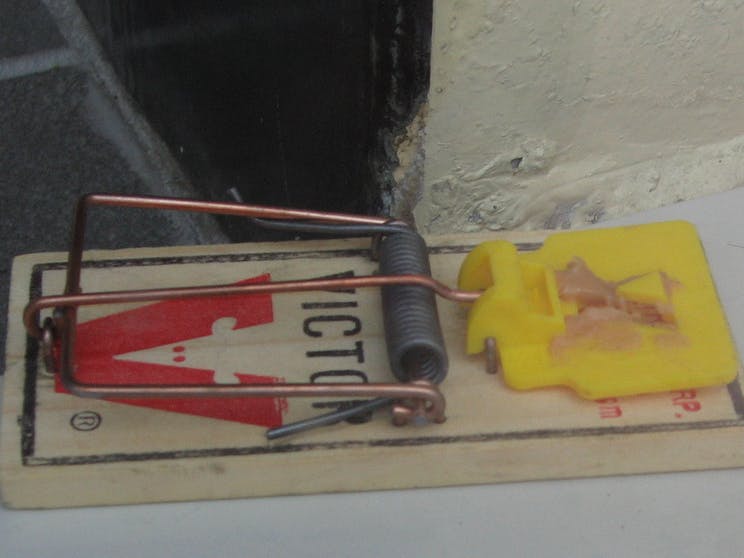
Using the protoshield the 3 resistors were linked between the digital input pins and ground to bias the pins towards a low state. The switches were hot glued into the mousetraps so that they would close whenever the mousetrap was locked in the 'armed' position. Each was then wired between the 5 volt pin and a digital input via the screw terminal block which was also mounted on the protoshield to make disconnecting the traps a lot easier. I had to use microswitches as the modern mousetraps I had are made of plastic. If you have some of the old fashioned metal traps on a wooden base then the trap itself can form the switch.
For me the interesting part was getting the Etherten to successfully send me an email. Despite several days of googling I couldn't find a single example of someone who had succeeded to do this directly from their arduino just lots of people who seemed to be stuck at different points or were actually sending the email via a script on their PC. Over a couple of days I was able to work through the steps of sending a simple email, and was able to get it going without any additional equipment. One drawback of my implementation is that the email is sent out blindly by the arduino. It doesn't know if the mail server has received the email or not and doesn't read any of the messages sent back. In my case this doesn't really matter as I send a new email every 6 hours anyway and the timing isn't critical.
Photos
The code that sends the emails
Notes about the code
Although I got this going with bigpond.com in Australia (Telstra), depending on the ISP you use this code may or not work for you. There are many different ways that email can be implemented � just have a look at all the options in the settings for your email client! Also it will probably only work from within your ISPs network as most of them won�t accept mail in this way via another ISP.
So here is the working code. I have only edited out my personal information and substituted it as follows:
***1 = My personal domain that resolves to my external IP address. This is one of those 'extra' bits of information some email servers can require.
***2 = Sending Email Address
***3 = Recipient 1 email address
***4 = Recipient 2 email address


Comments