


Hardware components | ||||||
_ztBMuBhMHo.jpg?auto=compress%2Cformat&w=48&h=48&fit=fill&bg=ffffff) |
| × | 1 | |||
Software apps and online services | ||||||
 |
| |||||
Our laundry machines are in the basement, when we remodeled our 1932 two story home, the staircases were sound insulated. The cute chirping of our front loading machines doesn't stand a chance of cutting through. My wife mentioned that our machines have some sort of phone connection for servicing, she asked why can't they tell her when the cycle is complete.
That started the build.
I had a couple Wii nunchucks from a broken Wii, they have motion sensors in them. A quick web search found an instructable http://www.instructables.com/id/Washer-Dryer-Laundry-Alarm-using-Arudino-SMS-Text-/?ALLSTEPS using a Arduino Yun, it was quite helpful, I had an Uno with an Ethernet card.
That started the build, which is straightforward. 4 wires from a Wii Nunchuck, and a few LED's to see what's going on, tweak the numbers to the machine and the laundry is IFTTT connected..
What about that other wayBefore going too far, let's consider different methods of grabbing an alert an Arduino could respond to. Vibration, current, and sound were all possibilities. I liked a current sensing method best, it however requires dealing with line voltages, even with an inductive sensor. The NEC is going to require the sensor be in a junction box. In my case both the washer and dryer are on independent circuits, so the main panel would be a fine place for the sensors. Since I designed and wired the whole lot, that method fits me quite well, for this project a blog post was one of the goals.
The main electrical panel method would limit the audience. So as MakerBee considered, a noninvasive solution fits the bill better. Vibration seemed better than sound to me, the variety of beeps and boops from today's electronic equipment seemed more difficult to decrypt.
Nunchuck and more, requirementsA nunchuck is a pretty inexpensive method to get a motion controller wired up ready to go. A little desoldering yields a nice starting point. Most of my laundry experience is with top load washers. They vibrate to beat the band, the front loader we have now, doesn't move very much. Of course when it spins, that all changes, but most of the time it just smoothly goes about its business. The nunchuck sensor is impressive, it easily picks up the slightest movement. Tapping one's fingers lightly on a sturdy desk, a couple feet away is discernable.
Another requirement was an auto start function. I want the device to be hands off, it should notice the machine is running, monitor it until complete and fire off a text message. The dryer monitor shouldn't auto start during a washer cycle, and vice versa. Lastly the device should indicate what's it is doing through a couple LED's.
The build, thanks to the nunchuck library is pretty easy.
Parts needed for one unit
1 - Arduino Uno
1 - Ethernet Shield
2 - Momentary contact buttons
4 - LED's different colors. (Red, Green, Blue, Yellow)
2 - about 2K Resistors
1 - Wii Nunchuck, maybe with a nunchuck breakout board.
1 - Case
1 - Neodymium magnet (hard drive salvage)
1 - Arduino nunchuck library Misc other standard building things, wire, breadboard
You may need another resistor. The red and blue LED's needed them, for some reason the yellow did not, and the green is typically held down by the program. I'm not an EE, but that side of me says both yellow and green should have a series resistor, maybe smaller on green. The buttons are not shown on the diagram, extend them from the nunchuck circuit board. The button module has 3 wires, a common and one for each button. The nunchuck is a 3.3 volt device. Read all about the nunchuck at https://create.arduino.cc/projecthub/infusion/using-a-wii-nunchuk-with-arduino-597254
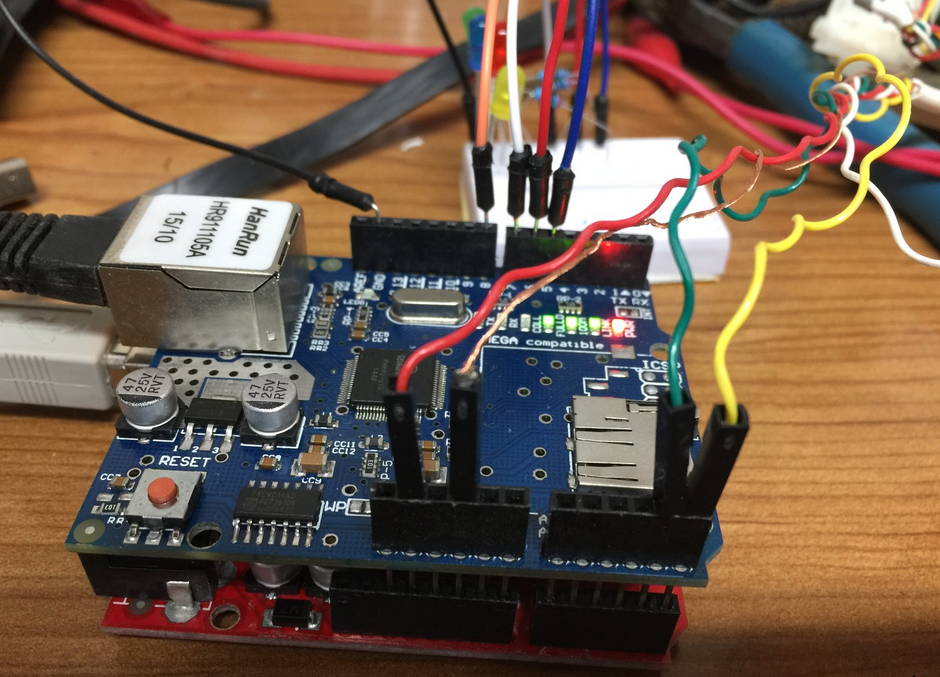
I started by cutting the plug off the nunchuck and installing DuPont connectors onto the wires.
Those were plugged into the Ethernet Shield sitting on top of the Uno. That is really all that is needed for this project, the LED's are fluff or as a friend says, everyone sells steak, that's the sizzle. When using an Ethernet Shield, don’t use pins 10 through 13, also sometimes pin 8 gets involved in network connections.
You should know, I'm quite new to Arduino, electronic design and Arduino code, I can solder, so take my notes like you read it on the internet.
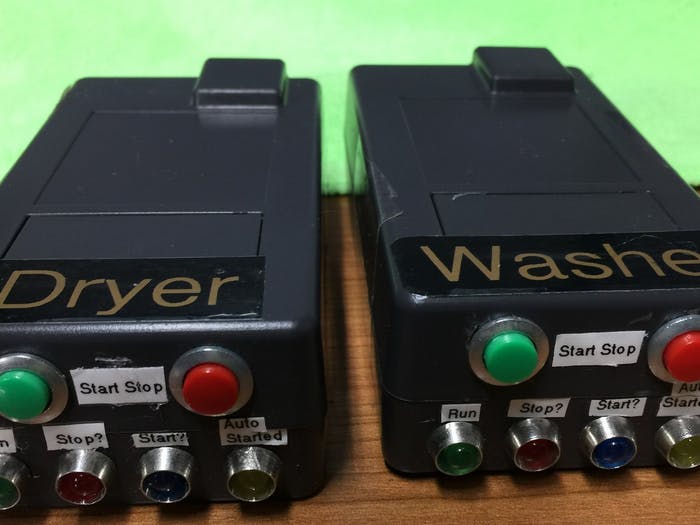
The LED sequence and usage are.
- Blue, comes on during POST then off when running.
- Blue turns on consider starting, turns back off it's done considering for now. Turns on at the half way point.
- Yellow, the system automatically started.
- Green, the system is running.
- Red, consider stopping, turns off it's done for now. turns on at 10% of the way there.
- Red turns off when network transmission to ifttt starts.
- Yellow turns off when network transmission to ifttt ends.
- Green turns off when cycle complete.
When adding LED's I found only the blue and red one's needed series resistors. The yellow one was already not too bright / about to smoke. The green one's level is held down during the Arduino loop, then it goes overdriven when a network transmission is taking place.
Nunchuck buttons are used as optional start or stop functions. Each laundry machine got its own device which share a common code base. Adding a couple transistors and tweaking the code would allow 2 nunchucks to live on the I2C protocol.
Configuration and Process DescriptionEach machine has it's own variable for each of the settings. The variable IsWasherDryer is used to control which machine the code is for. Set it to True for the washer and False for the dryer.
Auto Start ProcessThe Arduino is checking the sensor about 84 times a second. The motion sensor in the nunchuck is quite sensitive with the ability to see a rather light finger roll a couple feet away on a heavy desk. The movement information comes in as an integer between 0 and 254. The finger roll gives one or two of the 3 sensors a visible change. When the machine starts shaking the device starts up.
The start movement threshold is called AutoStartSensitivity. With such a rapid refresh rate and small movements, the sensors report no movement sometimes. This is handled with a variable AutoStartThreashold. That last variable defined for automatic starting is how long the device needs to be moving before it's an official start. That is called AutoStartMovementTime.
Ideally the device would start near the begin cycle of the machine, however with really smooth front loading washers, it might be better to start at the first spin cycle. The Dryer has a much more consistent vibration, and is easy to automatically start. The dryer's AutoStartMovementTime should be longer than the washer's spin cycle, or at least the violent part of it.
The Serial Log can be watched to tweak these settings. During Auto Start, it will scroll vertically if the AutoStartSensitivity is not reached. As that level is reached the log will begin to wrap 10 loops on a line. During a run, the log changes to showing the maximum movement received in about a second. It is useful when adjusting the automatic start settings to manually start run mode to watch the movement.
Run ProcessOnce we're started, we have two variables to control the run process. RunSensitivity, which is looking at movement like AutoStartSensitivity. The other option is used to determine the end of the cycle and called RunWaitTime. That is how many minutes of no movement before the ifttt post is made. For my machines the dryer RunWaitTime is short, 30 seconds or so, the washer has a much longer delay, a few minutes.
The ifttt post, has a Maker listener with an event name set to match the machine's IftttEventName. Your personal ifttt Key goes in iftttKey. Other than key, each of the above variables has a washer and dryer setting.
There are a couple test settings. isTestMode is used to not fire the ifttt event, isFastMode is an integer divider on the timers for easy desktop testing. Each device has a MAC and IP address setting, they should not be duplicated. The rest of the settings are, for what pins the LED's are connected, a timerAdjustment which can be changed to define what a minute is, and finally the baud rate to talk with the serial monitor. The nunchuck Z button is Start while C is stop.
These are currently in operation, and working great. It took over 10 laundry loads to get the settings correct. I watched a number of full cycles monitoring the serial monitor for feedback. Load size and selected options on the machines vary quite a bit. When setting autostart it is useful to manually enter run mode to see a different output on the serial monitor.
The End
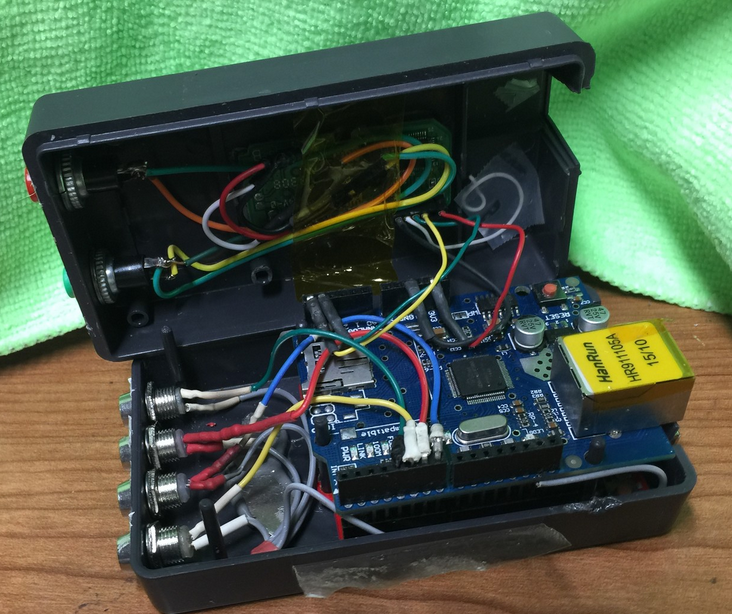
edit-I forgot to mention the Neodymium magnet, it is used to provide a better connection to the machine. I used a decent sized one, which can be seen the the Completed Build picture, JB Welded to the bottom of the case. If you have small one's use two. We want to be fairly well connected, like a dictionary was place on top of the device. A hard drive salvage magnet 1-1/2" by 1/2" by 1/8" worked well.
I hope you enjoy it as much as we do. Having the washer or dryer mention it's completed awesome. Good luck to you and stop by danvanfleet.com for a visit.


Comments