

Hardware components | ||||||
| × | 1 | ||||
Software apps and online services | ||||||
 |
| |||||
 |
| |||||
Simblee has been a great rapid prototype tools given with its selling point for native UI in Arduino IDE Sketch without the need of IOS / Android programming. All the coding and compilation only need Arduino IDE Sketch using SimbleeForMobile functions, hence reducing the complexity of multiple IDE tools. The SimbleeForMobile apps for both IOS and Andriod have been created by RFdigital. Quite similar to Evothings Studio, the app is like a browser to the BLE Simblee module. As a concept prototype, this is great! But then you wonder if you were to develop into a product, do you want customer to know your company and brand better via your own app and user experience or Simblee app? Do you want to access the mobile phone I/Os such as camera's image, mic, GPS, gyro, accelerometer data, contact list...etc? This is where Evothings Studio & Cordova comes in.
In this tutorial, I will show you how to setup Evothings to work with Simblee using the Evothings' RFduino LED On/OFF example. You will need this tools:
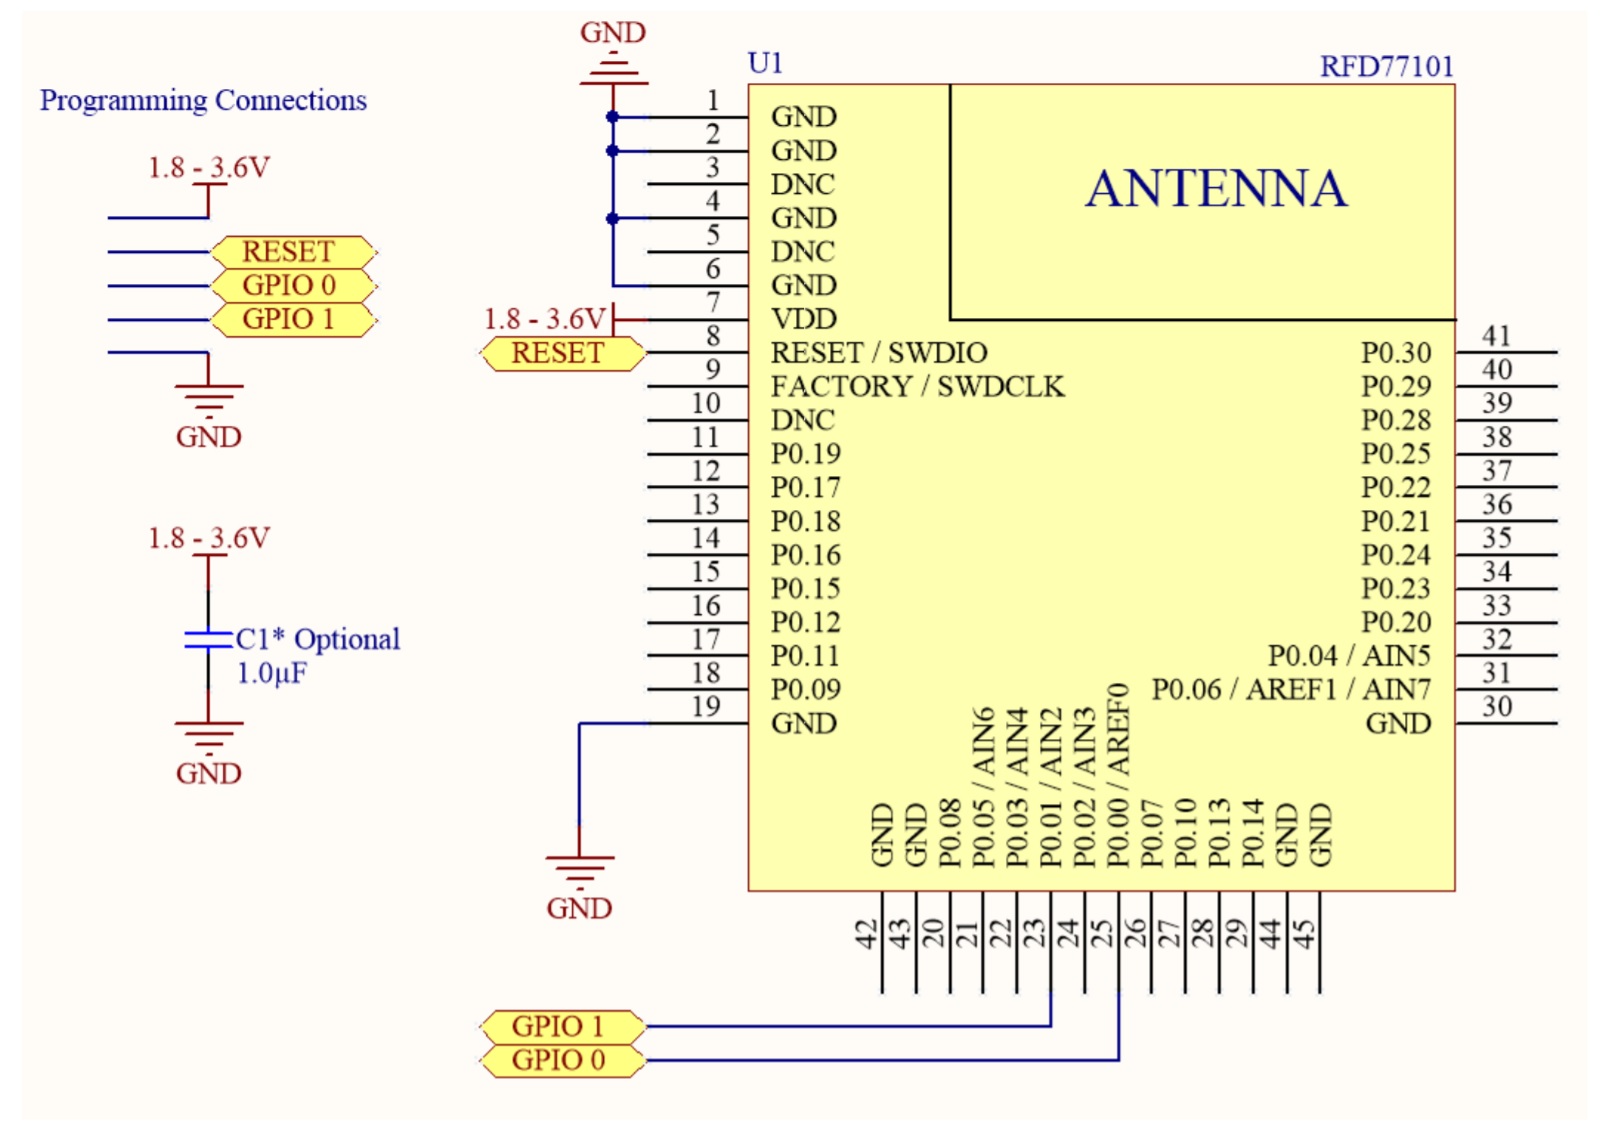
- RFD77801 Starter Kit which consists of
- RFD77201 Simblee 7 pin DIP board
- RFD22121 USB Programming Shield
- RFD22122 RGB LED/Button Shield
- Arduino IDE
- Evothings Studio
The first setup in this tutorial is to install Arduino and the Simblee board package. There has been an excellent guide here "Simblee Quick Start Guide".
Before we dive into the code, I would like to bring your attention to these two similar Simblee functions: SimbleeForMobile vs. SimbleeBLE. We won't be using SimbleeForMobile because these functions are used to talk to the RFDigital's SimbleeForMobile IOS / Andriod app. When you are developing your own mobile app, you need to use SimbleeBLE. They do not work with each other. SimbleeForMobile has additional UI functions that SimbleeBLE hasn't. SimbleeBLE is backward compatible to RFduinoBLE. Whatever RFduinoBLE is capable of, SimbleeBLE does as well.
- SimbleeBLE.h : RFduinoBLE.h
- SimbleeBLE.begin() : RFduinoBLE.begin()
- SimbleeBLE.end() : RFduinoBLE.end()
The list continues....
So referring to the tutorial post on Evothings' RFduino - 4 easy steps to create a mobile app for controlling the RFduino , we will be basically changing the RFduino word into Simblee word in the program. I won't go into code details as the guide has done that.
// Code for Simblee LED On Off example.
// For Simblee (RFD77201) connected to Simblee RGB Shield (RFD22122).
#include <SimbleeBLE.h>
// Define input/output pins.
// Input pins for key buttons, and output pins for LED RGB On-Off control
// GPIO2 on the Simblee RGB shield is the Red LED
// GPIO3 on the Simblee RGB shield is the Green LED
// GPIO4 on the Simblee RGB shield is the Blue LED
// GPIO5 on the Simblee RGB shield is key button A
// GPIO6 on the Simblee RGB shield is key button B
#define RED_LED_PIN 2
#define GREEN_LED_PIN 3
#define BLUE_LED_PIN 4
//#define BUTTON_A_INPUT_PIN 5
//#define BUTTON_B_INPUT_PIN 6
// This function is called only once, at reset.
void setup()
{
 // Enable serial debug.
 Serial.begin(9600);
 Serial.println("Simblee example started");
 Serial.println("Serial rate set to 9600 baud");
 // Enable outputs.
 pinMode(RED_LED_PIN, OUTPUT);
 pinMode(GREEN_LED_PIN, OUTPUT);
 pinMode(BLUE_LED_PIN, OUTPUT);
 // Turn Off all LEDs initially
 digitalWrite(RED_LED_PIN, LOW);
 digitalWrite(GREEN_LED_PIN, LOW);
 digitalWrite(BLUE_LED_PIN, LOW);
 // Indicate RGB LED is operational to user.
 digitalWrite(RED_LED_PIN, HIGH);
 delay (500);
 digitalWrite(RED_LED_PIN, LOW);
 digitalWrite(GREEN_LED_PIN, HIGH);
 delay (500);
 digitalWrite(RED_LED_PIN, LOW);
 digitalWrite(GREEN_LED_PIN, LOW);
 digitalWrite(BLUE_LED_PIN, HIGH);
 delay (500);
 digitalWrite(RED_LED_PIN, LOW);
 digitalWrite(GREEN_LED_PIN, LOW);
 digitalWrite(BLUE_LED_PIN, LOW);
 // Check Simblee CPU temperature, and print to log
 float CPU_temperature = Simblee_temperature(CELSIUS);
 Serial.print("Simblee_temperature is: ");
 Serial.print(CPU_temperature);
 Serial.println(" deg C");
 // this is the data we want to appear in the advertisement
 // (the deviceName length plus the advertisement length must be <= 18 bytes
 // SimbleeBLE.advertisementData = "ledbtn";
 SimbleeBLE.advertisementInterval = 500;
 Serial.println("Simblee BLE Advertising interval 500ms");
 SimbleeBLE.deviceName = "Simblee";
 Serial.println("Simblee BLE DeviceName: Simblee");
 SimbleeBLE.txPowerLevel = -20;
 Serial.println("Simblee BLE Tx Power Level: -20dBm");
 // start the BLE stack
 SimbleeBLE.begin();
 Serial.println("Simblee BLE stack started");
}
// This function is called continuously, after setup() completes.
void loop()
{
 // switch to lower power mode
 Simblee_ULPDelay(INFINITE);
}
void SimbleeBLE_onAdvertisement()
{
 Serial.println("Simblee is doing BLE advertising ...");
 digitalWrite(RED_LED_PIN, LOW);
 digitalWrite(GREEN_LED_PIN, LOW);
 digitalWrite(BLUE_LED_PIN, LOW);
}
void SimbleeBLE_onConnect()
{
 Serial.println("Simblee BLE connection successful");
 digitalWrite(RED_LED_PIN, LOW);
 digitalWrite(GREEN_LED_PIN, HIGH);
 digitalWrite(BLUE_LED_PIN, LOW);
}
void SimbleeBLE_onDisconnect()
{
 Serial.println("Simblee BLE disconnected");
 // don't leave the leds on after disconnection
 digitalWrite(RED_LED_PIN, LOW);
 digitalWrite(GREEN_LED_PIN, LOW);
 digitalWrite(BLUE_LED_PIN, LOW);
}
void SimbleeBLE_onReceive(char *data, int len)
{
 // if the first byte is 0x01 / on / true
 Serial.println("Received data over BLE");
 if (data[0])
 {
   digitalWrite(BLUE_LED_PIN, HIGH);
   Serial.println("Turn Simblee Blue LED On");
 }
 else
 {
   digitalWrite(BLUE_LED_PIN, LOW);
   Serial.println("Turn Simblee Blue LED Off");
 }
}
By now, you could stack the 3 DIP boards together and plug them onto USB port.
Then, select Tools>Board>Simblee, select serial port, compile and upload the code. Once you have uploaded the code, you can test run the code by opening Tools>Serial Monitor. Set to baud rate of 9600 and you should see "Simblee example started".
Part 2 Mobile ApplicationIn order to run the example provided you need to install the Evothings Workbench ( 2.1.0 or newer) on your computer and the Evothings Viewer (iOS, Android) on your smartphone. There is more detailed instructions available on Evothings homepage.
Open the Evothings Workbench on your computer and press the Connect tab. In this tab you will connect your smartphone with your computer in order to enable live updates of your mobile application project. Press the GET KEY button to receive a key.
Open the Evothings Viewer on your smartphone and enter the key in the Connect Key field and press the Connect button. Now you have connected your workbench to your mobile phone and you are ready to start to develop your mobile application.
Open the Examples tab in Evothings Viewer and locate the example named RFduino LED On/Off. Press the Copy-button, change the folder name to simblee-led-onoff and press the Create-button. Press the Code-button to access the application and to make the necessary changes described below. With updated application icon photo, your workbench will look like this.
Click EDIT button and change the one line description to "Simple app to control the Simblee using BLE. ". Then, click SAVE button.
Click CODE button to get to the EvothingsStudio\MyApps\simblee-led-onoff\app folder. Use any editor to edit index.html. You need to change RFduino to Simblee and rfduino to simblee in case sensitive. I made some comments changes but you can leave them out or just copy the code below.
<!DOCTYPE html>
<html>
<!--
This is an example app that demonstrates how to control an
Simblee RFD77201 board using BLE (Bluetooth Low Energy).
Please note that this example requires an Simblee RFD77201 plus
and RGB LED Button shield (RFD22122). In addition, an
USB shield (RFD22121) is needed for programming the
Simblee from a PC or Mac.
-->
<head>
<meta charset="utf-8" />
<meta name="viewport" content="width=device-width, user-scalable=no,
shrink-to-fit=no, initial-scale=1.0, minimum-scale=1.0, maximum-scale=1.0" />
<title>Simblee LED On/Off</title>
<style>
@import 'ui/css/evothings-app.css';
</style>
<style>
div {
margin: 10px 0px;
}
button {
margin: 5px 0px;
}
.lead {
font-weight: bold;
}
</style>
<script>
// Redirect console.log to Evothings Workbench.
if (window.hyper && window.hyper.log) { console.log = hyper.log }
</script>
<script src="cordova.js"></script>
<script src="libs/jquery/jquery.js"></script>
<script src="libs/evothings/evothings.js"></script>
<script src="libs/evothings/ui/ui.js"></script>
<script src="libs/evothings/simbleeble/simbleeble.js"></script>
</head>
<body>
<header>
<button class="back" onclick="history.back()">
<img src="ui/images/arrow-left.svg" />
</button>
<img class="logotype" src="ui/images/logo.svg" alt="Evothings" />
<!--<button class="menu" onclick=""><img src="ui/images/menu.svg" /></button>-->
</header>
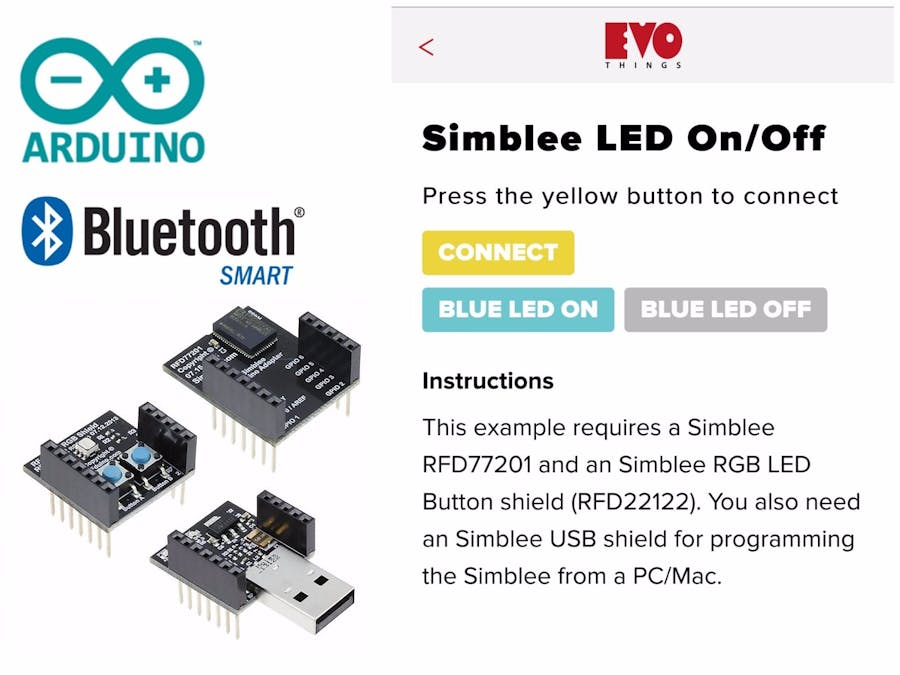
<h1>Simblee LED On/Off</h1>
<p id="info" class="lead">Initializing...</p>
<button type="button" class="yellow" onclick="app.connect()">
Connect
</button>
<br />
<button type="button" class="blue" onclick="app.ledOn()">
Blue Led On
</button>
<button type="button" class="charcoal" onclick="app.ledOff()">
Blue Led Off
</button>
<h2>Instructions</h2>
<p>This example requires a Simblee RFD77201 and an Simblee RGB
LED Button shield (RFD22122). You also need an Simblee USB shield
for programming the Simblee from a PC/Mac.</p>
<!-- TODO: Image is missing.
<p><img src="Simblee_Image.png" style="max-height:30%;" /></p>
-->
<!-- JavaScript code for the app -->
<script>
// Short name for Simblee BLE library.
var simbleeble = evothings.simbleeble;
// Application object.
var app = {};
// Connected device.
app.device = null;
// Turn on LED.
app.ledOn = function()
{
app.device && app.device.writeDataArray(new Uint8Array([1]));
};
// Turn off LED.
app.ledOff = function()
{
app.device && app.device.writeDataArray(new Uint8Array([0]));
};
app.showMessage = function(info)
{
document.getElementById("info").innerHTML = info;
};
// Called when BLE and other native functions are available.
app.onDeviceReady = function()
{
app.showMessage('Press the yellow button to connect');
};
app.connect = function()
{
console.log("close");
simbleeble.close();
// Wait 500 ms for close to complete before connecting.
setTimeout(function()
{
console.log("connecting");
app.showMessage("Connecting...");
simbleeble.connect(
"Simblee",
function(device)
{
console.log("connected");
app.showMessage("Connected");
app.device = device;
},
function(errorCode)
{
app.showMessage("Connect error: " + errorCode);
});
},
500);
};
// When the app is fully loaded the "deviceready" event is triggered.
document.addEventListener(
'deviceready',
function() { evothings.scriptsLoaded(app.onDeviceReady) },
false);
</script>
</body>
Rename the rfduinoble folder into simbleeble folder at EvothingsStudio\MyApps\SimbleeBLE\app\libs\evothings\ . Also rename the rfduinoble.js into simbleeble.js within that folder.
Find and replace the rfduino word into simblee in the simbleeble.js file. Then, change the service UUID from
(line 123)
'00002222-0000-1000-8000-00805f9b34fb',
to
'2D30C083-F39F-4CE6-923F-3484EA480596',
The whole simbleeble.js code looks like this. Alternately, you can copy simbleeble.js and replace the rfduinoble.js.
// File: simbleeble.js
// Load dependent library EasyBLE.
evothings.loadScript('libs/evothings/easyble/easyble.js')
/**
* @namespace
* @author Patrik D.
* @description <p>Functions for communicating with an Simblee board.</p>
* <p>It is safe practise to call function {@link evothings.scriptsLoaded}
* to ensure dependent libraries are loaded before calling functions
* in this library.</p>
*/
evothings.simbleeble = {};
;(function()
{
	// Internal functions.
	var internal = {};
	/**
	 * Stops any ongoing scan and disconnects any connected devices.
	 * @public
	 */
	evothings.simbleeble.close = function()
	{
		evothings.easyble.stopScan();
		evothings.easyble.closeConnectedDevices();
	};
	/**
	 * Called when you have connected to the board.
	 * @callback evothings.simbleeble.connectsuccess
	 * @param {evothings.simbleeble.SimbleeBLEDevice} device -
	 * The connected BLE shield.
	 */
	/**
	 * Connect to an Simblee board.
	 * @param {evothings.simbleeble.connectsuccess} success -
	 * Success callback: success(device)
	 * @param {function} fail - Error callback: fail(errorCode)
	 * @public
	 */
	evothings.simbleeble.connect = function(deviceName, success, fail)
	{
		evothings.easyble.startScan(
			function(device)
			{
				console.log('found device: ' + device.name);
				if (device.name == deviceName)
				{
					evothings.easyble.stopScan();
					console.log('connectToDevice');
					internal.connectToDevice(device, success, fail);
				}
			},
			function(errorCode)
			{
				fail(errorCode);
			});
	};
	/**
	 * Connect to the device.
	 * @private
	 */
	internal.connectToDevice = function(device, success, fail)
	{
		device.connect(
			function(device)
			{
				// Get services info.
				internal.getServices(device, success, fail);
			},
			function(errorCode)
			{
				fail(errorCode);
			});
	};
	/**
	 * Read all services from the device.
	 * @private
	 */
	internal.getServices = function(device, success, fail)
	{
		device.readServices(
			null, // null means read info for all services
			function(device)
			{
				internal.addMethodsToDeviceObject(device);
				success(device);
			},
			function(errorCode)
			{
				fail(errorCode);
			});
	};
	/**
	 * Add instance methods to the device object.
	 * @private
	 */
	internal.addMethodsToDeviceObject = function(device)
	{
		/**
		 * Object that holds info about an Simblee device.
		 * @namespace evothings.simbleeble.SimbleeBLEDevice
		 */
		/**
		 * @function writeDataArray
		 * @description Write data to an Simblee.
		 * @param {Uint8Array} uint8array - The data to be written.
		 * @memberof evothings.simbleeble.SimbleeBLEDevice
		 * @instance
		 * @public
		 */
		device.writeDataArray = function(uint8array)
		{
			device.writeCharacteristic(
				'2D30C083-F39F-4CE6-923F-3484EA480596',
				uint8array,
				function()
				{
					console.log('writeCharacteristic success');
				},
				function(errorCode)
				{
					console.log('writeCharacteristic error: ' + errorCode);
				});
		};
	};
})();
The Simblee has new 16 bit BT SIG Service UUID (FE84) and 128 bit characteristics UUIDs.
Service UUID
- RFduino : 2220
- Simblee : FE84
With Bluetooth Base UUID
- RFduino: 2220-0000-1000-8000-00805f9b34fb
- Simblee: fe84-0000-1000-8000-00805f9b34fb
Characteristics UUID
- RFduino : 2221
- Simblee : 2d30c082-f39f-4ce6-923f-3484ea480596
- RFduino : 2222
- Simblee : 2d30c083-f39f-4ce6-923f-3484ea480596
- RFduino : 2223
- Simblee : 2d30c084-f39f-4ce6-923f-3484ea480596
You can always learn more about UUID by downloading the nRF Connect IOS and Andriod mobile app from Nordic Semiconductor. This app can connect to the Simblee module and show the UUIDs.
If you press the connect button now the application should establish a connection between the smart phone and development board and you should be able to turn on and off the led.
This guide above is a starting point to customize the mobile app for Simblee should you find that the native UI in Arduino IDE sketch is limited.


Comments