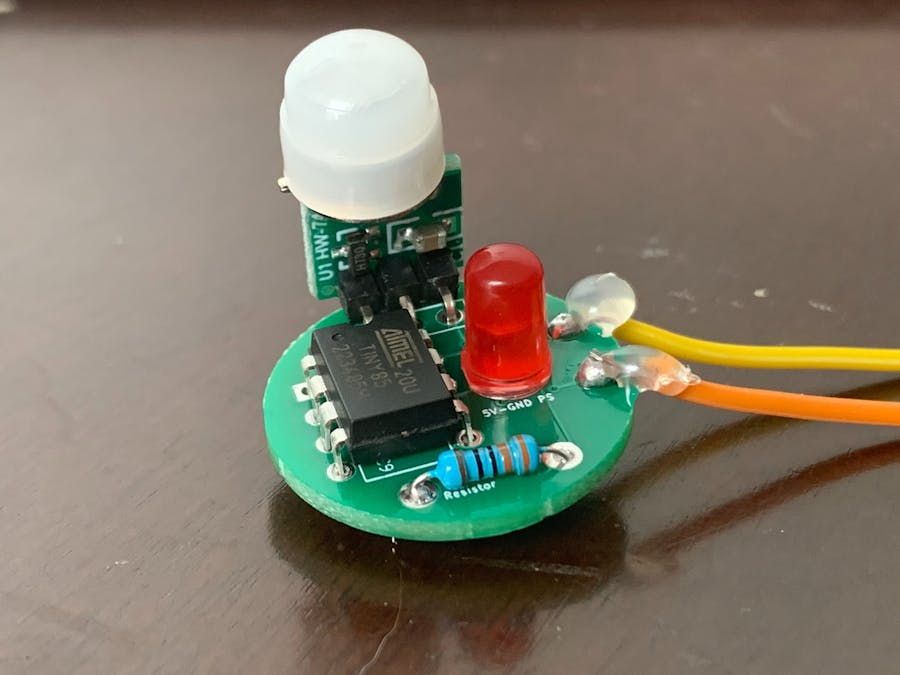
A device with stealth, military, and fun applications, this human proximity sensor is a stealth gadget equipped with the ability to freak out your enemies, or friends, and give you solid intel on others' locations. It is tiny and concealed and hardly noticeable.
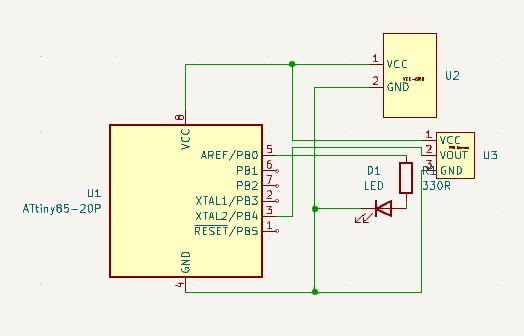
Step One: The ComponentsSince the goal of this project was to create a small circuit board, I needed a tiny IC. The ATtiny85 dip was the perfect choice. It has a load of functionality, including digitalRead(), digitalWrite(), and delay() functions that were needed to make this project work.
Step Two: PIR SensorPassive infrared, PIR, sensors are sensors that have the ability to sense changes in infrared radiation, caused by movement of IR-radiation-emitting objects such as humans and animals, and produce a digital HIGH signal or a digital LOW signal depending on if there is movement or not. This technology is at the heart of almost every motion-activated system commercially available today.
Step Three: The Circuit BoardThis circuit board I developed has a minute 11mm radius, making it just about the size of the tip of your thumb. This board features a power input and output and tracks that connect all of the components to VCC, GND, and the ATtiny85.
Step Four: The CodeThis image showcases all of the code for this project: it's very simple. It flashes an LED rapidly when the PIR sensor is activated. I would recommend experimenting on your own if you would like the LED to flash slower or faster than it already does. Edit the delay(50) function to change the flash rate.
Step Five: SolderingSince the circuit board is small and there are delicate components used, the order in which you solder components matters. I would recommend soldering the power connections, 5V and GND, first, followed by the ATtiny85, resistor, LED, and finally, the PIR sensor. Be careful not to heat up the board too much, as the excess energy will damage the board and or components. Also, before plugging in power, make sure to test for continuity when you are finished soldering all of the components.
Step Six: Going FurtherAfter you play around with this device, check out my personal website for projects like the one you see above.


Comments