

Hardware components | ||||||
 |
| × | 1 | |||
_ztBMuBhMHo.jpg?auto=compress%2Cformat&w=48&h=48&fit=fill&bg=ffffff) |
| × | 1 | |||
 |
| × | 1 | |||
 |
| × | 1 | |||
| × | 1 | ||||
 |
| × | 1 | |||
 |
| × | 1 | |||
 |
| × | 1 | |||
 |
| × | 1 | |||
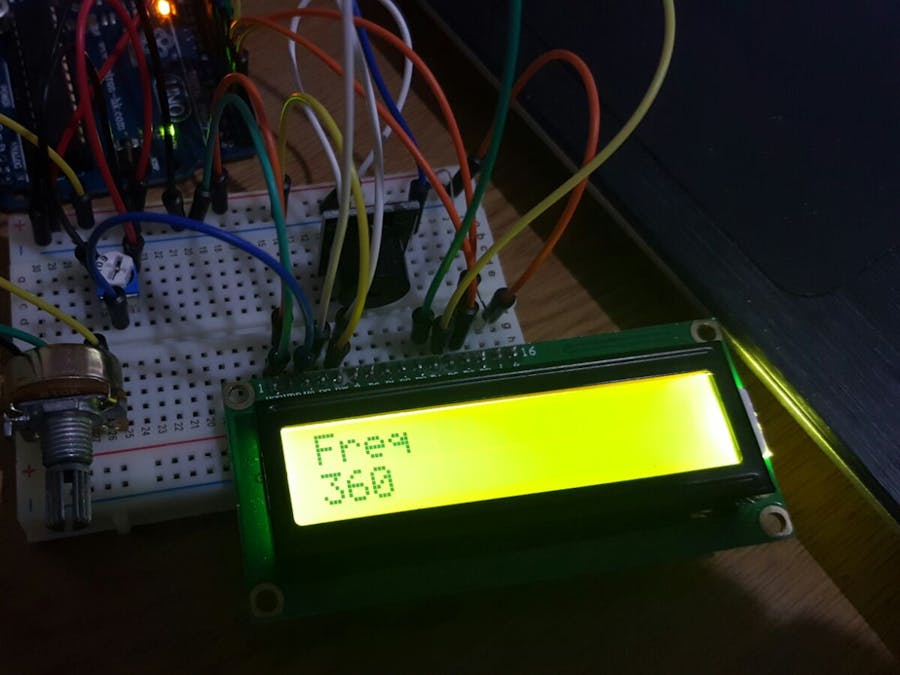
This is a small tone selector with the ability to change the frequency by a potentiometer and to see the result on a 16x2 display. It also has an automatic testing mode at the beginning.
DemoPlease watch the video till the end (less than a minute) to see what it can do:
The project is pretty straight forward:
Arduino reads the analog data from the potentiometer and the program transforms it into a frequency to be played by the buzzer (in a range of 20-2000 Hz). The program provides the thresholds on lower and on higher frequencies.
It starts with a test sequence that it sends to the buzzer a wave of notes and then the program listens to the potentiometer values.
The display shows the frequence played at the moment.
I used a trimmer to adjust the display contrast (at the beginning it usually doesn't show anything because of the too high contrast, so it needs to be adjusted.
The buzzer is a Elegoo passive buzzer connected using only 2 pins as a standard buzzer (so, any buzzer can be used as well).
The potentiometer is a 10Kohm linear and it works pretty well in this range, but I adjusted the scale on the program so to double it because of the original range too low (0-1024).
The arduino Sketch built-in library "Tone" has been used for the buzzer and the LiquidCrystal library for the 16x2 display.
It can be used as a base to learn synth music or to build a proper synth with other controls for changing the basic square wave and to add some loops like in a sequencer.
This project can be viewed also on my website: http://www.gianpa.com/a-tone-generator-with-lcd-display/


Comments