

Hardware components | ||||||
 |
| × | 1 | |||
| × | 1 | ||||
| × | 1 | ||||
| × | 1 | ||||
A friend recently purchased a drone, and after flying once I was hooked. However, I figured it would be more fun to build my own.
The end goal of this project is to have a semi-autonomous drone that is only connected over cellular via a Particle Electron. However, in the first few parts of the build you will noticed I used a Particle Photon. I have found that it is much easier to develop on the Photon and then deploy to the Electron (It saves on data usage).
In the first step I got the BLDC motors working and in this part I explore the different sensors to be used in flight controls.
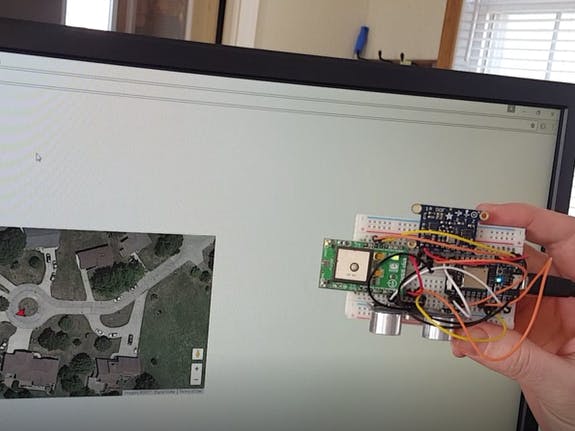
What is it?Check out the video below to see step 2 of my drone project in action. As you can see in the video, the GPS receiver, 10-DOF IMU, and Ultrasonic distance sensor is communicating and publishing data to the web.
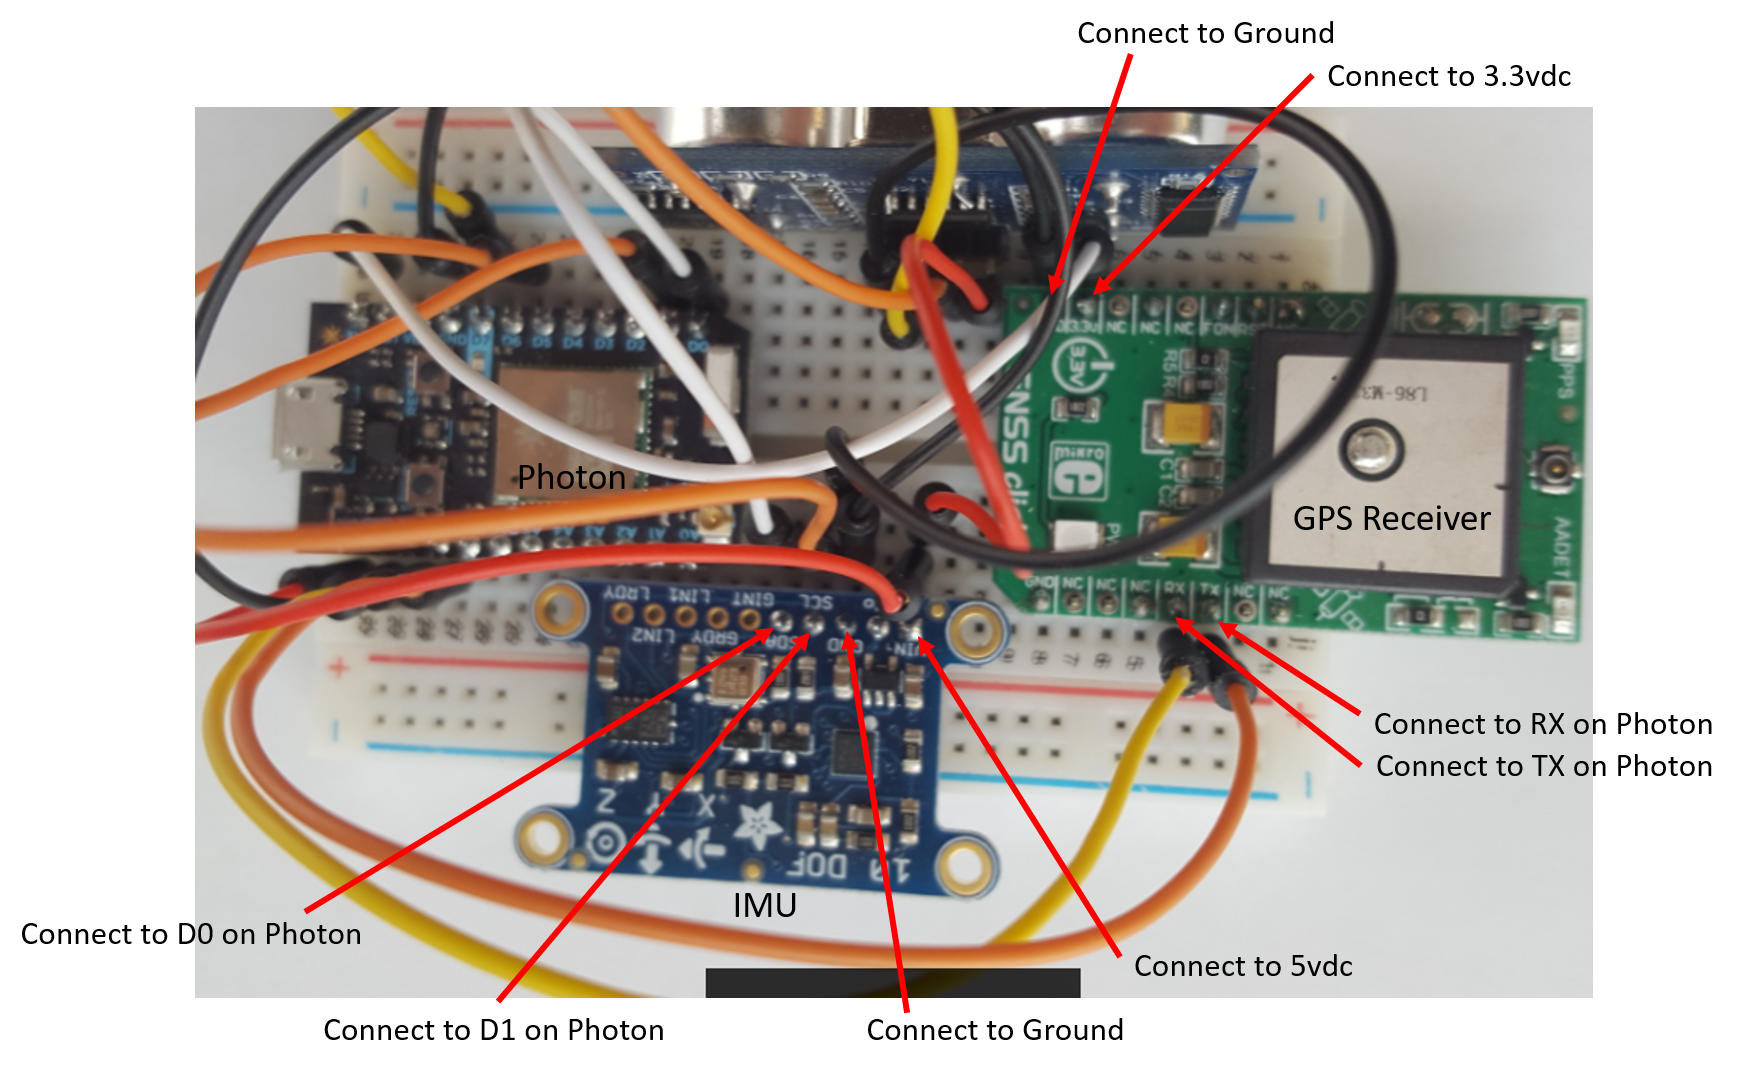
HardwareThree pieces of hardware were added in this step. The first is a GPS receiver, this will be used to track the position of the drone and will also give us speed and altitude. I used the GNSS Click module from MikroElektronika, I wanted a GNSS receiver because it uses both the U.S. GPS satellites as well as the Russian Glonass satellites. This is supposed to increase the coverage area and be more accurate. The GPS receiver is connected to the Photon over the serial bus.
The second sensor is a 10-Degree of Freedom Inertial Measurement Unit (10DOF IMU). This module from Adafruit incorporates several sensors into one interface (I2C). Most notably it gives you the pitch, roll, and heading of the drone. It also has gyros that will return the speed of pitch, roll, and heading. Accelerometers on the board will give you the fore/aft, up/down, and side/side speeds. Lastly, there is a pressure sensor to give you altitude. These measurements will be very important in the control algorithms to control the stability of the drone.
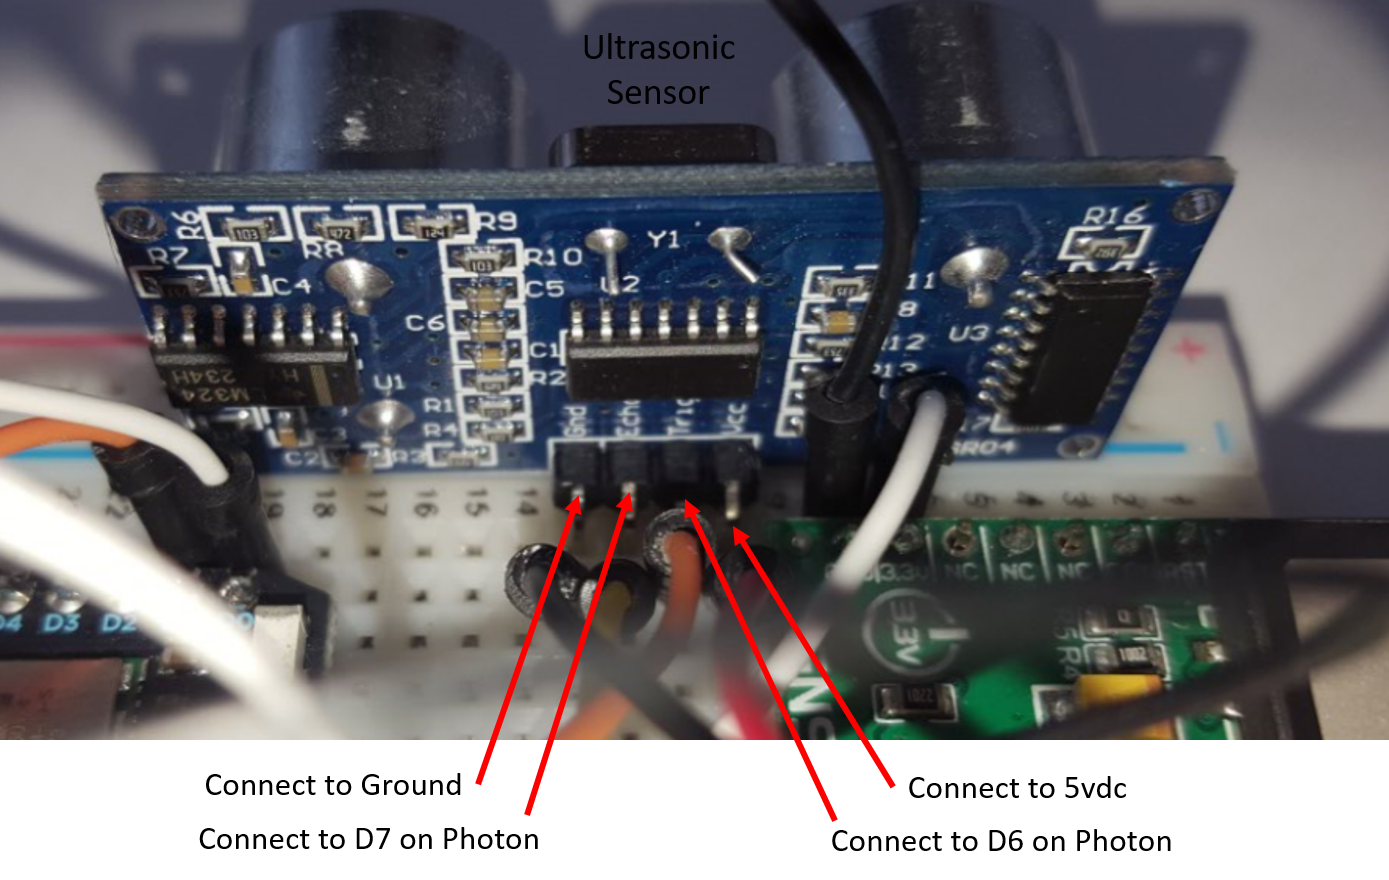
The last sensor is an ultrasonic distance sensor. This will be used for obstacle detection. It connects via two digital pins on the Photon. It has a range of about 16 feet, which will give us plenty of time to stop or avoid the obstacle.
Software/FirmwareThe firmware used on the Photon was adapted from examples from the various sensors. The loop checks the values once per second and publishes them to the Particle Cloud. When these sensors are incorporated into the drone we will sample at a much higher rate, but 1 second was plenty when sending over the internet. Most of this information will only be used for closed loop control of the propellers, so we will not need to broadcast it very often.
The code is commented but if you have any questions please feel free to contact me. Also I used publicly available libraries for the GPS sensor and IMU sensor. The GPS library is called TinyGPS https://github.com/mikalhart/TinyGPS. If you use the Particle IDE it is available in the public library. Just search for TinyGPS and add it to your project.
The IMU uses the Adafruit_10DOF library. This is also available on the Particle IDE, search for Adafruit_10DOF_IMU and add it to your project. The Photon code will not work without these libraries added.
The webpage is html and JavaScript, there is a connect button that starts listening for publish events from the Photon. Once it gets data, it displays the data and starts listening for the next event. The most important thing is to enter your Photon ID, and Access Code. These can be found in the Particle IDE under Devices.
Google MapsThe Google Map shows the current position and heading. Each time an event is published the position and heading are updated, and the map is re-centered. This part requires you to have a Google Maps API. This is free and click here for a good tutorial.


Comments