

Hardware components | ||||||
 |
| × | 1 | |||
 |
| × | 1 | |||
 |
| × | 1 | |||
Software apps and online services | ||||||
 |
| |||||
Hand tools and fabrication machines | ||||||
| ||||||
We now have created a platform on Hackster.IO for the Pulse Train Hat, if you could help us by becoming a member, then it would help us a lot as we need 25 members to get it featured.
https://www.hackster.io/pulse-train-hat
The new Pulse Train HAT add-on board is now available for the Raspberry Pi. Making stepper motor control easy, fast and accurate.
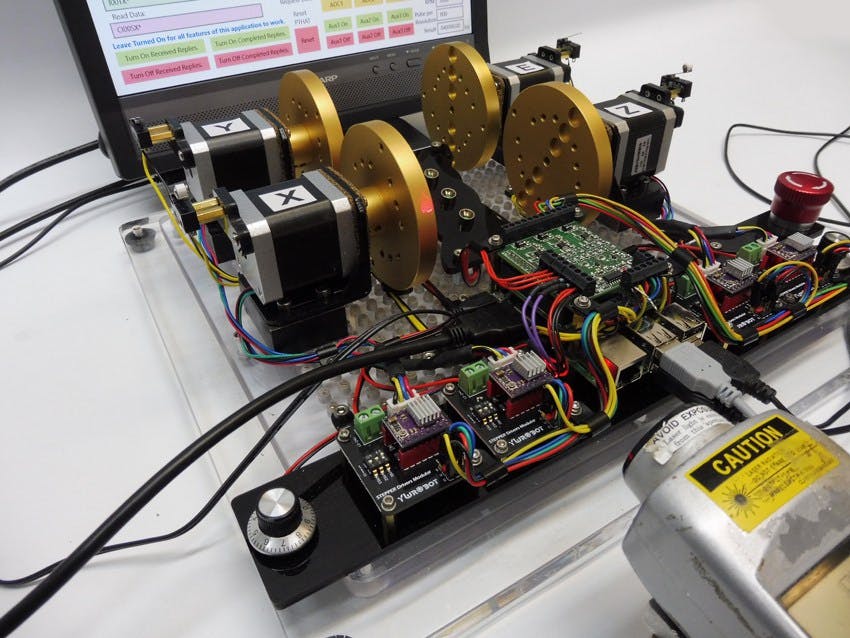
This is a test rig we built for when we were developing the code.
It allows us to test all 4 channels of the PTHAT by sending the pulses to stepper drivers, that were connected to small Nema 17 motors. It also has all the limit switch inputs brought out to switches, the ADC inputs connect to 10K pots and AUX outputs connected to LED’s.
We decided to use low cost stepper drivers that are usually found in 3D printers as they are not brilliant, but do the job. Our thinking is if the PTHAT can control these noisy little drivers, then handling the more expensive drivers would be easier!
Usually with stepper motors to get higher speeds, you would take the motor voltage up to 35 volts, but we have left the supply at 24 volts to show that the clean pulses produced by the PTHAT overcomes a lot of issues that sometimes can be seen with noisy, dirty pulses.
We have covered the example application in more detail on the Raspberry PI page with more screen shots, but also the video below shows it in action.
Commands used in this example are:
Set Axis Command Start Axis Command Stop Axis Command Pause/Resume Axis Command Request Current Pulse Count Command Request ADC Reading Command Set Aux Output Command Turn On/Off Received Command Replies Turn On/Off Completed Command Replies Request Firmware Version Reset PTHAT
In this video we give an overview of the example software we supply to get people started, showing the sending of Instant Commands to each Axis.
The end developer has easily modify this example to build their own application.
The example application was developed in Visual Studio 2015 that can be used with Windows 10 IOT on the Raspberry PI or compiled to x86/x64 for use on a PC.The example has been written in C# as a Universal Windows Platform (UWP).
Please use the following link to download the full source code.
Gallery


Comments