//  Made by: Caleb Wright
//  5-15-2018
//  Object - Maymester
//  Digital I/O

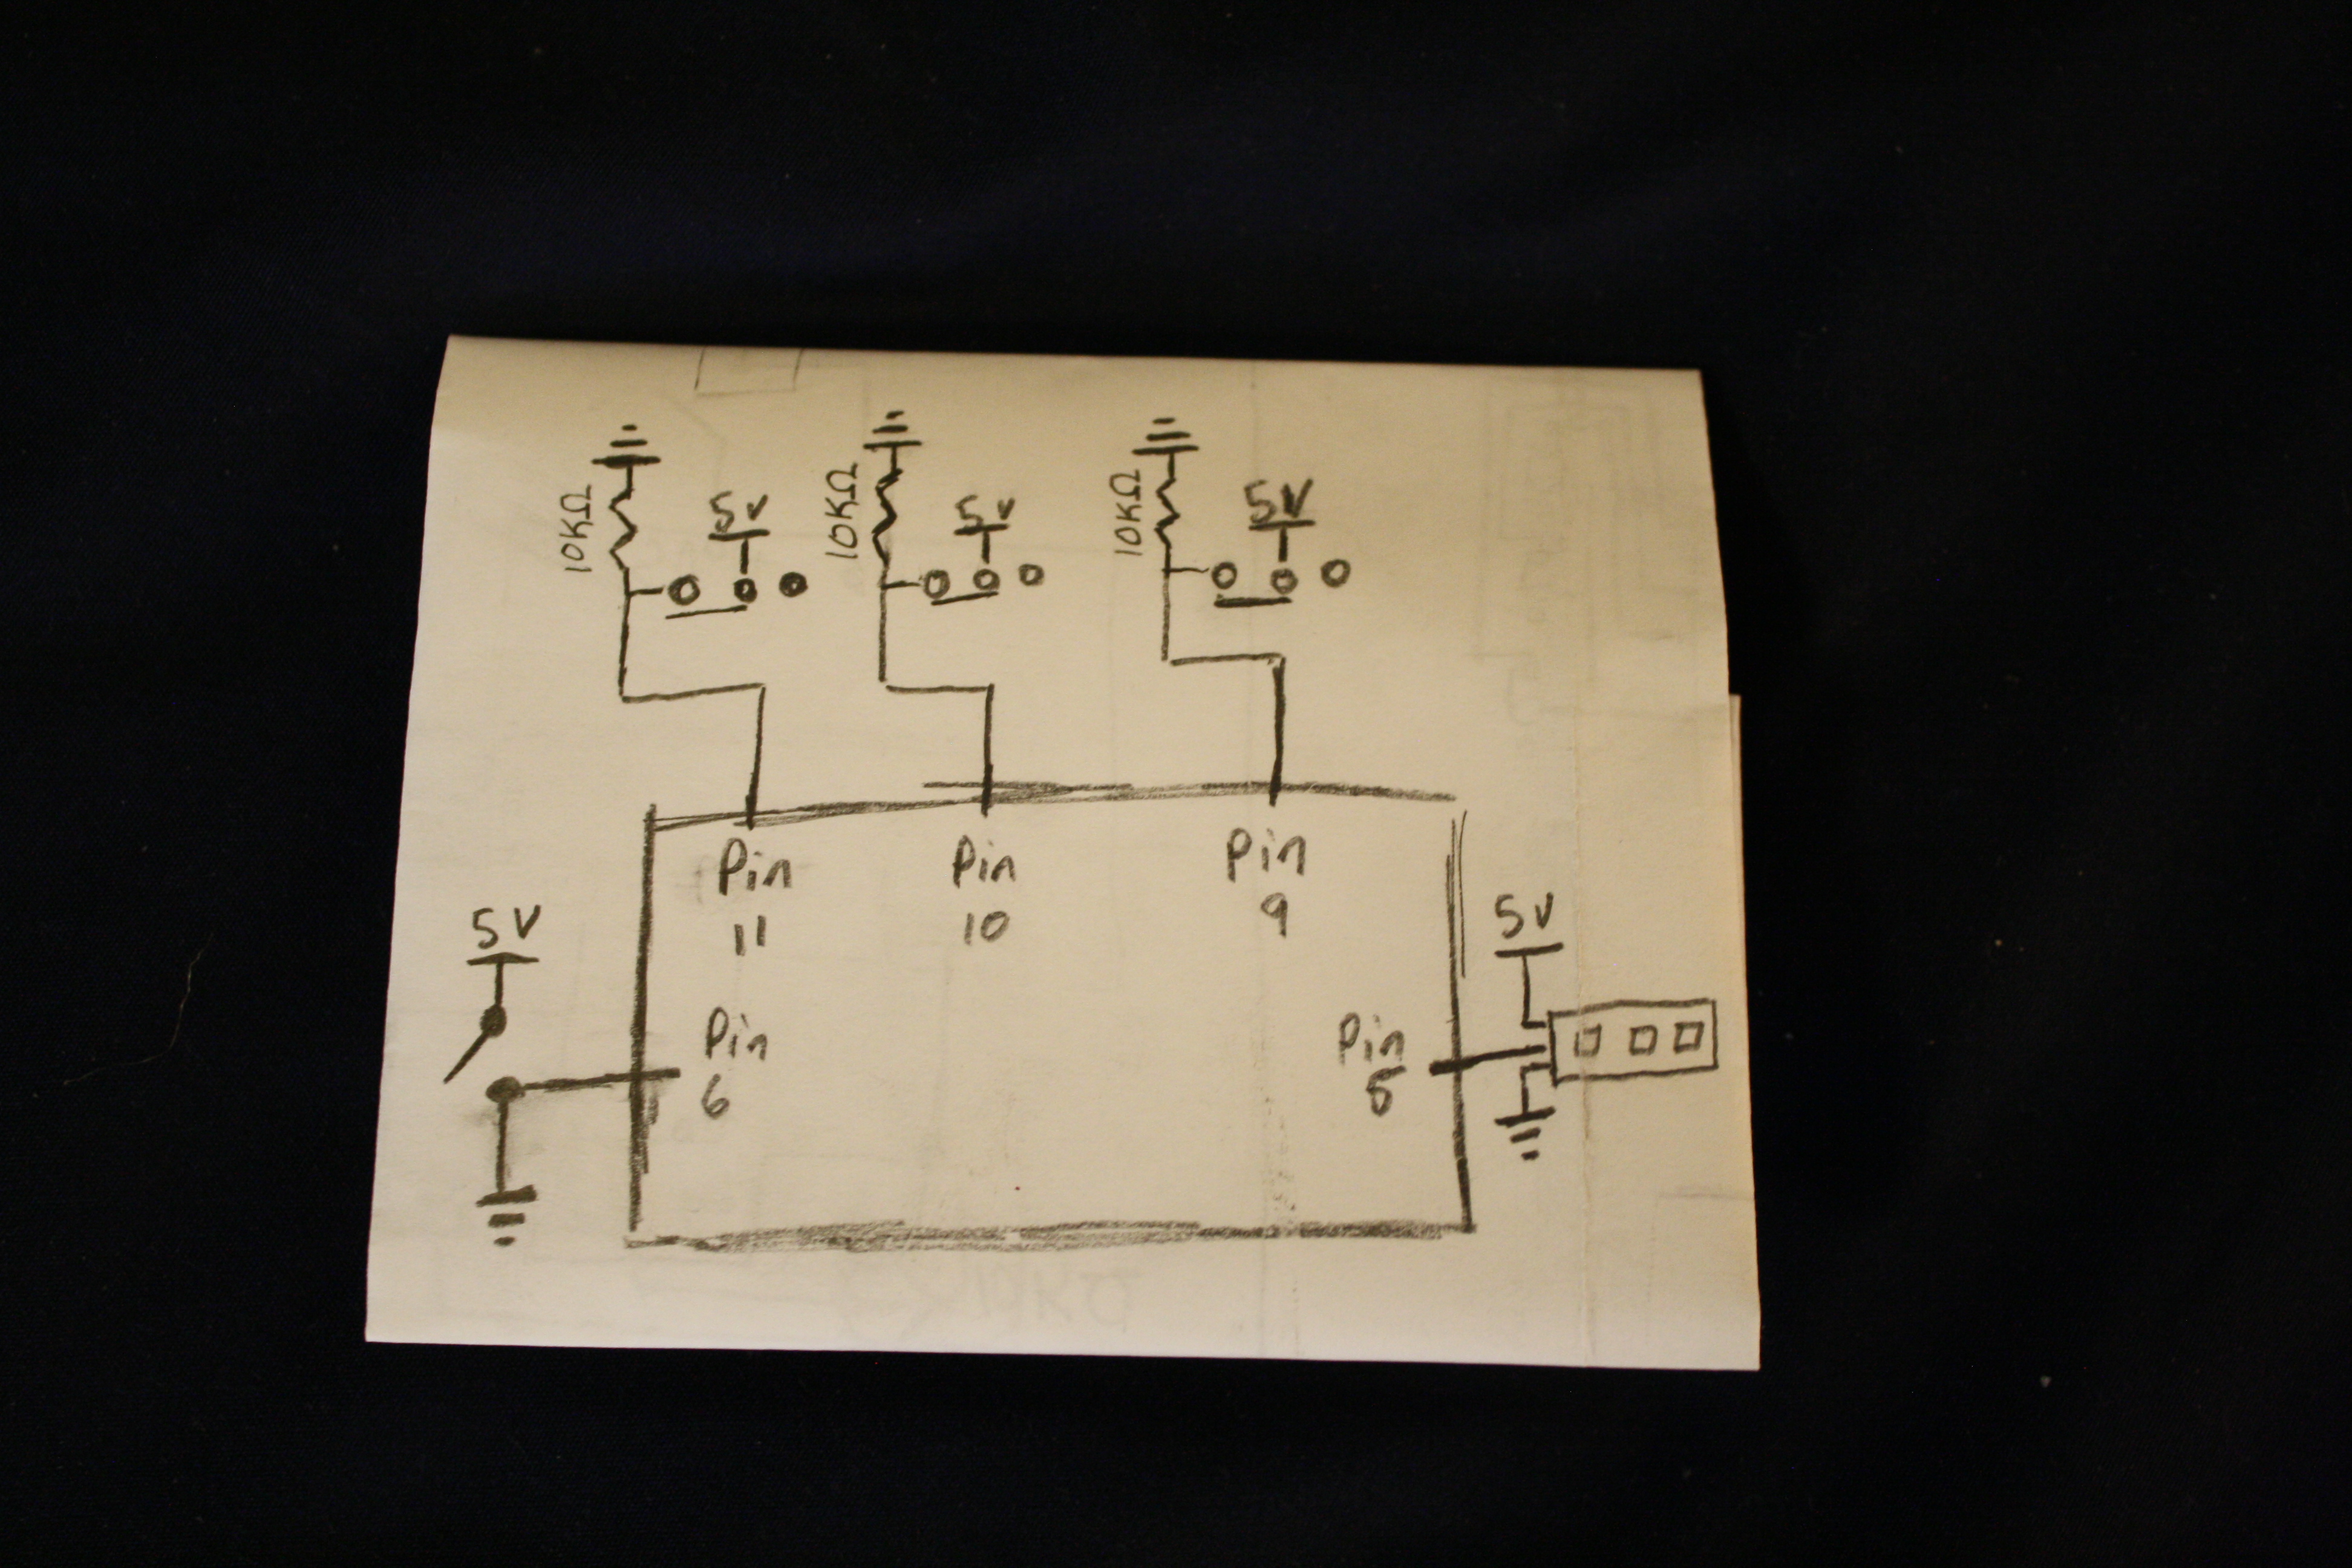
// Schematic for circut: https://clbwright.files.wordpress.com/2018/05/img_9968-e1526449729541.jpg?w=680
// Blog post on process: https://wp.me/p9Drf1-18

// Include libraries and schtuff.
#include <Adafruit_NeoPixel.h>
#ifdef __AVR__
  #include <avr/power.h>
#endif
// Which pin are you feeding info into for the IALED?
#define PIN            5
// How many NeoPixels are attached to the Arduino?
#define NUMPIXELS      5

// When we setup the NeoPixel library, we tell it how many pixels, and which pin to use to send signals.
// Note that for older NeoPixel strips you might need to change the third parameter--see the strandtest
// example for more information on possible values.
Adafruit_NeoPixel pixels = Adafruit_NeoPixel(NUMPIXELS, PIN, NEO_GRB + NEO_KHZ800);

int delayval = 50;            // set our delay value to 1/20th of a second, or 50 ms.
int redVal = 25;              // red starts as 25 (this is barely on, because I didn't love it when it was on full-chooch.)
int greenVal = 25;            // green starts at 25
int blueVal = 25;             // blue starts at 25

void setup() {
  pixels.begin();             // This initializes the NeoPixel library.
  pinMode(11, INPUT);         // Define pin 11 as an input
  pinMode(10, INPUT);         // Define pin 10 as an input
  pinMode(9, INPUT);          // Define pin 9 as an input
  pinMode(6, INPUT);          // Define pin 6 as an input
  pinMode(5, OUTPUT);         // Define pin 5 as an output
                                                    // below is a little loading "animation" that runs a little test of all the pixels on the first power-on
  for(int i = 0; i<NUMPIXELS; i++){                           // This for loop runs, and increments i each time it finishes the loop, until it hits whatever value is set for NUMPIXELS
    pixels.setPixelColor(i, pixels.Color(25,0,0));            // Set the pixel at that index to 25 red, and nothing else
    pixels.setPixelColor(i-1, pixels.Color(0,0,0));           // Set the pixel behind this to black
    pixels.show();                                            // This sends the updated pixel color to the hardware.
    delay(100);                                               // Delay for a period of time (in milliseconds).
    pixels.setPixelColor(NUMPIXELS-1, pixels.Color(0, 0, 0)); // now make sure the last pixel is off, because it will not turn off if we don't tell it to
    pixels.show();                                            // show that
  }
  for(int i = 0; i<NUMPIXELS; i++){
    pixels.setPixelColor(i, pixels.Color(0,25,0));            // set the pixel at that index to 25 green, and nothing else
    pixels.setPixelColor(i-1, pixels.Color(0,0,0));           // set whatever pixel is behind that index to black
    pixels.show();                                            // This sends the updated pixel color to the hardware.
    delay(100);                                               // Delay for a period of time (in milliseconds).
    pixels.setPixelColor(NUMPIXELS-1, pixels.Color(0, 0, 0)); // last pixel to black
    pixels.show();                                            // update color
  }
  for(int i = 0; i<NUMPIXELS; i++){
    pixels.setPixelColor(i, pixels.Color(0,0,25));            // set the pixel at that index to 25 blue, and nothing else
    pixels.setPixelColor(i-1, pixels.Color(0,0,0));           // set the pixel behind this to black
    pixels.show();                                            // This sends the updated pixel color to the hardware.
    delay(100);                                               // Delay for a period of time (in milliseconds).
    pixels.setPixelColor(NUMPIXELS-1, pixels.Color(0, 0, 0)); // last pixel to black
    pixels.show();                                            // update color
  }
}

void loop() {
  if(digitalRead(11) == HIGH){                        // If pin 11 is recieveing a voltage, set the red value to 25
    redVal = 25;
  }
  if(digitalRead(10) == HIGH){                        // If pin 10 is recieveing a voltage, set the green value to 25
    greenVal = 25;
  }
  if(digitalRead(9) == HIGH){                         // If pin 9 is recieveing a voltage, set the blue value to 25
    blueVal = 25;
  }
  while(digitalRead(6) == LOW){                       // while the button is not pressed, we run the turn on function. I might try making these if statements, and seeing how it works.
   turnOn();
  }
  while(digitalRead(6) == HIGH){                      // While the button is pressed, we run the turn off function
   turnOff();
  }
  redVal = 0;                                         // At the end of the loop, we set each pixel value to zero. Otherwise we would have to write if statements for each switch being off as well.
  greenVal = 0;
  blueVal = 0;
}
void turnOn(){                                                                      // This function is called turn on, and will turn each pixel on after a short delay between it an the last pixel.
  for(int i=0;i<NUMPIXELS;i++){                                                     // for loop, which runs until we have met the number of pixels in the strand.
      pixels.setPixelColor(i, pixels.Color(redVal,greenVal,blueVal));               // Set the pixel color to whatever value is defined at each
      pixels.show();                                                                // Show that color
      delay(delayval);                                                              // wait a bit before going to the next pixel
    }
}
void turnOff(){                                                                     // This is a function called turnOff, which turns off the LEDs one at a time, giving it a more interesting effect.
  for(int i=0; i<NUMPIXELS; i++){                                                   // For loop, which runs for number of pixels in the strand
    pixels.setPixelColor(i, pixels.Color(0, 0, 0));                                 // Sets the pixel color in question to black, or off
    pixels.show();                                                                  // Shows that pixel
    delay(delayval);                                                                // Waits a certain amount of time before running this loop on the next pixel
  }
}




Comments