


Hardware components | ||||||
 |
| × | 1 | |||
| × | 1 | ||||
 |
| × | 1 | |||
 |
| × | 1 | |||
 |
| × | 1 | |||
 |
| × | 1 | |||
In an era of always-listening devices, I wanted to explore an alternative: a voice assistant that is smart, responsive, and completely controlled by the user. My ESP32 Voice Assistant v0.1 project demonstrates how to build a powerful AI-driven device without the need for an "always-on" microphone. This not only offers a layer of privacy but also allows for deliberate control over API token usage (limited to 25 in server code).
This guide will walk you through integrating an ESP32, a Python server utilizing the Gemini API and gTTS, an I2S audio amplifier, and an OLED display into a functional voice assistant.
Features at a Glance- Offline Operation: Button-driven selection of predefined prompts for repeatable, microphone-free interaction.
- Gemini API Integration: Python server uses Gemini for intelligent text responses.
- Token-Efficient: Deliberate output length limitation (25) in the Python server to manage AI token consumption.
- Text-to-Speech (TTS): Real-time audio stream generation via the gTTS library.
- I2S Audio Output: High-quality sound playback through a MAX98357A amplifier and 4-ohm speaker.
- Visual Feedback: A 0.96" OLED display and status LEDs provide clear operational status (e.g., "Thinking...", "Speaking...", "Ready").
The project employs a client-server architecture. The ESP32 acts as the client, handling user input and audio output, while a Python server manages the AI and TTS processing.
- Initialization: ESP32 connects to Wi-Fi, displays "Ready, " and awaits input.
- User Input:
- "Next" Button: Cycles through an array of predefined text prompts stored on the ESP32.
- "Speak" Button: Triggers the process. The currently selected prompt is sent via HTTP GET request to the Python server.
- Python Server Processing:
- Upon receiving the prompt, the server sends it to the Gemini API.
- Gemini returns a text response. This response is then truncated or filtered to a predefined length to conserve AI tokens.
- The processed text is fed into the gTTS library, which generates an audio stream.
- Audio Playback: The server streams the audio back to the ESP32. The ESP32 utilizes its I2S peripheral to play this stream through the MAX98357A amplifier and speaker.
- Status Updates: The OLED display shows "Thinking..." during server communication and "Speaking..." during audio playback, with corresponding LED indicators.
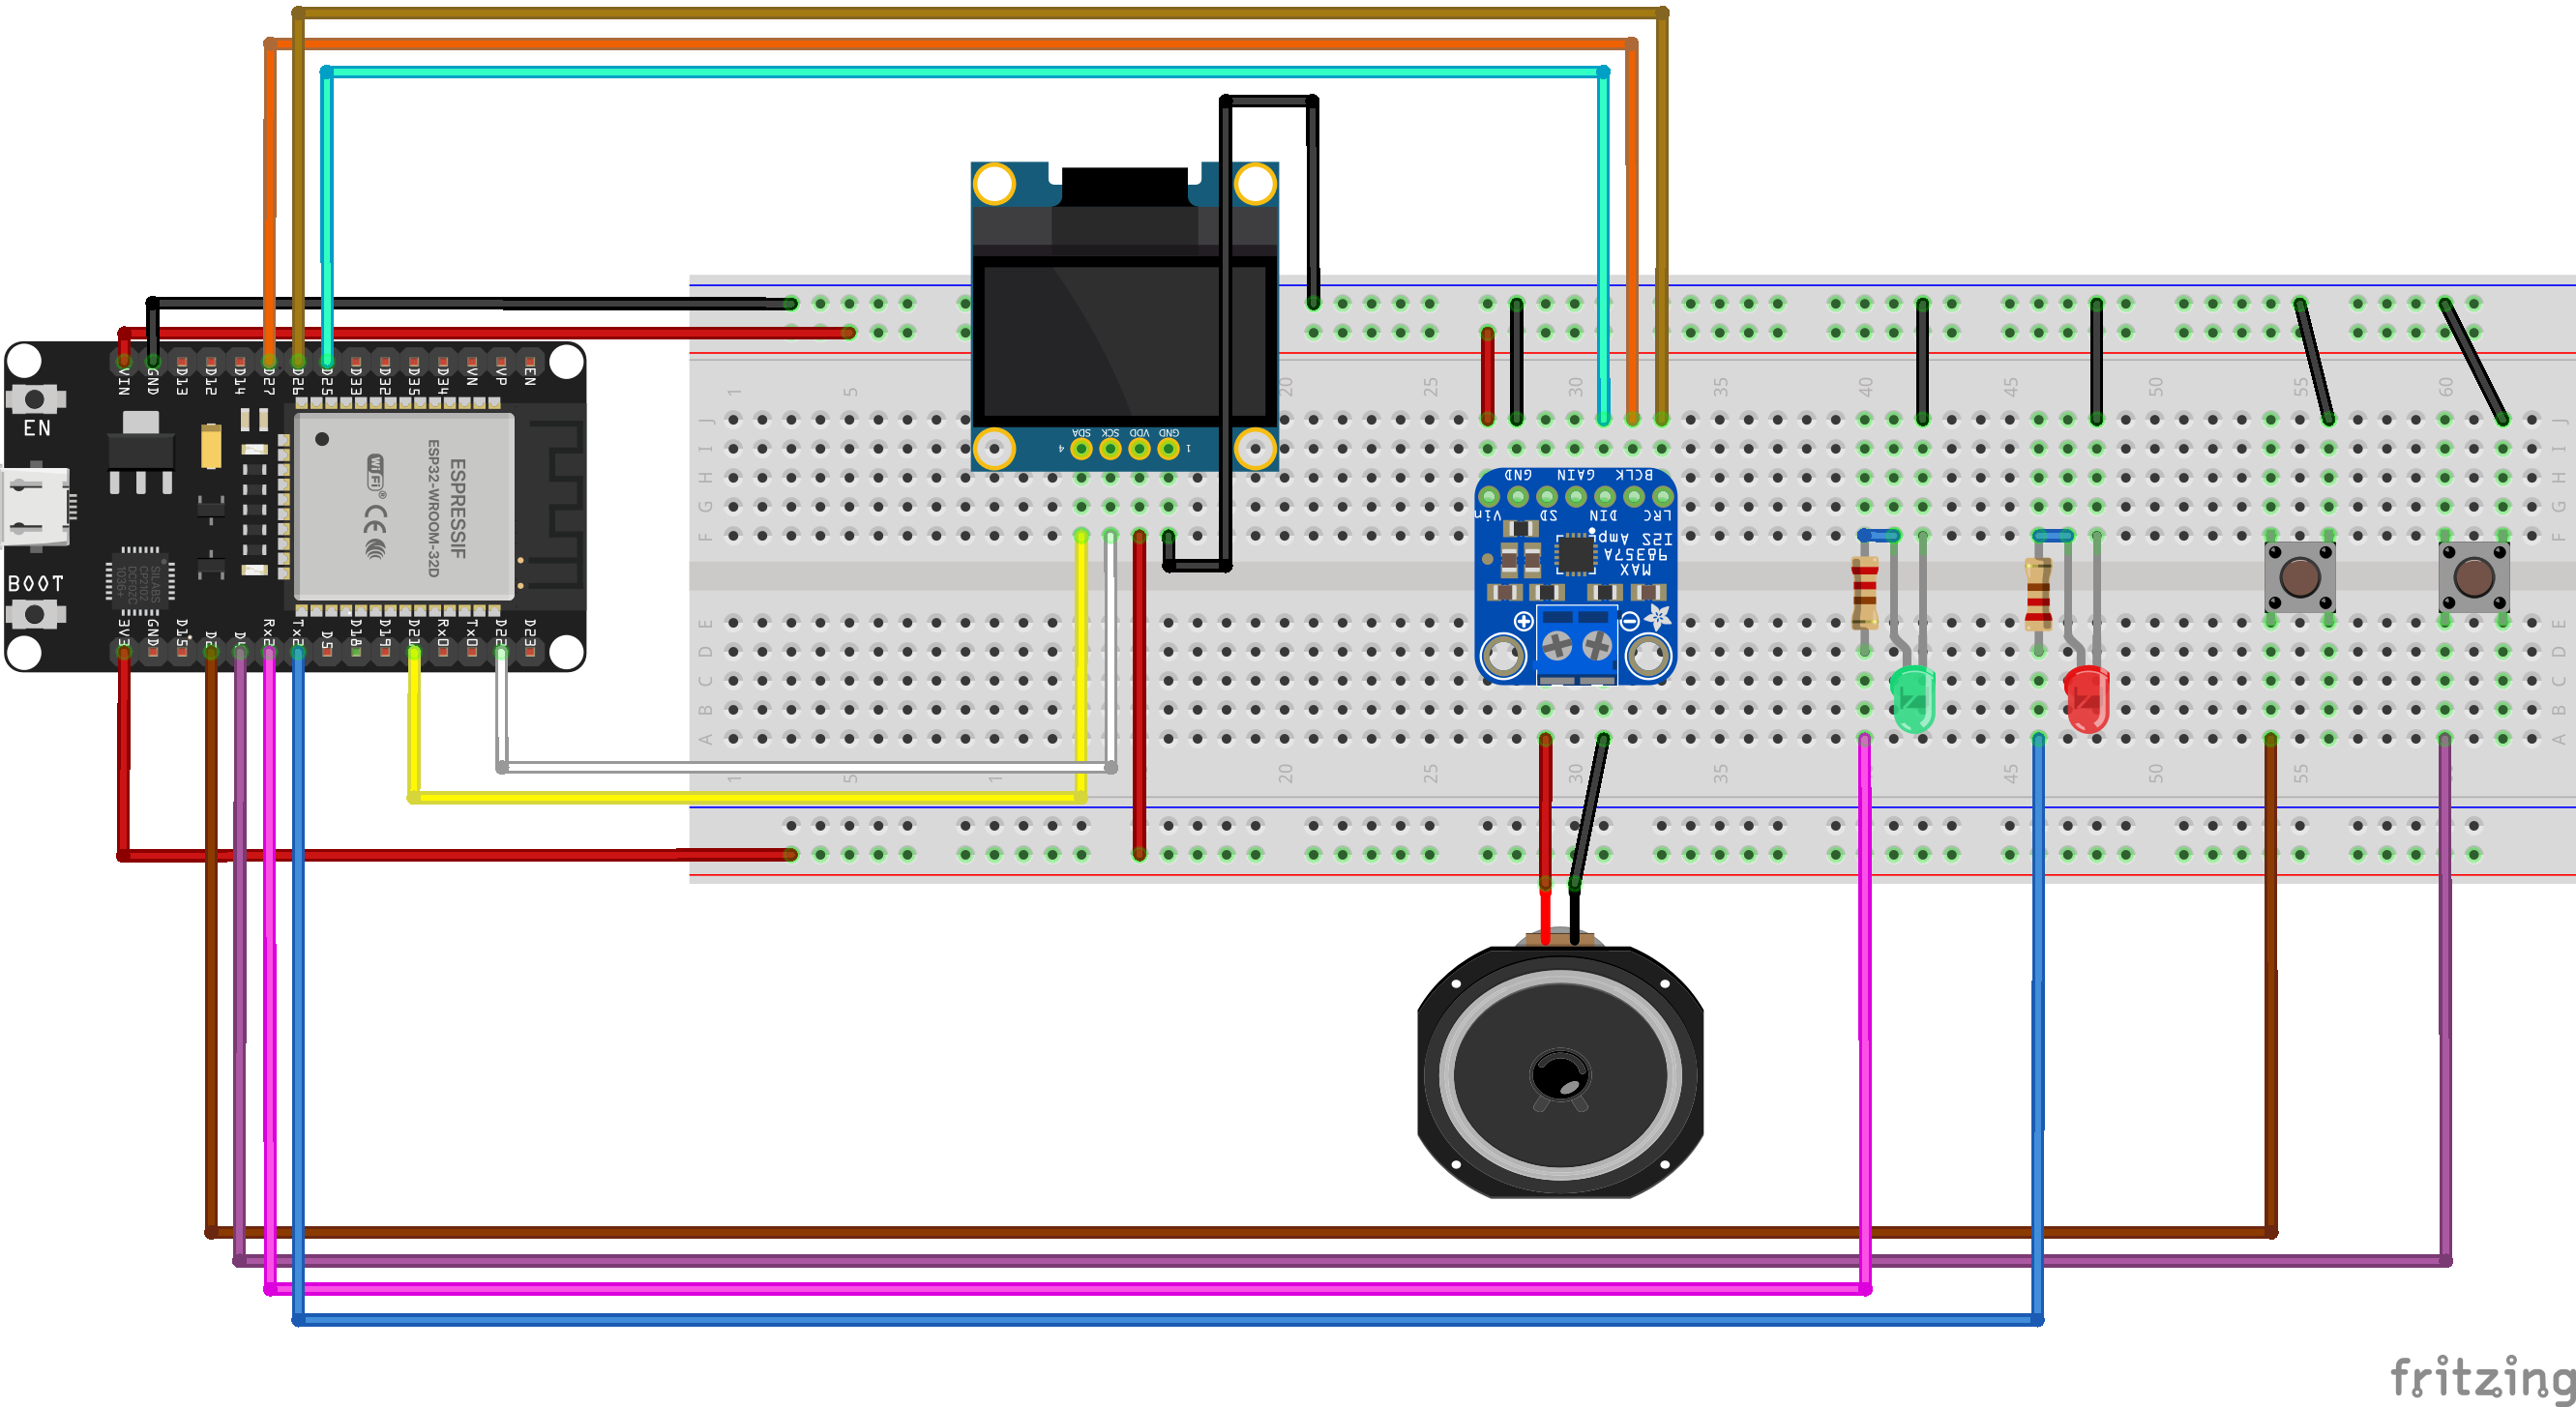
Hardware Components
- Microcontroller: ESP32 Dev Kit C
- Display: 0.96" OLED Display (SSD1306)
- Audio Output: MAX98357A I2S Class-D Amplifier + 8-ohm speaker
- User Input: 2x Tactile Buttons
- Visual Cues: Red and Green LEDs
- Miscellaneous: Breadboard, jumper wires, 1A USB power supply
(All GND pins should be connected to a common ground rail.)
Software Setup: Firmware & ServerThe project requires setting up both the ESP32 firmware (using Arduino IDE) and a Python server. Get the code here.
1. ESP32 Firmware Setup (Arduino IDE)- Install Arduino IDE and add the ESP32 board manager
- Install "esp32" package from Boards Manager.
- Install necessary libraries via Library Manager: "Adafruit GFX Library" and "Adafruit SSD1306 Library."
- Upload the provided firmware code (ensure Wi-Fi credentials are updated).
- Ensure Python 3 is installed.
- Create and activate a virtual environment.
- Install dependencies: pip install -r requirements.txt
- Create a.env file with GEMINI_API_KEY="YOUR_API_KEY_HERE".
- Run the server: python server.py.
This project provides a solid foundation for building interactive AI-driven hardware. It highlights the power of combining readily available microcontrollers with robust AI APIs and efficient TTS solutions. Future enhancements could include adding more complex prompt management, a web-based configuration interface, or even integration with local voice models for fully air-gapped operation.
I hope this guide inspires you to build your own token-efficient, privacy-conscious voice assistant!


Comments