

Hardware components | ||||||
 |
| × | 5 | |||
 |
| × | 3 | |||
 |
| × | 1 | |||
| × | 1 | ||||
 |
| × | 1 | |||
Software apps and online services | ||||||
| ||||||
| ||||||
Hand tools and fabrication machines | ||||||
 |
| |||||
| ||||||
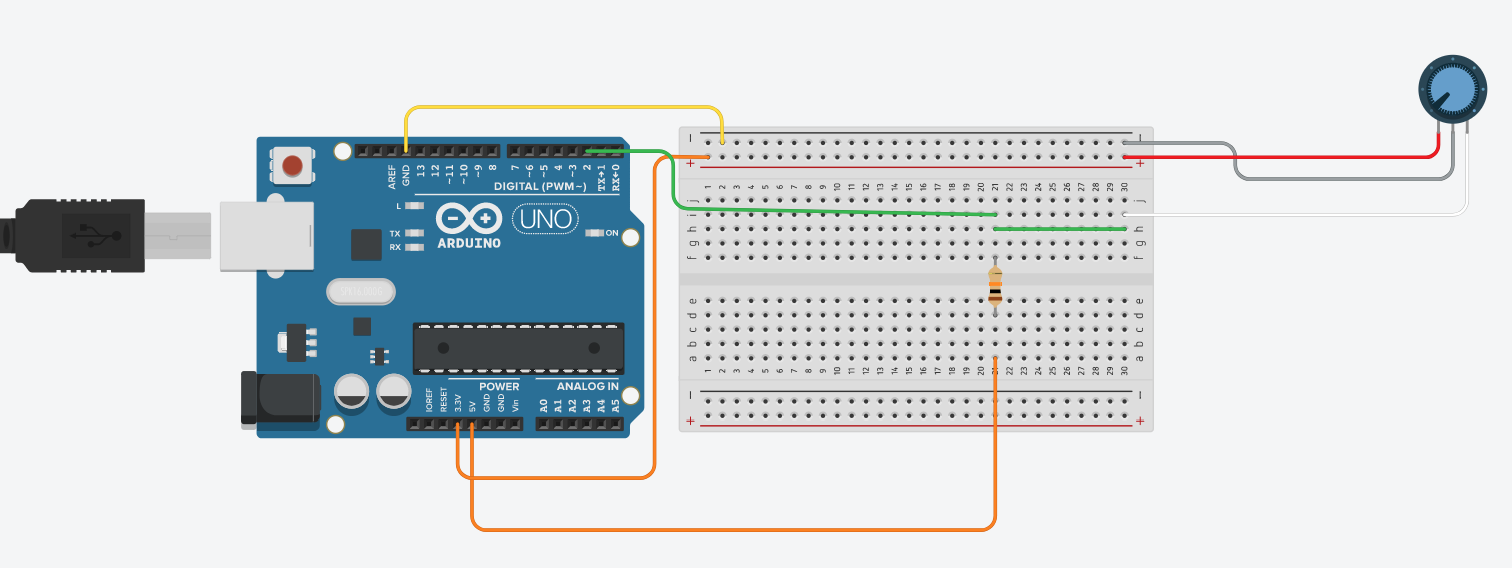
You need to wire up the photon on the breadboard like in the schematic. If everything was done correctly, it should look like this:
The relay should look like this:
Don't worry about the backside yet, we will come back to that later.
NextYou will need to open the Blynk app and create a new project.
Once you have created a project in Blynk you will receive an email that gives you your authentication code which you will then replace in the code where it says "your auth code here".
Then once in the project open the widget box and select the button.
Then set up the button, as shown below.
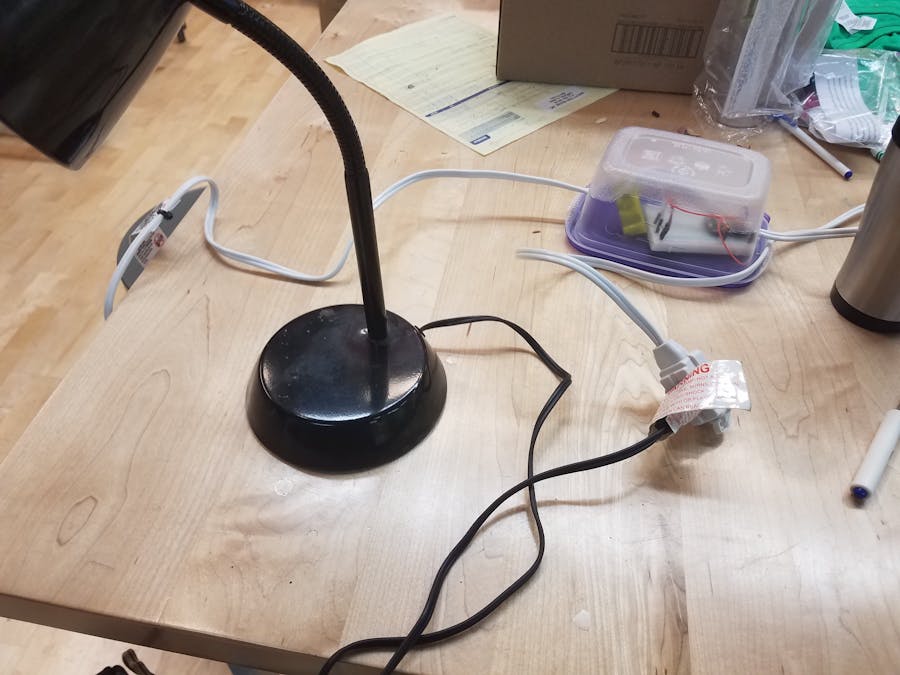
Get either your extension cord or lamp wire and separate the 2 lines from each other. Then cut and strip one side of the wire. Next tin the exposed wires.
Afterwards you can plug them into the relay's common and normally closed making sure that the wire in common goes directly to the plug that is going in the wall.
LastThen all that is left is to put the wires into your Tupperware and supply power to your photon either from a battery or the wall.


Comments