

Hardware components | ||||||
 |
| × | 1 | |||
 |
| × | 1 | |||
 |
| × | 1 | |||
 |
| × | 1 | |||
Software apps and online services | ||||||
 |
| |||||
 |
| |||||
In this tutorial, We will be building an amazing weather station that uses Ubidots IoT services with just couples of lines of Python using Zerynth IDE.
This tutorial will show you how to quickly build a weather station in Python with Zerynth IDE, this weather data will then be posted to Ubidots IoT services.
The Ubidots platform is one of the easiest cloud platforms to use on the online due to its simple setup which still allows users to quickly build into more complex projects as their understanding of the platform grows.
The first question that would pop into your mind is why ubidots platform?Well, First of all it is very easy to integrate your data in their cloud services, With just a couple of lines you have full capability of their enormous data collection, analysis, and visualization tools.
At this point I'm sure many of you are asking why XinaBox ?
My answer to that question is simple, I am no fan of soldering and wiring. The ecosystem speaks exactly to my needs so I can dive straight into the coding where all the fun is. (Agreed to Disagreed)
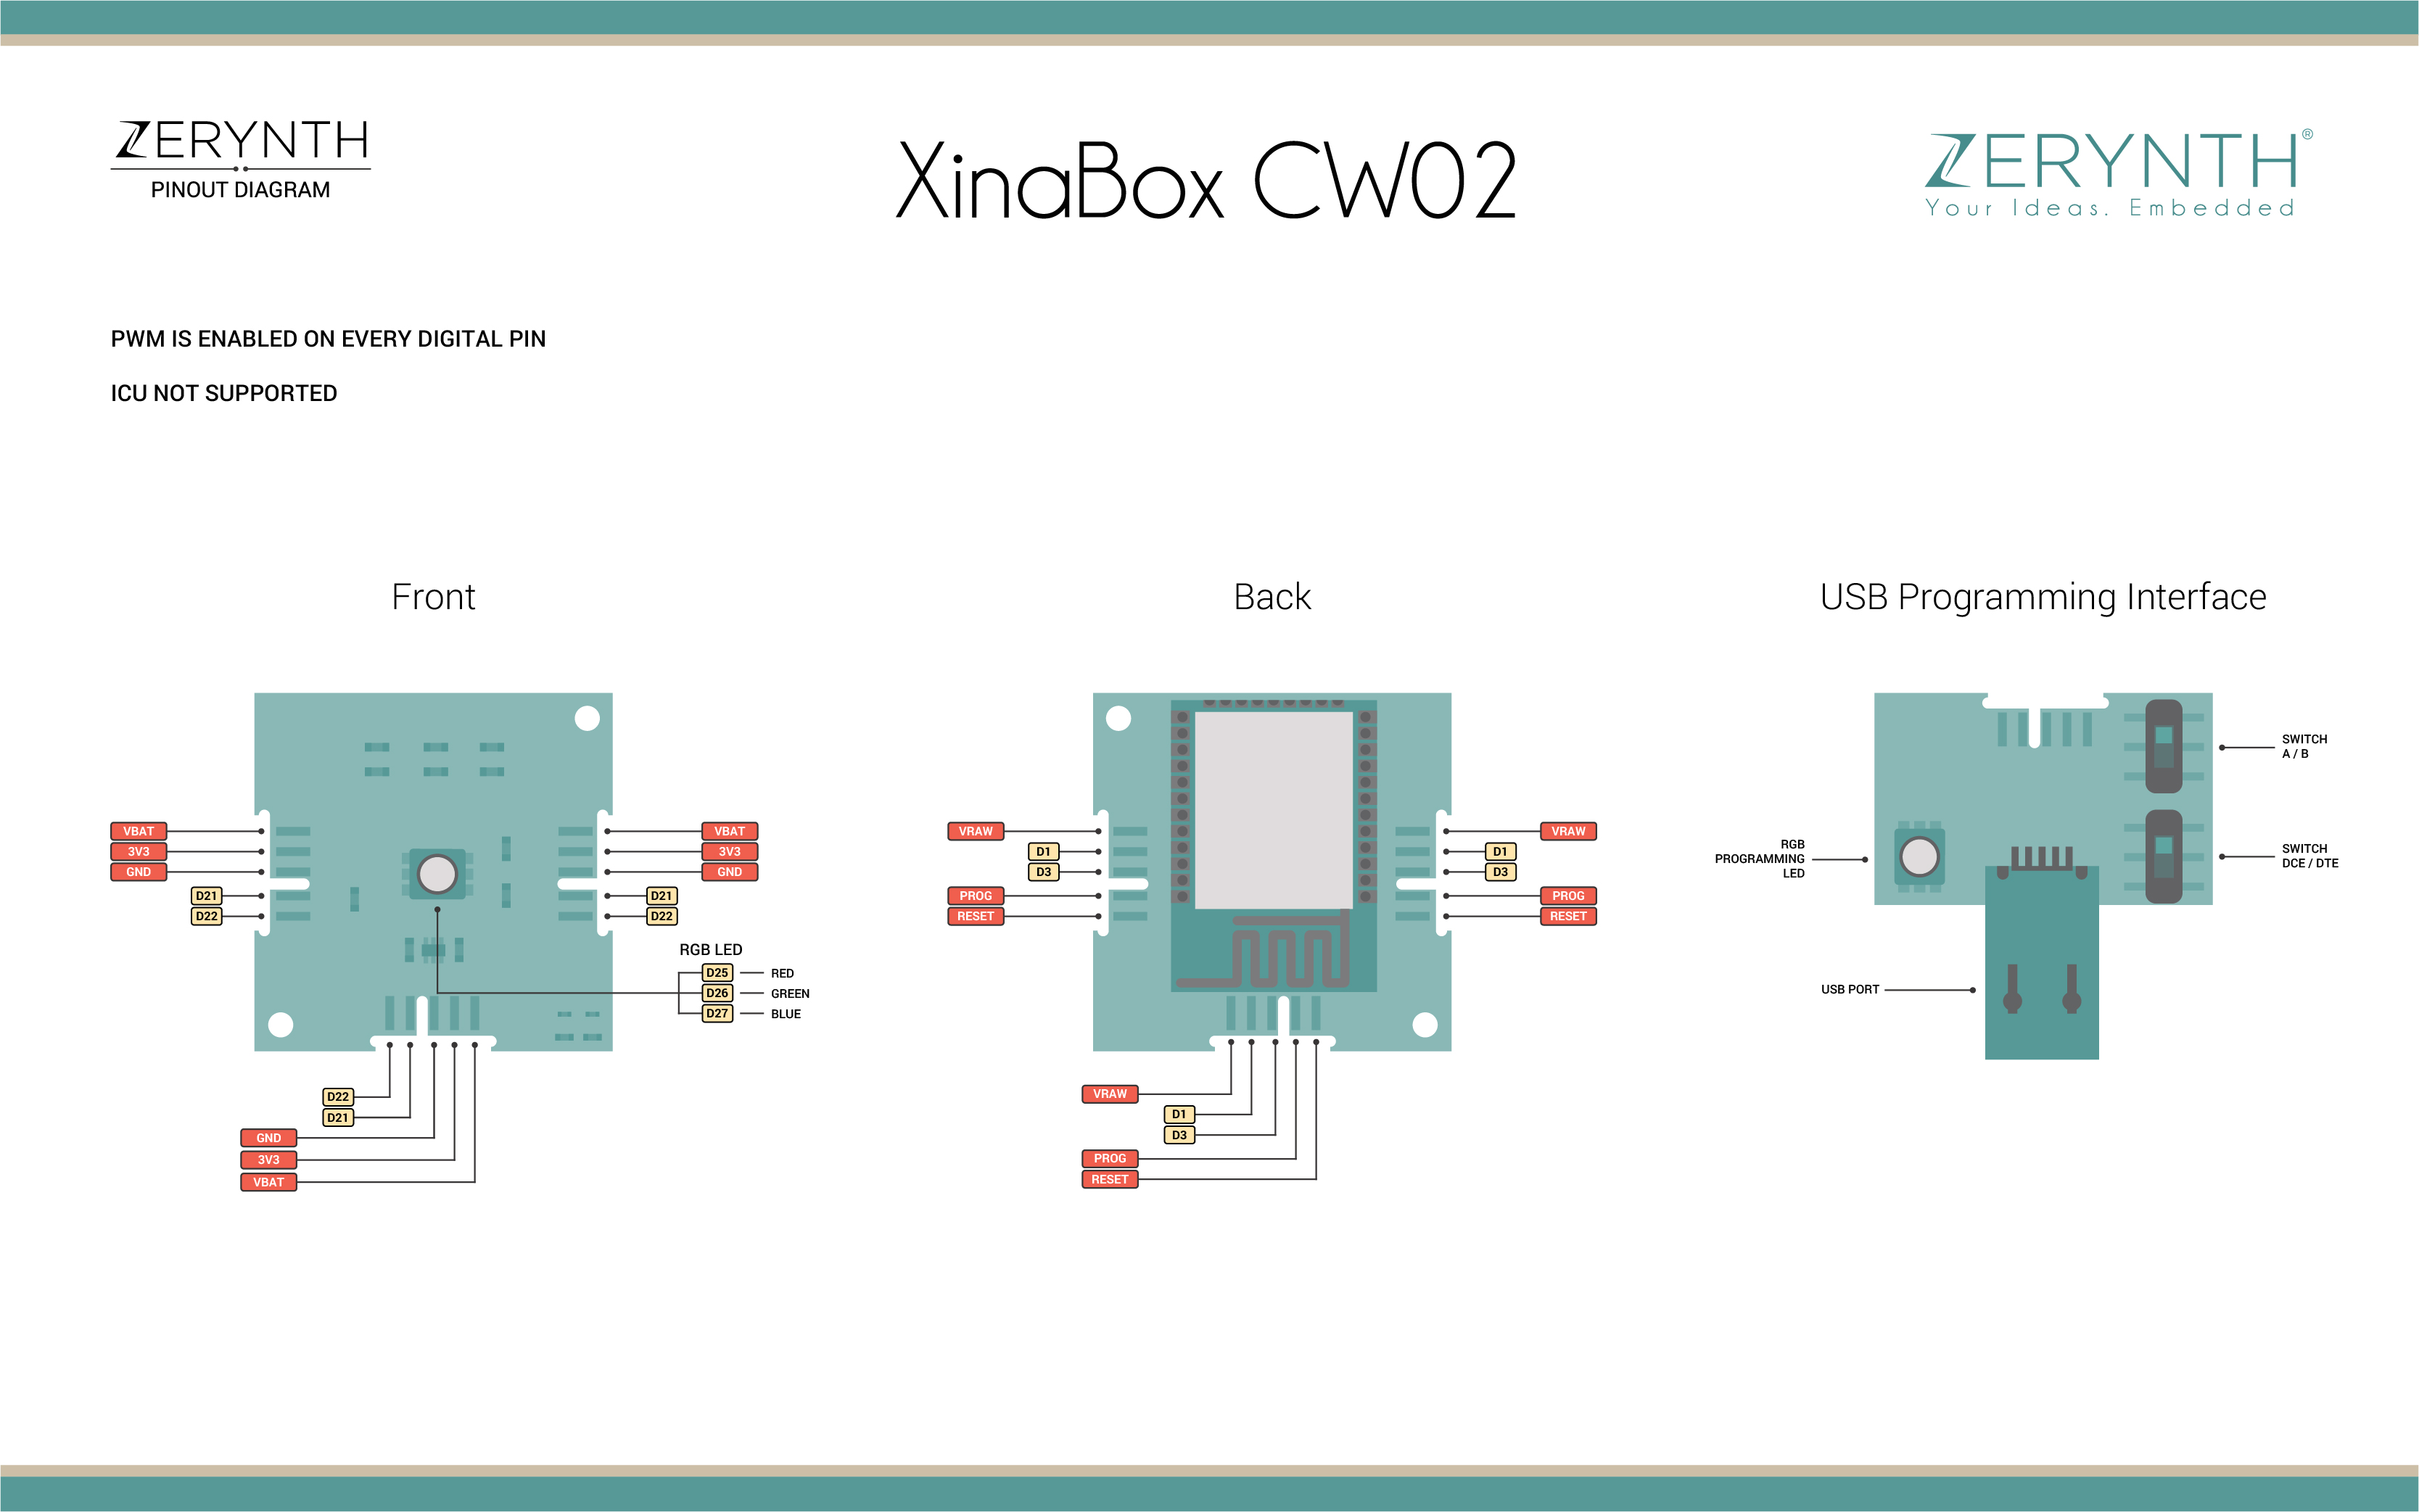
For the purpose of this tutorial, I will be making use of the CW02(ESP32) as my device of choice, but with Zerynth IDE you have a wide range of supported devices listed here:https://www.zerynth.com/zerynth-supported-devices/
Step-By-Step Instructions:Step 1: Software SetupAssemble your xChips
If you have never worked with XinaBox xChips before, check this Quick-Start guide on how to assemble your xChips.
Zerynth Setup, Connect and Virtualize your device
If this is your first time using Zerynth studio, Follow this documentation on getting started with Zerynth studio IDE.
After the virtualization, the XinaBox CW02 is ready to be programmed and the Zerynth scripts uploaded. Just clone the example “Controlled publish period”.
Once you have successfully cloned the project, copy and paste the code provided at the bottom of this tutorial into "main.py" file (yes, replace all the code that was included originally).
Are we done? Nope just a few more steps.
Ok, now to modify the code to match your Wi-Fi network and adding in the changes for your API token.
To add your Wi-Fi settings navigate in "main.py," and scroll down to line 42. This is where you need to add your network info.
   # FOR THIS EXAMPLE TO WORK, "Network-Name" AND "Wifi-Password" MUST BE SET
   # TO MATCH YOUR ACTUAL NETWORK CONFIGURATION
   wifi.link("Network-Name",wifi.WIFI_WPA2,"Wifi-Password")
Once completed we move on adding your API token, open "device.conf.json." Inside this config file we need to assign our CW02(ESP32) a unique device label if desired and enter in the API token provided by Ubidots.
As can be seen above the device_label, cw02-esp32 has been assigned to my device. This means that your request will be sent with these parameters to Ubidots.
So what does the code do ?
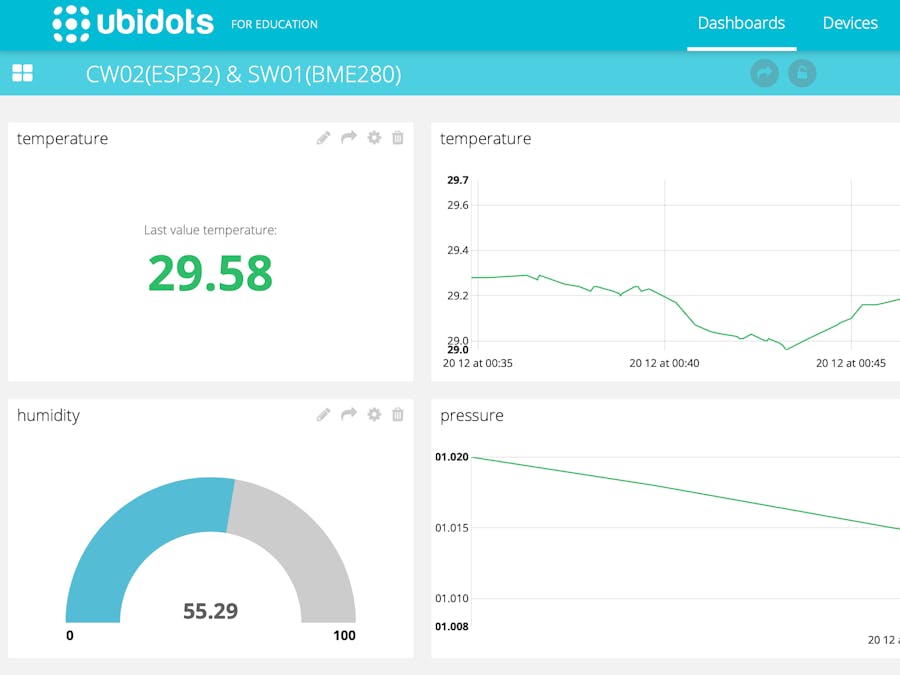
Simply put the code sends data to Ubidots MQTT server every 10 seconds. The data obtained from the SW01(BME280) include the following parameters:
Note: This examples reports data every 10 seconds if you would like it to be faster you need to modify the publish_period at line 52. In order for this code to run the above modifications need to be made.
Step 3: ProgrammingNow that the code has been modified to match your network we are ready to get into the programming.
You must now the code verify.
To verify, press the "check-mark" icon which can found below
Once the code has been verified, it's time to Uplink the code into the physical device. To uplink the script, press the "up arrow" icon found above.
Once start you will seen some text presented in the terminal log and the GREEN LED will flash on the IP01, once the uplink process is complete there will be a prompt in the terminal log stating the following "Uplink Done," this means the upload process was successful.
Now that our device is programmed we can open the console to view some debug info from our device.
At first, your console will report the connection status of both the Wi-Fi anf MQTT server. After connections have been made, each time the device sends data to cloud a log will be printed in the console.
Step 4: Check the AnalyticsLogin to your Ubidots accounts, navigate to the "Device" tab, then name your device and setup your variables for presentation in your dashboard.
Happy Coding!


Comments