


Hardware components | ||||||
 |
| × | 1 | |||
 |
| × | 1 | |||
 |
| × | 1 | |||
 |
| × | 1 | |||
 |
| × | 1 | |||
 |
| × | 1 | |||
Software apps and online services | ||||||
 |
| |||||
In this IoT project, we will demonstrate how to turn an ESP8266 module into a standalone web server. Unlike standard Wi-Fi projects that require a home router, this system operates in Access Point (AP) mode. This means the ESP module creates its own Wi-Fi network, allowing you to control hardware directly from your mobile phone browser anywhere—even in places with no internet connection.
DemonstrationHow it WorksThe ESP8266 is programmed to host a simple website. When you power the module, it broadcasts a Wi-Fi SSID named ESPI266 LED IP. By connecting your smartphone to this network and navigating to the specific IP address (192.168.4.1), you access a control dashboard. This dashboard allows you to toggle LEDs on and off and even remap the GPIO pins (D0, D2, D6) dynamically through the software interface.
Key Features:• Standalone Wi-Fi: No external router or internet data required.
• Browser Control: Works on any smartphone or laptop without installing an app.
• Dynamic Mapping: Change which on-screen button controls which LED instantly.
Components List• ESP8266 Module (NodeMCU or similar)
• 3x LEDs (Any colour)
• 3x Resistors (220 Ohms)
• Breadboard & Jumper Wires
• Micro USB Cable (For programming and power)
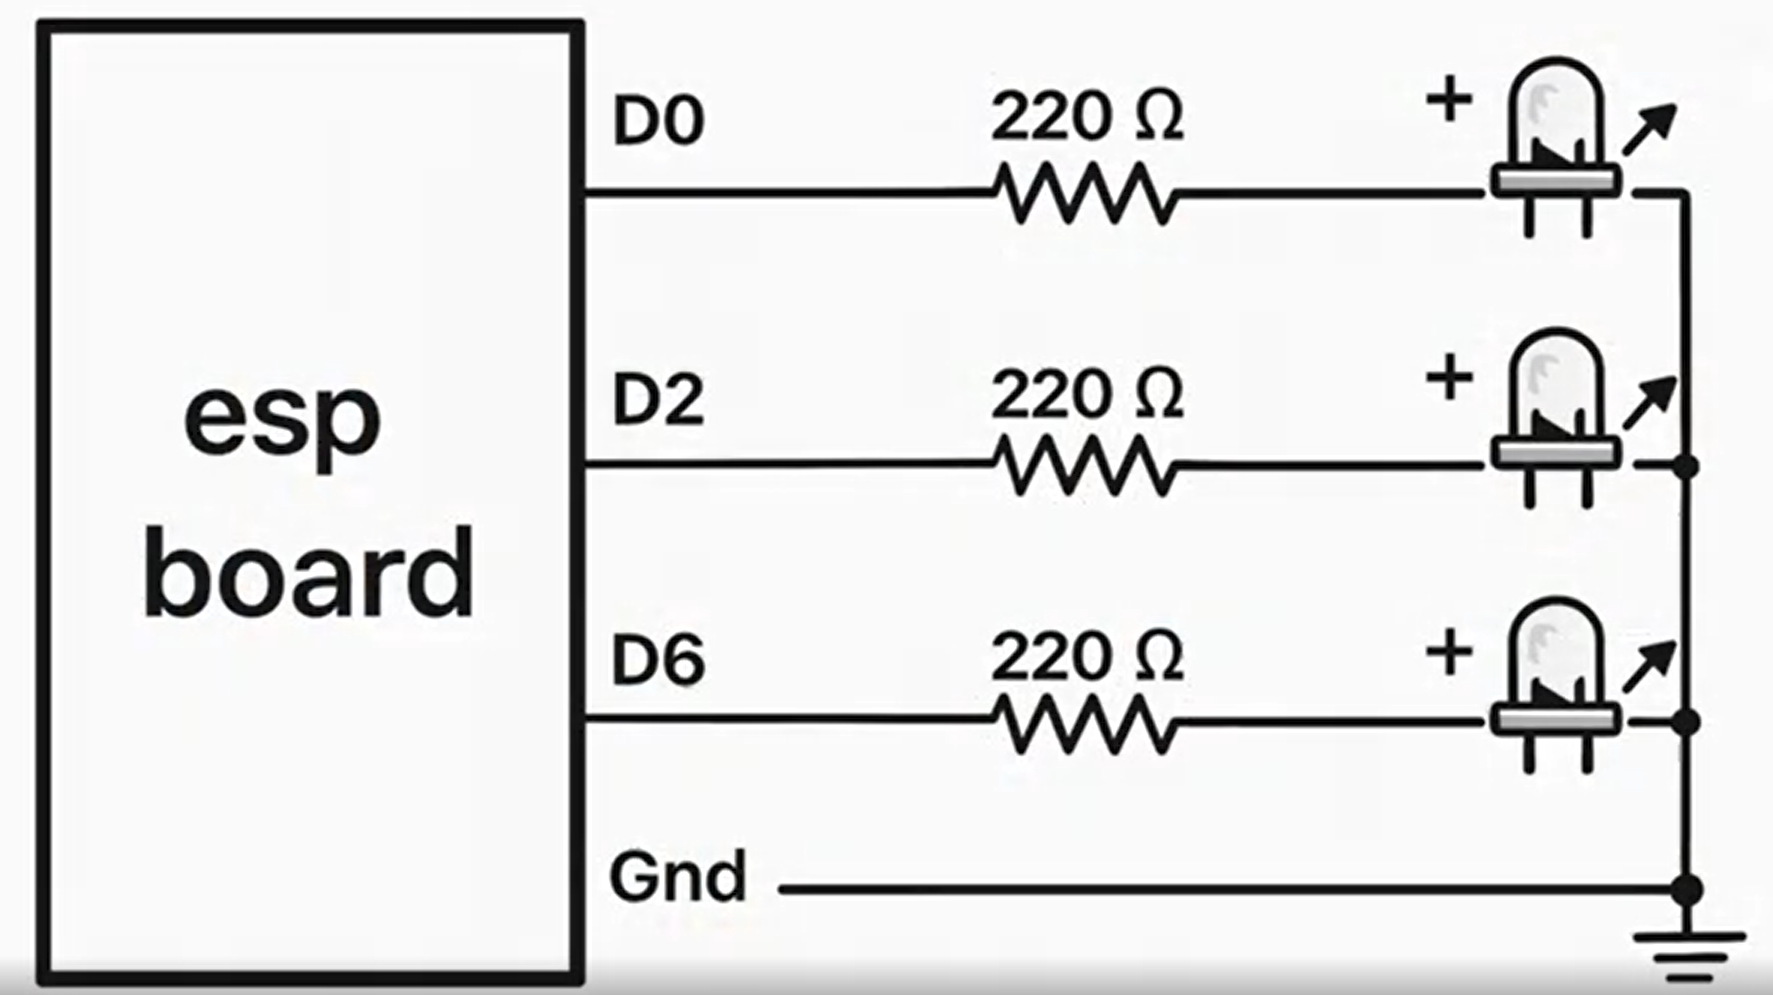
Step-by-Step InstructionsStep 1: Circuit Assembly Insert the ESP8266 module into your breadboard. Connect the three 220-ohm resistors to pins D0, D2, and D6. Connect the positive terminal of each LED to a resistor, and short all negative LED terminals together to the GND (Ground) pin on the ESP module.
Step 2: Uploading the Firmware Open the Arduino IDE and select your specific ESP board and the correct Port. Copy the code from the GitHub link (provided in the external links section) and paste it into your sketch. Click upload. You will see the ESP LED blinking as the code writes to the memory address.
Step 3: Connecting to the Access Point Once uploaded, open the Wi-Fi settings on your mobile phone. Look for the network named ESPI266 LED IP. Connect using the default password: 12345678. If your phone prompts that there is "No Internet Connection, " select the option to "Keep Wi-Fi connection".
Step 4: Web Control Open your mobile web browser and type 192.168.4.1 into the address bar. For the best experience, enable "Desktop site" in your browser settings. You can now control the three LEDs. You can also reconfigure the buttons by selecting different GPIO numbers (Default: 0, 2, 6) in the interface.
Full Tutorial VideoThe web server GUI


Comments