


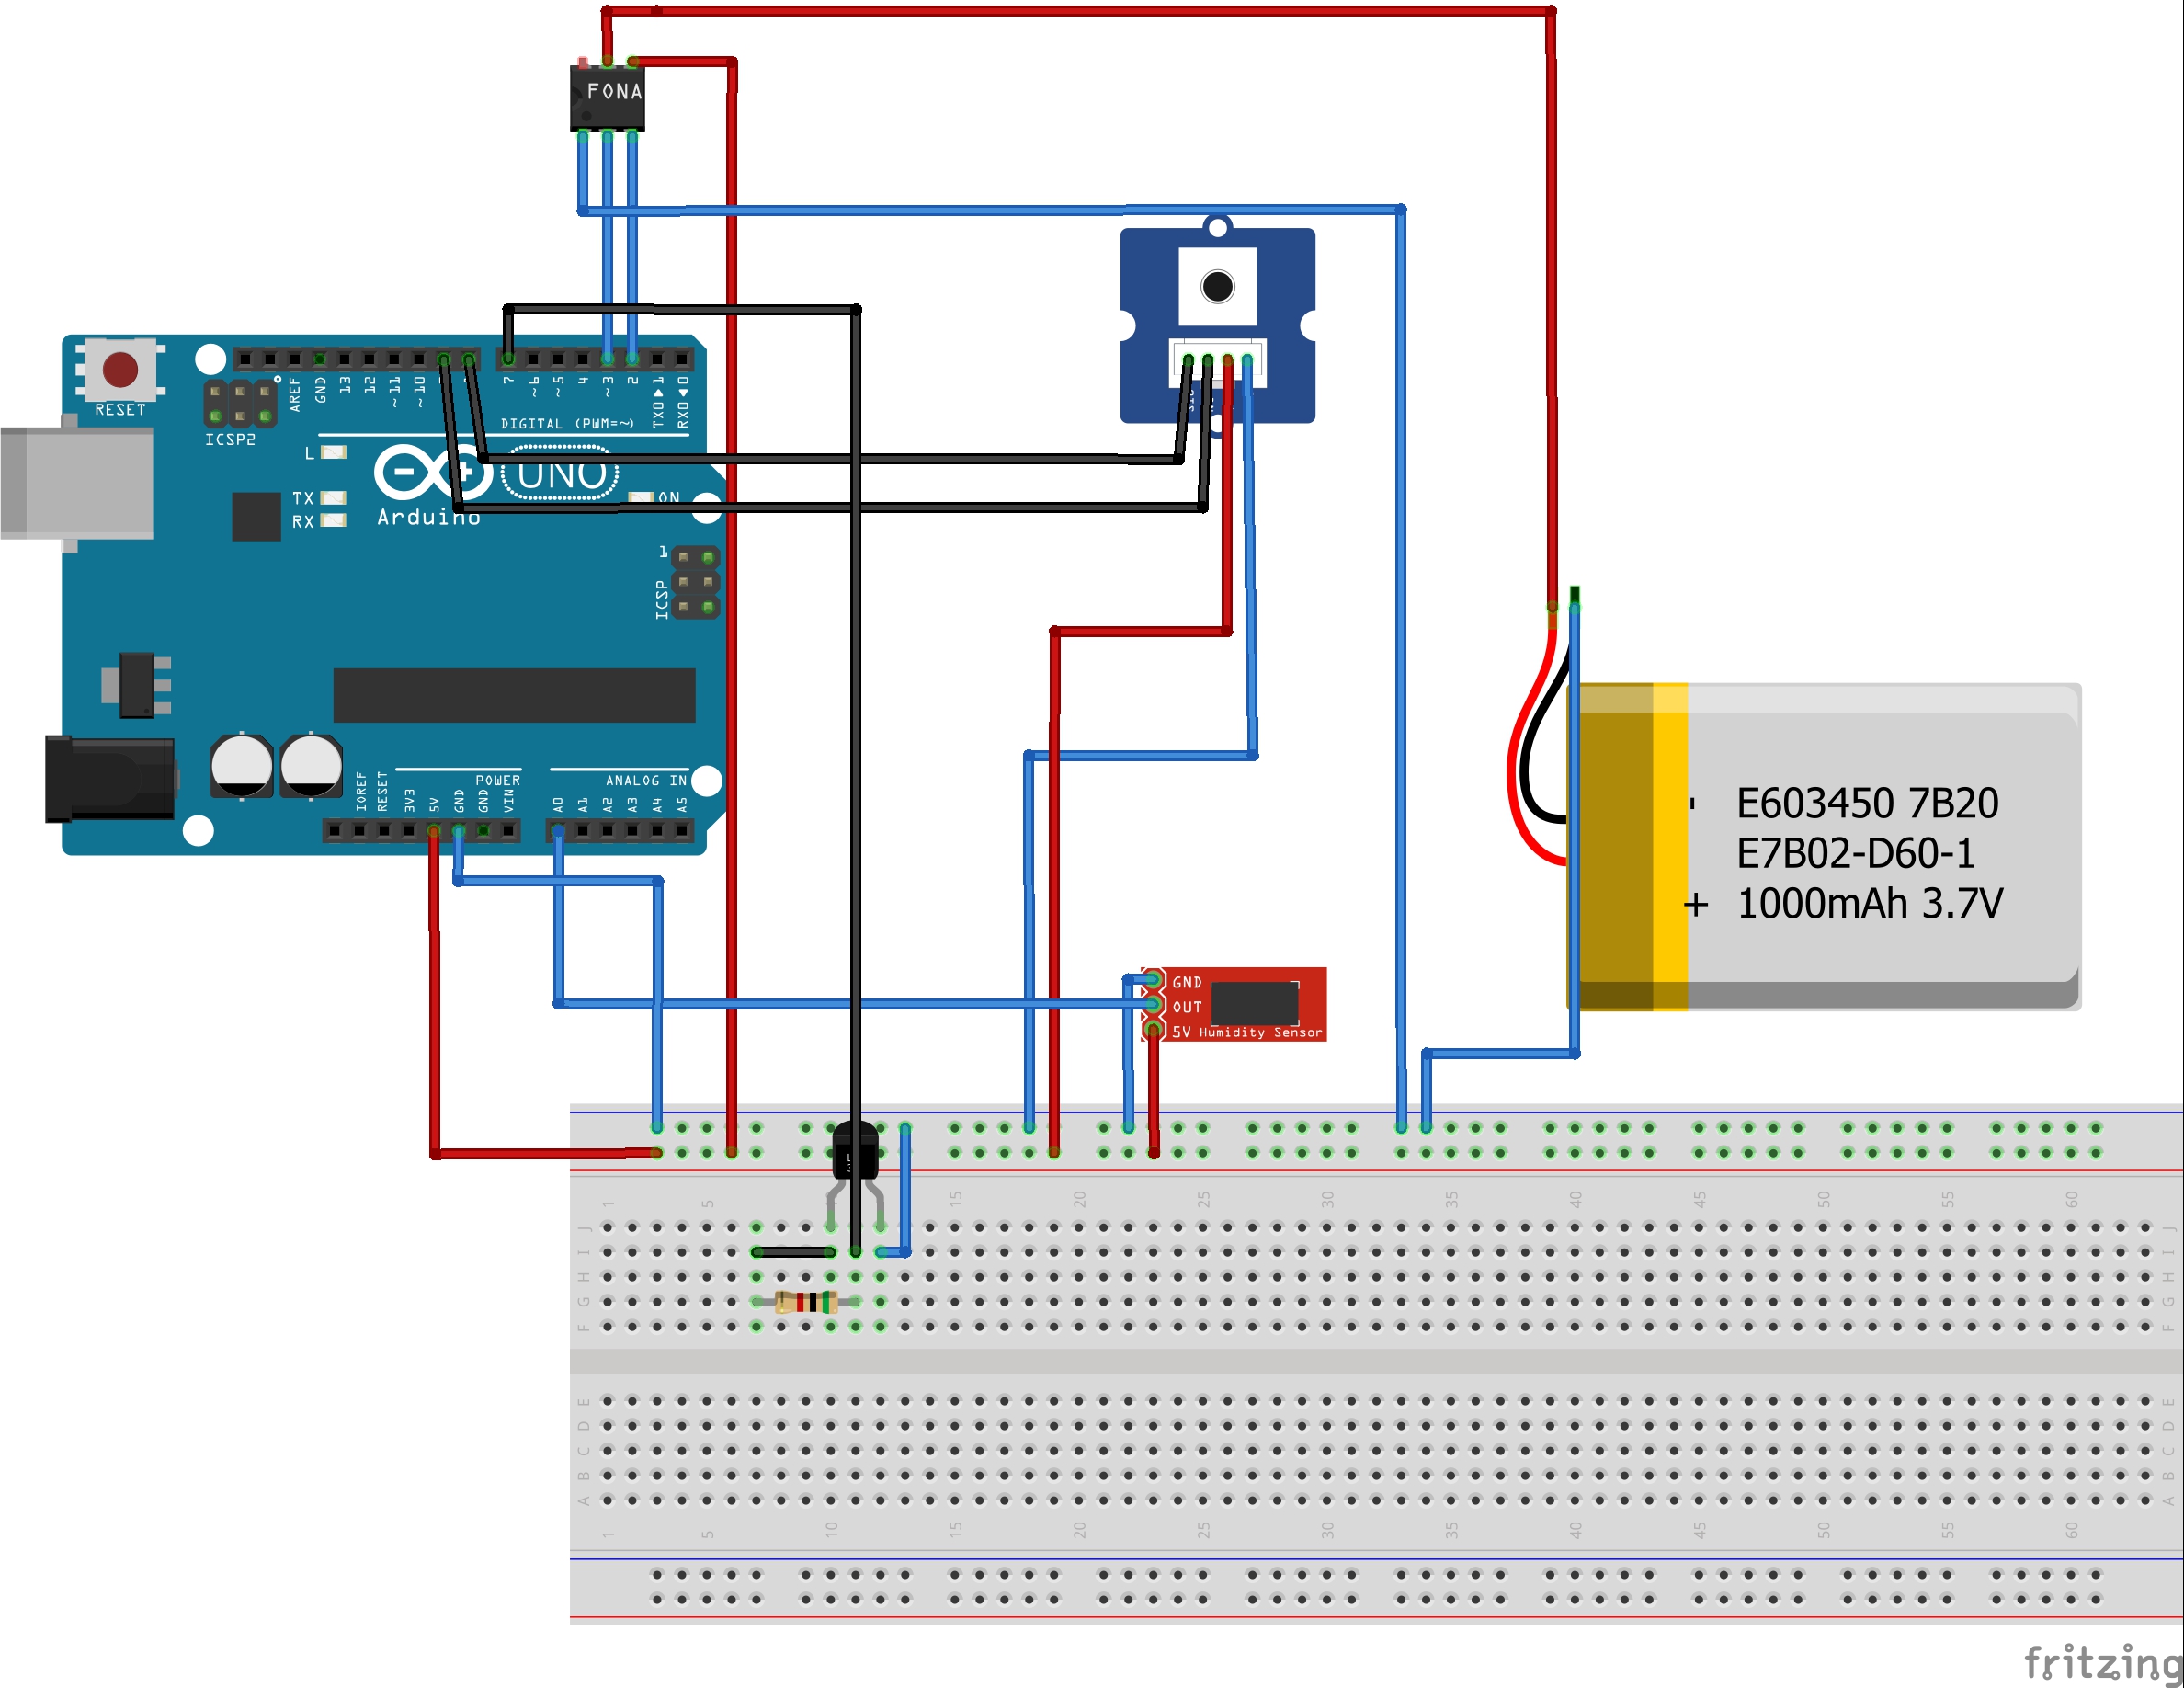
Hardware components | ||||||
 |
| × | 1 | |||
 |
| × | 1 | |||
| × | 1 | ||||
| × | 1 | ||||
| × | 1 | ||||
| × | 1 | ||||
Software apps and online services | ||||||
 |
| |||||
 |
| |||||
Hand tools and fabrication machines | ||||||
 |
| |||||
INTRO
Hello,
We are Jakob Monteyne and Benjamin Decoene, at the moment we study science and technology at VTI-Veurne. We chose for a project about the composting process. After a bit of research we found a specific way of composting, worm composting.
We will try to create the perfect biome for our worms, that way they can produce optimally. We can achieve this by measuring the soil with sensors and send this info with the Arduino to Allthingsmaker. That way the user has complete supervision over the bin. Allthingsmaker sends a notification if something’s horribly wrong with the composting bin, and if you have connection with the internet you can always check if everything’s alright with the worms. We also try to make the bin more appealing for the users so it has a decorative side to it as well. That way we aim at a larger group of people.
VIDEO
INTERVIEW
ALLTHINGSMAKER
There are certain factors that are important for the processing.
- The bin needs to be aired enough.
- The ph-value must be between 6,5-8,6.
- The humidity must be above 75%.
- The temperature must be between 15 and 25 for optimal composting
We can monitor this by the sensors.
If you push the button on the arduino the timer starts and the asset "composting proces" shows how far you are with the composting proces. Also the population of the worms increase over time. If you put the starting count of worms in arduino allthingsmaker will show how much worms currently are in the wormbin. The mass of processed waste depends on the amount of worms.
This are the rules set for the composting process. You can choose if you want to let allthingsmaker send a notification to your phone/e-mail/pc. That way you can keep an eye on your worms at all time.
INFORMATION ABOUT THE WORMBIN
Waste allowed to put in the bin:
The wormbin doesn't really produce a lot of compost. However the wormthee (urine of the worms + the compost fluid) that is collected in the bottom part of the bin. be careful! Never poor the pure liquid on your plants. The perfect proportion of wormthee to water is 1/9 wormthee.
Here's an example of what happends when you use the pure liquid...
CONSTRUCTION OF THE BIN
Here we cut the holes in the side of the upper part of the bin, this is where you will be able to plant spices or flowers or even vegetables.
Here we cut a hole in the bottom this is where the middle cylinder will go through so that the worm tea (this is the urine of the worms) can be collected in the bottom part.
Here we heat up the cuts we made before to stretch them into a gap where we can plant things in.
Now we place a cylindrical object into the cuts to stretch it till the plastic is hard again.
The cylinder that will be placed in the middle needs holes in the side so the worms can move freely through the whole bin, the holes are diameter 14mm they start at 15 cm of the top and 5 cm of the bottom (the length itself depends on your size composting bin.
Here we put the cylinder in the bin and we attach it with 2 components lime.
After the cleaning and the painting your result should be somewhat similar to this.
These are the parts that we will use for the bottom part of the bin.
We attached these parts using glue and vices the planks in the front will be attached with hinges these will be the doors.
Here we use the hinges to attach the 2 planks that will serve as doors so you have access to the container that collects the worm tea (this is the worm urine).
Here we attach doorknobs.
Here is our result after we attached the top part on the bottom part (we planted some spices and flowers in ofcourse). We put all the hardware into the bottom part of the composting bin.
We also had to make a waterproof case for the sensor since it wasn’t waterproof in the first place we printed this with a 3d-printer after we drew it in solid edge.
COMPOSTING MANUAL:
- First you turn on the battery in the electrical cabin.
- Secondly you need to put some little branches or paper shredding’s at the bottom of the middle cylinder.
- Now you can add some waste to the cylinder.
- Then you release the worms (tiger worms) in the cylinder in the middle.
- The bin is all set now, press the button in the electrical cabin to confirm that the composting process has started.
- In the end it is now possible to plant flowers or spices in the anticipated spaces.
- Do not forget to water your worms in time.


_3u05Tpwasz.png?auto=compress%2Cformat&w=40&h=40&fit=fillmax&bg=fff&dpr=2)
Comments