

Hardware components | ||||||
 |
| × | 1 | |||
| × | 1 | ||||
| × | 1 | ||||
| × | 1 | ||||
| × | 1 | ||||
| × | 1 | ||||
Software apps and online services | ||||||
| ||||||
| ||||||
| ||||||
Hello everybody, today we are going to build a smart mirror, another one, but here we want to focus on the part were we want to program a new plugin where we can get our data from the Sigfox Backend where our device is connected.
Our device will be a Sens'it set up in a computer server room and it needs to give us a report and an alert if the temperature change roughly, because it means maybe the AC might be broken and the temperature can get high very fast and damage the very expensive server.
Let's build the mirrorThe first step is to build a frame. I start to assembly wooden planks together.
For those pieces you need to cut each side with an angle of 45 degres and stick them with wood glue to get the following result.
Finally peint it and get a beautiful frame !
Now let's set up the one way mirror film on the plexiglass, this method is cheap than buying a glass pane.
For the dimensions I gave you, you need a plexiglass of 43x74cm.
Don't forget to use soapy water and spray it everywhere, if you don't do that this step might be a real pain !
So spray water on the film before to stick it and on the plexiglass, also when you want to chase the water spray water on top of the film also !
Now let's fix the screen inside with some Blackout Fabric !
Don't do the same mistake as me put the blackout fabric before the wood to old the screen because when you get very close to the mirror you can see the wooden parts inside.
You just have to fix an electricity plug and your raspberry inside and your mirror is done ! Congrats !
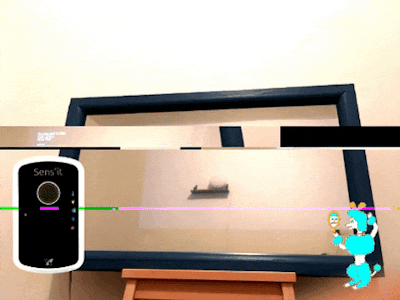
Our device and its new feature!The device we are going to use is a Sens'it ! I let you follow my previous tutorials to show you how to set it up, and load new features into it.
-->https://www.hackster.io/bettachn/sens-it-morse-dd863f
We are going to create a new feature which is going to :
- Get the temperature and humidity every 15min
- Compare the temperature with the previous
- Send an alert if the temperature increase more than 1 °C
- If no alert send the temperature each 1 hour
- Send it with the smallest payload possible
First let's define the variables we need
#define MEASUREMENT_PERIOD	900 /* Measurement  period, in second */
#define ALERT_DELTA	        1 /* Alert treshold in degree celcius */
#define ALERT_THRESHOLD		24 /* Temperature in degree celcius */
Then let's initialise all the button, the radio transmitter, the temperature & humidity sensor and the RTC alarm with the MEASUREMENT_PERIOD of 15 minutes we defined just before.
   /* Start of initialization */

   /* Configure button */
   SENSIT_API_configure_button(INTERRUPT_BOTH_EGDE);

   /* Initialize Sens'it radio */
   err = RADIO_API_init();
   ERROR_parser(err);

   /* Initialize temperature & humidity sensor */
   err = HTS221_init();
   ERROR_parser(err);
	HTS221_measure(&(data.temperature), &(data.humidity));
	prev_temp = data.temperature;

   /* Initialize RTC alarm timer */
   SENSIT_API_set_rtc_alarm(MEASUREMENT_PERIOD);

   /* Clear pending interrupt */
   pending_interrupt = 0;

   /* End of initialization */
Now we need to start our main loop and first check the battery
while (TRUE)
   {
       /* Execution loop */

       /* Check of battery level */
       BATTERY_handler(&(data.battery));
Each 15 minutes a RTC interrupt will happen and we are going to do a temperature and humidity measurement.
Before each measurement a blue led will blink and our we are going to increase the variable count.
When this variable will be equal to 4, it will mean that 1 hour has passed and we have to send our payload.
We do the measurement and we check if an error occured if not we are going to check the temperature with the previous measurement to know if we need to send an alert.
  /* RTC alarm interrupt handler */

       if ((pending_interrupt & INTERRUPT_MASK_RTC) == INTERRUPT_MASK_RTC)
		{
			SENSIT_API_set_rgb_led(RGB_BLUE);
			SENSIT_API_wait(30);
			SENSIT_API_set_rgb_led(RGB_OFF);
			count++;

           /* Do a temperatue & relative humidity measurement */
           err = HTS221_measure(&(data.temperature), &(data.humidity));
           if (err != HTS221_ERR_NONE)
           {
               ERROR_parser(err);
           }
           else if (check_temperature(prev_temp, data.temperature) || count == 4)
           {
	       count = 0;
               /* Set send flag */
               send = TRUE;
           }
	   prev_temp = data.temperature;

           /* Clear interrupt */
           pending_interrupt &= ~INTERRUPT_MASK_RTC;
       }
To check the temperature we need to convert the actual and the previous temperatures in degree celcius.
To convert the temperature into degree celcius we need to had an offset of 200, keep only the 12 last bits, deduct by 200 and divide 8.
If the difference between the previous and the actual is more or equal to our ALERT_DELTA or if the temperature is superior to our ALERT_THRESHOLD we return 1 which is going to set the flag send to the value TRUE.
bool	check_temperature(s16 temperature, s16 prev_temp)
{
	s8		delta;
	u8		n_temp;
	u8		n_prev;

	n_temp = (((temperature + 200) & 0xFFF) - 200) / 8;
	n_prev = (((prev_temp + 200) & 0xFFF) - 200) / 8;
	delta = n_temp - n_prev;
	if ((delta >= ALERT_DELTA) || (n_temp > ALERT_THRESHOLD))
		return (1);
	return (0);
}
Then this part is used to put our device in bootloader mode never remove this part or be very carreful if you modify it because you might to be able to use your Sens'it anymore.
/* Button interrupt handler */
       if ((pending_interrupt & INTERRUPT_MASK_BUTTON) == INTERRUPT_MASK_BUTTON)
       {
           /* Count number of presses */
           btn = BUTTON_handler();
           if (btn == BUTTON_FOUR_PRESSES)
           {
               /* Reset the device */
               SENSIT_API_reset();
           }
           /* Clear interrupt */
           pending_interrupt &= ~INTERRUPT_MASK_BUTTON;
       }
Before to send a message we check if the flag send and if it is equal to TRUE we build our payload and send it. A green led blink when a message is sended.
/* Check if we need to send a message */

       if (send == TRUE)
       {
	 payload[0] = (data.temperature + 200) >> 8;
	 payload[1] = data.temperature + 200;
	 payload[2] = data.humidity;
	 payload[3] = ((data.battery & 0x1F) << 3) + (alert << 3);

           /* Send the message */
           err = RADIO_API_send_message(RGB_GREEN, payload, 4, FALSE, NULL);

           /* Parse the error code */
           ERROR_parser(err);

           /* Clear button flag */
           data.button = FALSE;

           /* Clear send flag */
           send = FALSE;

           /* Reinitialise  alert flag and payload */
	   alert = 0;
           payload[0] = 0;
	   payload[1] = 0;
	   payload[2] = 0;
	   payload[3] = 0;
       }
Finally we clear all the interupt and put the device in sleep mode.
/* Reed switch interrupt handler */
       if ((pending_interrupt & INTERRUPT_MASK_REED_SWITCH) == INTERRUPT_MASK_REED_SWITCH)
       {
           /* Clear interrupt */
           pending_interrupt &= ~INTERRUPT_MASK_REED_SWITCH;
       }
       /* Accelerometer interrupt handler */
       if ((pending_interrupt & INTERRUPT_MASK_FXOS8700) == INTERRUPT_MASK_FXOS8700)
       {
           /* Clear interrupt */
           pending_interrupt &= ~INTERRUPT_MASK_FXOS8700;
       }
       /* Check if all interrupt have been clear */
       if (pending_interrupt == 0)
       {
           /* Wait for Interrupt */
           SENSIT_API_sleep(FALSE);
       }
Here is the parser for our payload to build an object with all the value we sent.
We convert the all payload into from hexadecimal to binary, then we slice each part into its respectives variables.
The conversion for the temperature is the same then before.
For the humidity we just need to divide the value by 2.
And for the battery here we need few lines of codes regarding the documentation of the Sens'it to convert it into pourcentage.
// Convert hexadecimal frame to binary frame
for (var i = 0; i <= (payload.length - 2); i = i + 2) {
 var byte = parseInt(payload.slice(i, i + 2), 16).toString(2);
 while (byte.length < 8) {
   byte = '0' + byte;
 }
 binary = binary.concat(byte);
}

temperature_MSB = parseInt(binary.slice(0, 8), 2);
temperature_LSB = parseInt(binary.slice(8, 16), 2);
humidity = parseInt(binary.slice(16, 24), 2);
battery = parseInt(binary.slice(24, 29), 2);
alarm = parseInt(binary.slice(29, 30), 2);

battery = (battery * 0.05) + 2.7;

if (battery >= 4.15)
   pourcent = 100;
else if (battery < 4.15  && battery >= 3.8)
   pourcent = (battery - 3.275) * 114;
else if (battery < 3.8 && battery >= 3.6)
   pourcent = (battery - 3.56) * 250;
else if (battery < 3.6 && battery >= 3)
   pourcent = (battery - 3) * 16;
else
   pourcent = 0;
MagicMirror is an open source modular smart mirror platform.
Website : https://magicmirror.builders/
Github : https://github.com/MichMich/MagicMirror
Its installation requires only one command :
bash -c "$(curl -sL https://raw.githubusercontent.com/MichMich/MagicMirror/master/installers/raspberry.sh)"
When is installed, MagicMirror starts automatically.
If you want to develop your own module, like us, you will need the API Documentation : https://github.com/MichMich/MagicMirror/blob/master/modules/README.md
Modules are fully developed with JS, CSS and HTML (Nunjucks).
In our case, we have used only 5 built-in functions :
getScripts -> To define which scripts should be imported
getStyles -> To define which style files should be imported
getTemplate -> To define which template .njk should be used
updateDom -> As its name suggests, it is for update DOM
start -> Main function
start uses JQuery to make a request to backend, every 5 seconds, and backend returns Sigfox sensit payload.
We have used a Python backend (Flask), for bypass CORS limitation.
For this you need to get an API key from the Sigfox Backend.
Go to your user and select the user group where your device is registered.
Go to API Access and select New to create an access.
Give a name to your API access, select the right Timezone and finally give the authorization to read.
Your API Access is created copy past your Login and Password and add it to the Python code.
creds = { "login": "XXX", "password": "XXX"}
Now we need the ID of your device, click on your device ID.
And copy the ID of your device in the URL.
Paste it into the Python code.
messages = requests.get('https://backend.sigfox.com/api/devices/XXX/messages'
Your Python Bypass is ready launch it with the following command.
python3 backend.py
When payload is returned, he passed to function decodePayload (see code in the attachments), and updateDom is called with decoded datas.
start: function() {
      let self = this;

       setInterval(function() {
           $.ajax({
               dataType: "json",
               url: 'http://127.0.0.1:5000',
               success: (data) => {
                   self.updateDom(self.decodePayload(data.data));
               }
           });
       }, 5000);
   },
If temperature is between 0 and 24, no problem, the color is green and all is good.
If it is between 24 and 26, it doesn't matter, the color is orange and just need to keep an eye on.
And if is higher to 26, color is red, alert is send and pray that everything doesn't burn.
let tc = document.getElementById("temp_chart");
let color = null;
let temp = data[4]['value'];

tc.style.strokeDasharray = data[4]['value'] / 2 + " 999";

if (temp <= 24)
    color = 'green';
else if (temp > 24 && temp <= 26)
    color = 'orange';
else
    color = 'red';

tc.style.stroke = color;
document.getElementById("temperature").style.color = color;
We have also added a passive buzzer to the mirror to provide us an other alarm if the temperature change to fast.
To activate the buzzer we have a condition in our Javascript Module which is going to check if in our payload the value alert is equal to 1.
if (data[1].value === 1) {
    $.ajax({
             dataType: "json",
             url: 'http://127.0.0.1:5000/buzz',
             success: (data) => {}
}
And this condition is going to activate the buzzer through our python backend.
@app.route('/buzz')def buzz():
    for i in range(5):
        b.on()
        sleep(1)
        b.off()
        sleep(1)
    return app.response_class(
	response=json.dumps({}),
	status=200,
	mimetype='application/json'
    )
When your module is ready, just push it in modules folder (in MagicMirror, of course), and add it to config.js file (in config folder), like this :
{
    module: "module_name",
    position: "module_position (see Documentation for possibles)"
},
Restart MagicMirror, and let the magic happen !


Comments