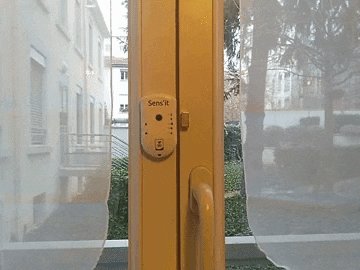

Sens'it is an electronic object with several sensors and the ability to communicate on the Sigfox network. This off‑the‑shelf device can be customized for many IoT use cases.
Here is a second tutorial that will show you how to use the Sens'it SDK to create a new feature that will allow us to detect the opening and closing of a window and send us back - Temperature - Humidity - How long the window was open.
On top of that we are going to build a dashboard to highlight all those informations to understand for exemple the optimal temperature of the room.
Prepare environment to connect your Sens'it to your computer (with Windows) :- Install arm-gcc for Windows
https://developer.arm.com/open-source/gnu-toolchain/gnu-rm/downloads
- Install MINGW and MSYS
- Install dfu-util for Windows
https://sourceforge.net/projects/dfu-util/
- Update your PATH environment variable to add bin/ subdirectories of arm-gcc, mingw, msys and dfu-util
- Install Zadig for WinUSB driver
- Put Sens'it in Bootloader mode
Run Zadig and install WinUSB driver for your device
This step is required to use dfu-util on Windows
dfu-util -l
- Register your Sens'it here
- Get your PAC number
- Activate your device and access your Sigfox Backend
https://buy.sigfox.com/activate/devkit/FR
Let's code our new feature :Our first mission is to detect when the window is open and closed.
In order to detect these two events we will use the reed switch.
So the first step is to detect an interupt on the reed switch.
if ((pending_interrupt & INTERRUPT_MASK_REED_SWITCH) ==
                          INTERRUPT_MASK_REED_SWITCH)
Then we need to know the state of the reed switch to understand if the window is open or close.
The SDK already contains many functions to interact with Sens'it sensors.
SENSIT_API_get_reed_switch_state(&state);
The variable state is a boolean :
- TRUE - Window closed
- FALSE - Window open
if (state == TRUE) /* Closed window */
{
SENSIT_API_set_rgb_led(RGB_GREEN);
SENSIT_API_wait(500);
SENSIT_API_set_rgb_led(RGB_OFF);
SENSIT_API_get_current_time(&timediff);
time_open = (timediff - timestamp) / 60;
}
else /* Open window */
{
SENSIT_API_set_rgb_led(RGB_RED);
SENSIT_API_wait(500);
SENSIT_API_set_rgb_led(RGB_OFF);
SENSIT_API_get_current_time(×tamp);
time_open = 0;
}
We switch on a Green LED when the window is closed and a Red one when the window is open.
We need also to get a timestamp to know how long the window was open.
SENSIT_API_get_current_time(&timediff);
This function takes as input a u32 and return a timestamp in second since the last reset of the device.
Then we do a temperature et humidity measurement.
/* Do a temperatue & relative humidity measurement */
err = HTS221_measure(&temperature, &humidity);
if (err != HTS221_ERR_NONE)
    ERROR_parser(err);
Afterwards we create our payload.
/* Create payload */
payload[0] = state;
payload[1] = (temperature + 200) >> 8;
payload[2] = (u8)(temperature + 200);
payload[3] = humidity;
payload[4] = time_open;
Finally send the payload.
/* Send payload */
err = RADIO_API_send_message(RGB_YELLOW, payload, 5, FALSE, NULL);
ERROR_parser(err);
To load it into your Sens'it, with your new feature, don't forget to edit your Makefile. And be sure your dfu-util files are in the same directory as your Makefile.
1 - Put the Sens'it in bootloader mode (4 short press + 1 long press)
2 - Put the Dfu files in the file SDK
3 - Access your cmd, change directory for your sdk file
4 - Compile your program
make window
5 - Load the program into your Sens'it
make prog
6 - Your Sens'it might reboot by itself with your new feature loaded
Get your message on try.iotagency.sigfox.com and parse it:Create an account on https://try.iotagency.sigfox.com.
(This platform will help us on quick prototyping to avoid creating a web server).
Once your account is created, login your Sigfox Backend to get your API access.
Then on IotAgency platform add a new connector.
On "device type" the connector you just created will appear, then create a callback on it.
You will see your messages appear now !
Now we need to create a parser to get our data properly.
What our parser does ?
- Convert the payload into byte code.
- Split the byte code into different variables: State, Humidity, Time_open, Temperature_MSB, Temperature_LSB.
- We push all those variables into objects and had few elements for example a sentence "The window is open".
I recommend you to play with this to do what you want.
Temperature explanation:
Temperature_MSB -> 0000 0000 -> 0000 0000 In bold what we keep
Temperature_LSB -> 0000 0000 -> 0000 0000 In bold what we keep
Temperature_MSB + Temperature_LSB (only with the part we kept)
(New_Value - 200) / 8 = Temperature
State explanation:
We give the value 10 and -10 to the state to highlight the value later on the dashboard.
var payload,
   binary = '',
   ret = [],
   parsedData = [],
   obj = {},
   window_open = '';
// Convert hexadecimal frame to binary frame
for (var i = 0; i <= (payload.length - 2); i = i + 2) {
 var byte = parseInt(payload.slice(i, i + 2), 16).toString(2);
 while (byte.length < 8) {
   byte = '0' + byte;
 }
 binary = binary.concat(byte);
}
state = parseInt(binary.slice(0, 8), 2);
temperature_MSB = parseInt(binary.slice(12, 16), 2);
temperature_LSB = parseInt(binary.slice(16, 24), 2);
humidity = parseInt(binary.slice(24, 32), 2);
time_open = parseInt(binary.slice(32, 40), 2);
if (state)
{
   window_open = "The window is close";
   state = 10;
}
else
{
   window_open = "The window is open";
   state = -10
}

obj = {};
obj.key = 'alert';
obj.value = 1;
obj.type = '';
obj.unit = '';
parsedData.push(obj);

obj = {};
obj.key = 'state';
obj.value = window_open;
obj.type = '';
obj.unit = '';
parsedData.push(obj);

obj = {};
obj.key = 'open';
obj.value = state;
obj.type = '';
obj.unit = '';
parsedData.push(obj);

obj = {};
obj.key = 'temperature';
obj.value = (((temperature_MSB << 8) + temperature_LSB) - 200) / 8;
obj.type = '';
obj.unit = '';
parsedData.push(obj);

obj = {};
obj.key = 'humidity';
obj.value = humidity / 2;
obj.type = '';
obj.unit = '';
parsedData.push(obj);

obj = {};
obj.key = 'time_open';
obj.value = time_open;
obj.type = '';
obj.unit = '';
parsedData.push(obj);

//console.log(parsedData);
return parsedData;
Click on create a new dashboard and edit it.
Now we are going to add widgets to do what we want.
The procedure will be basically the same all the time:
Here an exemple of what you can do, and if you want to had features the plateform is open source and available on Github, do not hesitate to had new widget and submit a pull request.
https://github.com/IoT-Makers/sigfox-platform
Thank you for following this tutorial, see you for new projects !


Comments