

Hardware components | ||||||
_ztBMuBhMHo.jpg?auto=compress%2Cformat&w=48&h=48&fit=fill&bg=ffffff) |
| × | 1 | |||
| × | 1 | ||||
 |
| × | 1 | |||
Last summer, when I went on vacation, I left the light of my store lit and it was for 10 days (I spent about 24kwh.) With this development I managed to turn off the light in the storeroom (or room) after a time there is movement.
Relay_PIR_timer.ino
ArduinoManage the time a device remains activated (lights on) when no presence is detected
/*
* Title: MyPip&Rele
* Author: Bernardo Lpez Daz
* Description:
Manage the time a device remains activated (lights on) when no presence is detected
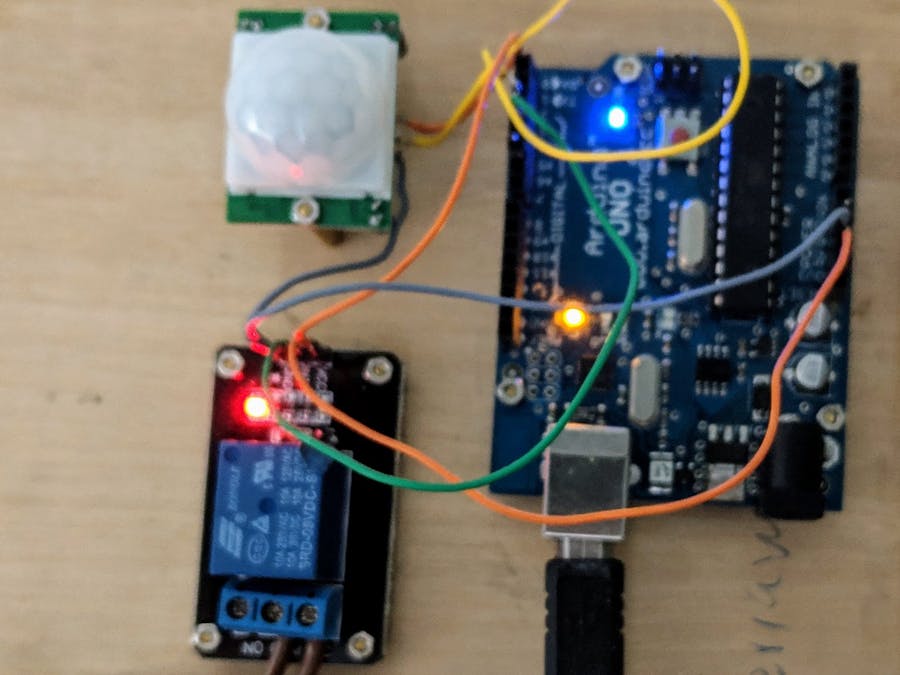
The hw devices that make up the project are:
1. Arduino board
2. Presence detector (PIR) connected to digital input 2 of the Arduino board
3. Relay that makes the voltage switch that feeds the bulb. It is connected to the digital output 3 of the Arduino board
4. 5 volt power supply for the Arduino board.
Start a counter (120 seconds). When the timer expires,acts on a relay to open the circuit to which the light is connected (turn on light). The timer restarts each time the PIR detects presence.
*/
#include <Temporizador.h>
// constants won't change. They're used here to set pin numbers:
const int pipPin = 2; // the number of the PIR pin
const int relePin = 3; // the number of the Rele pin
const int ledPin = 13; // the number of the LED pin
const uint32_t alarm = 120000; // When the PIR is activate the counter restart a new count.
uint8_t pipState = LOW;
Temporizador count(&activarRele);
void setup() {
// initialize the LED pin as an output:
pinMode(ledPin, OUTPUT);
// initialize the pushbutton pin as an input:
pinMode(pipPin, INPUT);
pinMode(relePin, OUTPUT);
Serial.begin(115200);
}
void loop() {
// read the state of the pushbutton value:
pipState = digitalRead(pipPin);
count.loop();
// check if the pushbutton is pressed. If it is, the buttonState is HIGH:
if (pipState == HIGH) {
// turn LED on:
digitalWrite(ledPin, HIGH);
digitalWrite(relePin, HIGH);
count.set(alarm);
} else {
// turn LED off:
digitalWrite(ledPin, LOW);
}
delay(20);
}
void activarRele(){
digitalWrite(ledPin, LOW);
digitalWrite(relePin, LOW); //When the timer is over the ligth is off
}
Temporizador.cpp
C/C++This class implements the counter method necessary. The Relay_PIR_counter needs this class to work
#include "Temporizador.h"

/******* PUBLIC FUNCTIONS RELATED WITH SLAVES AND BASIC BOARDS        ************************/


Temporizador::Temporizador(void (*_timeoutCallback)())
{
  counter 				      = 0;
  timeoutCallback = _timeoutCallback;
}

void Temporizador::set(uint32_t _counter){
	counter 		= millis()+_counter;
	if (counter <millis()){
		counter = 0xFFFFFFFF;
	}
}
void Temporizador::loop(){
	if (counter == 0){
		return;
	}
	if(counter <= millis()){
		counter = 0;
		timeoutCallback();
	}
}
#ifndef Temporizador_h
#define Temporizador_h
/*
Title: Temporizador (a counter or timer )
Author: Bernardo Lpez Daz
Description:
The class Temporizador defines the methods that implement the operation of a timer.
The loop method is invoked within the generic loop to update the counters.
The set method allows you to initialize a counter at a given value.
When you create an object of this class you have to pass the function to be called when the timer ends the account.
Once the account is finished, the timer does not restart.
*/
// includes files
#include "Arduino.h"

class Temporizador
{


  	public:
    	Temporizador(void (*_timeoutCallback)());
    	void set( uint32_t _counter);
    	void loop();

	private:
		uint32_t counter;
		void (*timeoutCallback)();
};

#endif


Comments