


I have an Apple Keyboard (A1048) which had several keys that had stopped working. I decided to take it apart to see if I could fix it. I found this handy guide after I had completed the fix, but you might find it useful.
Materials: To begin you will need:
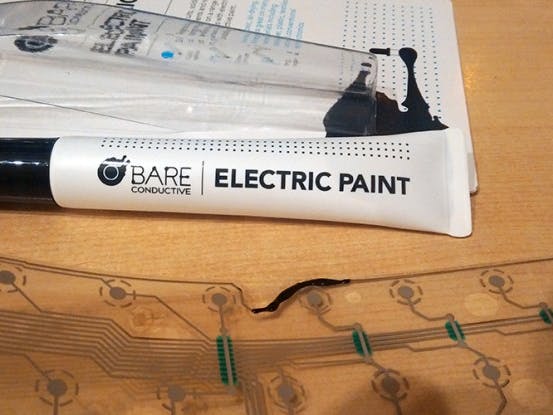
Electric Paint 10ml
Step 1:
Inside the keyboard are a pair of PCB plastic membranes separated by a clear plastic sheet. These membranes have sets of tracks that connect the keypads together – one set roughly horizontal, the other set roughly vertical. Using a multimeter I was able to check the connections to try and track down the damaged area, which had turned dark anyway, so it was quite easy to see. The set of keys that have stopped working also give a clue as to where the break must be.
Links
Step 2:
I used a thin track of Electric Paint to go over the damaged area joining the two good ends together, then waited until the paint was dry. I checked the fixed connection with the multimeter, then put the keyboard back together and it worked. 🙂
Comments