

Hardware components | ||||||
_ztBMuBhMHo.jpg?auto=compress%2Cformat&w=48&h=48&fit=fill&bg=ffffff) |
| × | 1 | |||
 |
| × | 3 | |||
| × | 1 | ||||
| × | 3 | ||||
| × | 1 | ||||
| × | 1 | ||||
Software apps and online services | ||||||
 |
| |||||
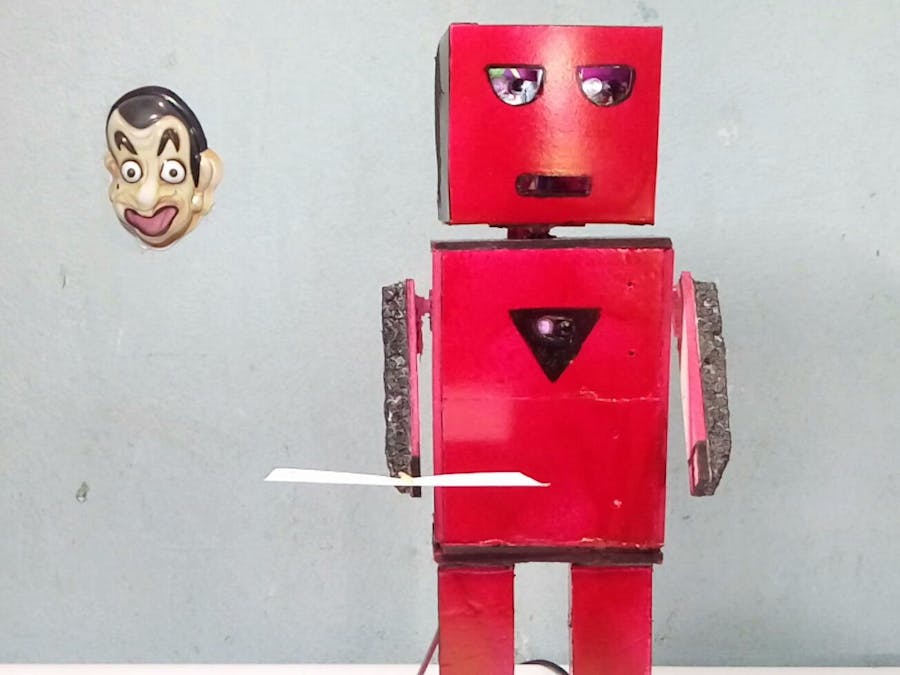
This Robot - Mofiza- (weird name) Can SEE, TALK and REACT to her surroundings. Before I proceed watch the video:
Ever since I've seen making talking robots I saw that people actually use other development boards rather than Arduino to make talking robots. But it's completely possible to make a Humanoid robot with Arduino who can talk and add a lot of servos to make it move. So lets begin:
Update (How I made it) -
Step 1: Parts You'll Need- Arduino Pro mini (5v 16 Mhz) [any board is good but i've used this to make it small)
- Female header pins for connecting on pcb
- Male header pins
- Vero Board to make the circuit
- Sd card TF module (to make it talk)
- micro sd card (not more than 2GB)
- 3x IR proximity sensor
- 3x servo motor (I've used micro servo sg90)
- Cardboard to make the body
Make a body with anything you want, I've made it by cardboard. It's pretty simple.
I've soldered IR sensors with ribbon cable just like this with a female header on one end and added two in two eyes and one in the chest.
The robot will say the welcome message if it detects anything in the chest sensor and will say "aaaah.. dont touch my eye" if any eyes sensor is high. and the servo in that are will move up.
Step 3: The CircuitThe circuit looks a bit complicated but no its all too easy, you can just power it up by one battery. solder the circuit and all other components in a vero board and add other servo on head and hands.
Step 4: CodeBefore the codes:
I had to use two libraries forthis robot.
TMRpcm.h - for playing audio from SD card- talk https://github.com/TMRh20/TMRpcm
ServoTimer2.h - avoid conflict with TMRpcm and run Servo motors using timer2 as TMRpcm uses Timer1 on arduino. https://create.arduino.cc/projecthub/ashraf_minhaj/how-to-use-servotimer2-library-simple-explain-servo-sweep-512fd9?ref=user&ref_id=507819&offset=1
This is the code for saying welcome. You can make your own environment and code. Before you get to code you'll have to add the ServoTimer2 library. Nor the robot wont run.
And then up The code:
#include "ServoTimer2.h"
#include#define SD_ChipSelectPin 10
#include"TMRpcm.h"
#includeTMRpcm tmrpcm;
ServoTimer2 matha;
ServoTimer2 lhand;
ServoTimer2 rhand;
int in1= 6;int in2= 7;int in3= 8;
void setup()
{ matha.attach(2);
lhand.attach(3);
rhand.attach(4);
tmrpcm.speakerPin=9;
Serial.begin(9600);
if(!SD.begin(SD_ChipSelectPin))
{  Serial.println("SD FAIL");  return;
}
}
void loop()
{
if(!(digitalRead(in3)))
{   tmrpcm.play("welcome.wav");
 lhand.write(2500);
delay(2000);
lhand.write(1200);  //handshake position
delay(9000);
}
else
{
lhand.write(300);
rhand.write(1700);
matha.write(1500); }
}
Now just power it up and your'e done. A smart robot is done making. [I'll upload other pictures and details soon]
If I could get more pins I'd make the robot walk. but I had just 3 pins remaining (digital). It;s less than I need.
Support me by Subscribing to my YouTube channel.


Comments