

Hardware components | ||||||
 |
| × | 1 | |||
_ztBMuBhMHo.jpg?auto=compress%2Cformat&w=48&h=48&fit=fill&bg=ffffff) |
| × | 1 | |||
 |
| × | 1 | |||
| × | 1 | ||||
 |
| × | 1 | |||
| × | 1 | ||||
 |
| × | 1 | |||
 |
| × | 2 | |||
| × | 1 | ||||
Software apps and online services | ||||||
 |
| |||||
| ||||||
 |
| |||||
| ||||||
 |
| |||||
| ||||||
I'm Ashish Anand, this is a project specified in my Internshala IoT training program powered by Bolt IoT. This Capstone Project assignment description given as follows the pharmaceutical companies use a cooling chamber which is similar to a refrigerator to keep the tablets and maintain the temperature in the required limits.
For this project I made a prototype using Bolt IoT and Arduino to work in both condition i.e online and offline
Working Principle1) Online Mode
if the device is connected to the internet then the Bolt module sends the data to Bolt IoT cloud and digital ocean server. if anomaly is detected then send email and sms to owner and supervisor of the pharmaceutical company.
machine learning algorithm for anomaly detection in the chamber.
it check whether enough data has been accumulated to calculate the Z-score, we calculate the Z score (Zn) for the data and use it to calculate the upper and lower threshold bounds required to check if a new data point is normal or anomalous.
- The next code is used to initialize the Bolt and SMS variables, which we will use to collect data and send SMS alerts. Here we also initialize an empty list with the name 'history_data' which we will use to store older data, so that we can calculate the Z-score.
- If anomaly detected we will be updated via SMS that ""Someone opened the chamber""
if sensor_value > maximum_limit or sensor_value < minimum_limit:
  response = mailer.send_email("Alert", "The Current temperature is beyond the threshold ")
if sensor_value > bound[0] :
  print ("The temperature increased suddenly. Sending Sms.")  response = sms.send_sms ("Someone opened the chamber")
  print("This is the response ",(response))
elif sensor_value < bound[1]:
  print ("The temperature decreased suddenly. Sending an email.")
  response = mailer.send_email("Someone opened the chamber")
  print("This is the response ",response)
history_data.append(sensor_value);
except Exception as e:
  print ("Error",e)
time.sleep(10)
2) Offline Mode
imagine if the internet is not connect to device for some reason. if any anomaly is occur in the chamber of pharmaceutical company that cause loss to that company.thats why I build an offline mode for this project
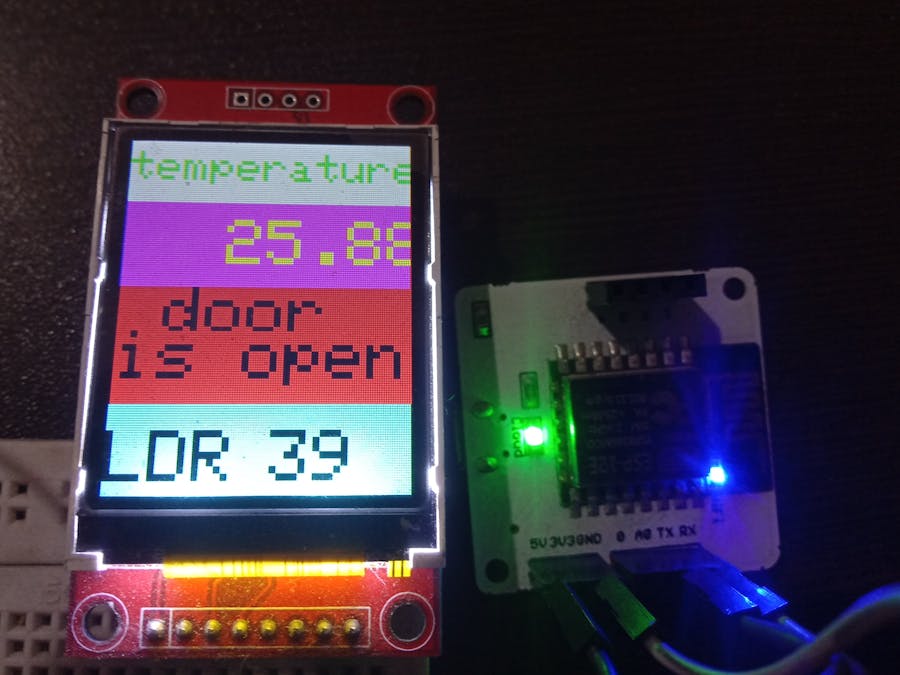
if the worker or supervisor of that company wants to see temperature inside the chamber in realtime without going inside the chamber we use an lcd display to show the current temperature of the chamber.i aslo use ldr and push button to detect chamber is close or not it will alert the supervisor
the device can be place on door of the chamber and sensor like Lm35, LDR are placed inside the chamber and push button is placed corner of the door.
logic for door open close
we know that when fridge is close the intesity of light is low inside the fridge or chamber.the intensity of light is high when we open the fridge or chamber according to this we use LDR and push button to detect whether door is close or not
if (push button button is press and intensity is low )
    print(door closed)
else
    print(door is open )
Connect all the component as shown in the circuit diagram given above.
- connect the bolt to the Arduino using UART communication
- connect LM 35 at Analog pin of Arduino Uno i.e A0
- connect LDR to Analog pin of Arduino at A1
- connect push button at digital pin i.e D2
There have been quite a few projects developed around the Bolt WiFi module, so I believe the reader has already created an Account on the Bolt Cloud and linked their Bolt WiFi module to the Cloud account.
If that is not the case, you might want to go through this.
1. Create a new product on the Bolt Cloud.
Ensure to select the 'Input Devices' and 'UART' option.
2. Configure the product:
I have shared the code for the software configuration.
Once done save and exit the product configuration view.
3. Link the Bolt device to your new product.
Once the device is linked, remember to click on the Deploy Configurations button
4. View your device.
The Cloud polls the device for data every 5 minutes, so it would be best to leave the system be for about 20 to 25 minutes before you check.
Step 3: Install the Required LibrariesFor this project you will require the BoltIoT-Arduino-Helper, the Adafruit_GFX.h and Adafruit_ST7735.h Arduino libraries.
To install the libraries just go to the link above, and click on the clone or download button.
Then click on the Download ZIP button. A zip file containing the library will be downloaded.
Once the library is downloaded, go to the Arduino IDE's tool bar, Sketck>Include Library>Add.ZIP Library...
Select the library file which you dowloaded earlier, and click on choose.
Remember to install ALL 3 LIBRARIES.
Step 4: Upload the Code1. Open the Arduino IDE.
2. Copy the Arduino Code at the end of the blog, and replace all the code inside the sketch with the copied code.
3. Connect your Arduino Uno to the PC and click on Upload.
CAUTION: For Arduino Uno users, remember to disconnect the Bolt module from the Arduino while uploading the code.
Step 4: Write Program to Fetch Sense Value to ServerOpen putty to connect to digital ocean server.
A Python Script (running on a server or your PC, for instance) queries the Bolt Cloud for this temperature value using the Bolt Python Library, which in turn is based on the Bolt open APIs for Serial Read.
open my code in nano editor and change the conf.py and email_conf.py according to your account setup boltiot, twilio, @mailgum
The Python script then checks if the temperature is less than a preset threshold. In case the anomaly is occurred or temperature cross the threshold, an SMS & mail alert is sent out using the Twillio SMS service and @mailgum.


_3u05Tpwasz.png?auto=compress%2Cformat&w=40&h=40&fit=fillmax&bg=fff&dpr=2)

Comments