OverviewThis project is about creating a wireless blind opener using the Blynk App on your phone. You will be able to control the blinds whenever you want and also set a time for when you want your blinds to open and close. The main components involved are a Particle Photon and Continuous Servo.
Here are websites I used:
*Here is the album with extensive amounts of videos and photos from different angles:
https://drive.google.com/drive/folders/11b-lxvpgAeiPnWlF31j3f5m_P2mJyyGL?usp=sharing
Steps- Download the Blynk App on your phone and it set it up with the instructions it will provide you. (https://www.blynk.cc/getting-started/). Make sure your photon is connected to the internet. Once your receive your authorization token replace it with the one in my code.
- Upload the code with your authorization token to your photon. Make a new project corresponding to that authorization code in Blynk.
- In Blynk add two buttons, a timer and a slider. Call the first button "Open small increments" and assign it to Virtual Pin 1. Call the second button" Open big increments" and assign it to Virtual Pin 3. Call the Slider "Close" and assign it to Virtual Pin 5. Change its values from 90 to 0. Assign the timer to virtual pin 4 and change its times to whenever you want your blinds to open and close.
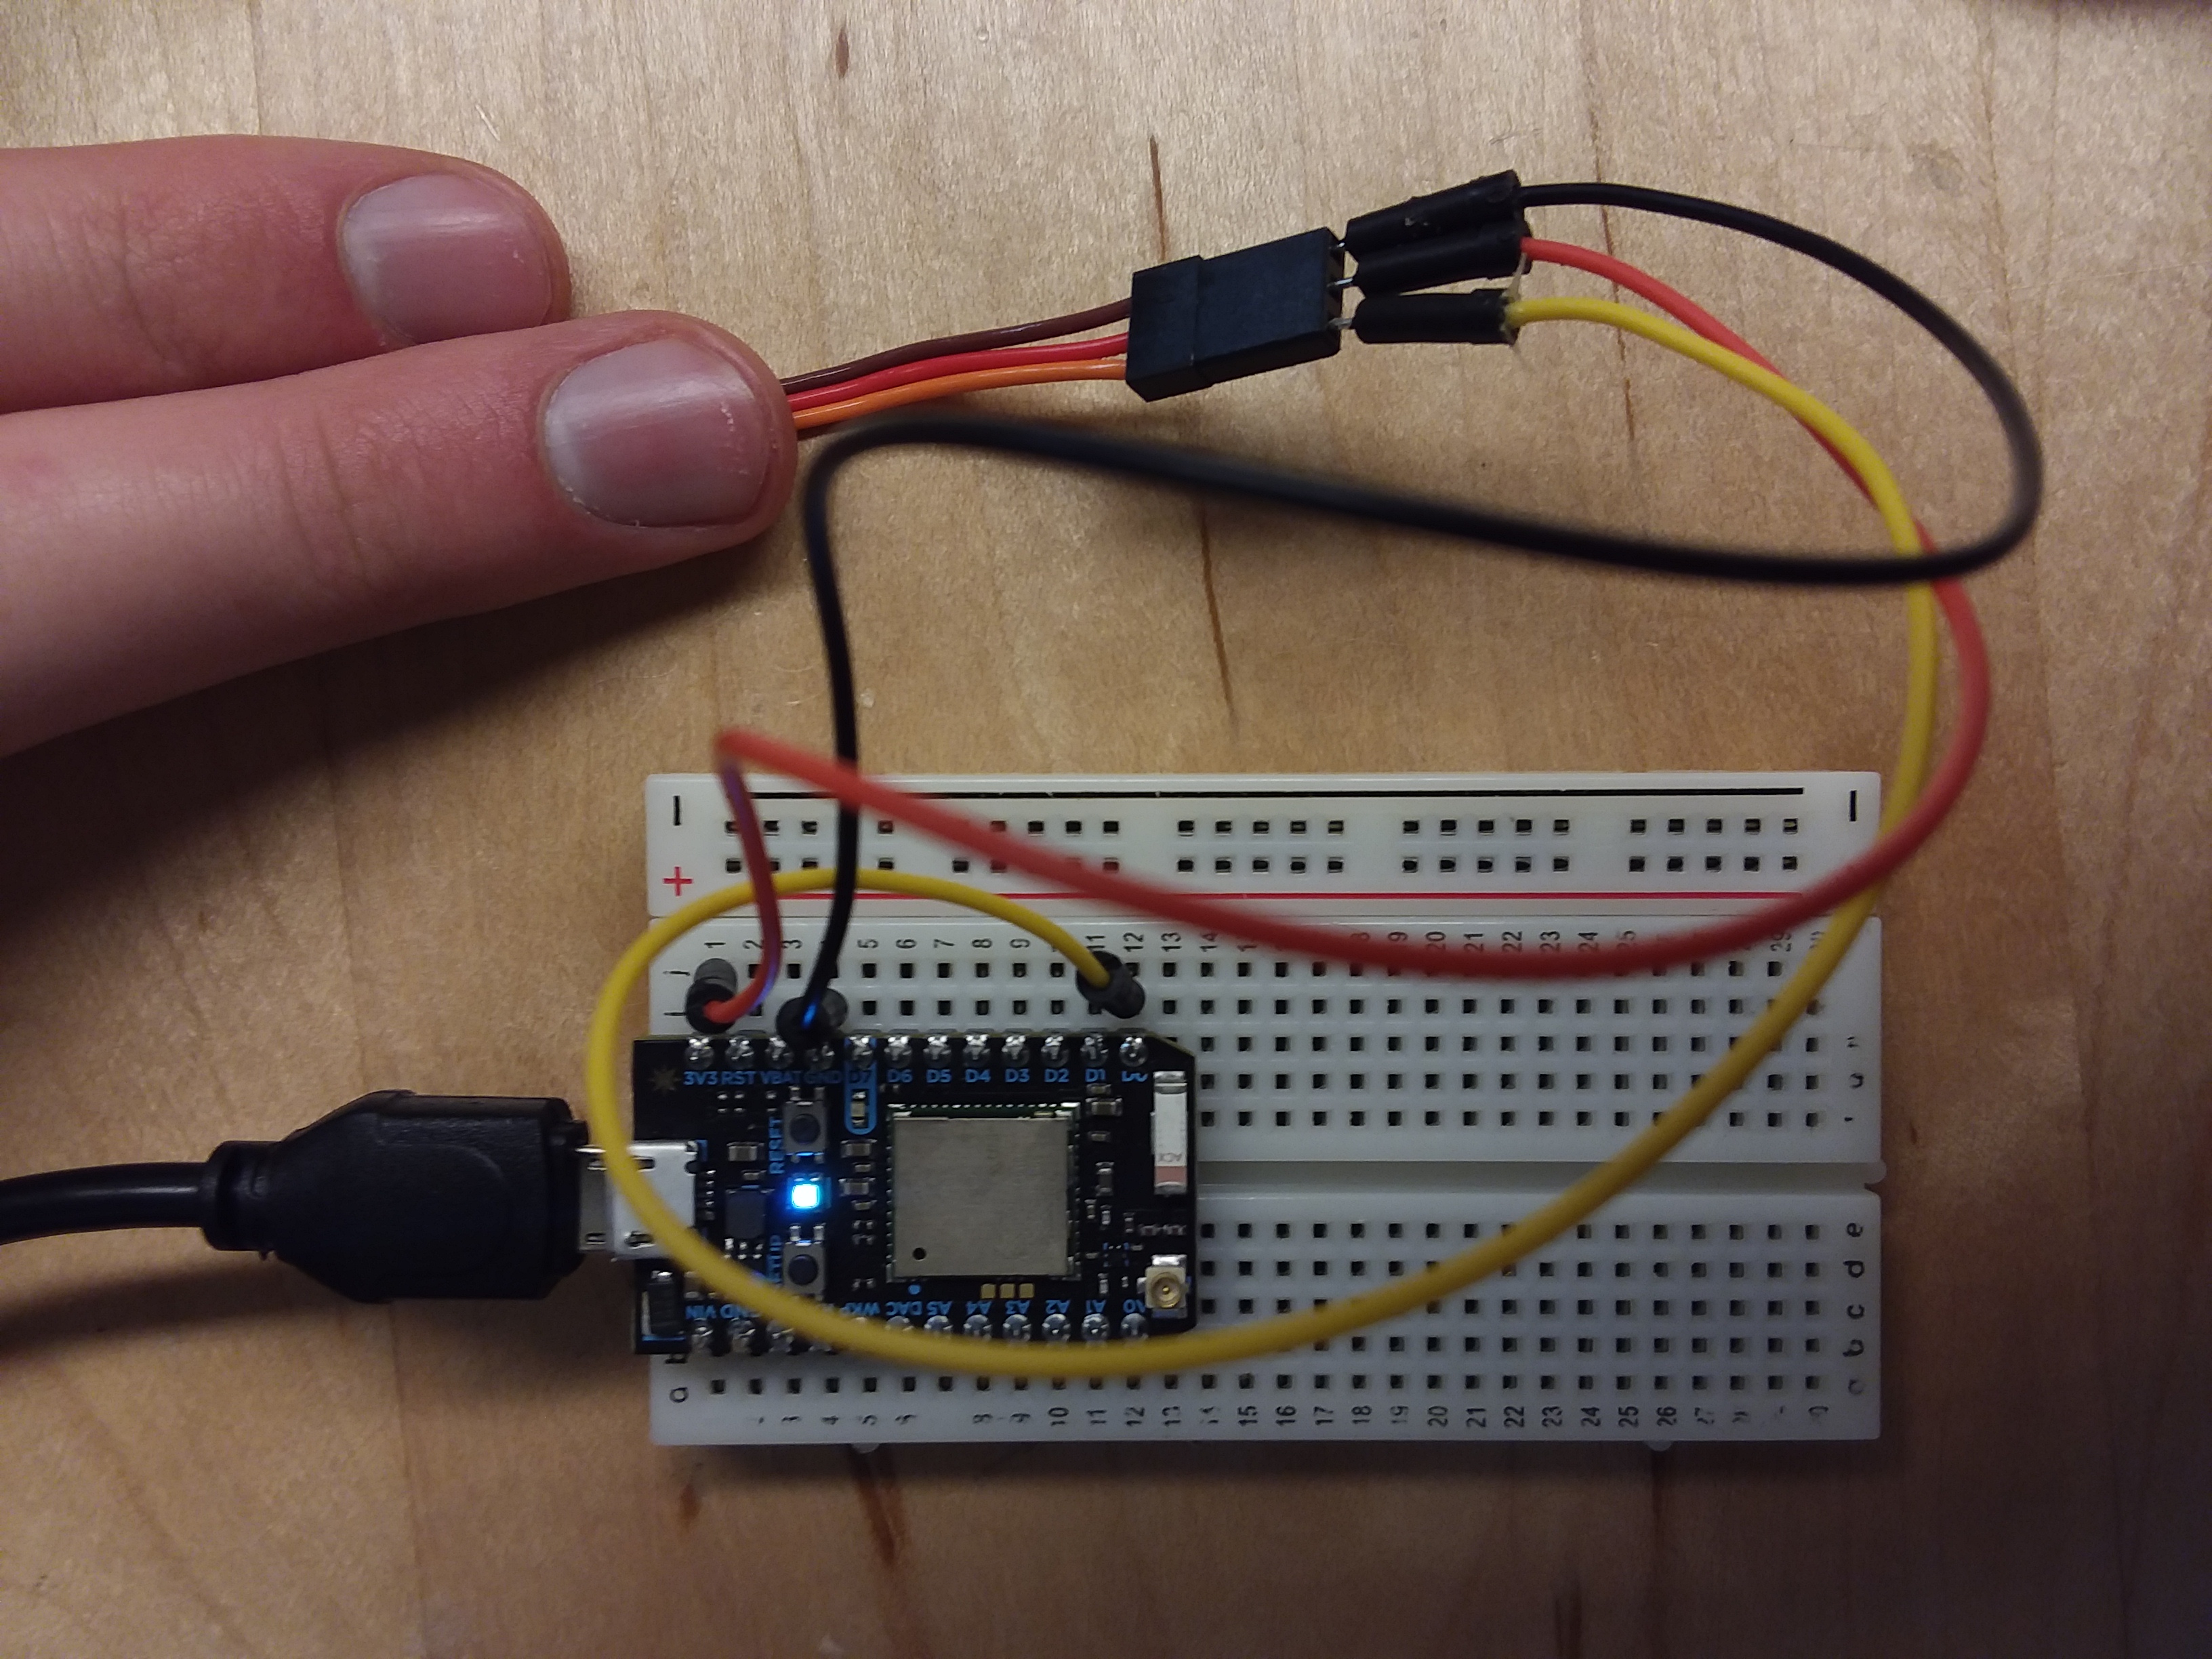
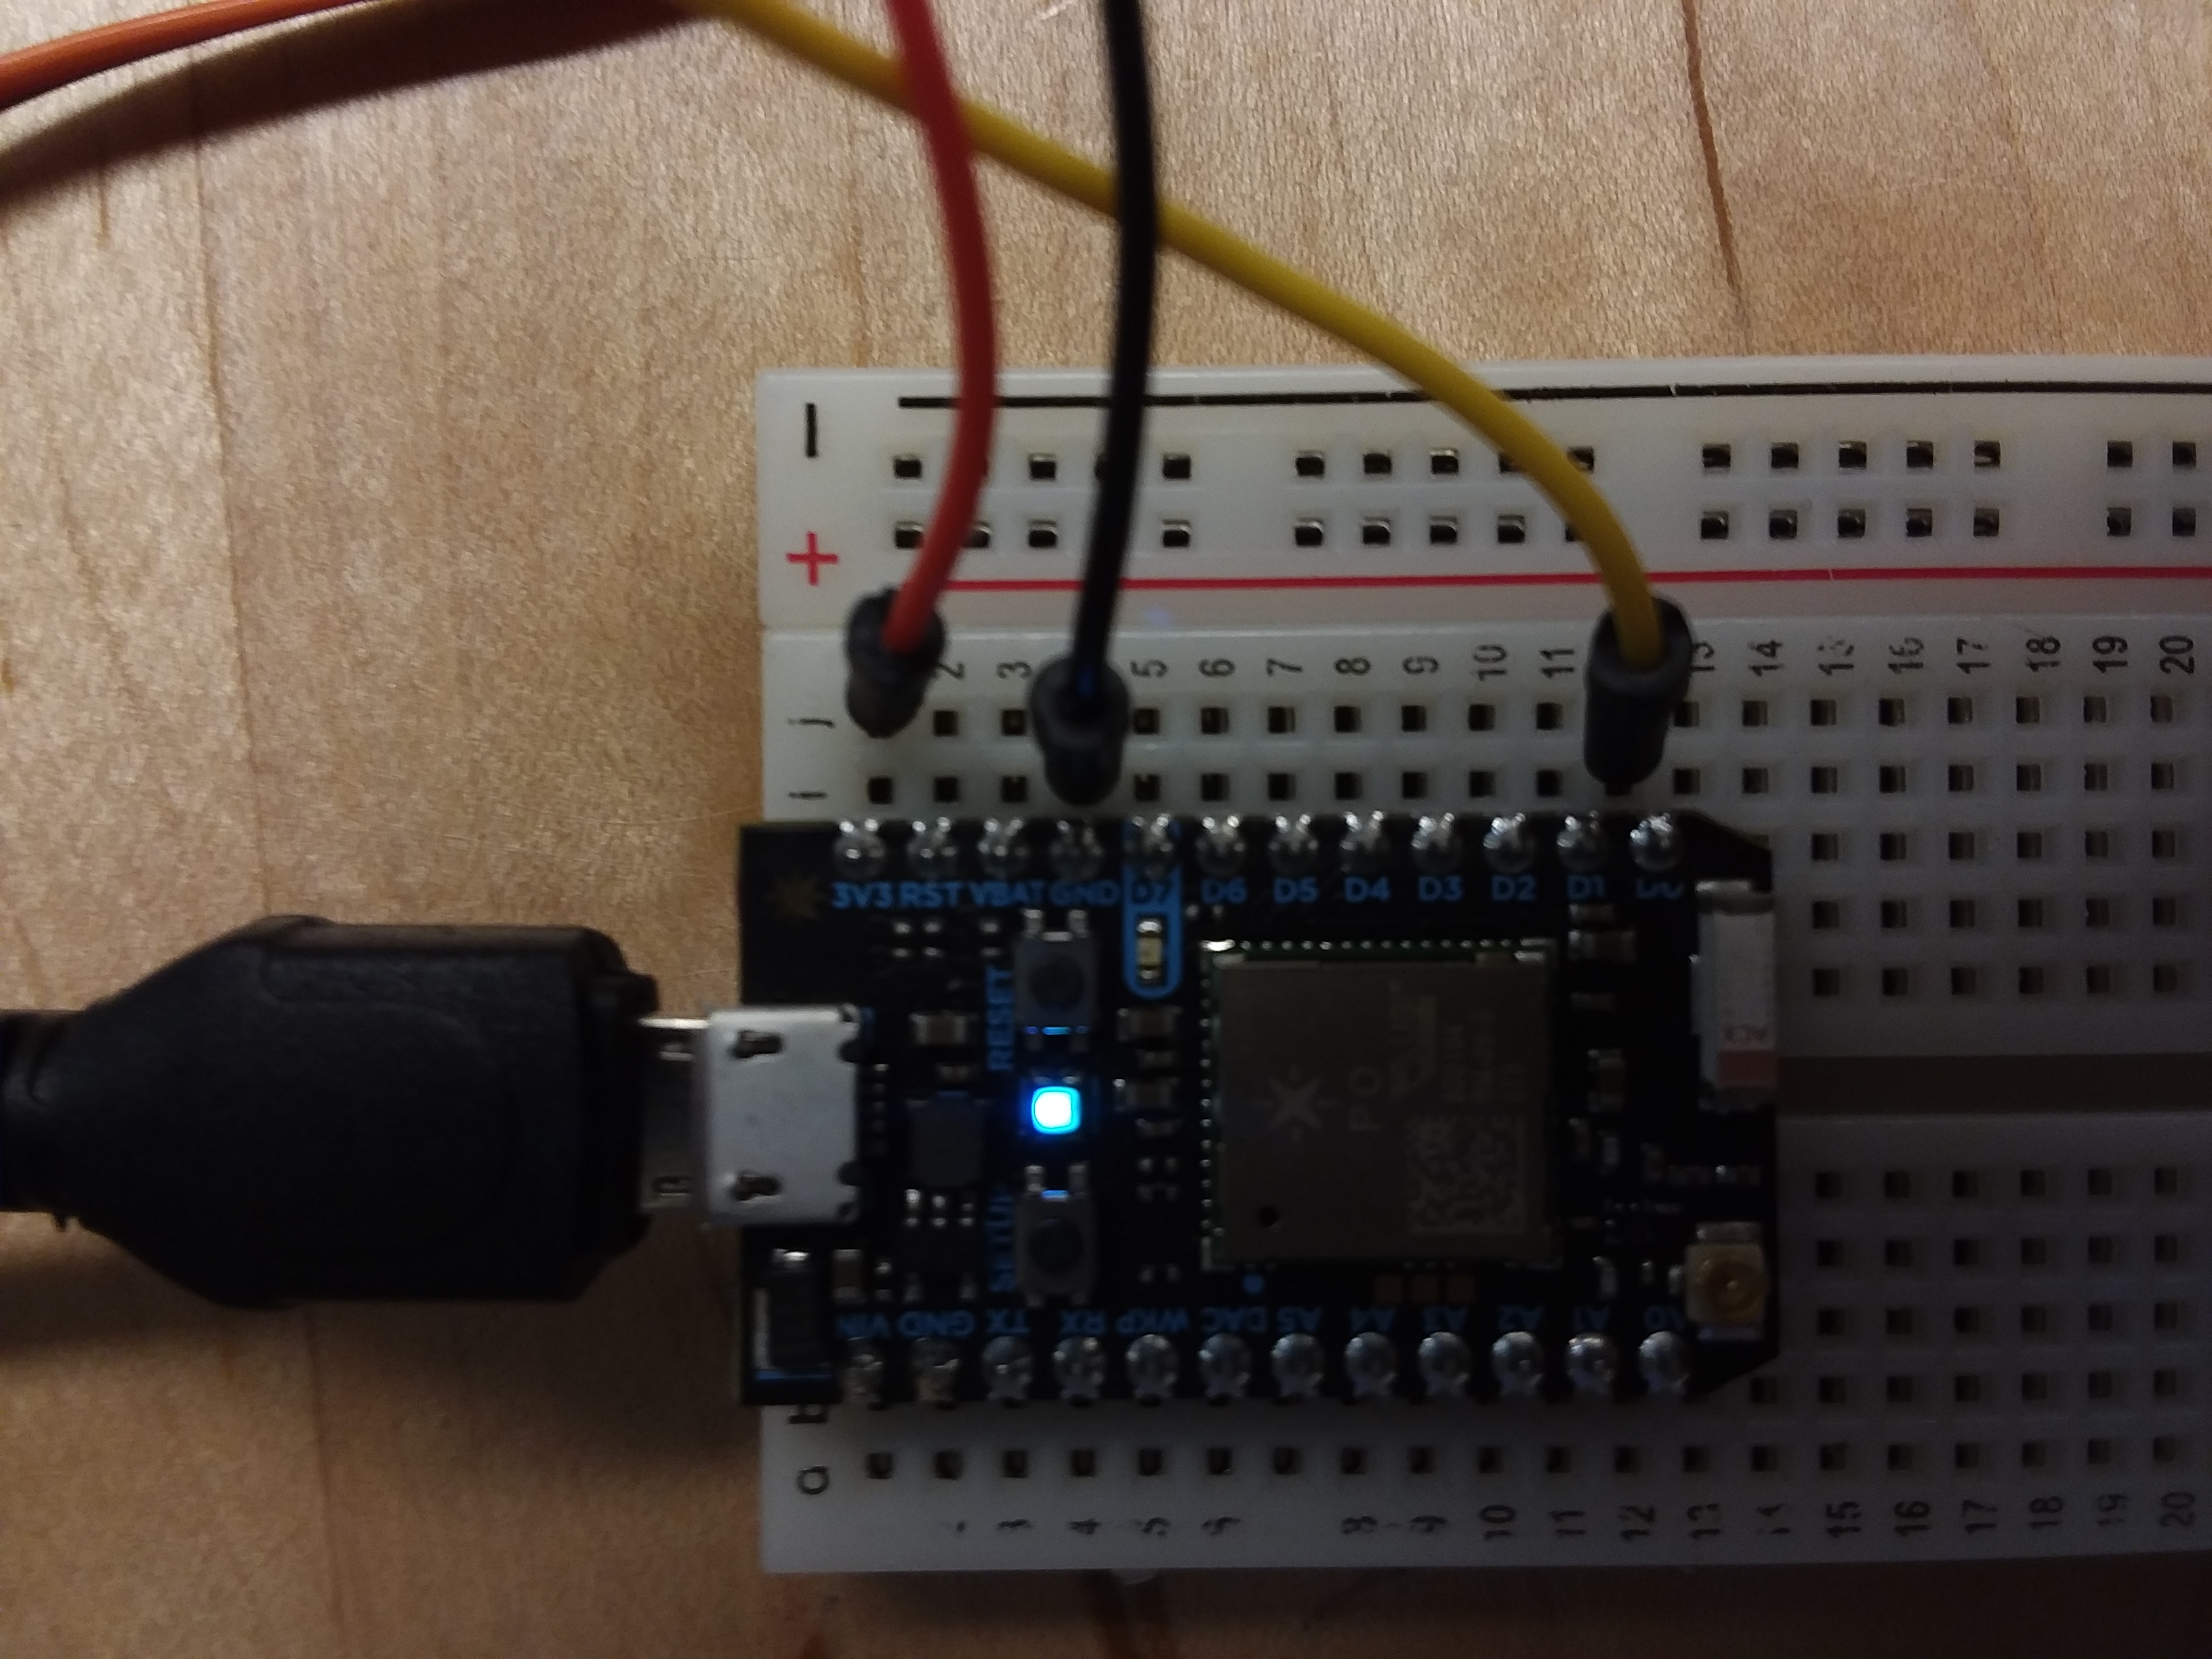
- Put your photon on the breadboard. Using jumper cables connect one from the 3v3 output into the red or middle wire portion of the servo. Connect one cable from ground into the brown (Some servos have black cables for ground) wire portion of the servo. Lastly connect a cable from the DO output of the photon and connect it to the orange wire portion of the servo. Pictures will be provided to see these connections.
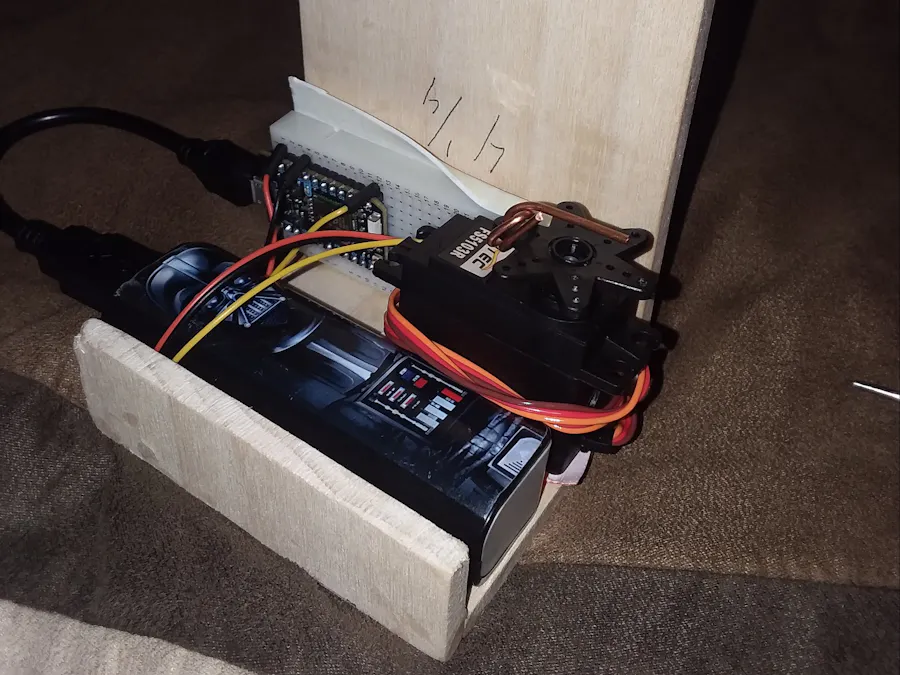
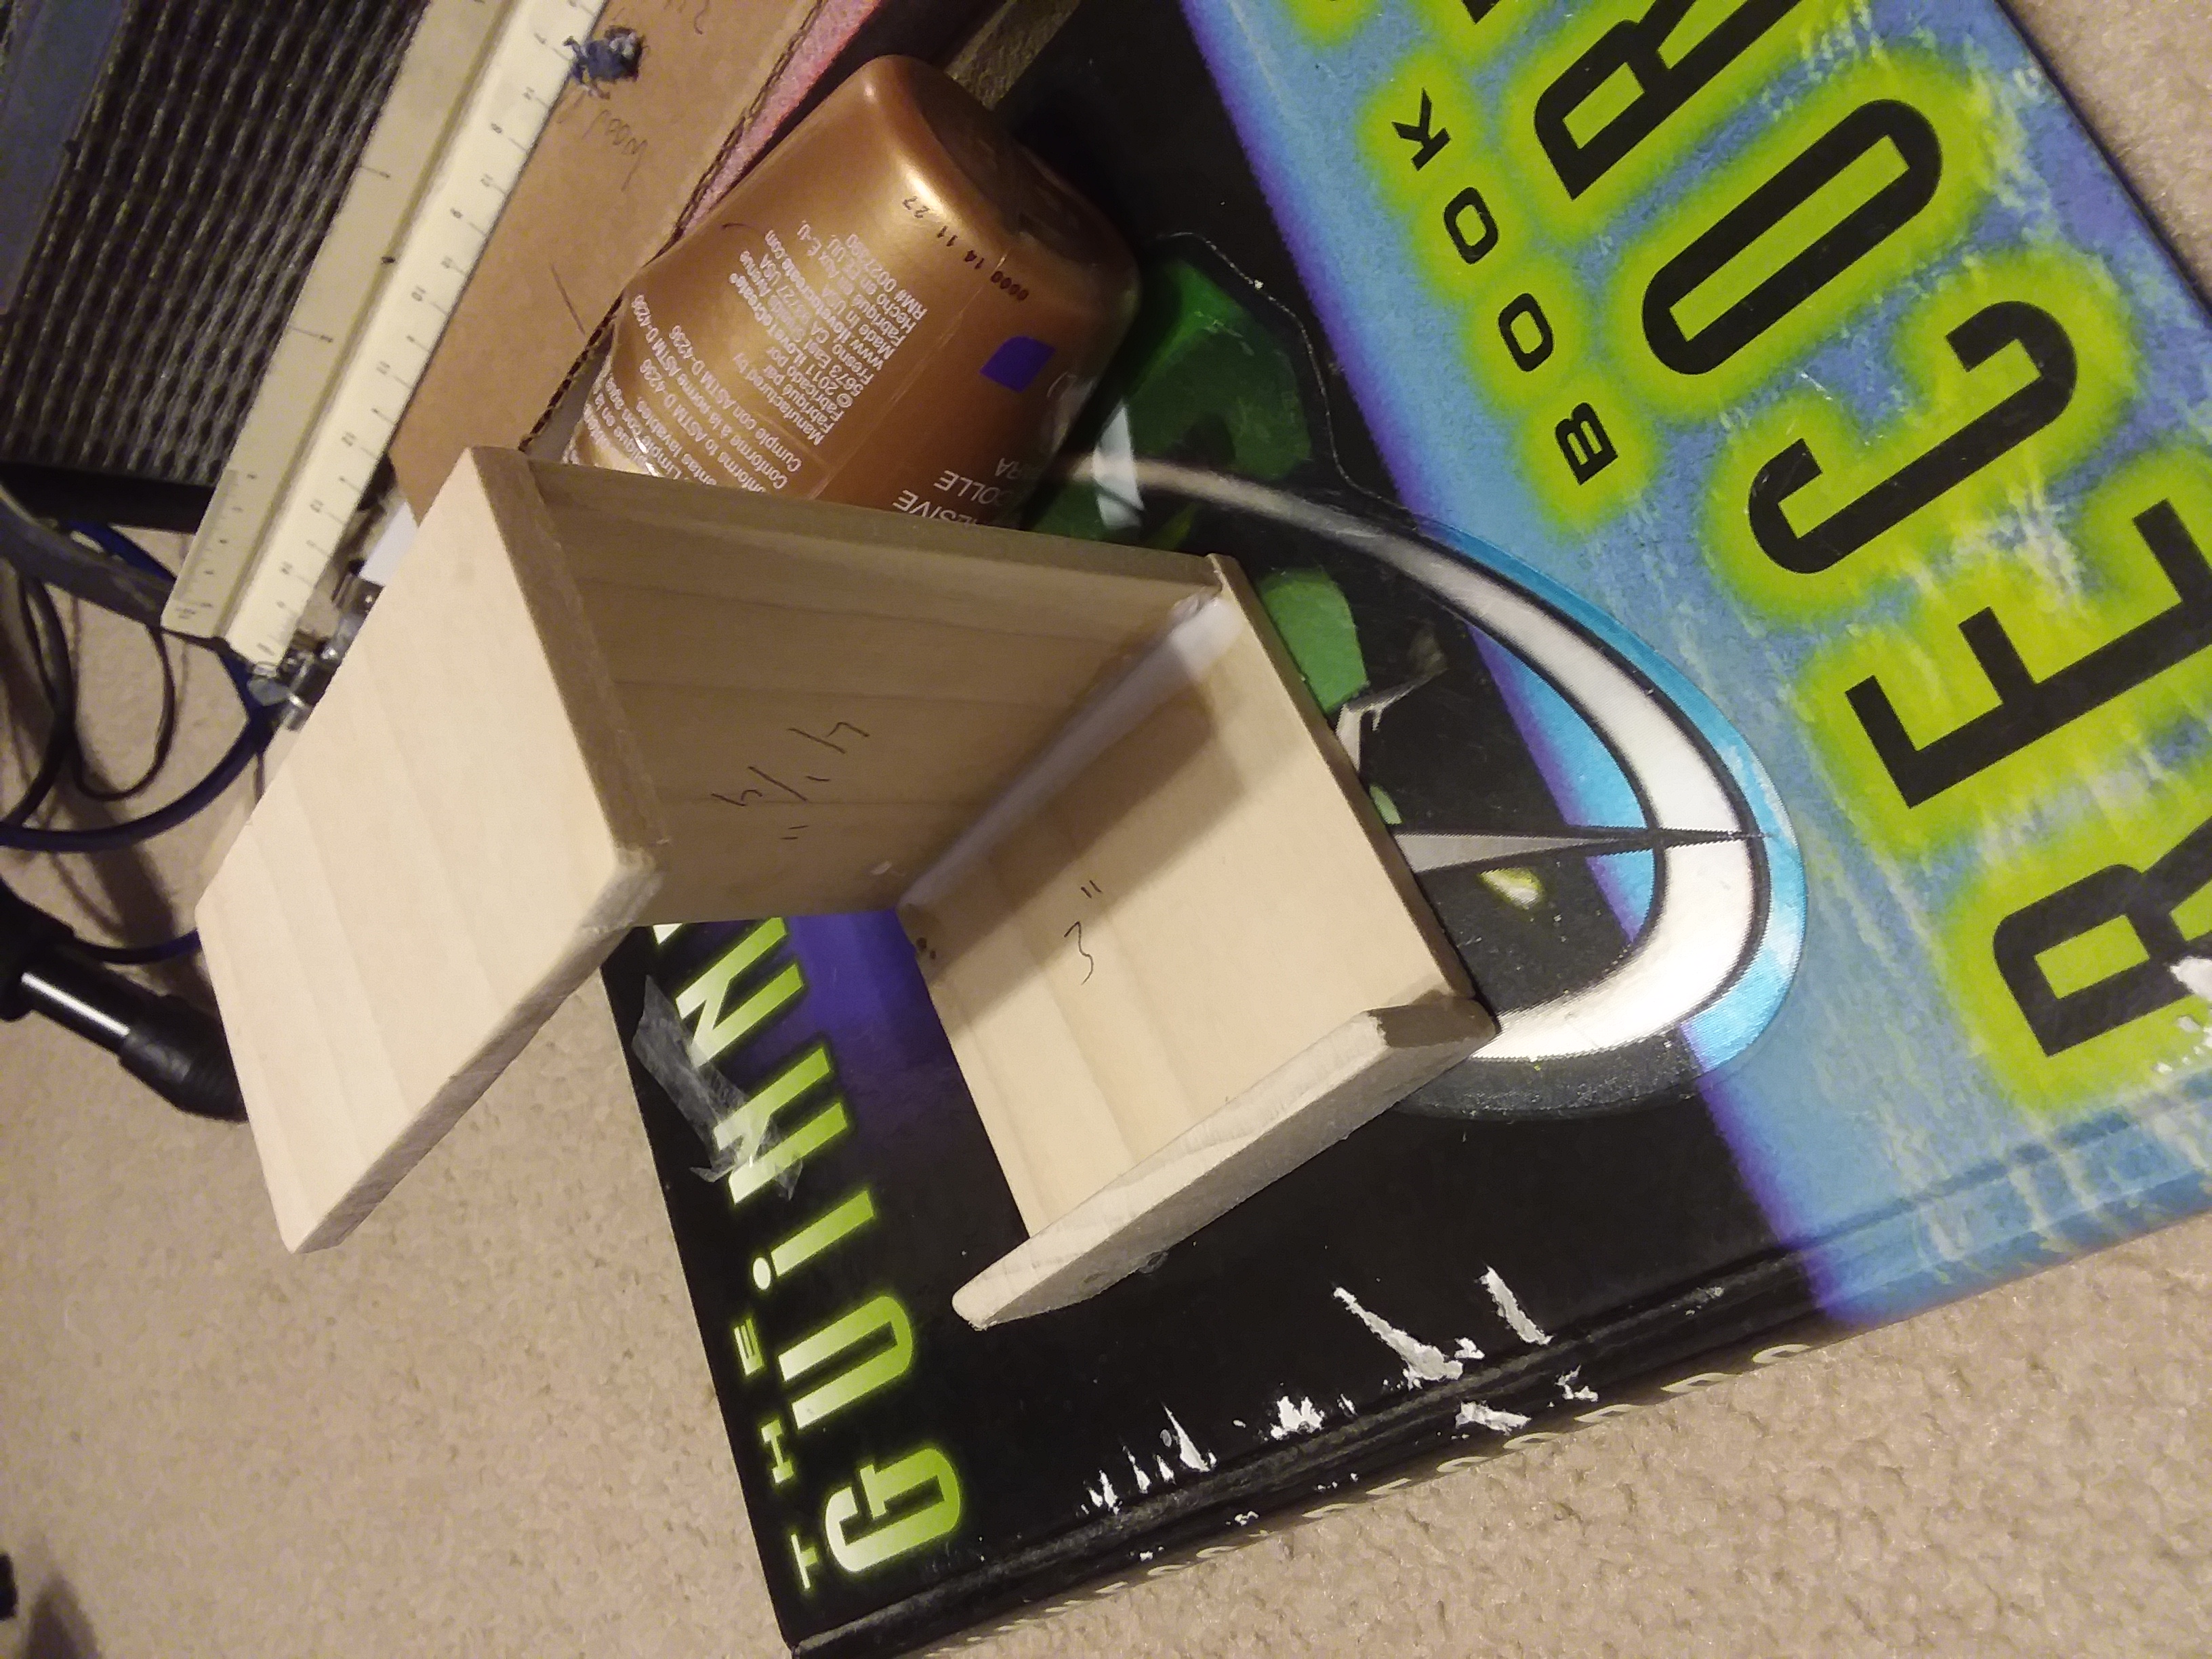
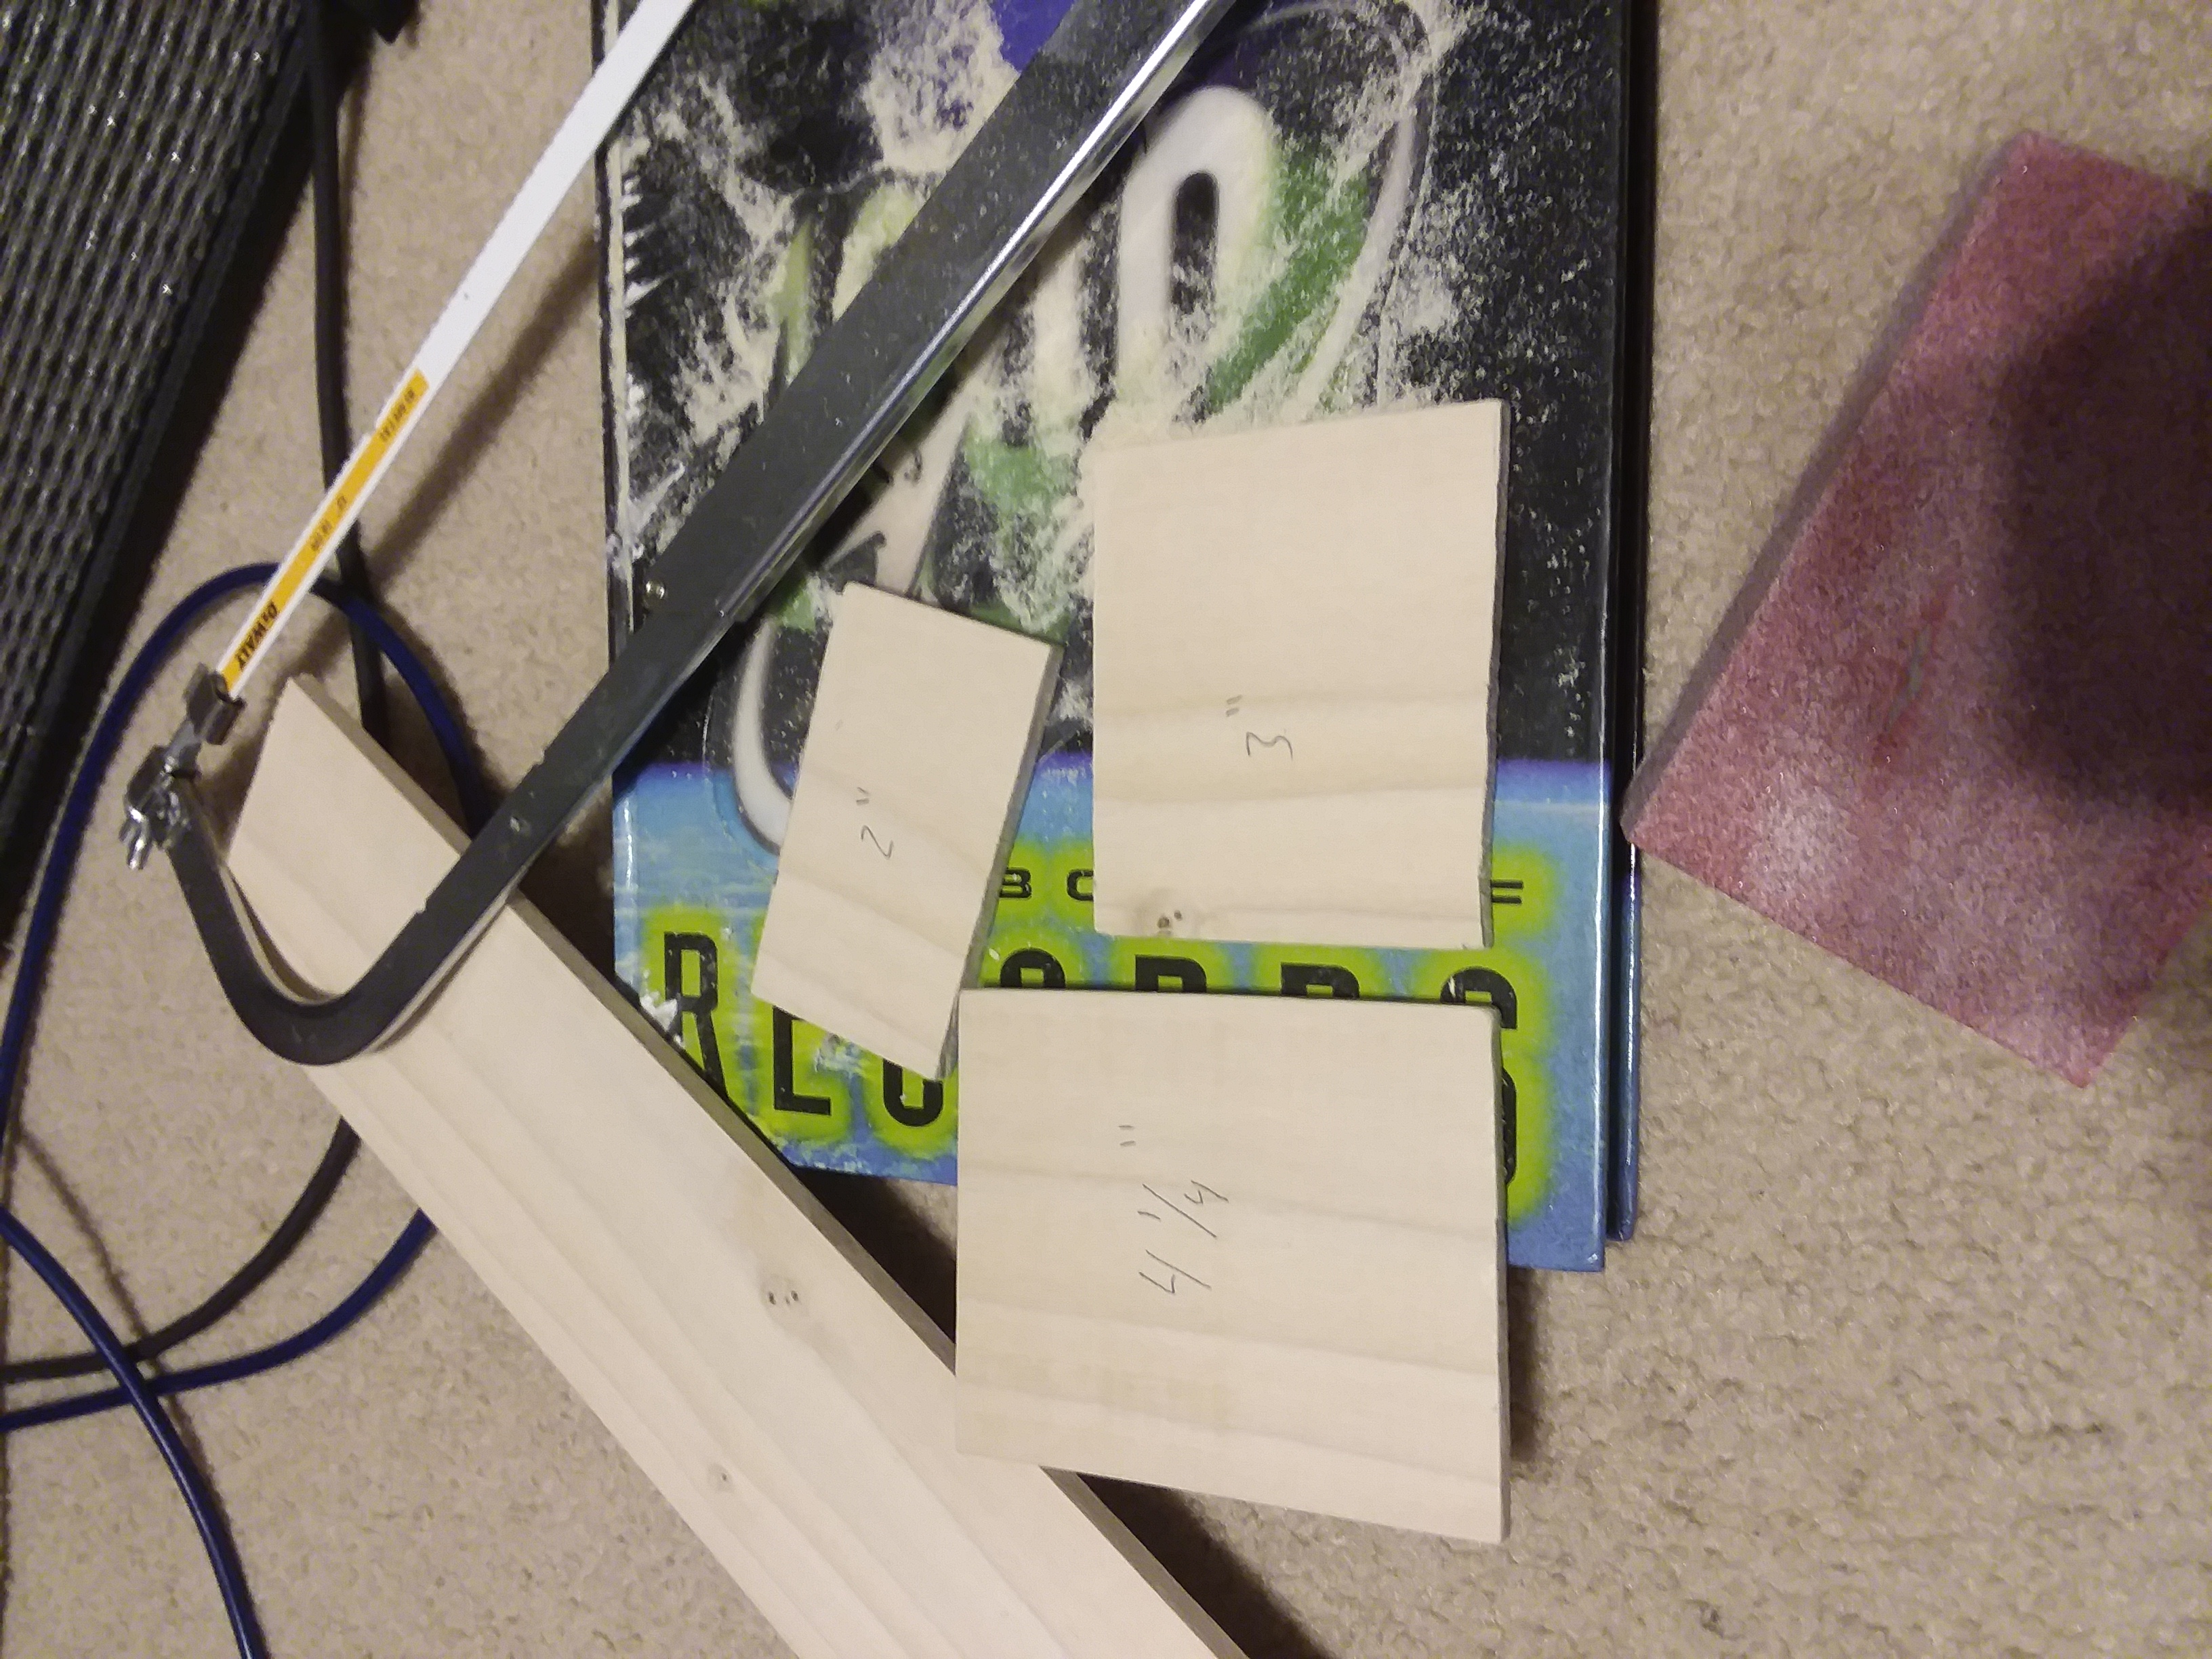
- Your housing unit could change depending on your blinds. In my case I took a wood plank that was 3 and half inches wide and cut it into 4 sections. One section that was 4 and half inches long, one that was 2 inches, one that was 3 inches long and one that was 1 inch long. I then used tacky glue to glue the pieces together as shown in the pictures below. This was an appropriate length for me as I was able to hang this onto my blind's rail and have space to fit a breadboard and battery on the side and the servo in the middle, attached with duct tape.
- The hook for your servo to attach to your blinds could change depending on your blinds. My blinds had a hole you could hook through so I took thick copper wire and wrapped it around the fin of my servo.
- Lastly, I hung up my project onto the rail and ran the copper wire though the hole for the blinds. It was ready to get to work.
Problems:The only problem I had was with the servo. When spinning to the right, inputting 90 degrees to make it stop would work instantaneously. When spinning to the left, it would not. To combat that, the buttons on Blynk programmed to make it open or spin to left were coded in a way that the motor would spin left for a set amount of time decide by the delay value, spin to the right for a small amount and then be told to stop which worked fine.
1 / 2 • Here is a different angle of my project
1 / 2 • Here is a different angle of my project


Comments