

Hardware components | ||||||
| × | 1 | ||||
 |
| × | 2 | |||
 |
| × | 1 | |||
 |
| × | 1 | |||
 |
| × | 1 | |||
 |
| × | 1 | |||
 |
| × | 1 | |||
Software apps and online services | ||||||
 |
| |||||
(This project is being managed here: Project Repository)
To charge small portable devices like a collar cell, headphones, mobile phones we cannot carry a heavy or large battery charger to charge it, we need a small battery charger module of compact size with the best battery management capacity.3.7VLithium-ion battery charger allows charging any of your devices that can work on a5V DC power supply anywhere. The size is very small, control of charging is very accurate and it can fully charge your devices.
I have created this project online using Inventhub, the git bash version control gives the user the facility of uploading schematic, PCB diagrams there with an easy way of managing and hosting users' libraries. I can also collaborate with others to get responses and feedback on my project. I have created BOM and releases of my project so that I will be able to send it to the manufacturer to get fabricated PCB and components.
Working- MCP73831-2-OT
The main component of this battery charger is the MCP73781-2-OT microchip. It is an IC that can control the charges that is mean we are able to get constant current and voltage through this IC. Its size is compact and can easily be used in Digital cameras, Bluetooth Headphones, USB chargers, and cellular telephones due to its better battery management capacity.
The main work of lithium-ion battery chargers is to understand the working of MCP73831 IC. It consists of 5 pins; Charge status output(CHRG), Ground(GND), Battery(BAT), VCC, Current Regulation(PROG).
- Charge Status Output(CHRG)
This pin is connected to the LED in a circuit to show if the battery is charging or not. If it will be charging it will lighten up otherwise it will be turned off. So, this is to indicate the status of charging the battery.
- Current Regulation(PROG)
We can adjust and block the charges or level of current through this pin of IC. we can place a resistor between PROG to VCC and that is how we can adjust the level of fast or slow charging of a battery.
Stages of charging a batteryThere are three stages of charging a battery:
- Preconditioning charge
- Constant-current fast charge
- Constant-voltage trickle charge
In a pre-conditioning stage of charging the battery will slowly charge to the maximum level at first i.e. 5V after that it will remain constant and in the last stage, it will decrease slowly.
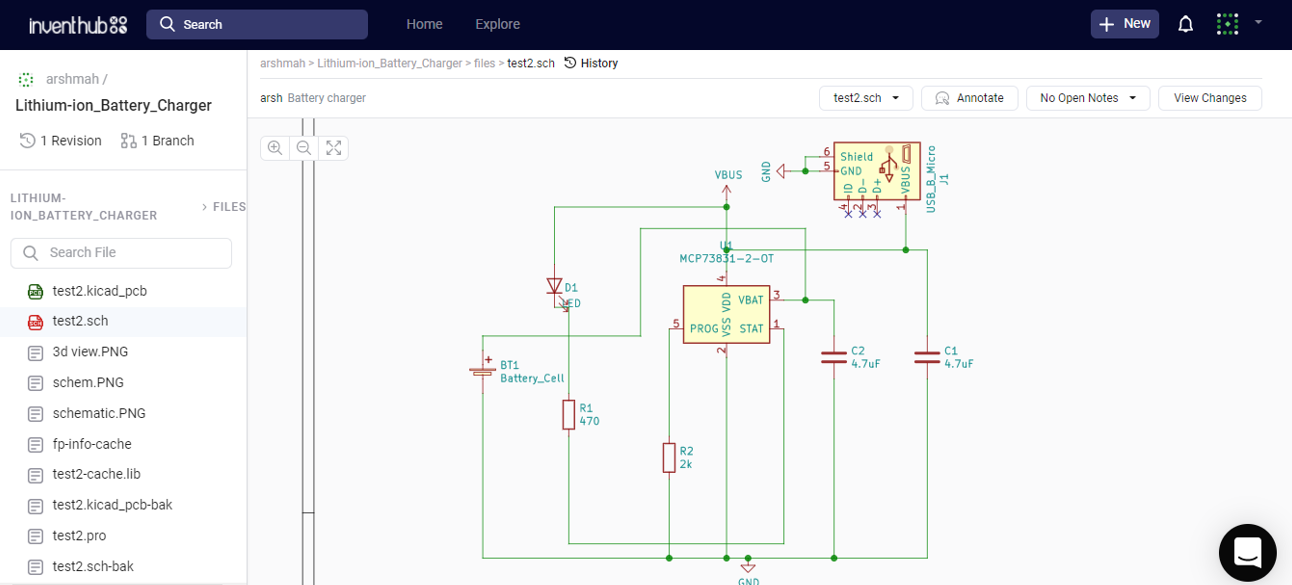
Schematic diagramI have created the schematic diagram using KiCAD. By creating a new project we can select a new schematic file where we can insert our components by going into Place→Symbol and can connect them using wires. We can add the footprints of each component by going into the Tools→Assign footprints option. According to the component dimension like length, lead spacing, diameter, height, etc. we can choose the desired footprint. Before assigning the footprint we can annotate each component. In this project, I am using a micro USB cable connector as it is commonly found in portable devices. The size of this connector is small and it provides you with a greater speed of data transfer from one device to another.
Here is the link to the schematic diagram, I have uploaded it on Inventhub where the detail of each component and its footprint is available.
https://inventhub.io/c/arshmah/Lithium-ion_Battery_Charger/tree/default
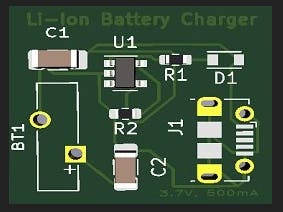
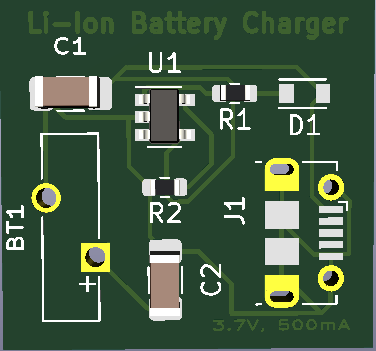
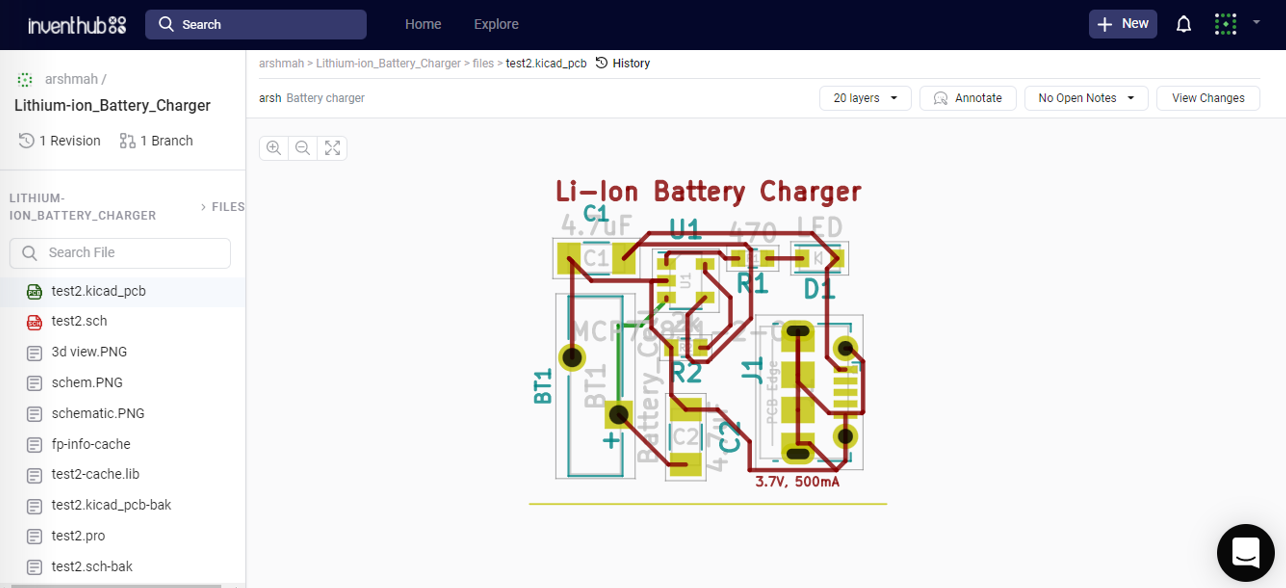
PCB designThe Li-ion battery charger is a compact size PCB. We can place components after getting them fabricated. We will be using that fabricated PCB as a charger. I have defined the size of every component in my schematic according to which I have selected the size of my board. This is a mini charger board that will be taking less space and material to facilitate the user. Below is the link to this PCB file.
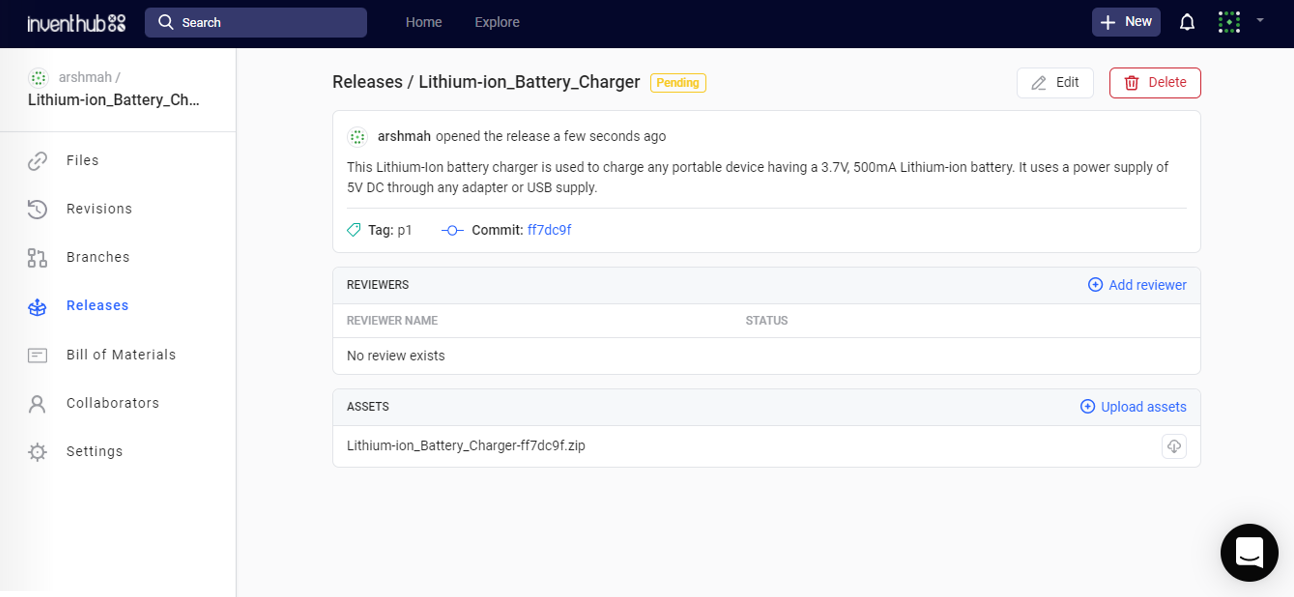
After creating the PCB design on KICAD I have created the release of the PCB board. I need to fabricate my PCB for what I have to send my whole project files with all routing layers, components, and board dimensions so that I can get the board of the same size as I exactly want or created in the software. Creating a release of the project allows us to comment with the manufacturer so that we can communicate with him on the fabrication of PCB.
I have used the online Inventhub platform to create my release. Where I have created a zip file of the whole project and the manufacturer can export it.
Here is the link where my manufacturer can find my Li-ion battery charger release.
https://inventhub.io/c/arshmah/Lithium-ion_Battery_Charger/releases/pending
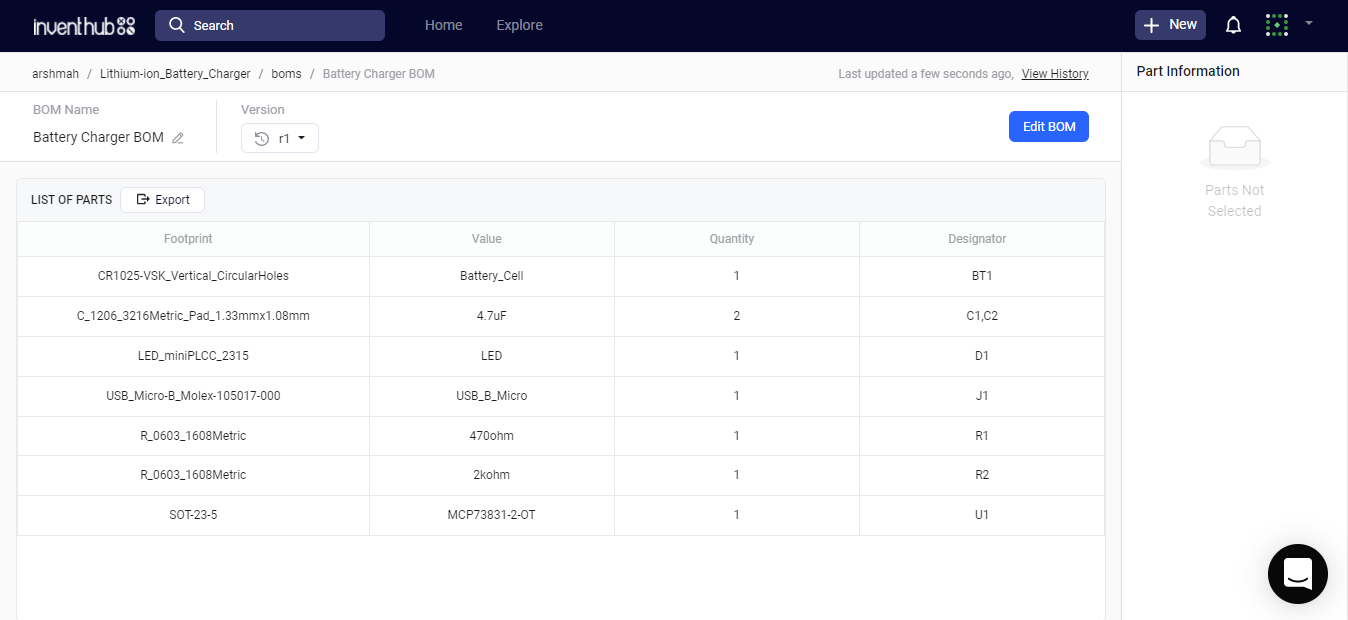
Bill of Materials(BOM)After getting my fabricated PCB from my manufacturer, I need to get the components from my component provider. Instead of making details of each component in an excel file, I have created a Bill of Material in Inventhub where my component provider can export the CSV file and can send me all the components with the same dimensions I have used in my design.
As we are dealing with the direct current in the Li-ion battery charger so there would not be anything different from your design that can cause trouble in your design. Otherwise, our device may be damaged. Creating a Bill of materials can help us in this to avoid any inconvenience in the design and at the hardware end.
This is the link where you can find the BOM of my project https://inventhub.io/c/arshmah/Lithium-ion_Battery_Charger/bom/list

Comments