


Hardware components | ||||||
 |
| × | 1 | |||
_ztBMuBhMHo.jpg?auto=compress%2Cformat&w=48&h=48&fit=fill&bg=ffffff) |
| × | 1 | |||
 |
| × | 1 | |||
 |
| × | 1 | |||
 |
| × | 2 | |||
 |
| × | 1 | |||
| × | 4 | ||||
| × | 1 | ||||
| × | 1 | ||||
| × | 1 | ||||
 |
| × | 1 | |||
| × | 1 | ||||
| × | 1 | ||||
Software apps and online services | ||||||
| ||||||
 |
| |||||
Concept
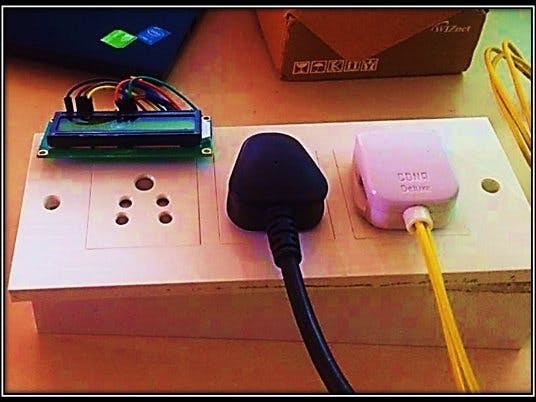
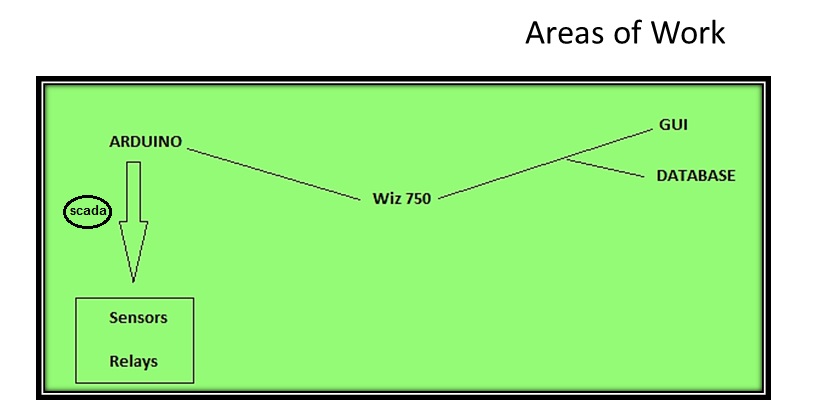
The project is on the application of SCADA property of Internet of Things. The project is about the development of a smart electric multipin plug box which can be used to power various electrical appliances this box can be remotely controlled/operated using a web application. The project proposes an efficient implementation for Internet of Things used for monitoring and controlling the home appliances via Internet. The project basically has three divisions a User Interface, Switch Board (wiz-wiki board) and Communication interface between the both. The Board is controlled using a Wizwiki-W7500 board which in turn is creates a webserver that can be accessed using a web browser.
Introspection
The project is about the development of a home/industrial automation which will be able to remotely control and monitor environment using a web application. Home automation develops automation for a home, called a smart home which includes the control and automation of AC (air conditioning), lighting, and security and additional home apparatuses; like washer/dryers, ovens or fridges. Wi-Fi is frequently utilized for remote checking and control. The project is based on Supervisory control and data acquisition (SCADA) which comprises of software and hardware elements that allows users to
- Control processes locally or at remote locations
- Gather, Monitor and process real-time data
- Switching traditional electrical appliances to Smart devices is very difficult task, the switchboard provides a feature to control any old electrical gadgets remotely
Why This Project?
We, as a team wanted to do a project that would satisfy these three constraints:
* easily implementable
* practically possible
* cost efficient
We majorly focus on the problem domain i.e. "Energy Conservation".
Why to conserve energy?
Ø Protection can spare you cash. Thisis one of the most compelling motivations numerous start to develop a cultureof preservation, be that as it may, as an ever increasing number of individualslearn, it is positively not by any means the only reason.
Ø Less power utilized means lessnon-renewable energy sources consumed. It's valid that we can acquire powerfrom cleaner wellsprings of vitality, for example, wind and sun oriented power,however a great part of the power that we utilize is still from sources, forexample, oil and coal. Petroleum products are not inexhaustible sources and thegreater power we devour, the quicker these assets will be drained.
Ø Non-renewable energy sources are nota spotless wellspring of vitality either. Preservation of electrical vitalitycan decrease contamination and lessen ozone harming substance discharges.
Ø As a component of the comprehensiveview, preservation can likewise help decrease the danger of oil slicks and thedangers that coal and oil acquirement stance to our biological communitiesaround the globe.
Ø With an end goal to decreasepetroleum derivative utilization, researchers have centered cash and endeavorsinto creating atomic reactors. Despite the fact that these reactors can yieldmuch power, it likewise delivers radioactive waste items. Diminishing ourinterest for power can diminish the requirement for atomic reactors and alongthese lines decrease the danger of radioactive contamination
Related Work/Background
Implementing Home Automation systems is one of the most popular Internet of Things projects with huge possibilities to expand. Home Automation projects done by beginners are mostly using Arduino controllerand Bluetooth devices which are easy to implement. With experience in Arduino, webdesigning and the interest in both led me to choose this project. Instead of using Arduino or Raspberry pi whichare easy in implementation, I choose Wizwiki-W7500 board because of itspotential in networking. A user interface was developed using HTML, CSS and JavaScriptto gain more experience in the same.
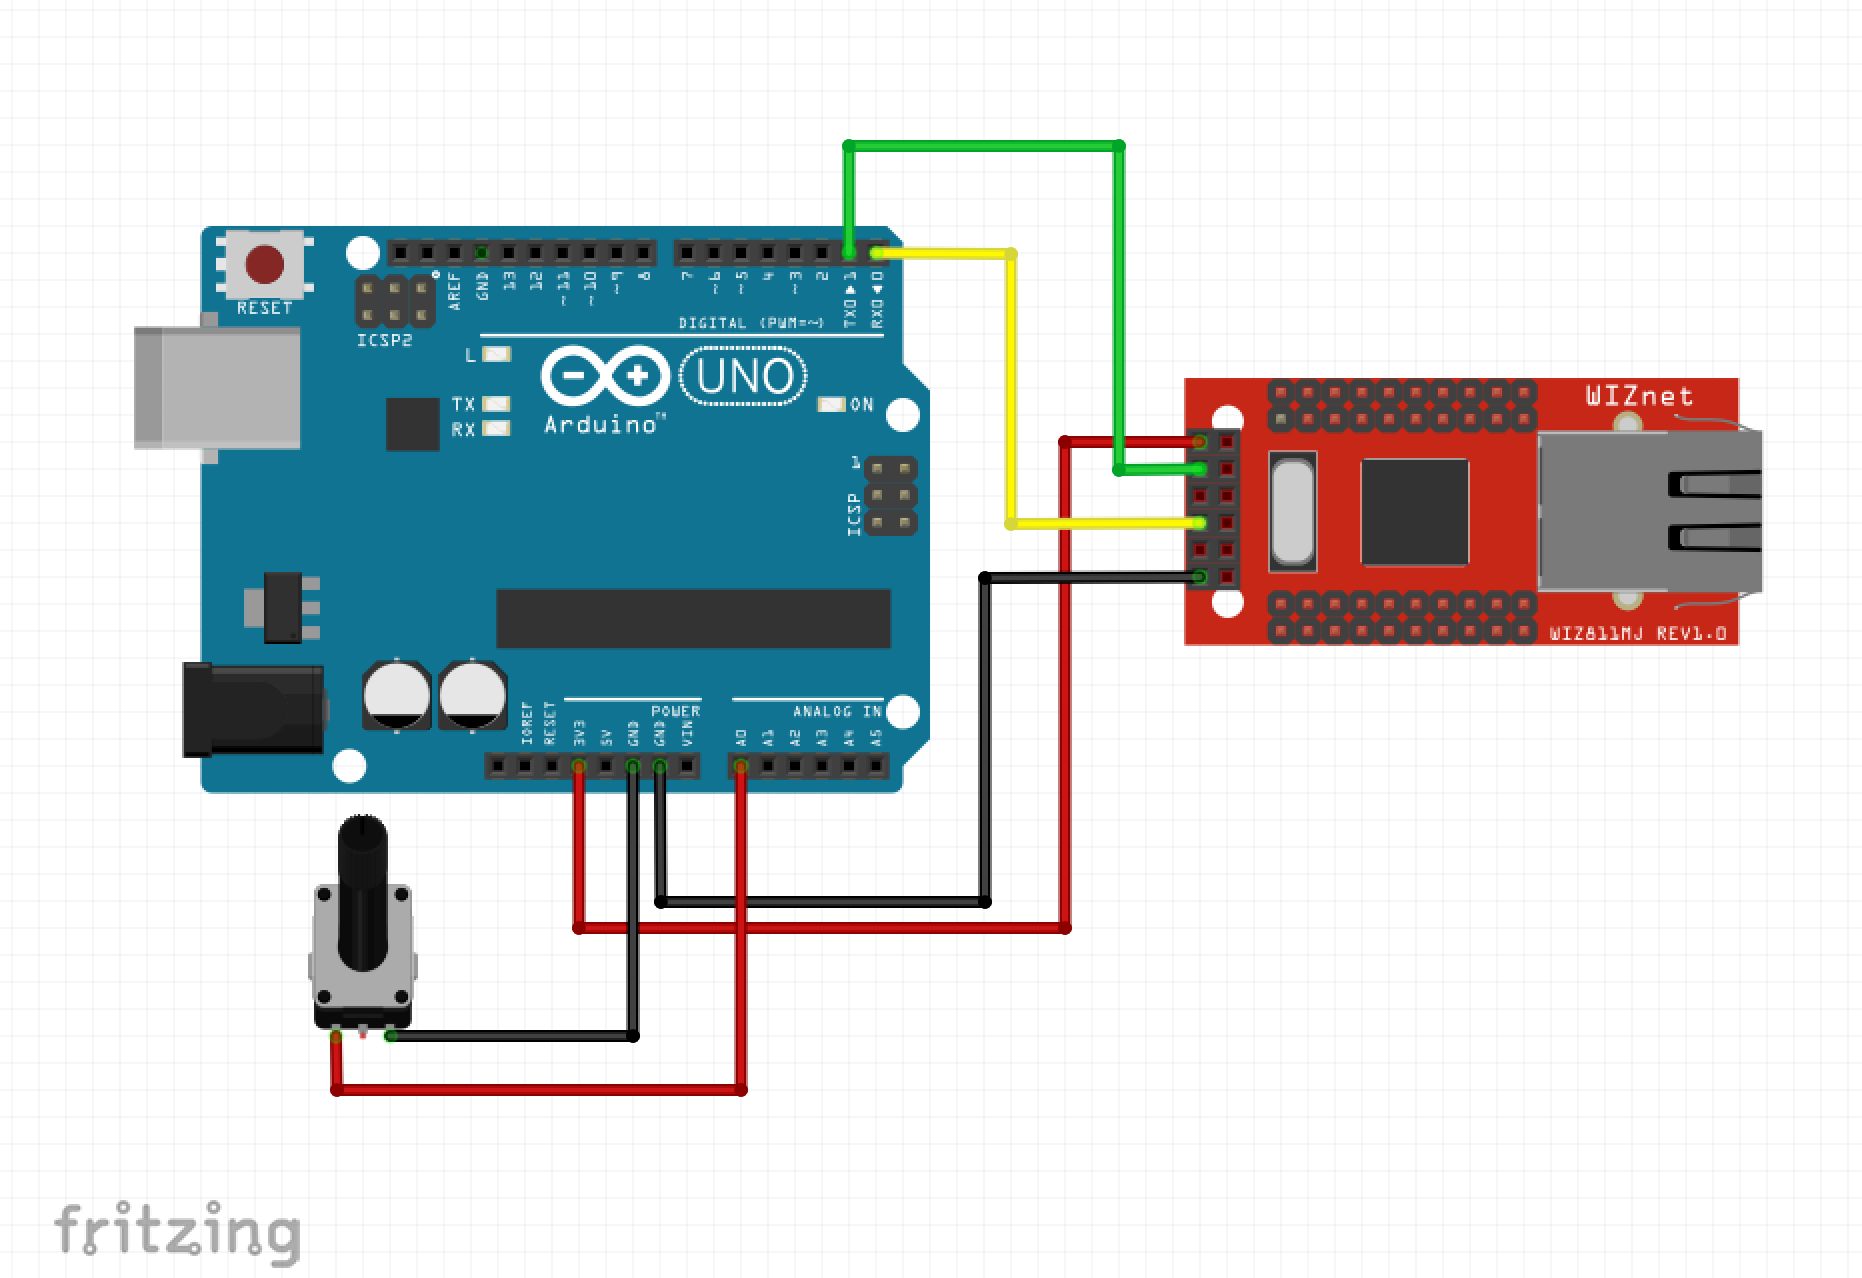
WIZ750SR: The game changer
WIZ750SR is the condensed sized serial toEthernet unit utilizing W7500P, WIZnet iMCU, cortex-M0. WIZ750SR is theconvention converter that transmits the information sent by serial gear asTCP/IP information compose, and changes over back the TCP/IP information gotthrough the system into serial information to transmit back to a serialhardware. It supports the serial interface of TTL, RS-232, RS-422/485. Learning about the “Wiz750SR” and making a project using it was the major responsibility. The project technically has three divisions: a User Interface, Switch Board (Comptroller board) and Communication interface between both. Wiz750SR plays a major role as the communication module concerning to device and the database.
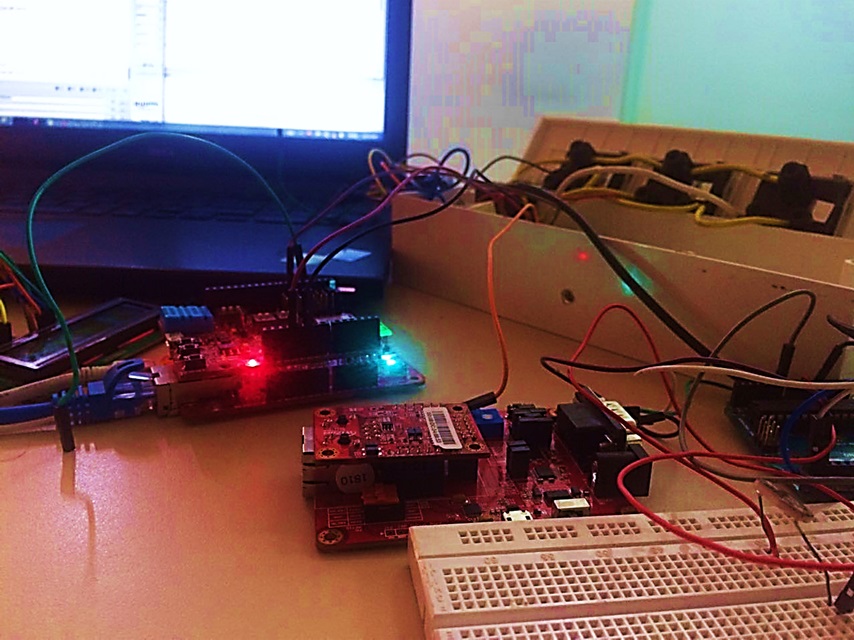
Actual Work/ Implementation
Here are the screenshots pictures of the actual work and output
UI/UX
Evidence:
Backend Establishment:
Anshul Shaji
 RAGUL M 1560912


Comments