Introduction
Hello guys, so I'm back here with an another exciting project.
Afraid of dark, here is the solution.The portable one.
First, you all have to know what is LDR sensor main component of this project.This sensor is also called Photo Resistor. Resistance of this sensor decreases with increase in intensity of intensity of light.
Behind the scenes
With increase in intensity number of photons increases and due to its intrinsic property resistance increases.
Gentle Note
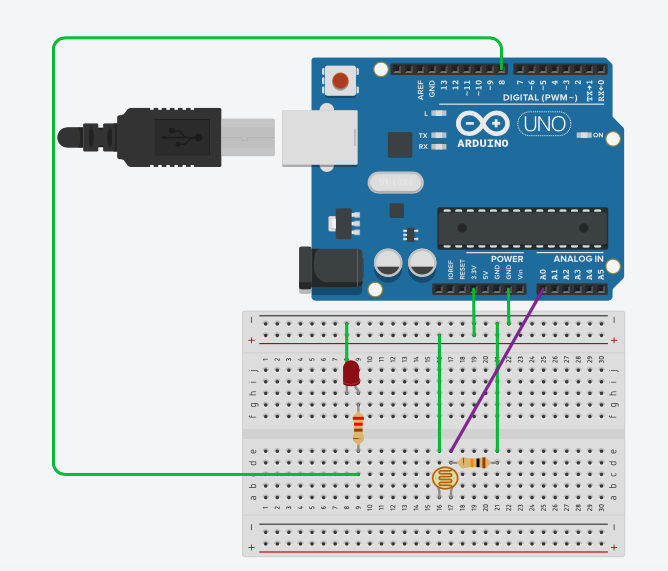
I will use USB cable to upload the program after that I will use 9V battery for powering my Arduino Board.You can use with 9V battery clip with DC jack as Arduino provides a separate port to connect that or just a normal one having two wires.
In former case, you just have to attach the jack to the port provided and your Arduino will be powered up. In latter one, you have to connect the negative wire in any of the ground pin available in Arduino Board and positive one in Vin pin available in Arduino Board.
Led Light in Arduino will blink up.
Steps
Make the connections as shown in diagram. For any further help contact me.


_ztBMuBhMHo.jpg?auto=compress%2Cformat&w=48&h=48&fit=fill&bg=ffffff)


Comments