

Hardware components | ||||||
 |
| × | 1 | |||
| × | 1 | ||||
| × | 1 | ||||
 |
| × | 2 | |||
 |
| × | 1 | |||
Software apps and online services | ||||||
 |
| |||||
EMG-Controlled Claw with Arduino:
Read moreElectromyography (EMG) is a technique used to measure and record the electrical activity produced by muscles during their contraction and relaxation. It allows us to monitor the electrical signals generated by the neuromuscular system as muscles contract.
The project showcases the Human-machine Interaction, where your natural muscle movements directly communicate with and control a mechanical claw.
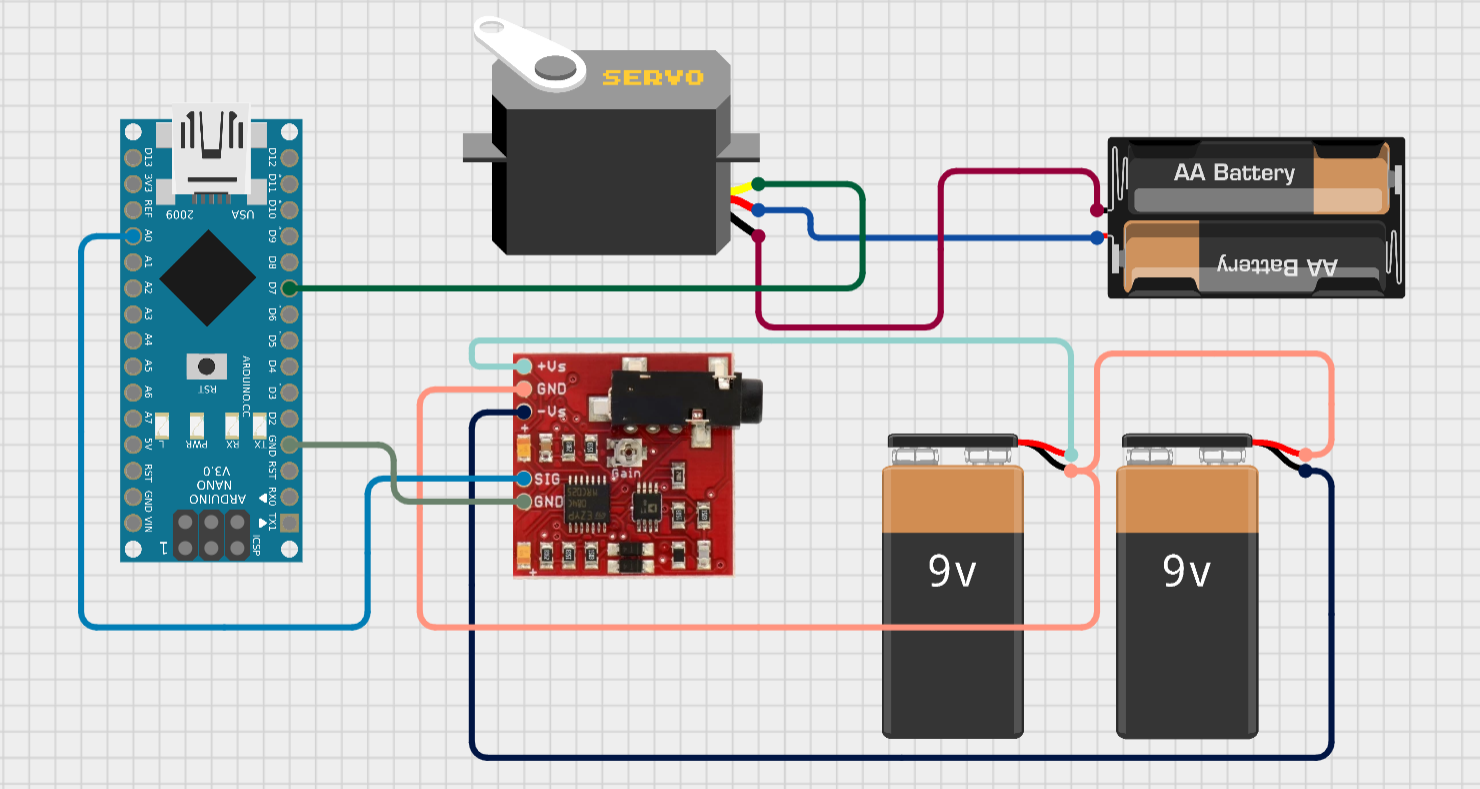
Wirings:Connecting the EMG sensor to your Arduino. The EMG sensor has five pins, connect them as follows:
- Vs+ to +Ve of 9V battery
- GND1st should be connected to the wire shorting a positive and negative pin of two 9v batteries.
- Vs- to -Ve of 9v battery
- Sig pin to Arduino's A0
- GND2nd to Arduino's GND
Connect the servo motor to your Arduino:
- Servo signal pin to Arduino's D7
- Servo's positive and negative to the corresponding of power supply.
The connections may be confusing, so refer the schematics provided below.
Schematics
Mount the Servo Motor to an aluminum gripper as shown in the figure.
Servo motor with a claw machenism.
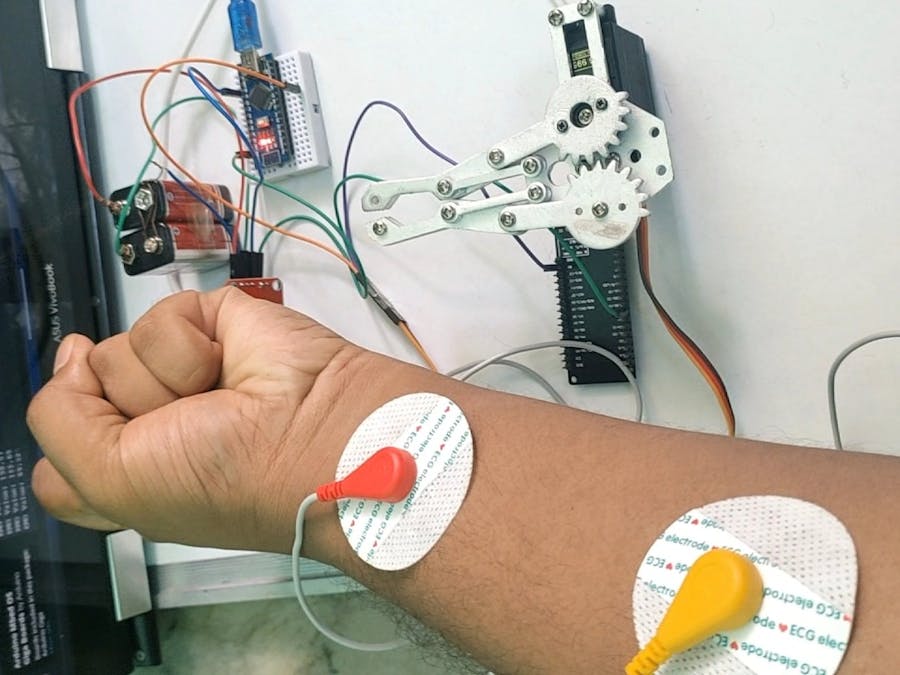
Follow the image below to place electrodes.

9 projects • 7 followers
Tech enthusiast and programmer who also happens to be a Biomedical Engineer.


Comments