


Hardware components | ||||||
| × | 1 | ||||
| × | 1 | ||||
| × | 3 | ||||
| × | 1 | ||||
| × | 1 | ||||
Software apps and online services | ||||||
 |
| |||||
What's this?
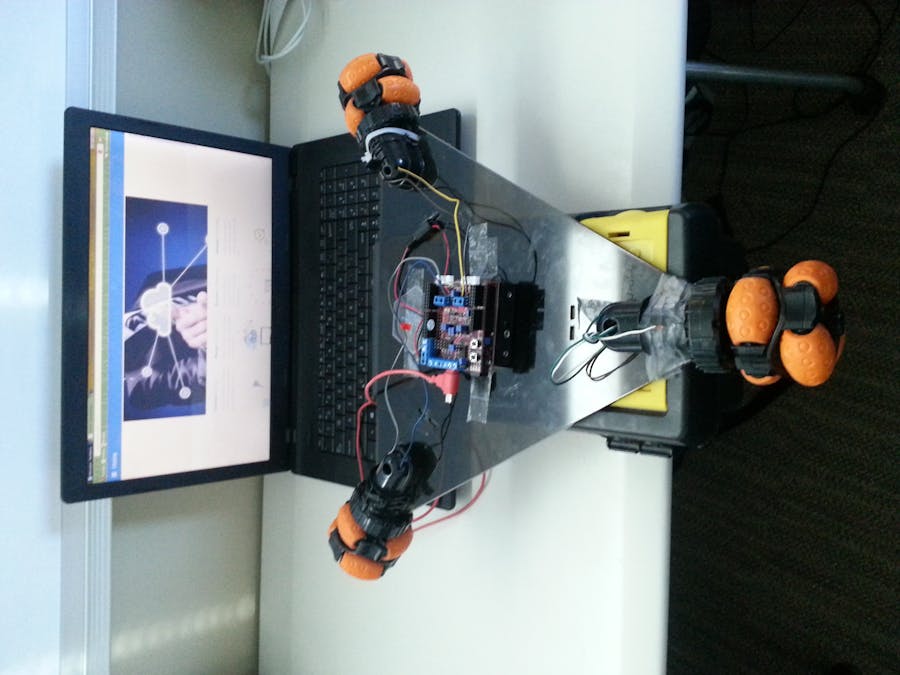
"The chipKIT™ Uno32™ is based on the popular Arduino™ open source hardware prototyping platform but adds the performance of the Microchip PIC32 microcontroller. The Uno32 is the same form factor as the Arduino™ Uno board and is compatible with many Arduino™ shields." "The chipKIT™ Motor Shield is an expansion board for use with the chipKIT Uno32 and chipKIT uC32. It provides additional circuitry and connectors for the Uno32 and uC32 to drive various motors types (digilentinc.com)." Using this board and shield with a set of three omni-wheels I was able to drive the robot though Octoblu's IoT platform.
You will need
Software Setup
To set up your chipKit Uno32 with Octoblu, please follow this entire guide, created by Moheeb Zara. Although you are using a chipKit Uno32, you will still use the Arduino node within Octoblu. The only difference is that you will need to set up your firmata from chipKit's IDE, MPIDE, instead of the Arduino IDE. You should load the firmata and upload it to your board, as shown below:
Hardware Setup
Building your robot is relatively simple:
Creating your flow
Once you setup your chipKit Uno32 with firmata, your arduino node in Octoblu, and have your robot built, you are ready to start making your flow. By the time we are done, your flow should look something like this:
Let's start by creating a "trigger" node:
Now make 6 of these... You can name these whatever you want, but you should name them the same to avoid confusion:
Now that you have 6 triggers created and named, we will start editing their contents. To edit a node, click on it and an edit page will pop up. It will save all changes automatically, so close them once you are done editing. Here are what your edit pages should look like for each trigger, in order:
Now that we have all of your triggers created and set up correctly, we will create 4 arduino nodes and edit those... Also note how the wires from the triggers connect to the arduino nodes:
We named the arduino nodes based on the color of the wire. Let's take a look at what each of those nodes should look like:
Now we this next step requires a little more logic and will require us to use the function nodes and a little bit of javascipt. First, we will need two "equal" nodes, and please still pay attention to how the wires are connected from node to node:
Now we need 4 function nodes:
Now make sure that all your wires are connected correctly:
Running it
Now that you have all of your stuff configured, and built, you are ready to control your robot. Each time you want to turn your robot on and let it take commands, you must:
1. Run bindPhysical
2. Plug in arduino power source
3. Deploy flow on Octoblu
It is very important that you follow those steps in that exact order, or your robot will not respond. If you are curious as to why we injected each value into each pin, please read the first few pages of the chipKIT Motor Shield Reference Manual.


Comments