


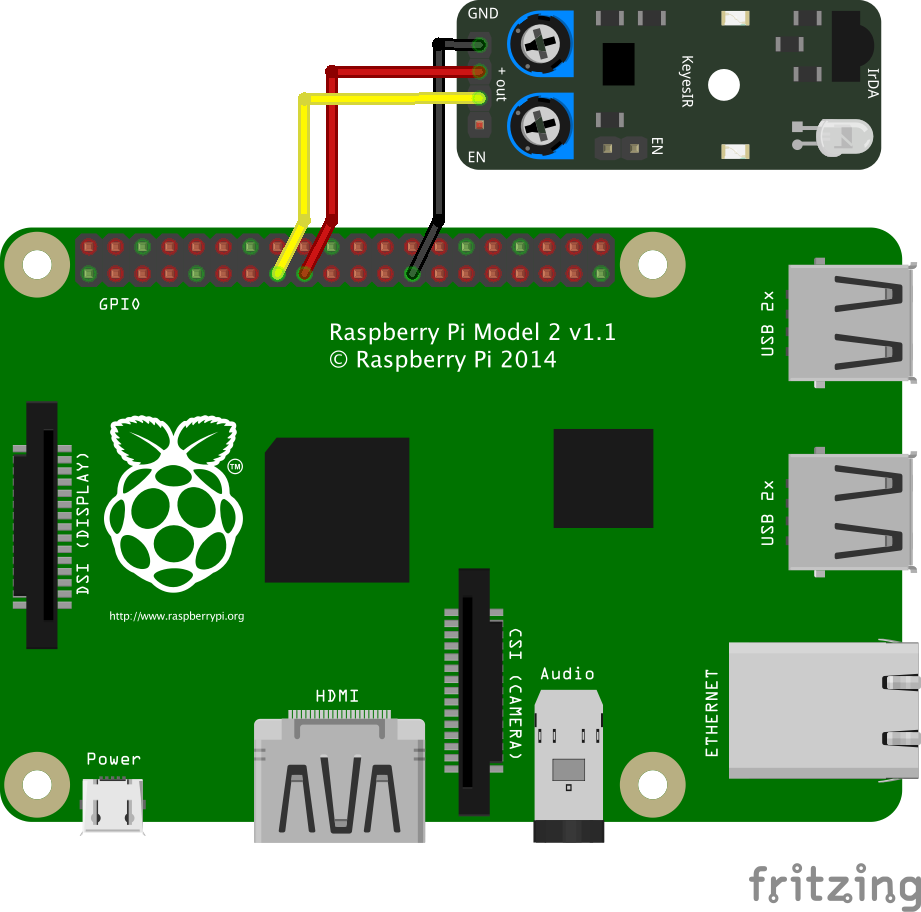
Hardware components | ||||||
 |
| × | 1 | |||
| × | 1 | ||||
| × | 1 | ||||
Software apps and online services | ||||||
 |
| |||||
By using a Raspberry Pi 2 with a motion sensor and Octoblu, it is incredibly easy to detect if your mail is being delivered. You can then use this information to kick off any flow of actions, such as sending a text, email, or even sending out your mail retrieving robot.
Throughout this walkthrough I will show you how to setup your Raspberry Pi, use the meshblu-custom-device-boilerplate, and setup your Octoblu flow.
Meshblu Custom Device BoilerplateI would like to start by explaining this piece. The boilerplate includes everything you need, except a meshblu.json, to create a custom device in Octoblu. It utilizes Meshblu socket.io to create a connection and send messages from your custom device to Octoblu. I recommend spending some time now to familiarize yourself with the main file.
If you would like more information, check out the official docs.
Raspberry Pi SetupNow we will setup your Raspberry Pi... However there are quite a few things we need to setup, such as: Pi image, keyboard configuration, WiFi connectivity, node, git, and meshblu-util installs. But don't worry, we will do this step by step.
1. Obtain a copy of Raspbian Jessie Lite
2. Burn Raspbian onto an SD card
3. Insert SD card into Pi and turn it on (default login is user:pi, pass:raspberry)
Now you have a working Raspberry Pi! We will now need to configure the keyboard properly...
4. Enter the command:
sudo raspi-config
5. Select 'International Options'
6. Select 'Change Keyboard Layout'
7. Now you will most likely need to select 101 or 104-key generic keyboard.
8. Select the language to English (us)
9. Select the default for the next two prompts
10. Reboot your Pi:
sudo reboot
Now all the special characters on your keyboard should be working properly, such as pipe '|'. If you are still having issues, try different keyboard configurations until one works.
We will now need to tell your Pi to connect to your WiFi network with it's WiFi dongle...
11. Edit 'interfaces' by entering the command:
sudo nano /etc/network/interfaces
12. Make sure that the section regarding wlan0 looks like this:
allow-hotplug wlan0
iface wlan0 inet manual
wpa-roam /etc/wpa_supplicant/wpa_supplicant.conf
iface default inet dhcp
13. Now scan for available networks:
sudo iwlist wlan0 scan | grep ESSID
14. Edit 'wpa_supplicant.conf':
sudo nano /etc/wpa_supplicant/wpa_supplicant.conf
Before you change this file, you will need to know a few things, such as what type of network you have(WEP, WPA), the ESSID, and the password. If you are having trouble with the WiFi connection setup, refer to this documentation.
15. If you have a WPA2 network, at the bottom of the file, add this:
network={
 ssid="YourESSID"
 psk="password"
 key_mgmt=WPA-PSK
 proto=RSN
 pairwise=CCMP
 auth_alg=OPEN
}
16. Reboot your Pi:
sudo reboot
17. Check if you are connected by verifying your ESSID:
iwconfig
Now that you are connected to the internet and have your keyboard setup, we can go ahead and install a few tools that we will need...
18. Download and install Node.js and it's package manager, npm.js:
wget http://node-arm.herokuapp.com/node_latest_armhf.deb
sudo dpkg -i node_latest_armhf.deb
19. Verify that both node and npm were installed:
node -v
npm -v
20. Install GitHub's command line tool, git, then verify that it installed:
sudo apt-get install git
git -v
21. Install meshblu-util which is Meshblu's command line tool, then verify it was installed:
sudo npm install --global meshblu-util
meshblu-util -h
Now we should have everything we need to clone the boilerplate, generate a meshblu device, and run our node app...
22. Clone the boilerplate (repo-url = https://github.com/ASteinheiser/meshblu-custom-device-boilerplate.git):
git clone repo-url
23. Now install dependencies:
cd meshblu-custom-device-boilerplate
npm install
We will now need to enter admin mode as meshblu-util wont have the correct permissions if we are not an elevated user...
24. Enter the following command:
sudo -i
25. Navigate back to the boilerplate:
cd /home/pi/meshblu-custom-device-boilerplate
26. Make sure we are in the correct branch:
git checkout raspberry-pi-2
27. Register a new meshblu device:
meshblu-util register -o -t device:mailbox-pi > meshblu.json
28. Now run your custom device!
node main.js
And with that, you have a custom Meshblu device running on your Pi! It will continue to stream messages to Meshblu whether or not you are listening for them.
Octoblu SetupNow we will need to claim your newly created custom device and then create a flow to listen to your device.
To claim your device, go to app.octoblu.com. Then go to Things -> All Things -> claim your device manually. Enter your UUID and TOKEN from the meshblu.json file on your Pi.
With your device connected to your account, you can go ahead and import this flow:
Make sure to delete my Mailbox Pi Thing and replace it with your custom device that you recently added.
Also edit the SMS and Email Things to have your contact information.
Press the green start button at the top right and test your sensor! You should now be getting texts and emails when your motion sensor is tripped!
If you have any questions regarding Octoblu or Meshblu, hit us up on gitter or via the little chat icon in the lower right on app.octoblu.com!


Comments