

Hardware components | ||||||
 |
| × | 1 | |||
 |
| × | 1 | |||
 |
| × | 1 | |||
 |
| × | 1 | |||
| × | 1 | ||||
Hand tools and fabrication machines | ||||||
 |
| |||||
 |
| |||||
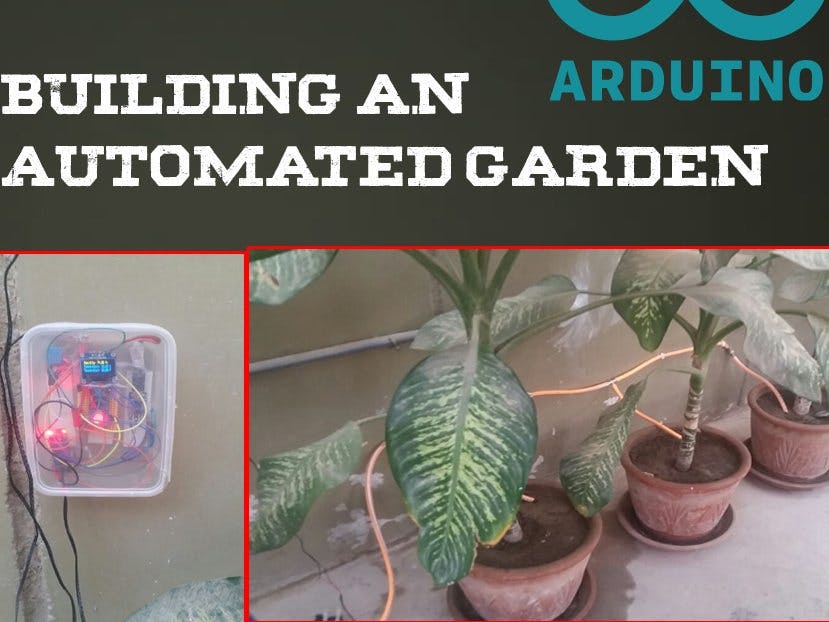
My country has been badly affected by climate change due to heavy deforestation. So many campaigns arose planting more trees. However, to reduce my effort in gardening, I made something that water my plants based on an Android app.
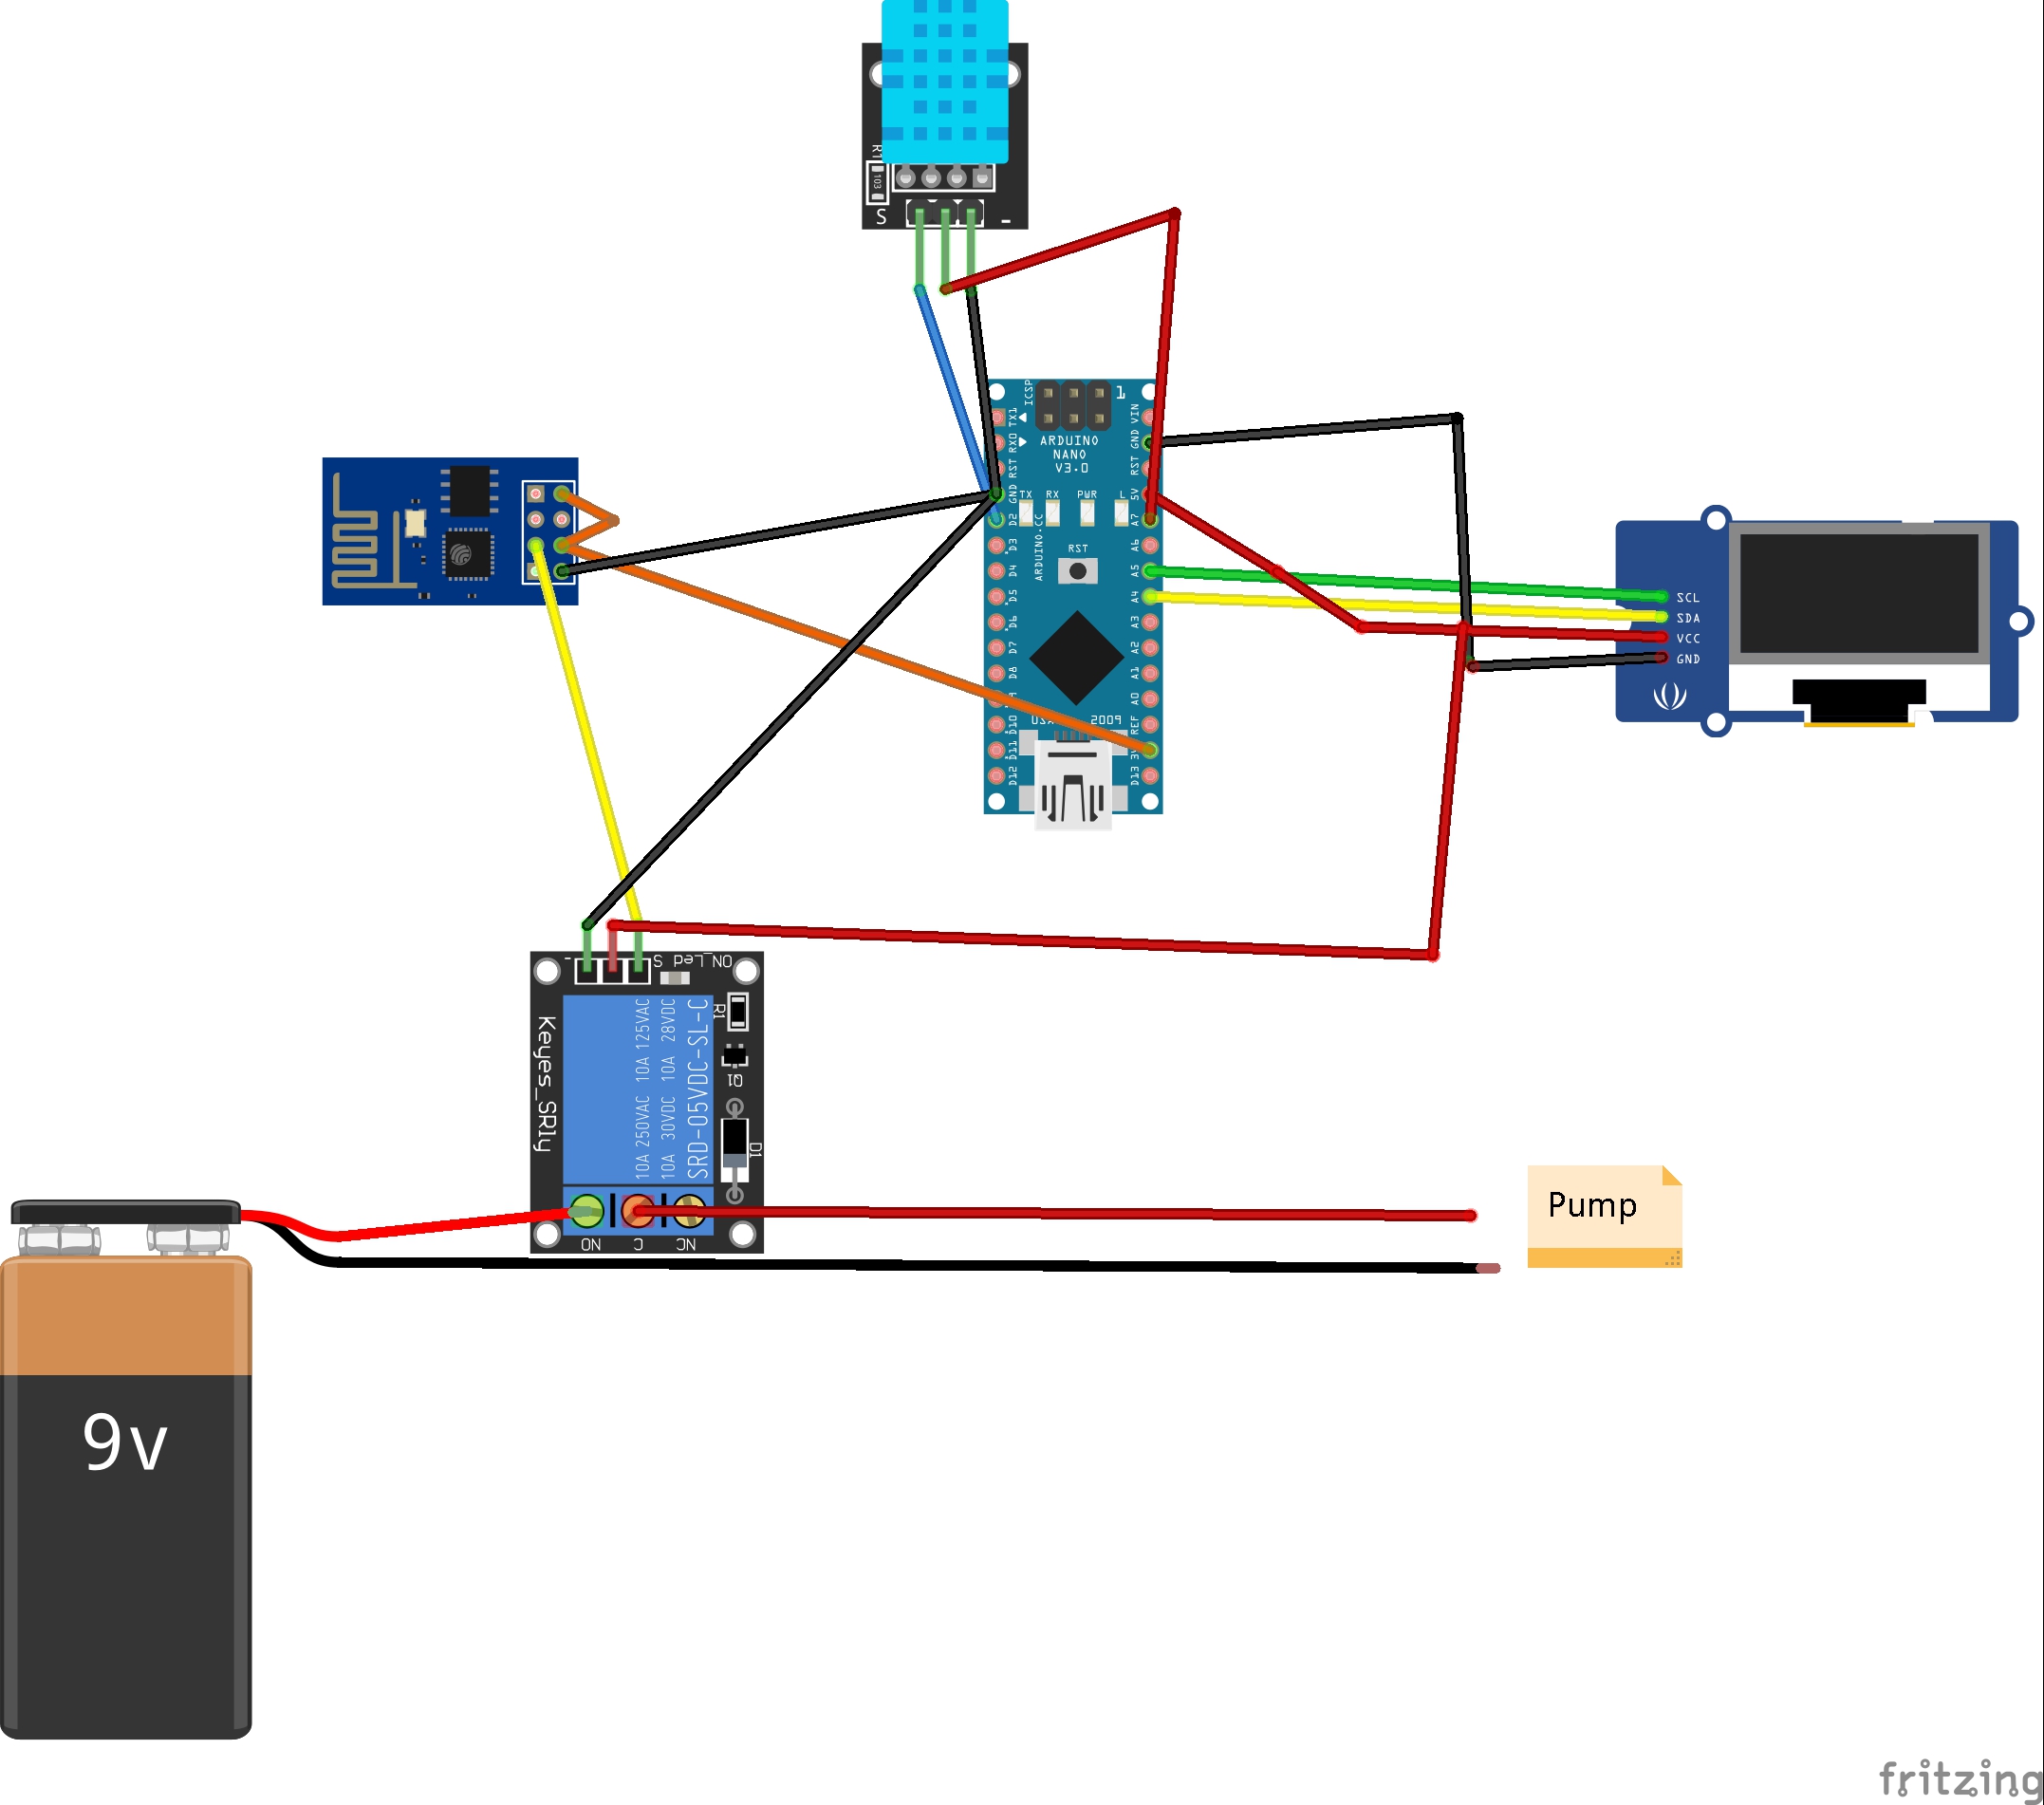
The concept is simple: I designed a web server using ESP8266. Changed index a bit. Also, the ESP8266 controls the relay to water pump.
Pump to watering
The second component is an Arduino Nano, which takes readings from DHT11 and displays on an OLED.
Complete control box
Please check this video out!


2 projects • 10 followers
I do freelancing mostly and develop Embedded systems. with a good grip on IoT systems and Webservers
I hope to someday make a Makerspace


Comments