

Hardware components | ||||||
| × | 1 | ||||
Software apps and online services | ||||||
| ||||||
 |
| |||||
Imagine having your own monitoring system capable of recording environment status, visualizing data on your computer or turning things on and off wherever you are on the planet, sounds cool right?
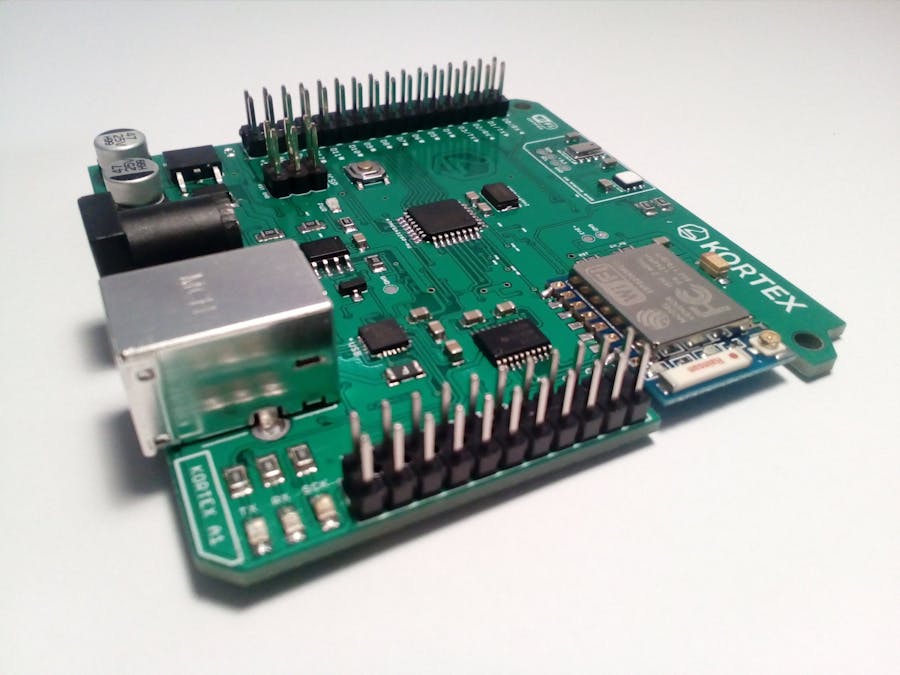
In this project, I used my own-made IoT-sensor board named Kortex A1 together with Blynk app to create an environmental monitoring system that will report temperature/humidity/pressure/altitude wirelessly through WiFi. Kortex A1 can also be used to control things from anywhere in the world via WiFi, like turning on/off your home lights when you are at your friend's house, set your washing machine before arriving home, etc...
The board is available at Tindie: https://www.tindie.com/products/kortex_am/kortex-a1--wifi-multi-sensor-development-board-2/
DetailsBefore getting into this, we should consider some important prequisites:
Prerequisites- Get a Kortex A1 board
- Install the CP2104 Driver
- Install the Arduino IDE. (Before uploading the code to your Kortex A1, remember to set the board on the Arduino IDE to Arduino UNO/ Genuino UNO, so the IDE will recognise your Kortex A1)
Running Blynk with Kortex A1
For running Blynk with your Kortex A1 there are two code scripts, the one called "KORTEXA1_BLYNK_BLANK" comes with no dashboard configured onto it, and "KORTEXA1_BLYNK_DASHB1" comes with a dashboard made from a set of widgets (1 chart, 4 data panels and 1 button). If you want to create your own dashboard you can use and modify "KORTEXA1_BLYNK_BLANK" code so it can be interfaced through your Blynk dashbaord, here there's some documentation on how to do it: http://docs.blynk.cc/.
To link your Kortex A1 to the Blynk dashboard (DASHB1) that I built, just follow these steps: (note that these steps are only for "KORTEXA1_BLYNK_DASHB1")
- Download Blynk from the play store.
- Once you have downloaded the app, register and create an account.
- Create your first project, and copy your AUTH_KEY which we will use later on our code (more info)
- On project settings, give your project a name, and on hardware model select Arduino UNO
- Now you have to setup your dashboard. Remember that Blynk gives you only 1000 of power, so take advantage of it. Start by adding a chart with 4 sources of data (temperature/humidity/pressure/altitude), also add 4 data panels which will visualize in numbers the received data such as temperature, pressure, etc... finally add a push button.
- Once you have added all the widgets, now it's time to configure them. Start by linking the push button to digital pin 13 (D13). Then you'll have to configure the 4 data panels. The first data panel which corresponds to "temperature", must be linked to virtual pin 0.The second data panel corresponds to "humidity" and has to be linked to virtual pin 1, the third data panel corresponds to "altitude" and its virtual pin is 2, and finally the fourth data panel corresponds to "pressure" and also has to be linked to virtual pin 3.
- Now that you have successfully created and configured your Blynk dashboard, you have to make some modifications in the code (KORTEXA1_BLTNK_DASHB1). Start by pasting your AUTH_KEY **where it says YOUR_AUTH_KEY:
char auth[] = "YOUR_AUTH_KEY";
Then add your access point SSID and password (AP_SSID / AP_PASS)
Blynk.begin(auth, wifi, "AP_SSID", "AP_PASS"); // Initilize Blynk
Finally upload the code to your Kortex A1 board and open serial monitor at 9600 baud. You'll see that the board will connect to your access point and it will automatically start pushing data to Blynk server. Now open your Blynk app and enjoy your wireless monitoring! Make sure that D13 LED works when you toggle your push button! ;)
This is a demo video of how it should work, note that I'm using a relay instead of an LED connected to D13:
FilesCode_Files.zip: Code for Blynk and Thingsboard. K_Console is only for visualizing temperature/humidity on serial chart of the Arduino IDE


Comments