

Hardware components | ||||||
 |
| × | 1 | |||
 |
| × | 1 | |||
 |
| × | 1 | |||
 |
| × | 1 | |||
 |
| × | 1 | |||
Software apps and online services | ||||||
 |
| |||||
 |
| |||||
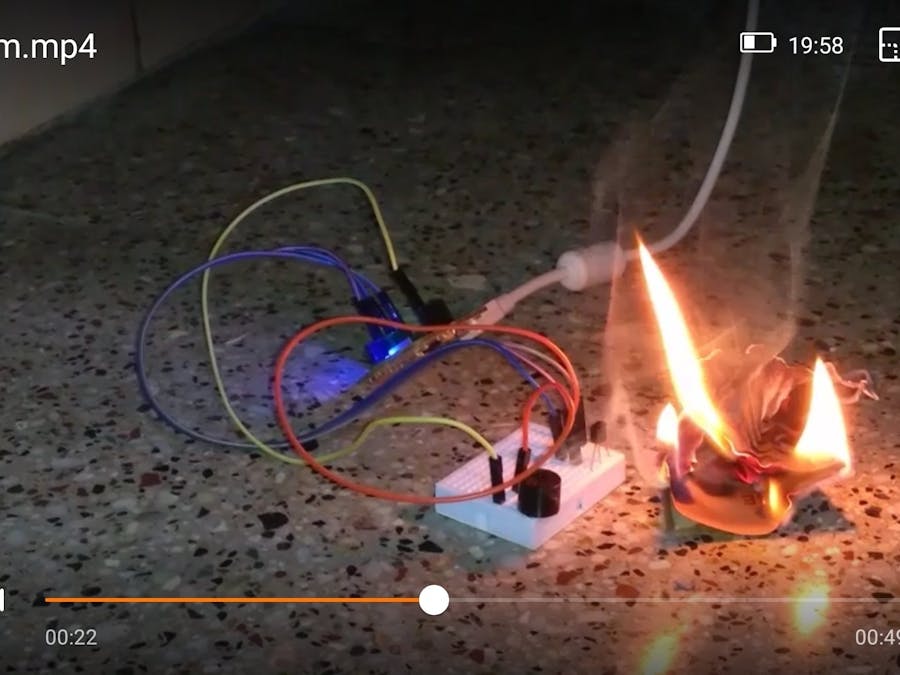
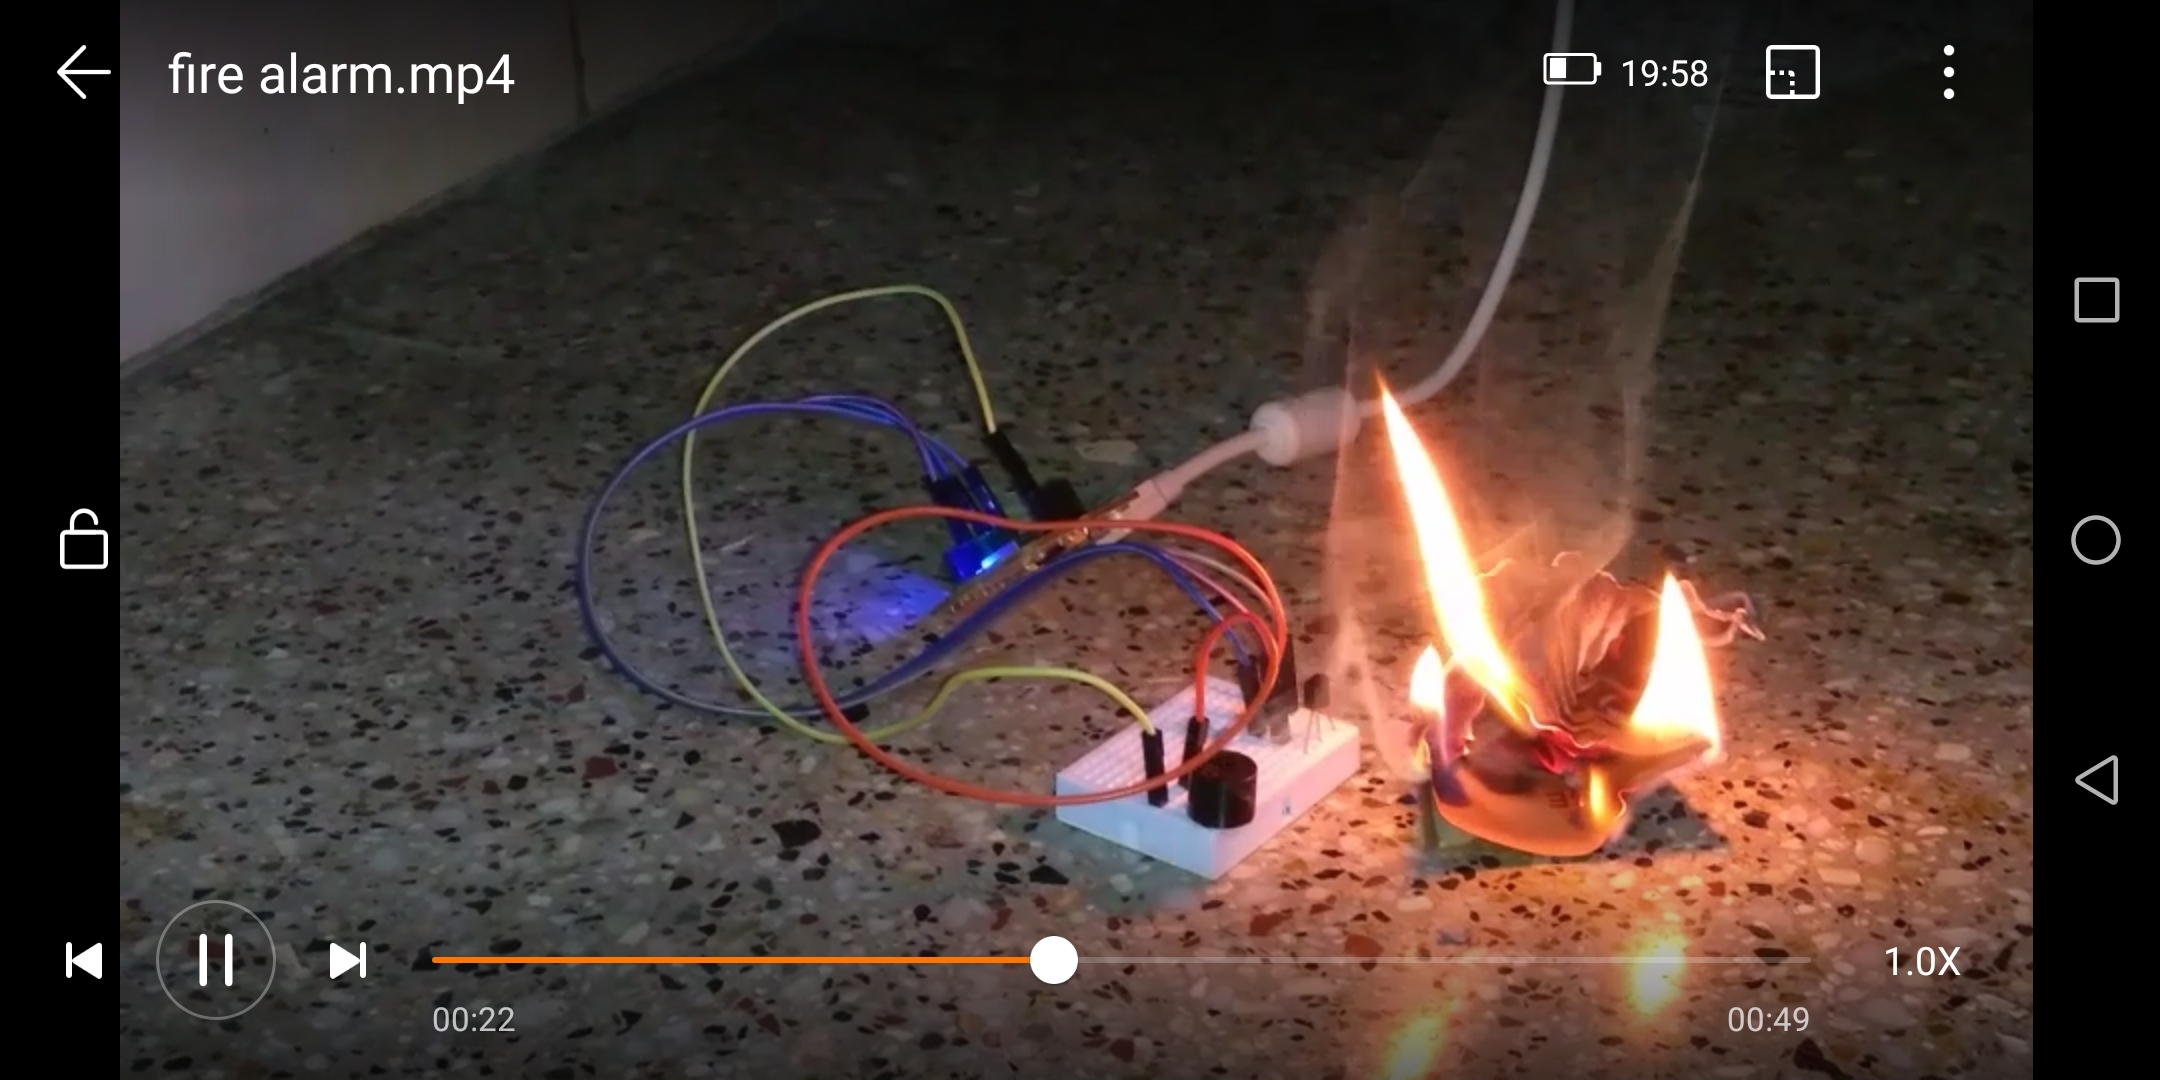
It is a project of fire detecting alarm and it alerts the user from fire with help of buzzer sound and by sending SMS on mobile. It's a story of one of my friends. Few years back my friend's farm house got a bit damage due to the short circuit in the house and then it caught fire. All of a sudden his farm house became a damaged and shattered house. They even did't know for a month or while because they didn't visit there for that much of time. When my friend told me about it I was shocked and started remembering the moments we had enjoyed at his farm house. So, when I started a project on iot the first thing came in my mind was that incident and so I was inspired for this project. Just think of what if my friend got an alert message or an alarm then today he might have his farm house which was built by his Grandpa. But neverthless we hope if we encounter such situations in future then we surely could tackle or handle it more easily and safely. So its an amazing experience doing this project and getting familiar with the Internet Of Things.
Circuit Connections and Software Set upHardware Area
Step 1: Hardware Components
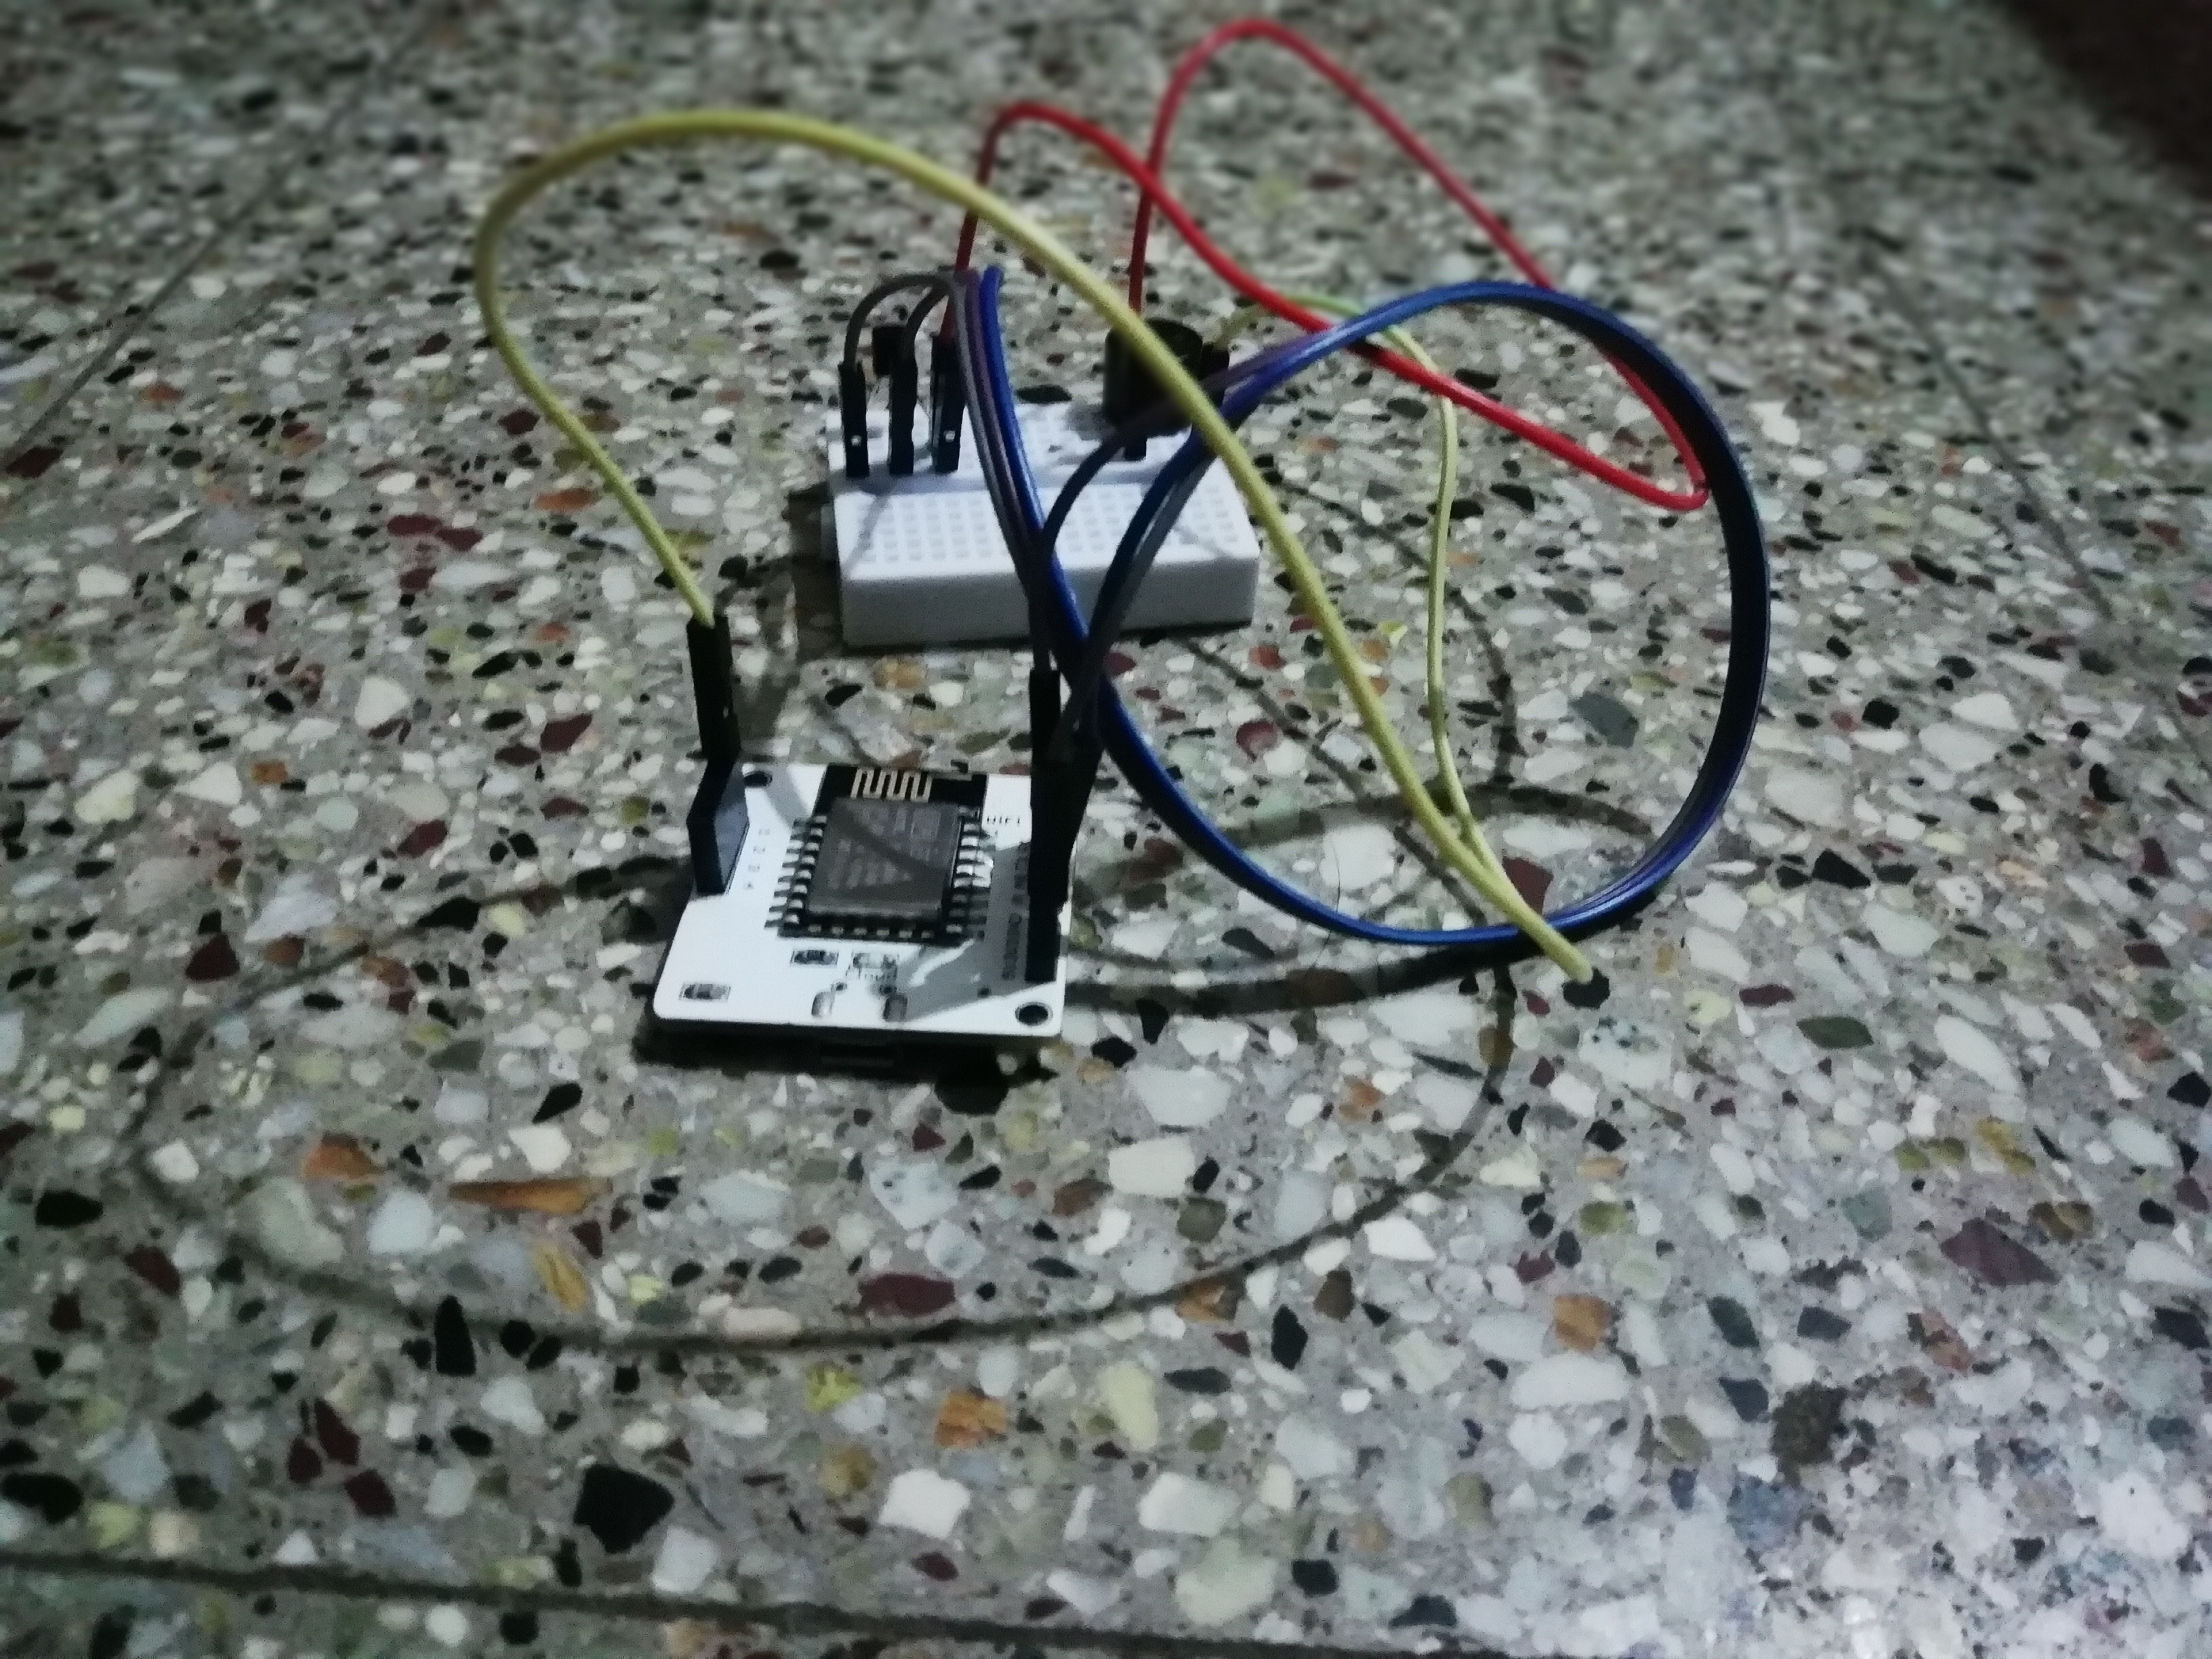
1. Hardware Componentsonents to build the whole project:
*Bolt WiFi module
*LM35 Temperature sensor
*3Jumper wires ( Male to Female ) and 2simple connecting wires(for buzzer)
*USB cable ( mobile charger can also be used )
*Power Source ( power bank can also be used )
*Bread Board
***********************************
Step 2: Hardware Configuration
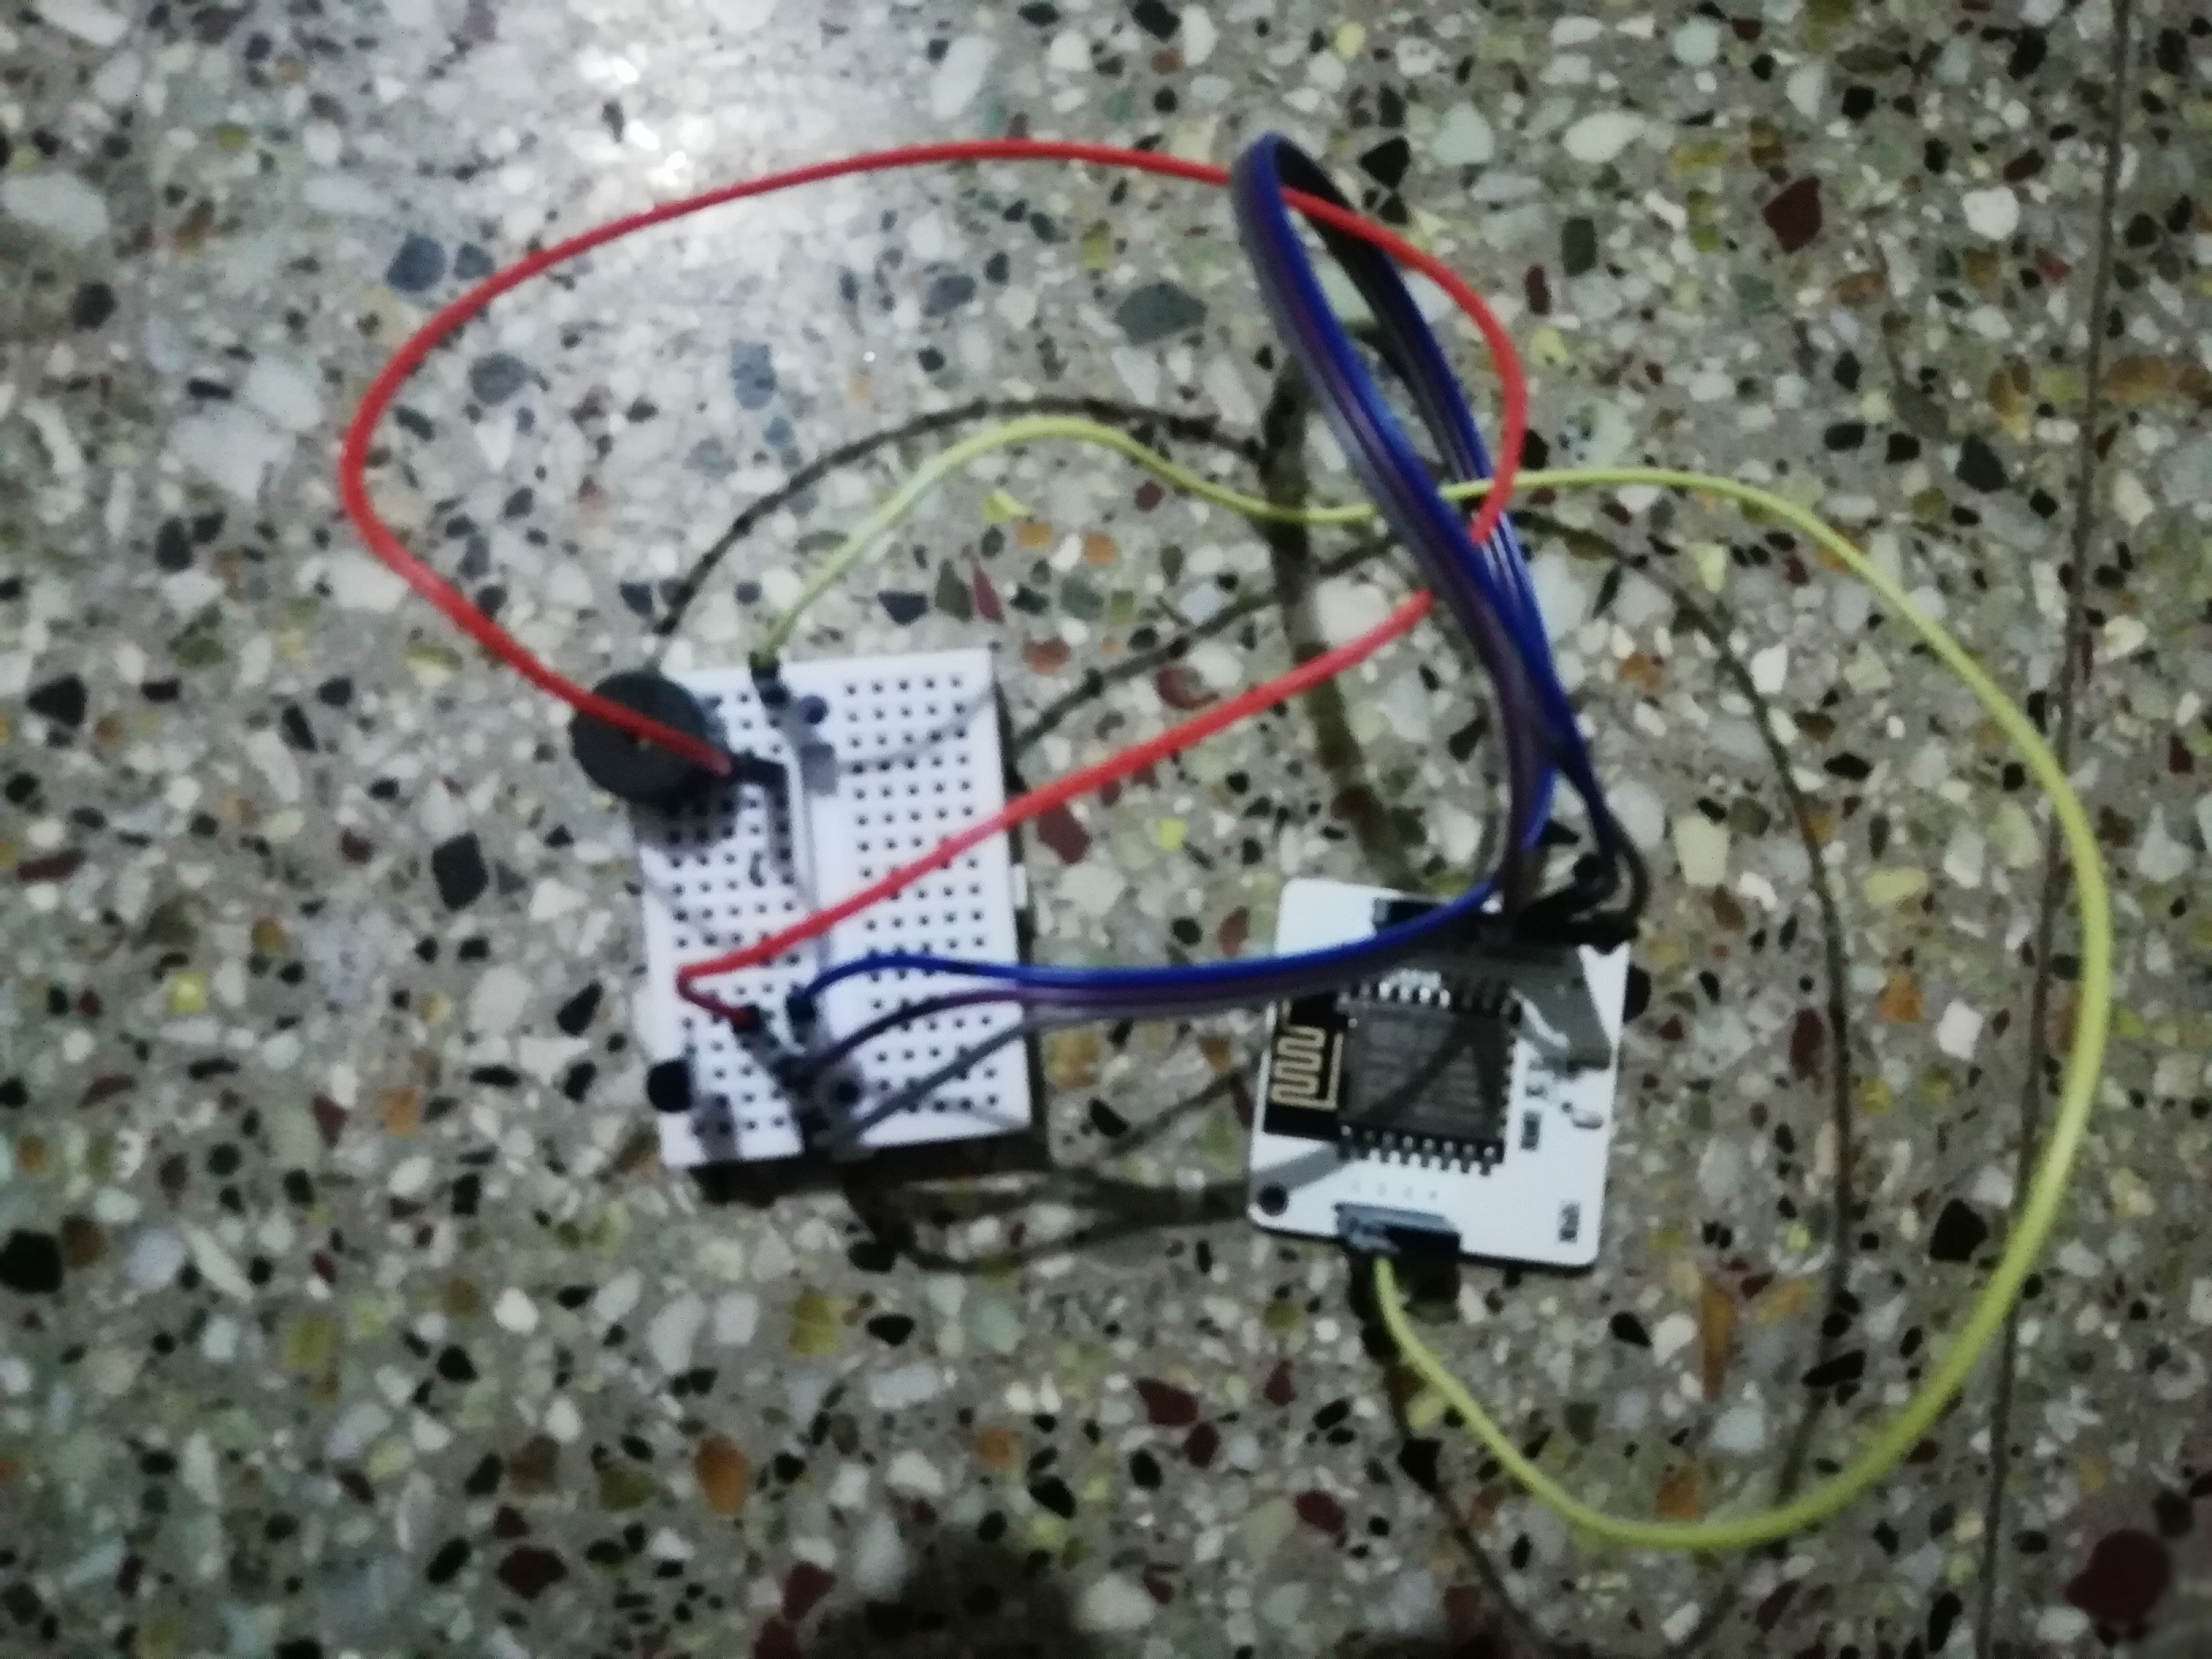
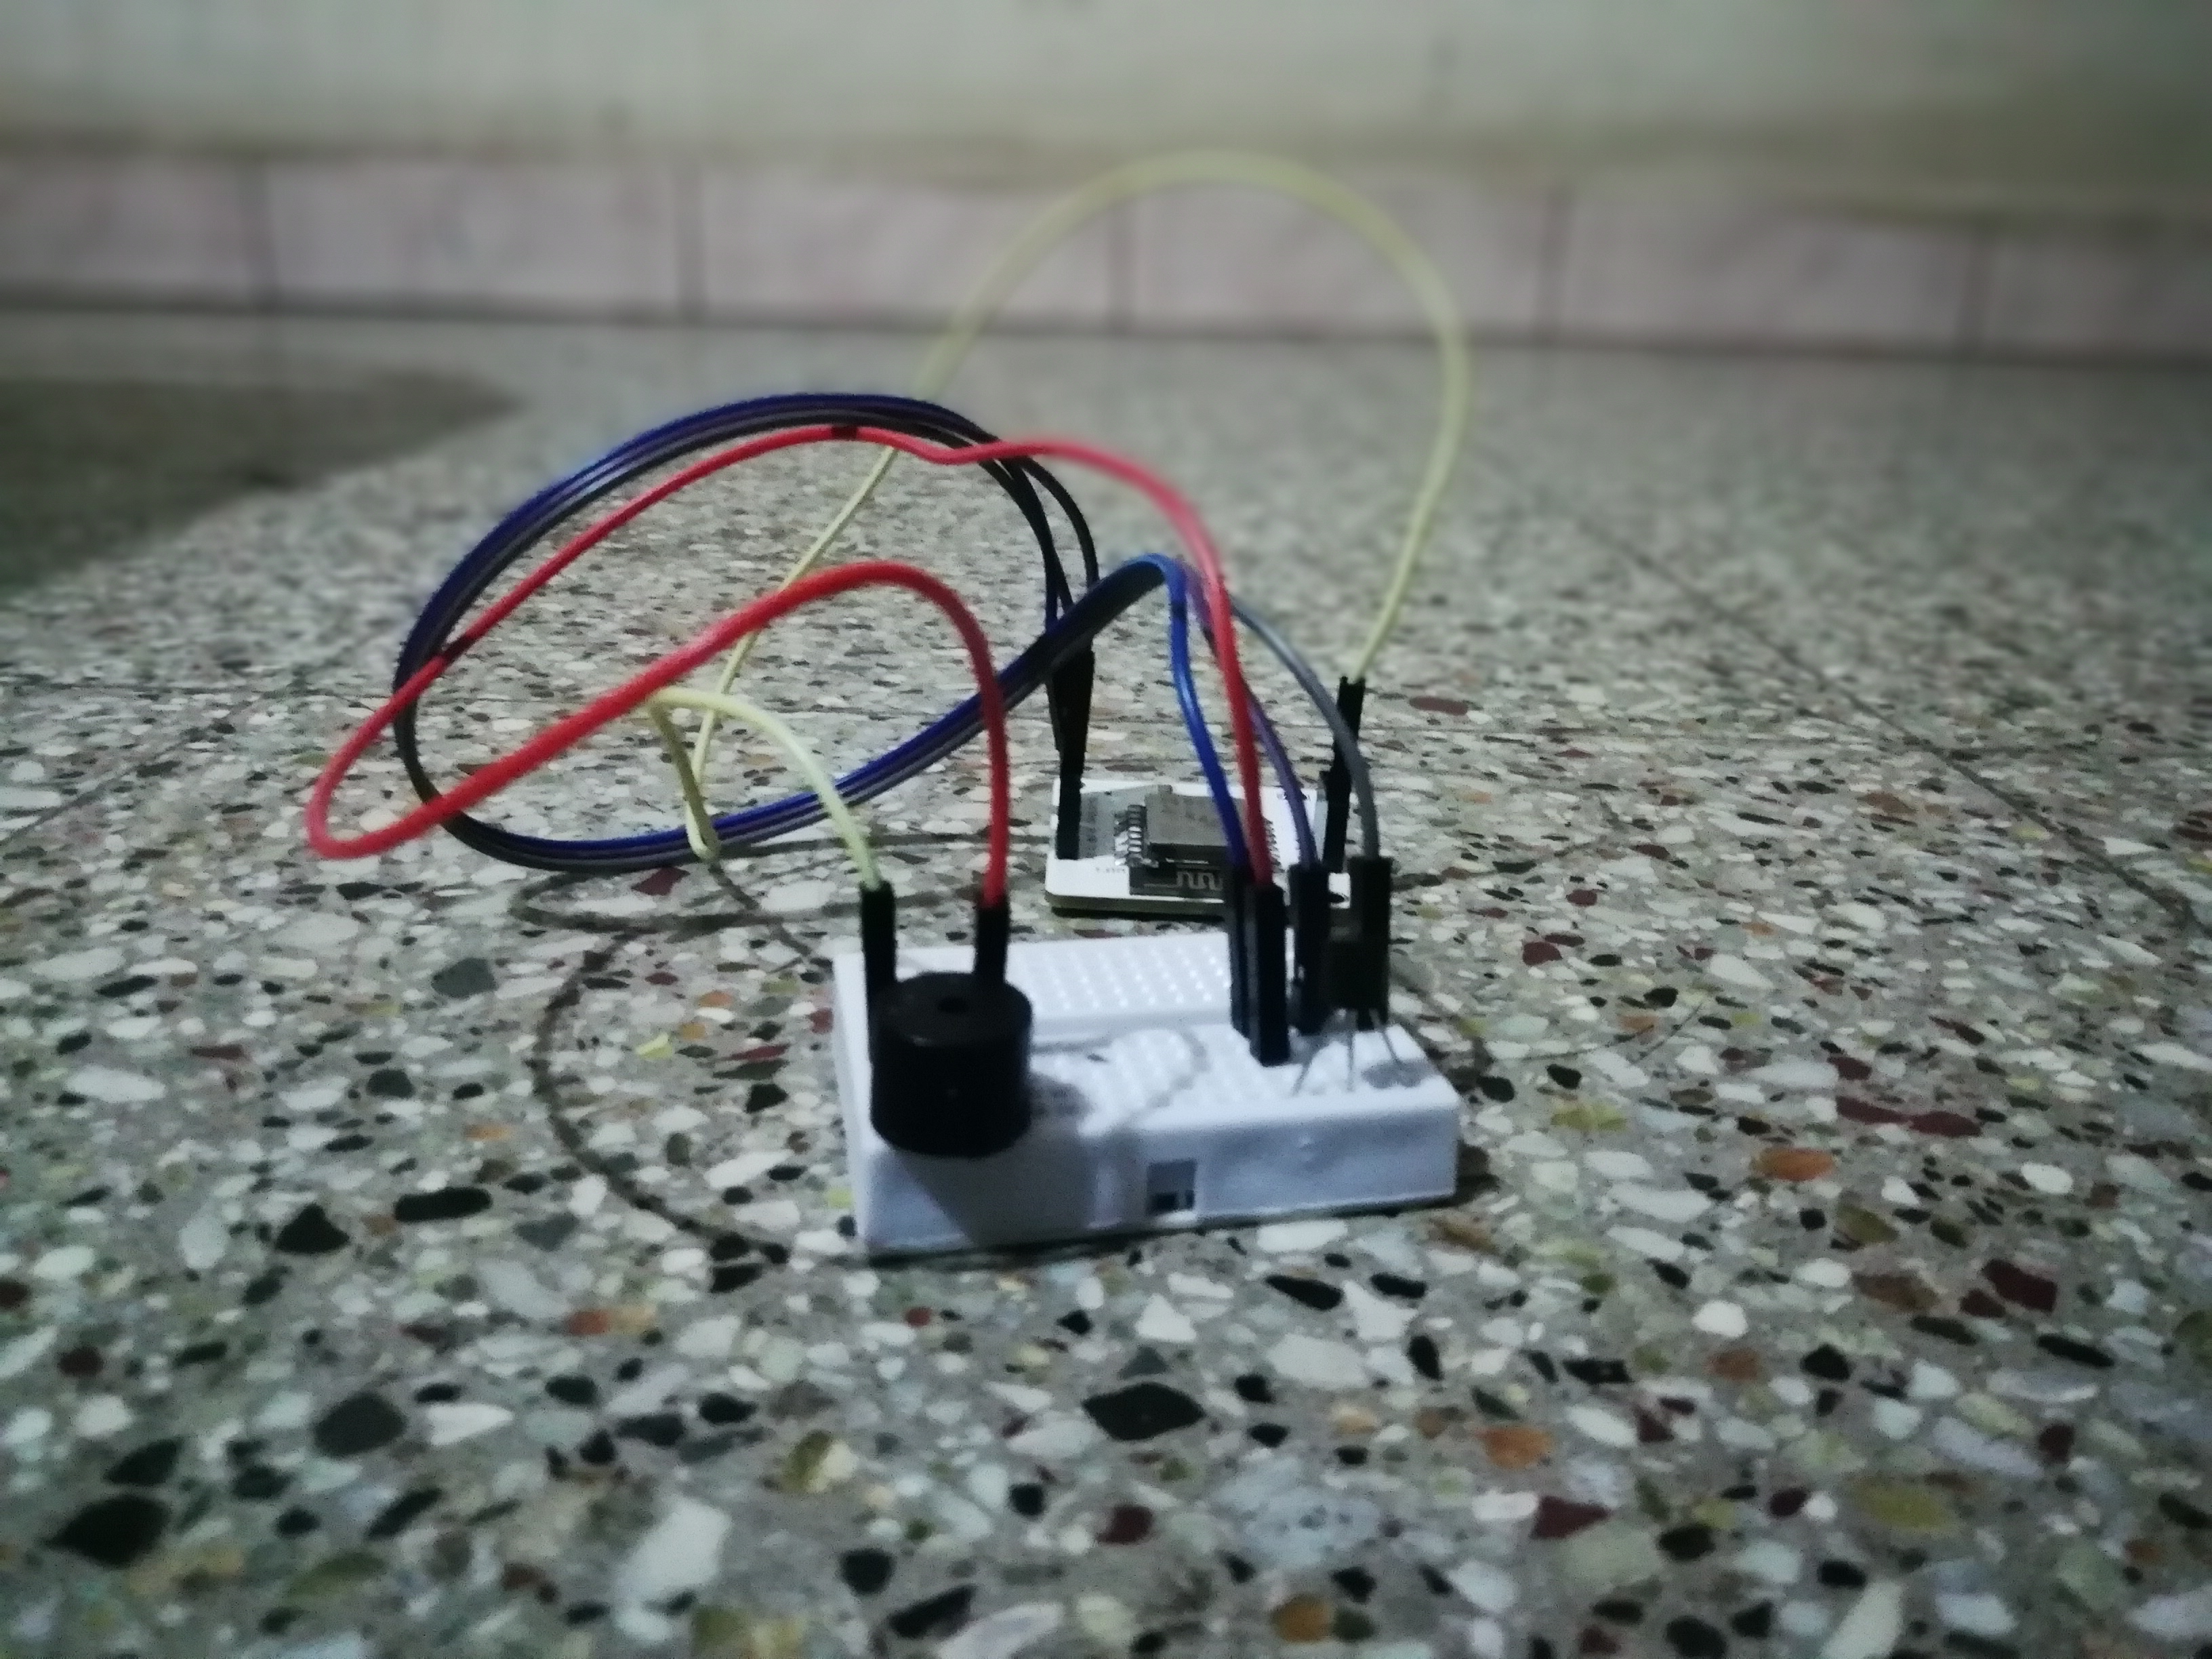
*First, we will connect the Bolt Wifi module to LM35 temperature sensor through jumper wires.
*LM35 has 3 pins, namely VCC, output, GND. So, we'll connect it with Bolt Wifi Module as follows:
*VCC pin of the LM35 is connected to 5v of the Bolt Wifi module.(The brown wire)
Output pin (middleone)is connected to A0 (Analog input pin) of the Bolt Wifi module.(The red wire)
*GND pinLM35 is connected to the GND.(The orange wire)
*To connect the Buzzer, we'll use simple connecting wires, and connect as follows:
*The negative pin(small one) is connected with the GND along with the LM35.
*The Positive pin(large pin) is connected to the pin '1' (GPIO).
***********************************
Step 3: Software Configuration.
We'll be using VMware Ubuntu device on our PC(Windows). You can Download the Virtual Box and Ubuntu Server.
***********************************
Step4: Introduction to Twilio
Twilio is a third-party SMS functionality provider. It is a cloud communications platform as a service (PaaS) company. Twilio allows software developers to programmatically make and receive phone calls and also send and receive text messages using its web service APIs.
Please note that SMS delivery via a trial Twilio account is not guaranteed to be instant by Twilio. Also, note that SMS will not be sent to numbers which have DND(Do Not Disturb) turned ON.
Creating an account on Twilio
Step a: Open https://www.twilio.com/ in browser.
Step b: Click on Get a Free API Key button to sign up.
Step c: Fill all the necessary details in SIGN UP form.
Step d: To verify they will ask for your phone number. Choose India as an option in the dropdown and then enter your phone number.
Step e: Click on "Products".
Step f: Now enable the SMS services by clicking on two checkboxes for Programmable SMS and Phone Numbers and click on "Continue".
Step g: Now, you will need to give a name for your project. I have given the name as My Project. Click on "Continue" once you have entered the project name.
Step h: Click on "Skip this step" when it asks you to Invite a Teammate.
Step i: Your project should be created at this point. Click on "Project Info" to view the account credentials which is required for your projects.
Step j: You can view the Account SID and Auth token on this page. The Auth token is not visible by default, you can click on "view" button to make the Auth token visible as shown below. Copy both and save them somewhere securely.
Step k: From the drop-down menu, choose "Programmable SMS". Now click on Get Started button to generate phone number.
Step l: Click on Get a number button.
Step m: Then a popup will appear. Click on Choose this number button.
Step n: Then a popup will appear which will have the final number. Copy this number and save to notepad for future references.
That's it. You have successfully created the account on Twilio. In the next lesson, we will use Bolt Python library to create
***********************************
Step 5: Bolt Python Library
The Bolt Python library makes it easy to interact with the Bolt cloud API from our Python application.
We can control or fetch the data from Bolt cloud to our server(Here Ubuntu from VMware ), Bolt Python library will help us in building the IoT product.
***********************************
Step 6: Coding :
1. Make the same circuit connections as described before.
2. Once you are done with that, log in to ubuntu server and create a new folder to hold the files for this topic.
3. We can create a new file by using the following command.
*sudo nano conf. Py
*sudo nano fire_detection_alarm. py
4. Now you have to write code in the terminal.
After writing the code
5. Click CTR+X and Y to save the file
6. After that run this code to Get output
*sudo python3 conf.py
*sudo python3 fire_detection_alarm.py
7. To convert Sensor reading into celsius used below formula
Temperature in celsius=sensor reading/10.24


Comments