

The next project in my "What Do I Build Next?" series.... I've built a balancing 'bot before based upon a Pololu Zumo configuration that was supposed to have a Raspberry Pi on the final build...as its brain...but I never installed the RPi because it ran fine without it.
*********************************** I have been asked for availability of this product recently
Update 12/16/2018:
" This article is for new product testing feedback, and the Elegoo will put Tumbller on sale on Amazon in 2019, stay tuned"
***********************************
I've seen other "Balancing 'bot" projects but wasn't impressed with the kit as viewed online and the searched code available for its success went unfound.
This soon to be released kit was easy to build, came with all instructions and a well done video. It had IR Remote and Bluetooth capability. And most of all, I like it.
Here's my build...
I had the opportunity to watch the assembly video before the kit arrived...
The key to this build was too pay attention to the video and to which screws are used and where. (I made that mistake...I used longer screws "M3*6" where the "M3*5" ones were called for when mounting the motors to the support) that's later in this write-up
Step 1, I put the included two "IRC18650 2200 mAh batteries on the charger"
Step 2, for me was to remove protective film from all the acrylic pieces. (my pet peeve is this step)
Step 3, attach the motor mounts to bottom plate with 8 M3*6 screws from labelled bag
Step 4, attach the motors to motor mounts using 8 M3*5 screws
Step 5, attach hubs to axles (I used lock tight on setscrews...not in video)
Step 6, Attach wheels to hubs on motors. These are a tight fit.
Step 7, Attach the support base
Step 8, Assemble the electronics on carrier board..gather items for MPU6050 (6 axis accelerometer and gyroscope) mounting
Step 9, attach TB6612FNG (Motor DRiver) to carrier board with M3*11 standoff
Step 10, Attach the Bluetooth module
Step 11, Attach Elegoo UNO R3 to carrier board
Step 12, Attach carrier board M3*23 Copper standoffs to assembled base with 4 M3*6 screws
Step 13, Attach assembled carrier/electronics module to assemble base unit using 4 M3*6 screws
Note: Pay attention to orientation of carrier electronics module of assembled base unit
Step 14, Assemble the battery carrier
Note: Pay attention to mount battery holder on plate with power lead and ON/OFF switch aligned with notch in plate
Step 15, Attach assembled barrier plate to M3*45+6 Copper standoffs that were previously attached to assembled Tumbllr base
Step 16, Install 2 charged "ICR18650" 2200 mAh batteries in battery holder
Step 17, Attach top cover plate with 4 M3*6 screws
Step 18, Carefully route and install interconnect electronic wiring, Look at pictures. NOTE: be sure to turn battery power switch to OFF position
Step 19, Throw away debris
Elegoo's Assembly Video
Step 20, Start the Tumbllr, Be Careful....once powered ON Tumbllr will quickly move and orientate itself upright
Step 21, Tumbllr in action video
IR Remote Control Mode DescriptionBy pressing Arrow Keys: Forward, Backwards, Left, and Right will cause Tumbllr to react accordingly and will start a BLUE glow illumination
By pressing the OK Key: Tumbllr will enter STANDBY mode and STOP movement
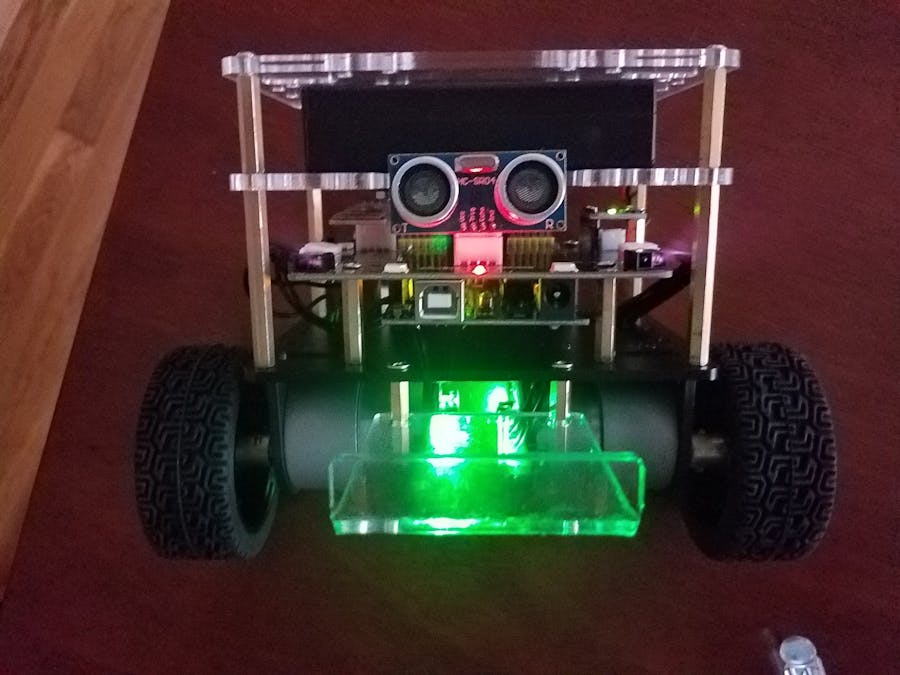
Auto-Follow Mode DescriptionBy pressing the #1 Key: Tumbllr will start glowing a GREEN glow illumination and will FOLLOW any obstacle moving within 35 cm ahead of the ULTRASONIC SENSOR; if the obstacle is placed within 7 cm of either edge will cause Tumbllr to turn either LEFT or RIGHT depending upon the edge.
By pressing the #0 Key: Tumbllr will be in Auto-Follow Mode with GREEN glow illumination and will move BACKWARDS if obstacles are within 35 cm of the ULTRASONIC SENSOR; if the obstacle is placed within 7 cm of either edge will cause Tumbllr to turn either LEFT or RIGHT depending upon the edge.
Obstacle-Avoidance ModeBy pressing the #2 Key: Tumbllr will be in Obstacle-Avoidance Mode with a YELLOW glow illumination; in this mode, Tumbllr will automatically avoid obstacles that are within 50 cm in front of the ULTRASONIC SENSOR.
Bounce-ModeBy pressing the #4 Key: Tumbllr will lean FORWARD onto plastic support
By pressing the #5 Key: Tumbllr will BOUNCE UP and continue to BALANCE itself
Glowing ModeBy pressing the #3 Key: Tumbllr will start flashing/glowing random lighting effects
and by pressing the #3 Key again, it will change into another GLOWING effect. There are 6 total glowing/lighting effects to switch from.
By pressing the #8 Key: the GLOWING ILLUMINATION will become brighter
By pressing the #7 Key: the GLOWING ILLUMINATION will become RED
By pressing the #7 Key again, the GLOWING ILLUMINATION will fade away.
By pressing the #9 Key: Tumbllr will turn OFF all lights/illumination
By pressing the #6 Key: Tumbllr will turn ON all lights/illumination
Bluetooth ModeSwitch jumper cap from DOWNLOAD to BLUETOOTH position on interface board
You will need to DOWNLOAD the "ELEGOO BLE TOOL" (Elegoo Smart Robot Car App) from the Android/Google Store
Within BLE App,
Press Connect button:
Scan Devices... look for HC-08 (Elegoo's Tumbllr Bluetooth Device)
Customize BLE App KeypadButtons
You will press and hold each numbered button and enter same number in code field:
blank key "s" STANDBY
blank key "f" FORWARD
blank key "b" BACKWARD
blank key "l" TURNLEFT
blank key "r" TURNRIGHT
button * "*" BREAK- No function
button # "#" BREAK- No function
button #1 key "1" Auto-Follow Mode function
button #2 key "2" Obstacle-Avoidance function
button #3 key "3" Glowing Mode-will change color effect each time pressed-6 available
button #4 key "4" Bounce Mode-Down
button #5 key "5" Bounce Mode-Upright
button #6 key "6" All Lights ON
button #7 key "7" Glowing RED Illumination will glow dimmer each time pressed
button #8 key "8" Glowing RED Illumination will glow brighter each time pressed
button #9 key "9" All Lights OFF
button #0 key "0" STOP/STANDBY function
Bluetooth Control APP- 11/19/2018 video
Sorry, Final Code not available for release
" This article is for new product testing feedback, and the Elegoo will put Tumbller on sale on Amazon in 2019, stay tuned"


Comments