// -----------------------------------
// Controlling LEDs over the Internet
// -----------------------------------
// First, let's create our "shorthand" for the pins
// Same as in the Blink an LED example:
// led1 is D0, led2 is D7
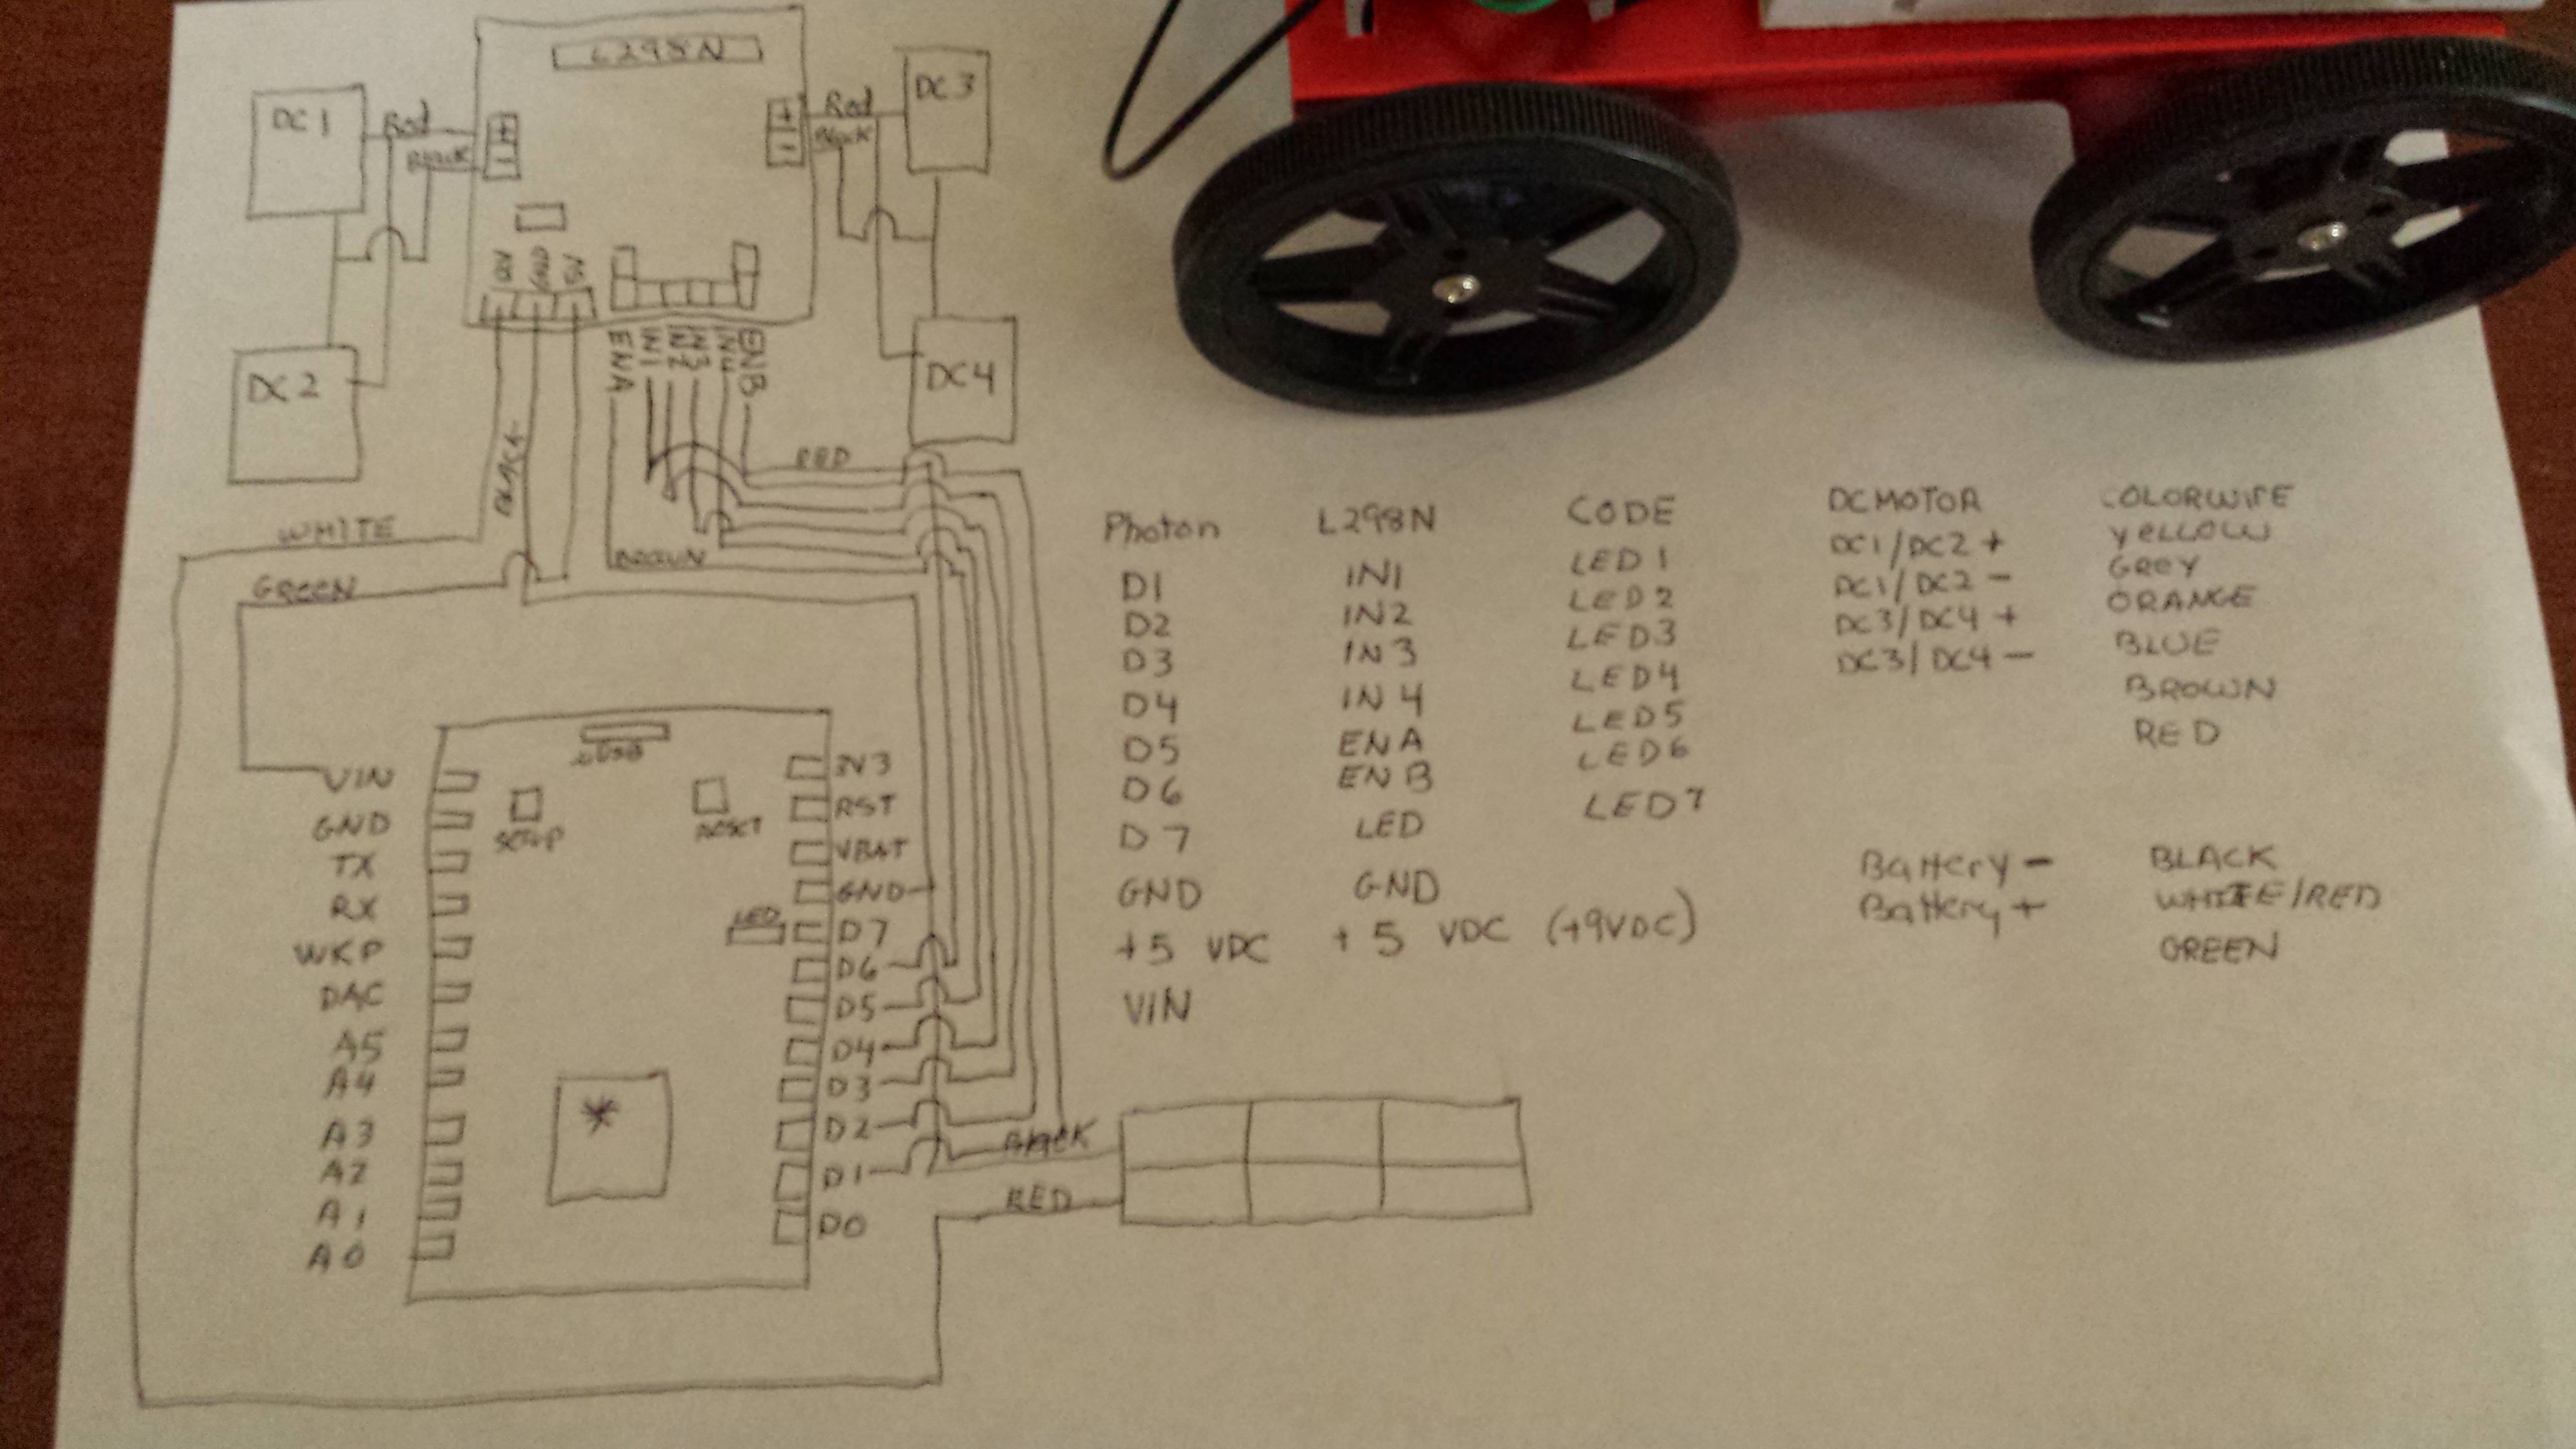
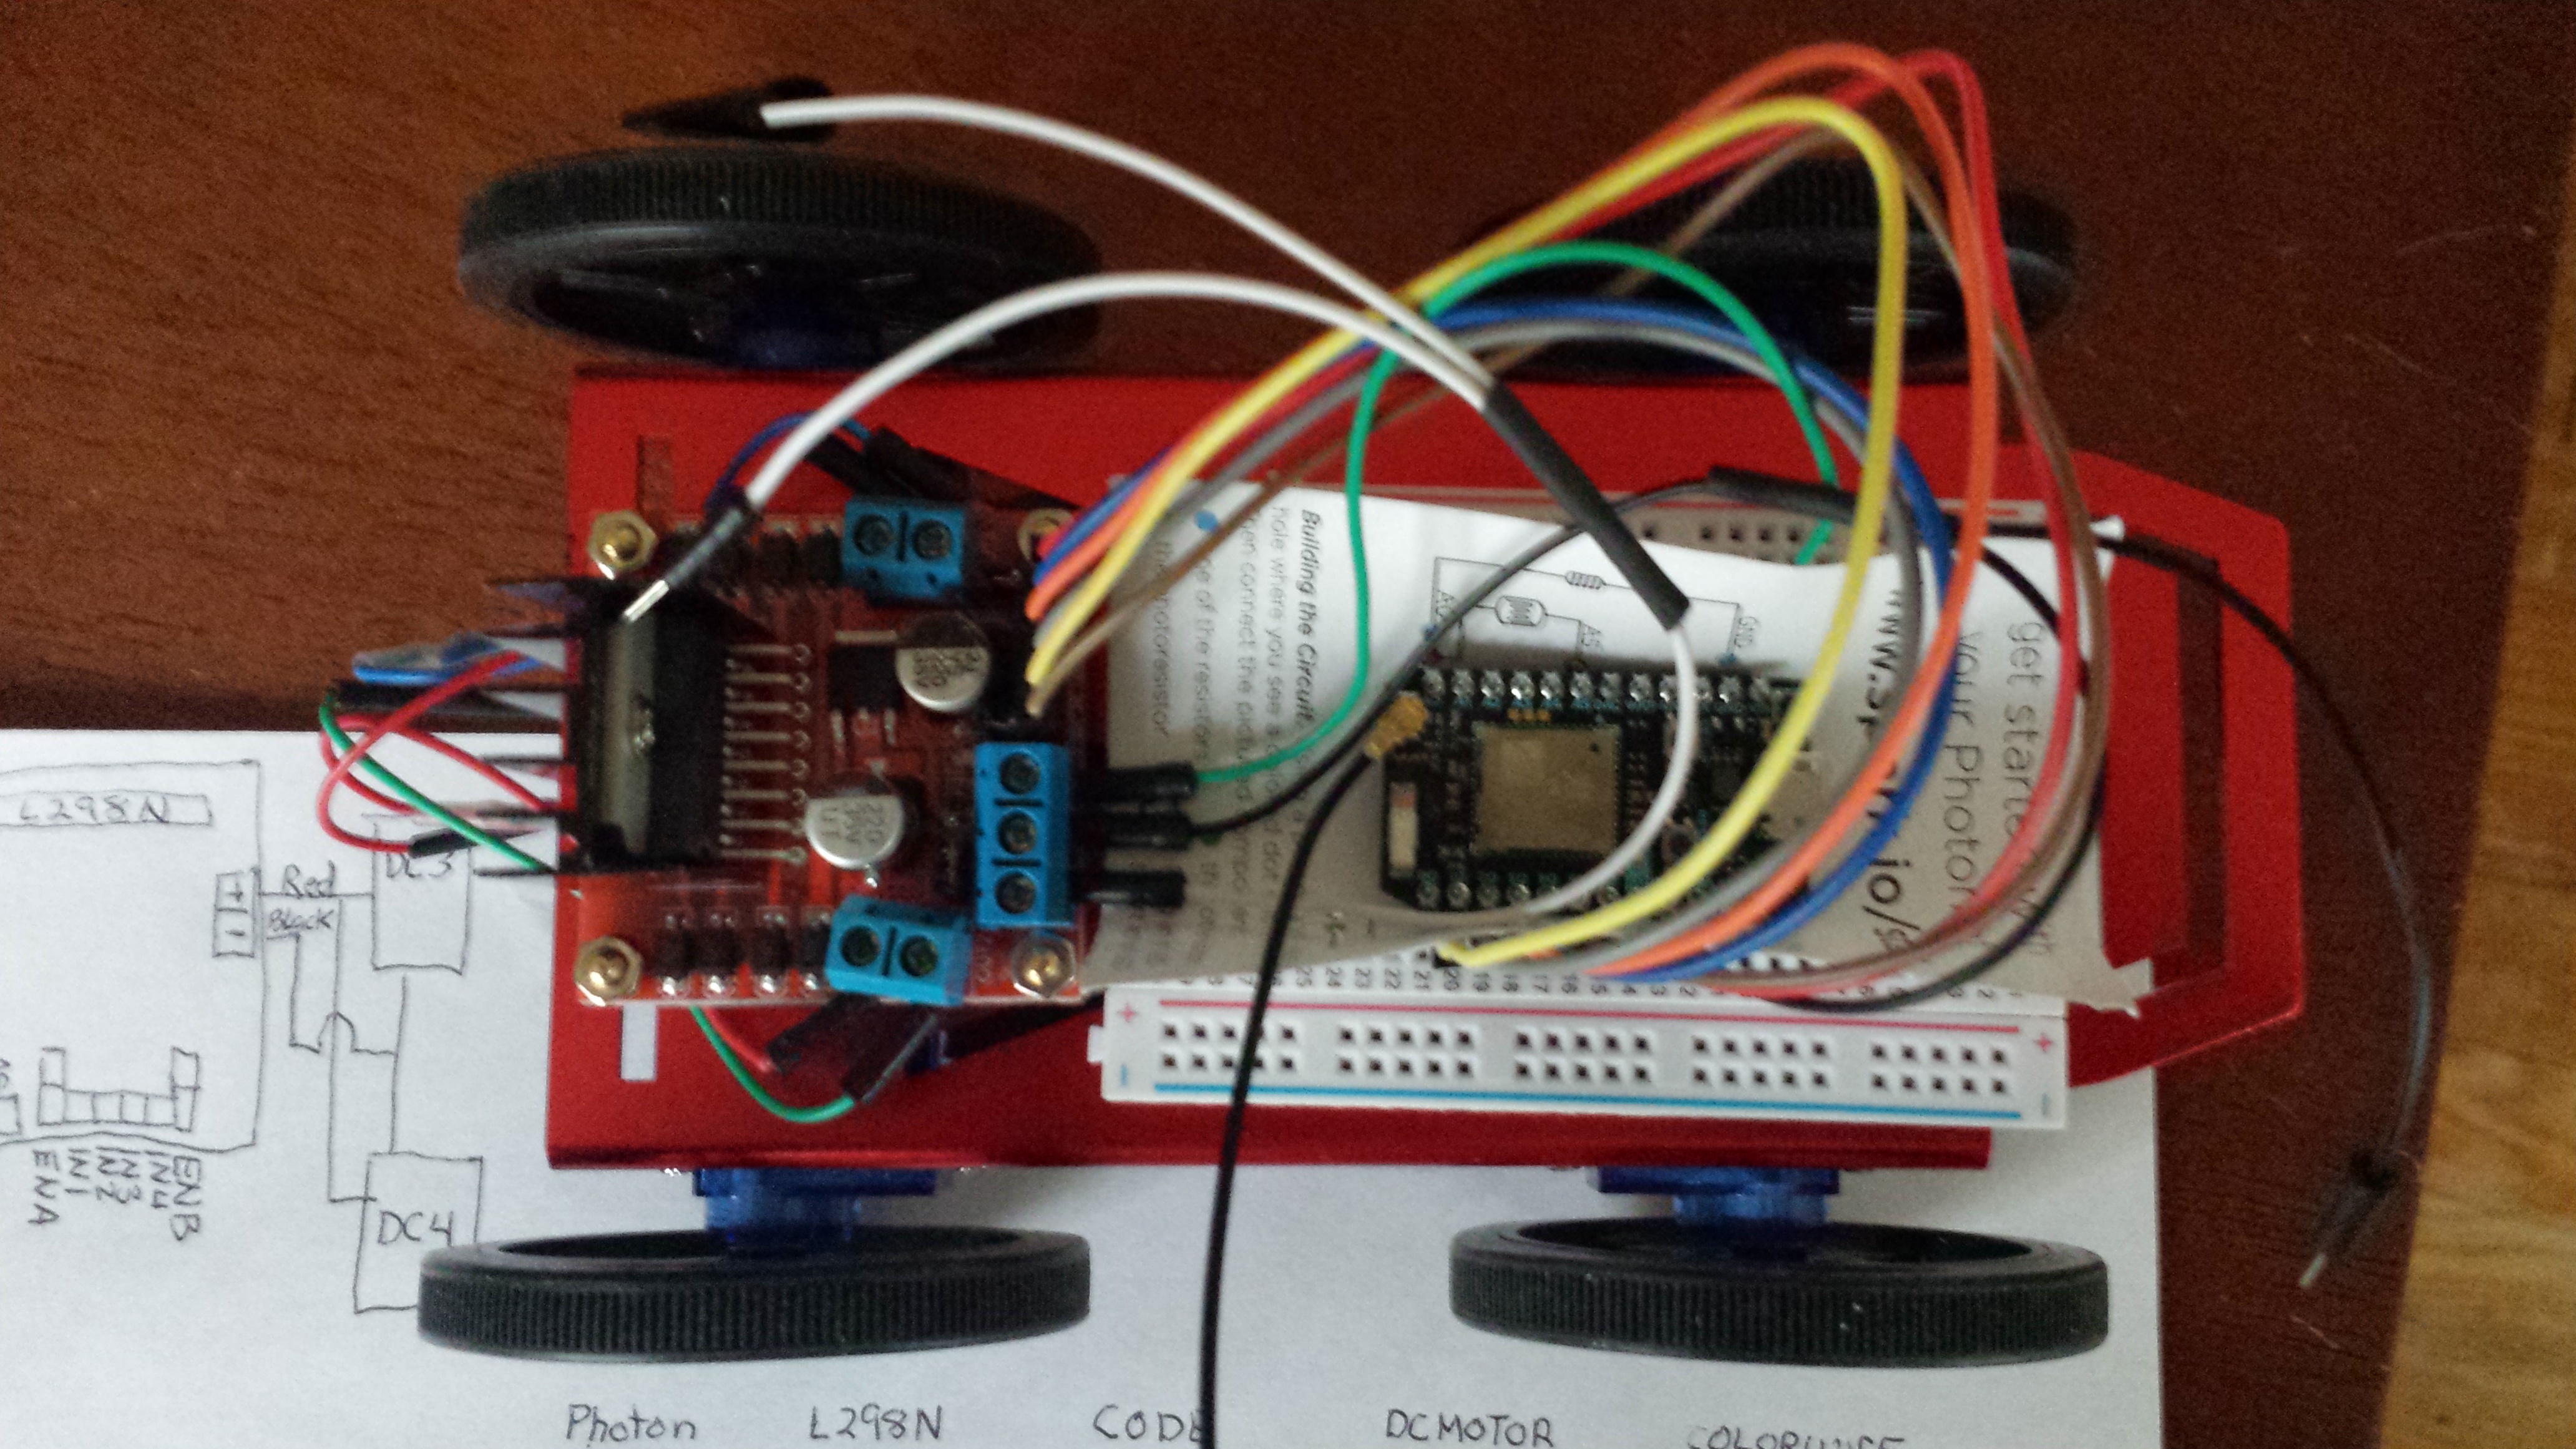
int led1 = D0;
int led2 = D7;
int led3 = D1; //motorA+
int led4 = D2; //motorA-
int led5 = D3; //motorB+
int led6 = D4; //motorB-
int led7 = D5; //pwm INA
int led8 = D6; //pwm INB
// Last time, we only needed to declare pins in the setup function.
// This time, we are also going to register our Spark function
void setup()
{
// Here's the pin configuration, same as last time
pinMode(led1, OUTPUT);
pinMode(led2, OUTPUT);
pinMode(led3, OUTPUT); //motorA+
pinMode(led4, OUTPUT); //motorA-
pinMode(led5, OUTPUT); //motorB+
pinMode(led6, OUTPUT); //motorB-
pinMode(led7, OUTPUT); //pwm INA
pinMode(led8, OUTPUT); //pwm INB
// We are also going to declare a Spark.function so that we can turn the LED
on and off from the cloud.
Spark.function("led",ledToggle);
// This is saying that when we ask the cloud for the function "led", it will
employ the function ledToggle() from this app.
// For good measure, let's also make sure both LEDs are off when we start:
digitalWrite(led1, LOW);
digitalWrite(led2, LOW);
digitalWrite(led3, LOW); // GET /S STOP
digitalWrite(led4, LOW);
digitalWrite(led5, LOW);
digitalWrite(led6, LOW);
digitalWrite(led7, LOW);
digitalWrite(led8, LOW);
}
// Last time, we wanted to continously blink the LED on and off
// Since we're waiting for input through the cloud this time,
// we don't actually need to put anything in the loop
void loop()
{
// Nothing to do here
}
// We're going to have a super cool function now that gets called when a
matching API request is sent
// This is the ledToggle function we registered to the "led" Spark.function
earlier.
int ledToggle(String command) {
/* Spark.functions always take a string as an argument and return an
integer.
Since we can pass a string, it means that we can give the program commands
on how the function should be used.
In this case, telling the function "on" will turn the LED on and telling it
"off" will turn the LED off.
Then, the function returns a value to us to
let us know what happened.
In this case, it will return 1 for the LEDs turning on, 0 for the LEDs
turning off,
and -1 if we received a totally bogus command that didn't do anything to
the LEDs.
*/
if (command=="on") {
digitalWrite(led1,HIGH);
digitalWrite(led2,HIGH);
return 1;
}
else if (command=="off") {
digitalWrite(led1,LOW);
digitalWrite(led2,LOW);
return 0;
}
else if (command=="w") {
digitalWrite(led3, HIGH); //D1 motor A+ GET /W moves FORWARD
digitalWrite(led4, LOW);
//D2
digitalWrite(led5, HIGH); //D3 MOTOR B+
digitalWrite(led6, LOW); //D4
digitalWrite(led7, HIGH); //D5
digitalWrite(led8, HIGH); //D6
delay(300);
digitalWrite(led3, LOW);
digitalWrite(led5, LOW);
return 2;
}
else if (command=="x") {
digitalWrite(led3, LOW); // GET /X moves REVERSE
digitalWrite(led4, HIGH); // MOTOR A-
digitalWrite(led5, LOW);
digitalWrite(led6, HIGH); // MOTOR B-
digitalWrite(led7, HIGH);
digitalWrite(led8, HIGH);
delay(300);
digitalWrite(led4, LOW);
digitalWrite(led6, LOW);
return 3;
}
else if (command=="s") {
digitalWrite(led7, LOW); // GET /S STOP
digitalWrite(led8, LOW);
digitalWrite(led3, LOW);
digitalWrite(led4, LOW);
digitalWrite(led5, LOW);
digitalWrite(led6, LOW);
delay(30);
return 4;
}
else if (command=="a") {
digitalWrite(led3, LOW); // GET /A moves LEFT
digitalWrite(led4, HIGH);
digitalWrite(led5, HIGH);
digitalWrite(led6, LOW);
digitalWrite(led7, HIGH);
digitalWrite(led8, HIGH);
delay(300);
digitalWrite(led4, LOW);
digitalWrite(led5, LOW);
return 5;
}
else if (command=="d") {
digitalWrite(led3, HIGH); // GET /D moves RIGHT
digitalWrite(led4, LOW);
digitalWrite(led5, LOW);
digitalWrite(led6, HIGH);
digitalWrite(led7, HIGH);
digitalWrite(led8, HIGH);
delay(300);
digitalWrite(led3, LOW);
digitalWrite(led6, LOW);
return 6;
}
else {
return -1;
}
}


Comments