

Hardware components | ||||||
_baVEVgguW1.jpg?auto=compress%2Cformat&w=48&h=48&fit=fill&bg=ffffff) |
| × | 1 | |||
| × | 1 | ||||
 |
| × | 1 | |||
 |
| × | 1 | |||
 |
| × | 1 | |||
 |
| × | 1 | |||
Software apps and online services | ||||||
 |
| |||||
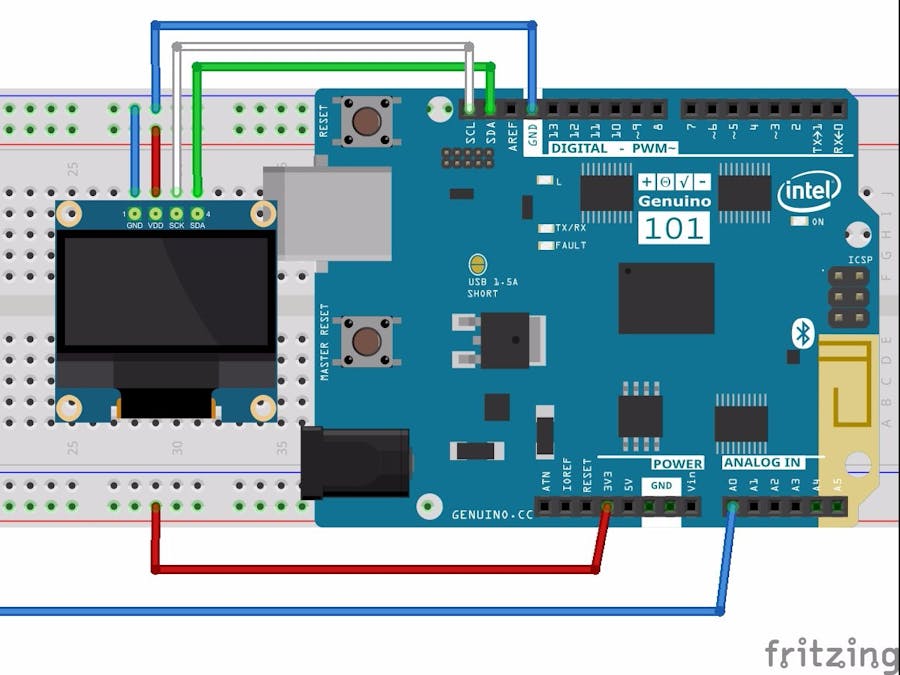
Months ago I bought my Arduino 101 and wanted to connect my shields and modules that I used in Arduino One, but there were always problems with the libraries and there were many headaches. I was looking for information on the internet and could not find my answers.
Today I finally found the way to connect my OLED screen of 0.96 inches with Arduino 101 and I want to share my discovery with this tutorial, since it could help many people with the same problem as me.
- Materials
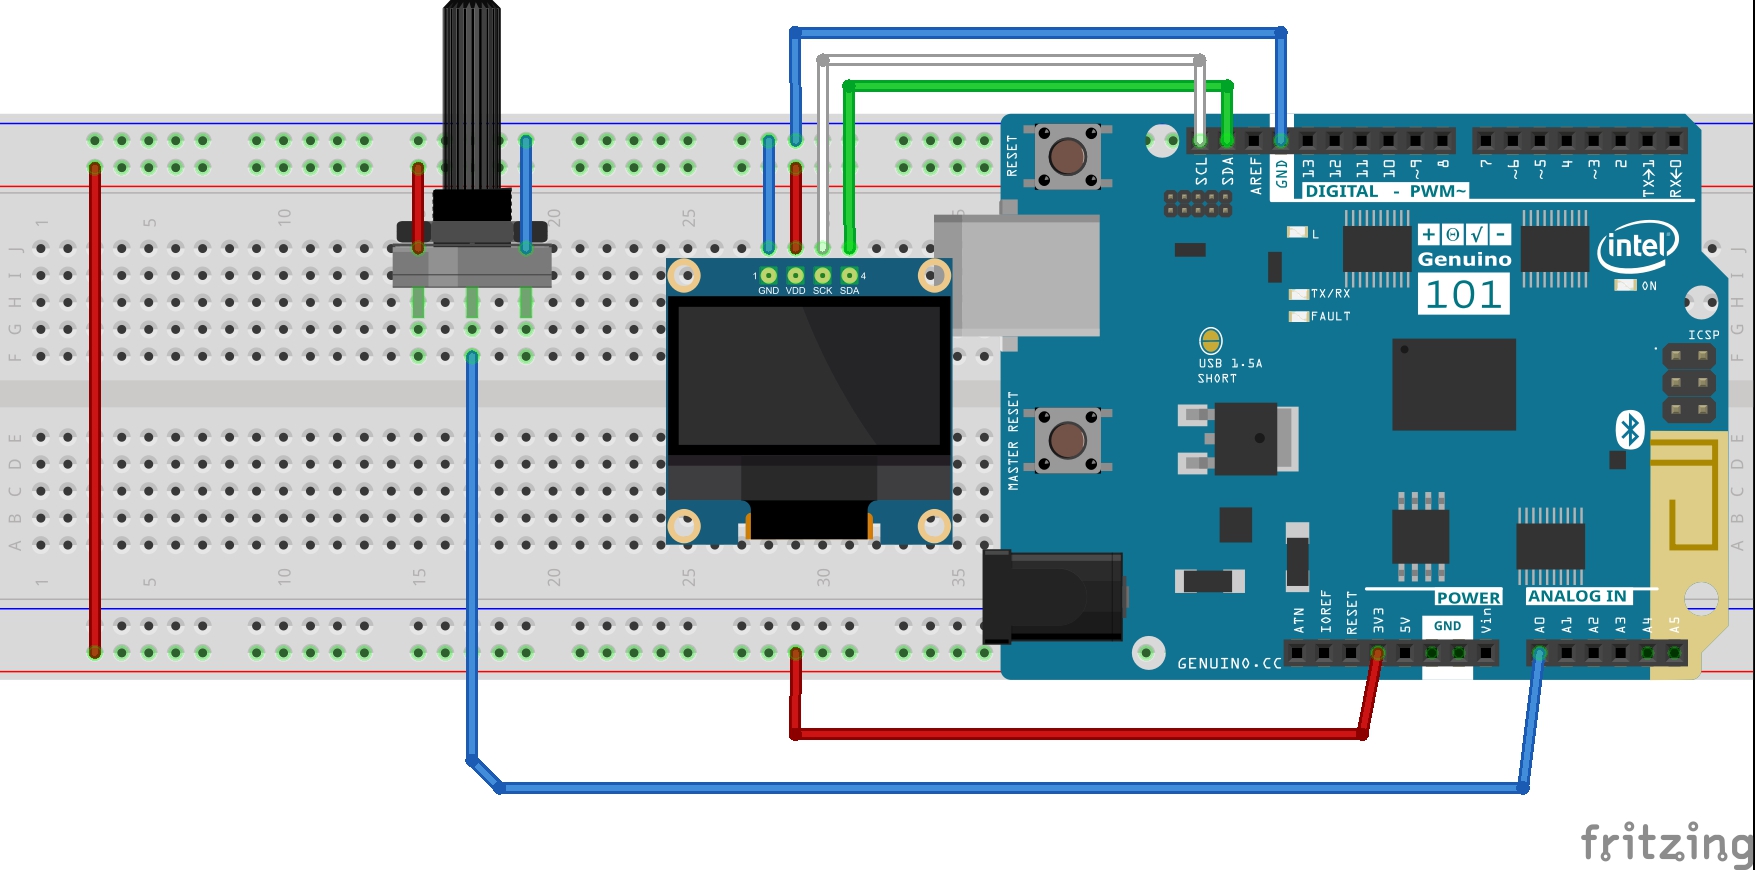
To do this tutorial, we need materials, in this case we will use an Arduino 101, the OLED screen with the model SSD1306 of resolution 128X64 pixels, cables, a potentiometer and a protoboard.
- Code
Then open Arduino IDE and copy and paste the next code:
#include <Arduino.h>
#include <U8g2lib.h>
#ifdef U8X8_HAVE_HW_SPI
#include <SPI.h>
#endif
#ifdef U8X8_HAVE_HW_I2C
#include <Wire.h>
#endif
U8G2_SSD1306_128X64_NONAME_F_SW_I2C u8g2(U8G2_R0, /* clock=*/ SCL, /* data=*/ SDA, /* reset=*/ U8X8_PIN_NONE);   // All Boards without Reset of the Display
int a=0; //variable of value of analog read pin
char taco[4];//variable to send text to the oled display
void setup(void) {
 u8g2.begin();// Oled display begins
}
void loop(void) {
 a=analogRead(A0); //read potentiometer value
 sprintf(taco,"%04d",a); //convert potentiometer value to string
 u8g2.clearBuffer();					// clear the internal memory
 u8g2.setFont(u8g2_font_inr38_mf);	// choose a suitable font
 u8g2.drawStr(0,60,taco);  // write something to the internal memory
 u8g2.sendBuffer();					// transfer internal memory to the display
 delay(1000);
For everything to work we must download the library u8g2.
All the information of this library is here.
After uploading the code, and having connected the potentiometer to the Arduino plate, the value of the potentiometer can be seen in the display, from 0 to 1023, as shown below.
With these steps, I was finally able to use my OLED screen with this board and I can go on, in my next projects.


Comments