


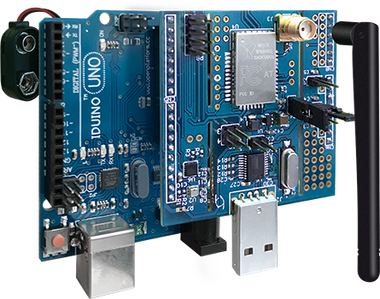
Hardware components | ||||||
_ztBMuBhMHo.jpg?auto=compress%2Cformat&w=48&h=48&fit=fill&bg=ffffff) |
| × | 1 | |||
Software apps and online services | ||||||
 |
| |||||
 |
| |||||
How might we utilise smart water management systems to enhance our human experience. This mission encapsulates not only the people of today, but also strives to benefit the lives of people of tomorrow - worldwide.
The VisionThis is not just a project. This is the start of a journey that aims to empower individuals to play their part in not only environmental sustainability in developed nations, but in developing smart water management systems to provide sustainable clean water to individuals in developing nations - working towards UN Sustainable Development Goals 6 & 13:
- Goal 6: Clean Water & Sanitation.
- Goal 13: Climate Action
This project aims to start the journey with a Smart Garden Management Tool which integrates data points such as real time Soil Moisture, the optimal soil moisture for different plants, and weather forecasts to consult home owners on when to turn on sprinklers and irrigation systems. However, it doesn't end their. After being consulted by our Smart Garden System, we are are able to activate the irrigation/sprinkler system through our voice to achieve optimal results. This solution allows for the ideal quantity of water being used to keep the garden at optimal health - reducing water wastage and environmental degradation. This is only the start.
Demo VideoProject Overview:For the purpose of creating a smooth flow and ease of replication we will go through the project in a series of stages, in saying this, the guide will be written with the expectation that readers have a reasonable understanding of how the Internet of Things works including Sigfox, Arduino and Alexa.
Stage 1: Set up Accounts, Software & Hardware
Stage 2: Sigfox Integration
Stage 3: Develop a Garden Monitoring Device
Stage 4: Integrate Garden Data to AWS Cloud
Stage 5: Develop the Smart Solenoid Valve
Stage 6: Build Alexa Skill for Water Activation and Garden Consultation
Stage 1: Sigfox IntegrationHere we will go through the set up of the project - with a focus on setting up accounts and software to ease the flow of our journey.
1.1 Sigfox & Device Registration
Throughout this project we use the Sigfox Network to take advantage of their ability to transmit low energy signals from the Arduino board to the cloud.
To set up an account follow the link: https://backend.sigfox.com/activate/thinxtra which should take you to a screen where you will need to choose the country - Australia (as seen in image below).
Next enter the Device Information which can be found in/on the package of your Thinxtra Kit.
Enter account details and hit *Subscribe* to complete the Sigfox account set up & device registration.
This will take you to the developer portal where you will be able to see your newly registered Device under the [Device] tab.
Run the demo app on your device and check that the messages are coming up on your Sigfox network.
Now you need to set up the Thinxtra development kit. Follow these guides to set up your Thinxtra device with your sigfox console https://www.thinxtra.com/xkit/#step-1
Stage 2: Setting up the Soil Moisture ReaderNow connect the soil moisture reader AO pins of the sensor expansion shield, then connect together the Arduino board and Thinxtra shield to the expansion shield like this. Upload this code to the Arduino board and check you are receiving messages on your sigfox console.
#include <dht.h>
#include <WISOL.h>
#include <Tsensors.h>
#include <Wire.h>
#include <math.h>
int temp;
int mositure;
Isigfox *Isigfox = new WISOL();
Tsensors *tSensors = new Tsensors();
typedef union{
   float number;
   uint8_t bytes[4];
} FLOATUNION_t;
typedef union{
   uint16_t number;
   uint8_t bytes[2];
} UINT16_t;
typedef union{
   int16_t number;
   uint8_t bytes[2];
} INT16_t;
int val = 0; //value for storing moisture value
int soilPin = A0;//Declare a variable for the soil moisture sensor
int soilPower = 7;//Variable for Soil moisture Power
void setup(){
 Serial.begin(9600);
 pinMode(soilPower, OUTPUT);//Set D7 as an OUTPUT
 digitalWrite(soilPower, LOW);//Set to LOW so no power is flowing through the sensor
 Isigfox->initSigfox();
 Isigfox->testComms();
// Init sensors on Thinxtra Module
 tSensors->initSensors();
 // Init an interruption on the button of the Xkit
 tSensors->setButton(buttonIR);
}
void loop()
{
static unsigned long dataTime=millis();
if(millis() >= dataTime)   //Every 800 milliseconds, print a numerical, convert the state of the LED indicator
 {
 dataTime=millis()+600000;
 Send_Data();
 }
}
int readSoil()
{
   digitalWrite(soilPower, HIGH);//turn D7 "On"
   delay(10);//wait 10 milliseconds
   val = analogRead(soilPin);//Read the SIG value form sensor
   digitalWrite(soilPower, LOW);//turn D7 "Off"
   return val;//send current moisture value
}
int readTemp(){
 int temp = (tSensors->getTemp() * 100);
 return temp;
 }
void Send_Pload(uint8_t *sendData, const uint8_t len) {
 recvMsg *RecvMsg;
 RecvMsg = (recvMsg *)malloc(sizeof(recvMsg));
 Isigfox->sendPayload(sendData, len, 0, RecvMsg);
 for (int i = 0; i < RecvMsg->len; i++) {
   Serial.print(RecvMsg->inData[i]);
 }
 Serial.println("");
 free(RecvMsg);
}
void Send_Data(){
 UINT16_t mositure, temp;
 mositure.number = (uint16_t)readSoil();
 Serial.println(mositure.number);
 temp.number = (uint16_t)readTemp();
 Serial.println(temp.number);
const uint8_t payloadSize = 4; //in bytes
//  byte* buf_str = (byte*) malloc (payloadSize);
 uint8_t buf_str[payloadSize];
 buf_str[0] = mositure.bytes[0];
 buf_str[1] = mositure.bytes[1];
 buf_str[2] = temp.bytes[0];
 buf_str[3] = temp.bytes[1];
Send_Pload(buf_str, payloadSize);
 }
void buttonIR(){
Send_Data();
Serial.print("Button Works");
}
Re-upload the demo sketch to your Arduino Board and follow the Xkit with Amazon Web Services guide on https://www.thinxtra.com/xkit/#step-3
After following and completing this guide, re-upload the Soil Moisture Reader sketch and change the variables in the callback function of the Sigfox message to pass the soil moisture data, as well as changing the variables the Lambda function passes to the Dynamo Table. Make sure the Lambda function feeds the Dynamo Table the time as '100' in order to constantly overwrite the data, as well as tabling the Soil Moisture reading under the name 'moisture'.
Stage 4: Develop the Smart Solenoid ValveYou can create the Smart Solenoid valve by connecting the Arduino board, ESP8266 Wifi Module, Solenoid Valve and 1 Channel relay board like this.
Now follow this guide on how to set up your ESP8266 to connect to your wifi
https://learn.adafruit.com/adafruit-huzzah-esp8266-breakout/using-arduino-ide
Also you have to download and install MQTT libraries from https://learn.adafruit.com/mqtt-adafruit-io-and-you/arduino-plus-library-setup
Once you have set all this up, we have to create a IFTTT Applet to trigger the solenoid to turn on.
Stage 6: Build Alexa Skill for Water Activation and Garden ConsultationCreate an Alexa Skill by following this simple guide https://developer.amazon.com/alexa-skills-kit/alexa-skill-quick-start-tutorial
When creating the Alexa Skill, add in this code to your Intent editor
{
 "languageModel": {
   "intents": [
     {
       "name": "activateSprinkler",
       "samples": [
         "water my grass",
         "activate sprinkler",
         "water my garden",
         "turn on sprinkler",
         "do what you need to do"
       ],
       "slots": []
     },
     {
       "name": "AMAZON.CancelIntent",
       "samples": []
     },
     {
       "name": "AMAZON.HelpIntent",
       "samples": []
     },
     {
       "name": "AMAZON.StopIntent",
       "samples": []
     },
     {
       "name": "gardenCheck",
       "samples": [
         "give me a garden briefing",
         "How is my grass",
         "check the grass",
         "check the garden",
         "does my grass need watering",
         "how is my garden",
         "give me a garden update"
       ],
       "slots": []
     }
   ],
   "invocationName": "my gardener"
 }
}
Also, when creating the Lambda function, add this to your code
var callback;
var myRequest = 'Skill';
const AWSregion = 'us-east-1';  // us-east-1
const params = {
   TableName: '3E5ACD',
   Key:{ "deviceId": '3E5ACD', "time":	'100'}
};
// 2. Skill Code =======================================================================================================
const Alexa = require('alexa-sdk');
const AWS = require('aws-sdk');
AWS.config.update({
   region: AWSregion
});
exports.handler = function(event, context, callback) {
   var alexa = Alexa.handler(event, context);
   alexa.appId = '{Skill ID}';
   alexa.registerHandlers(handlers);
   alexa.execute();
};
const handlers = {
   'LaunchRequest': function () {
       this.response.speak('Welcome Alex, I am your personal garden assistant, what would you like to know?').listen('try again');
       this.emit(':responseReady');
   },
   'gardenCheck': function () {
       readDynamoItem(params, myResult=>{
           var speach = '';
           var moisture = myResult;
           if (moisture < 250){
               speach = "Your grass is currently very dry, it is advised to activate the sprinkler to ensure it stays healthy, would you like me to do something?"
               this.response.speak(speach).listen('try again');
           } else if (moisture > 450){
               speach = "Your grass is very wet and potentially flooded, it is advised to stay clear and consider checking on it's drainage"
               this.response.speak(speach);
           } else {
               speach = "Your grass is looking very well and healthy, no need to water it today"
               this.response.speak(speach);
           }
           this.emit(':responseReady');
       });
   },
    'activateSprinkler': function () {
   httpsGet(myRequest,  (myResult) => {
               this.response.speak('Turning on the sprinkler system for you now');
               this.emit(':responseReady');
           }
       );
   },
   'AMAZON.HelpIntent': function () {
       this.response.speak('Ask me how your pool is going').listen('try again');
       this.emit(':responseReady');
   },
   'AMAZON.CancelIntent': function () {
       this.response.speak('Goodbye!');
       this.emit(':responseReady');
   },
   'AMAZON.StopIntent': function () {
       this.response.speak('Goodbye!');
       this.emit(':responseReady');
   }
};
//    END of Intent Handlers {} ========================================================================================
// 3. Helper Function  =================================================================================================
function readDynamoItem(params, callback) {
   var AWS = require('aws-sdk');
   AWS.config.update({region: AWSregion});
   var docClient = new AWS.DynamoDB.DocumentClient();
   console.log('reading item from DynamoDB table');
   docClient.get(params, (err, data) => {
       if (err) {
           console.error("Unable to read item. Error JSON:", JSON.stringify(err, null, 2));
       } else {
           console.log("GetItem succeeded:", JSON.stringify(data, null, 2));
var moisture = data.Item.moisture
           callback(moisture);  // this particular row has an attribute called message
       }
   });
}
var https = require('https');
function httpsGet(myData, callback) {
   var options = {
       host: 'maker.ifttt.com',
       port: 443,
       path: '/trigger/{Webhook Trigger Word}/with/key/{Webhook Key}',
       method: 'GET',
   };
   var req = https.request(options, res => {
       res.setEncoding('utf8');
       var returnData = "";
       res.on('data', chunk => {
           returnData = returnData + chunk;
       });
callback();
   });
   req.end();
}
Now you should have a working Alexa enabled sprinkler model, enjoy!


Comments