

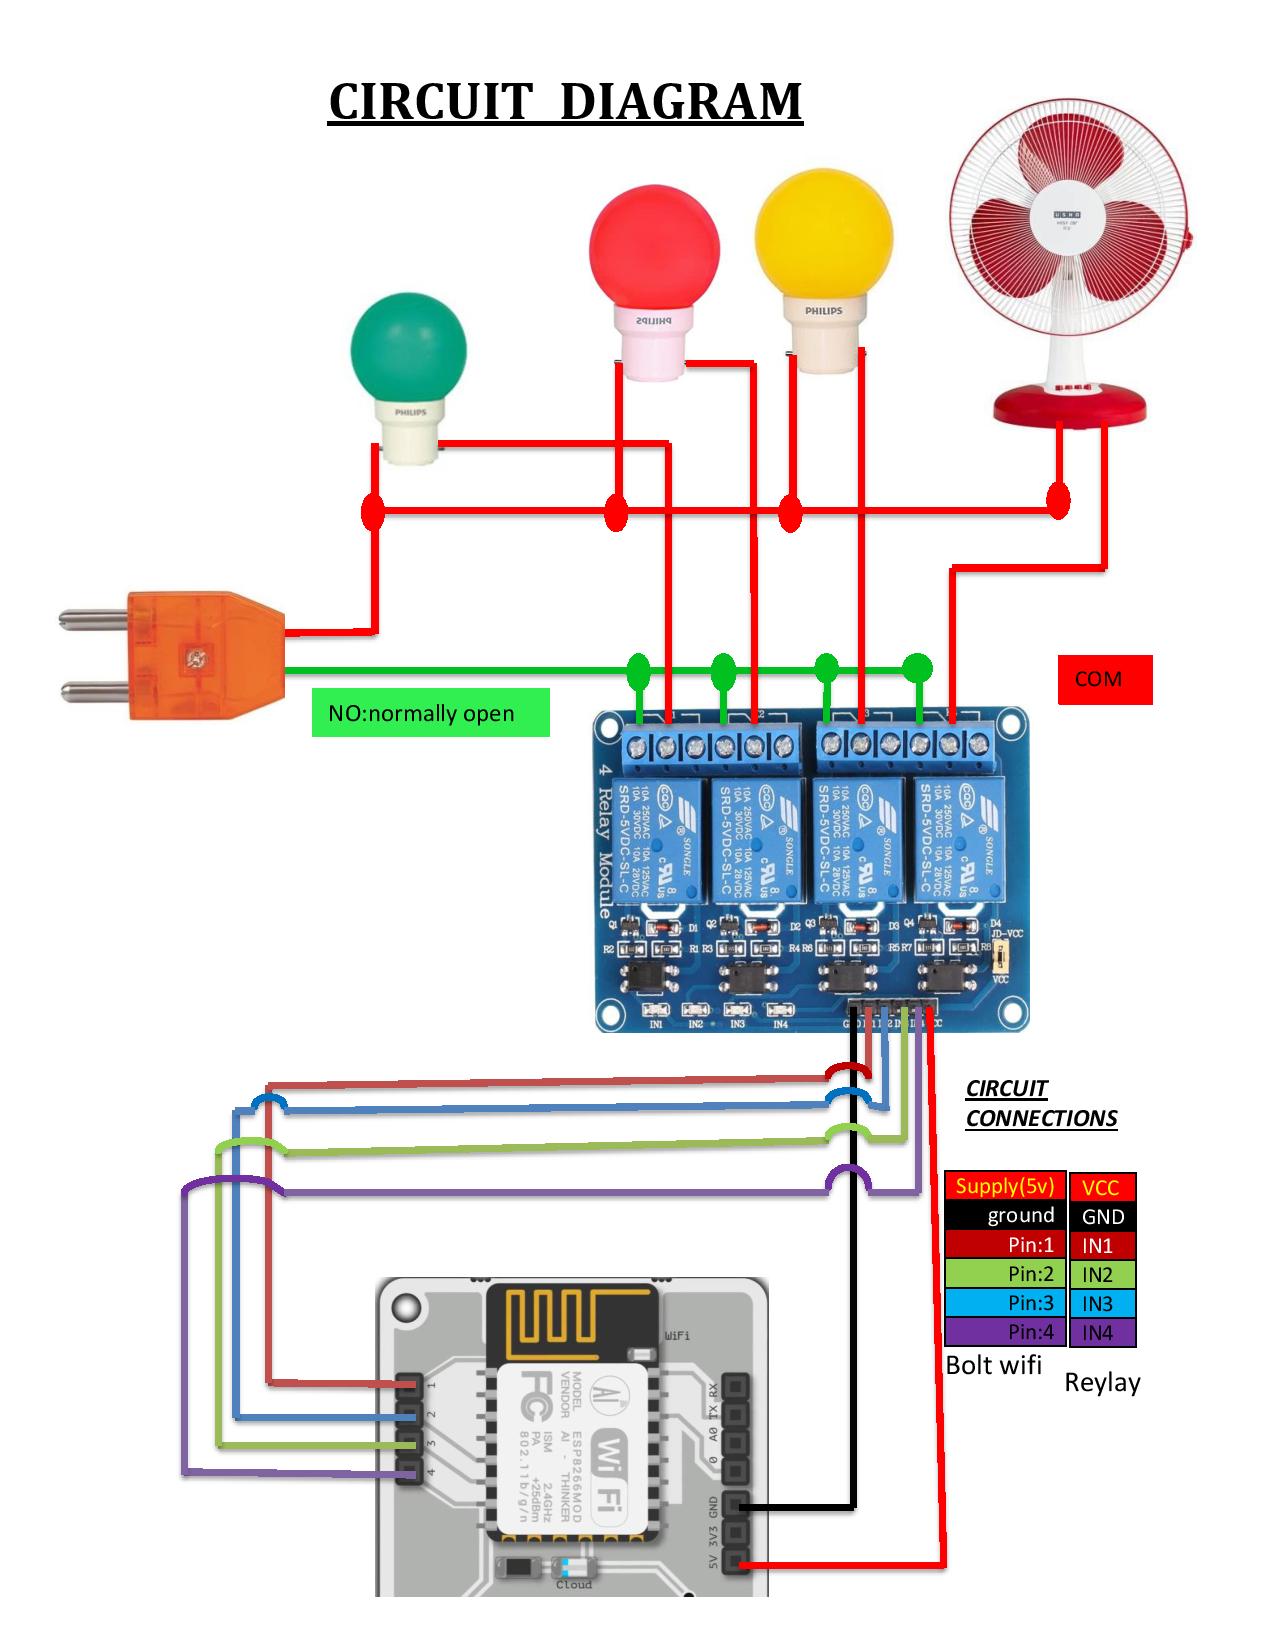
Hardware components | ||||||
 |
| × | 1 | |||
| × | 1 | ||||
 |
| × | 1 | |||
 |
| × | 1 | |||
| × | 3 | ||||
| × | 1 | ||||
| × | 1 | ||||
| × | 3 | ||||
Software apps and online services | ||||||
 |
| |||||
 |
| |||||
| ||||||
Hand tools and fabrication machines | ||||||
 |
| |||||
STEPS to create the project
1. First we have to log in to the bolt cloud https://cloud.boltiot.com/ from the website.
2. Click on the products tab.
3. Next click on the add product tab.
4. We can give the name of the product and change to Output device(led, buzzer) and select the GPIO.
5. Click on the configure this project
6. Next we came to the hardware section, we select the pins and give the names to the pins
7. Next we have code section
8. Save the code
9. Exit from the code section
10. Link the Bolt wifi module
11. Select the Bolt
12. Link the Bolt
13. Deploy configuration
14. Click on the view section and it's show's like the below page
STEPS to link the Google assistant
1. Search the website https://ifttt.com/ Sign up with the google and login
2. Create the applets, click on the icon it show the create click on it
3. Click on +This
4. Search for Google assistant and click on it
5. Choose the simple phrase type
6. Create as your's need (how the google assistant work) and click on trigger
7. Click on +That
8. Search for webhooks and click on webhooks
9. Click on Make a web request
10. Give the URL https://cloud.boltiot.com/remote/APIKEY/digitalWrite?pin=0&state=LOW&deviceName=BOLT******** in the place of APIKEY replace your APIKEY and BOLT******** in this place you need to replace your BOLT id
STEPS to find APIKEY and BOLT id
1. Login to bolt cloud through the link https://cloud.boltiot.com/ and click on API
2. Click on enable and click on GENERATE NEW API KEY and click the copy and replace the above shown place with your API KEY
3. Click on device we find the ID copy the id and replace as shown above
And select the GET
Next select the application/json
And finally Create action
11. Click on Finish
As the same you have to create the applets for the off position also
This way the google assistant linked to the BOLT


Comments